1. Introducció i finalview
Thank you for choosing the Ryobi RPD500-G 500W 13mm Hammer Drill. This manual provides essential information for the safe and effective use of your new power tool. Please read these instructions carefully before operation and retain them for future reference. The Ryobi RPD500-G is a versatile corded hammer drill designed for drilling in wood, metal, and masonry with its powerful 500W motor and hammer function.

Image 1.1: The Ryobi RPD500-G 500W 13mm Hammer Drill, showcasing its compact design and auxiliary handle.
2. Informació de seguretat
Sempre observeu les precaucions de seguretat bàsiques quan utilitzeu eines elèctriques per reduir el risc d'incendi, descàrrega elèctrica i lesions personals.
- Seguretat de l'àrea de treball: Mantingueu la zona de treball neta i ben il·luminada. Les zones desordenades o fosques conviden als accidents. No feu servir eines elèctriques en atmosferes explosives, com ara en presència de líquids, gasos o pols inflamables.
- Seguretat elèctrica: Els endolls de les eines elèctriques han de coincidir amb la presa de corrent. No modifiqueu mai l'endoll de cap manera. Eviteu el contacte corporal amb superfícies connectades a terra, com ara canonades, radiadors, fogons i neveres.
- Seguretat personal: Always wear eye protection. Use hearing protection when operating the tool for extended periods. Wear appropriate clothing; avoid loose clothing or jewelry. Secure long hair.
- Ús i cura de l'eina: No forceu l'eina elèctrica. Feu servir l'eina elèctrica adequada per a la vostra aplicació. Desconnecteu l'endoll de la font d'alimentació abans de fer qualsevol ajust, canviar accessoris o guardar eines elèctriques.
- Peça de treball segura: Sempre clamp or secure the workpiece to prevent movement during drilling.
3. Components i característiques del producte
The Ryobi RPD500-G is engineered for efficiency and user comfort, featuring:
- Motor de 500 W: Proporciona ample power for various drilling tasks.
- Mandril sense clau de 13 mm: Allows for quick and easy bit changes without a chuck key, accommodating a wide range of drill bit sizes.
- Variable Speed Control (0-3000 RPM): Permet un ajust precís de la velocitat per a diferents materials i aplicacions.
- Hammer Function (0-50,000 BPM): Engages for efficient drilling into masonry and concrete.
- Gripzone Technology: Integrated soft-grip areas for enhanced user comfort and reduced vibration during prolonged use.
- Interruptor endavant/enrere: For driving and removing screws, and for freeing jammed drill bits.
- Nansa auxiliar: Proporciona control i estabilitat addicionals.
- Parada de profunditat: Per a un control precís de la profunditat de perforació.

Imatge 3.1: Frontal view of the Ryobi RPD500-G, highlighting the 13mm keyless chuck and auxiliary handle attachment point.

Imatge 3.2: Lateral view of the Ryobi RPD500-G, showing the main handle with trigger and mode selector.
4. Configuració
4.1 Fixació de la nansa auxiliar
The auxiliary handle provides improved control and safety. To attach, loosen the handle by rotating it counter-clockwise. Slide it over the chuck and onto the front of the drill body. Rotate the handle clockwise to tighten it securely in the desired position.
4.2 Inserting and Removing Drill Bits
- Assegureu-vos que el trepant estigui desendollat de la font d'alimentació.
- Rotate the front collar of the keyless chuck counter-clockwise to open the chuck jaws.
- Introduïu la broca completament al mandril, assegurant-vos que estigui centrada.
- Rotate the front collar clockwise to tighten the chuck jaws firmly around the drill bit. Hand-tighten only; do not use tools.
- To remove, reverse the tightening process.
4.3 Ajust de la parada de profunditat
The depth stop allows for consistent drilling depth. Loosen the auxiliary handle, slide the depth stop rod through the hole in the handle, and adjust it to the desired depth. Retighten the auxiliary handle to secure the depth stop.
5. Instruccions de funcionament
5.1 Connexió d'alimentació
Connect the drill's power cord to a suitable power outlet. Ensure the voltage coincideix amb els requisits de l'eina.
5.2 Selecting Drill Mode
A switch on the top or side of the drill allows selection between rotary drilling and hammer drilling modes. Select rotary mode for wood, metal, and plastics. Select hammer drill mode for masonry and concrete.
5.3 Variable Speed Control and Forward/Reverse
- Interruptor d'activació: The drilling speed is controlled by the pressure applied to the trigger switch. Press lightly for slower speeds and harder for faster speeds.
- Botó de bloqueig: For continuous operation, press the lock-on button while the trigger is fully depressed. To release, press the trigger again.
- Interruptor endavant/enrere: Located near the trigger, this switch changes the direction of rotation. Use forward for drilling and reverse for removing screws or freeing jammed bits. Always ensure the drill has come to a complete stop before changing direction.
5.4 Tècniques de perforació
- Perforació general: Apply steady, even pressure. Allow the drill to do the work. Do not force the drill.
- Wood Drilling: Use wood-specific drill bits. Start with a slower speed and increase as needed.
- Perforació metàl·lica: Use HSS (High-Speed Steel) drill bits. Use cutting oil to cool the bit and improve drilling efficiency. Start with a pilot hole for larger diameters.
- Masonry Drilling: Use carbide-tipped masonry drill bits and select the hammer drill mode. Apply firm, consistent pressure.

Image 5.1: A user demonstrating drilling into a wall with the Ryobi RPD500-G, wearing appropriate safety glasses.
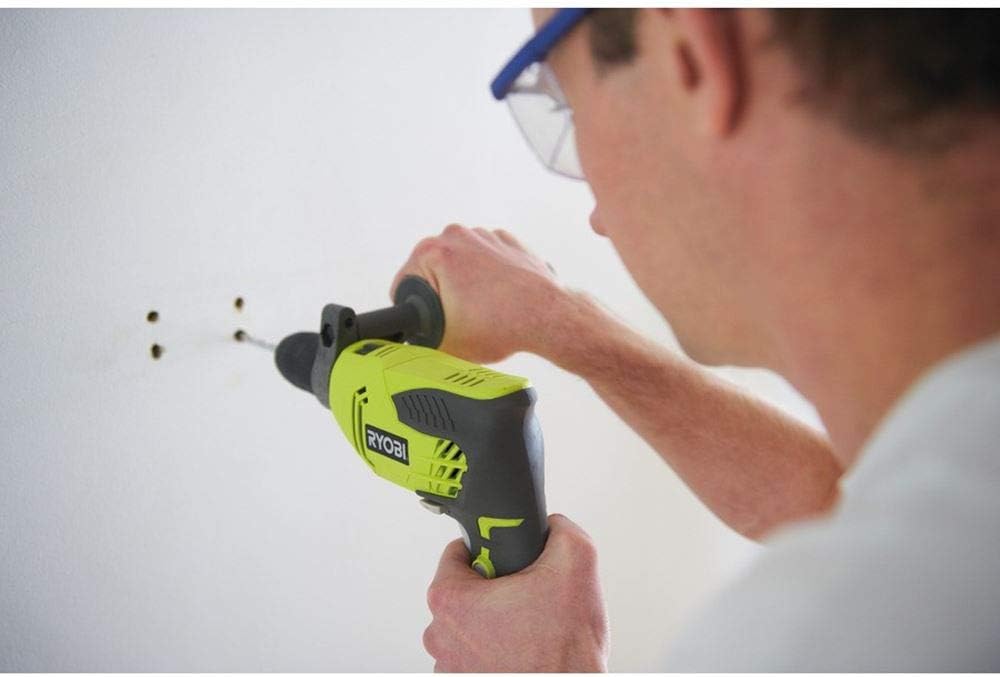
Imatge 5.2: Un primer pla view of the Ryobi RPD500-G in use, showing the drill bit engaging with the wall surface.
6. Manteniment
Regular maintenance ensures the longevity and safe operation of your drill.
- Neteja: Després de cada ús, netegeu l'eina amb un drap suau iamp drap. No utilitzeu productes químics agressius ni netejadors abrasius. Mantingueu les obertures de ventilació netes de pols i deixalles.
- Inspecció del cable d'alimentació: Regularly inspect the power cord for any signs of damage, cuts, or fraying. If damaged, have it repaired by a qualified service technician.
- Manteniment del mandril: Keep the chuck jaws clean and free of debris to ensure proper gripping of drill bits.
- Emmagatzematge: Store the drill in a dry, secure location out of reach of children.
7. Solució De Problemes
If you encounter issues with your Ryobi RPD500-G, refer to the following common problems and solutions:
| Problema | Causa possible | Solució |
|---|---|---|
| El trepant no arrenca | No power supply; Faulty power cord; Trigger switch issue | Check power outlet and cord; Consult a qualified technician for repair. |
| Pobre rendiment de perforació | Dull drill bit; Incorrect drill mode; Insufficient pressure | Replace or sharpen drill bit; Select appropriate mode (e.g., hammer for masonry); Apply steady, firm pressure. |
| Sobreescalfament | Overloading; Blocked ventilation; Prolonged use | Reduce load; Clear ventilation slots; Allow tool to cool down. |
| Embussos de broques | Incorrect speed; Hitting an obstruction; Excessive force | Use appropriate speed; Use reverse function to free bit; Reduce force. |
8. Especificacions
Key technical specifications for the Ryobi RPD500-G Hammer Drill:
- Model: RPD500-G
- Número de referència: 5133002244
- Entrada d'alimentació: 500 W
- Mida del mandril: 13 mm sense clau
- Velocitat sense càrrega: 0-3000 RPM (revolutions per minute)
- Taxa d'impacte: 0-50,000 BPM (blows per minute)
- Parell màxim: 9.1 Nm (Newton-meters)
- Font d'alimentació: Elèctric amb cable
- Voltage: 800 Volts (Note: This value appears unusually high for a standard power tool. Please verify with product labeling.)
- Ampera: 15 A
- Pes: 2.1 kg
- Dimensions (L x A x A): 26.4 x 70 x 245 cm (Note: These dimensions appear unusually large. Please verify with product labeling.)
- Material: Metall
9. Garantia i Suport
Specific warranty details for the Ryobi RPD500-G are not provided in this manual. For comprehensive warranty information, service, or technical support, please refer to the documentation included with your purchase or visit the official Ryobi website for your region. Always ensure any repairs or servicing are carried out by authorized service centers to maintain product safety and warranty validity.


