1. Introducció
Thank you for choosing the Avidsen 107104 Digital Multimeter. This compact, handheld device is designed for measuring various electrical parameters, including DC voltage, vol. ACtage, DC current, and resistance. It features a 3.5-digit digital display for clear readings and double insulation for enhanced safety. Please read this manual thoroughly before use to ensure proper operation and to prevent potential hazards.
2. Informació de seguretat
Sempre observeu les següents precaucions de seguretat quan utilitzeu el multímetre:
- Doble aïllament: The multimeter features double insulation for user protection. Do not attempt to bypass or modify this safety feature.
- Categories de mesura: This device is rated CAT III 300V and CAT II 500V. Ensure that the measurement category and voltage rating are appropriate for the circuit being tested.
- Inspect Test Leads: Before each use, inspect the test leads for any damage to the insulation or exposed metal. Do not use damaged leads.
- Do Not Exceed Maximum Input Values: Refer to the specifications section for maximum input values for each function. Exceeding these limits can damage the meter and pose a safety risk.
- Protecció de fusibles: The multimeter is protected by fuses (500mA 500V Fastrapid and 10A 500V Fastrapid). If a fuse blows, replace it only with a fuse of the specified type and rating.
- Nivell de bateria: Ensure batteries are adequately charged. A low battery indicator may affect measurement accuracy.
- Condicions ambientals: Operate the multimeter within the specified operating temperature range (0°C to +40°C).
- Connexió adequada: Always connect the common (COM) test lead first, then the live test lead. Disconnect the live test lead first, then the common test lead.
- Eviteu condicions humides: Do not use the multimeter in wet or damp ambients.
3. Producte acabatview
The Avidsen 107104 Digital Multimeter features a clear digital display, a rotary function switch, and input jacks for test leads.

Figura 1: Davant view of the Avidsen 107104 Digital Multimeter, showing the display, rotary switch, and input terminals.
Components clau:
- Pantalla digital: 3.5-digit LCD for displaying measurement values, with automatic polarity indication. Maximum display: 1999.
- Interruptor de funció rotatiu: Used to select the desired measurement function and range (e.g., DCV, ACV, DCA, Resistance, Diode, Continuity).
- Preses d'entrada:
- COM (Common) Jack: For the black (negative) test lead.
- Presa VΩmA: For the red (positive) test lead when measuring voltage, resistance, or current up to 200mA.
- Jack de 10A: For the red (positive) test lead when measuring current up to 10A. Note: Maximum 10 seconds every 10 minutes for 10A measurements.
- Sondes de prova: Two insulated test probes (red and black) are included for making connections to the circuit under test.
4. Configuració
4.1 Instal·lació de la bateria
The Avidsen 107104 Multimeter operates on two 3V AAA batteries (included). To install or replace batteries:
- Assegureu-vos que el multímetre estigui APAGAT.
- Localitzeu la tapa del compartiment de la bateria a la part posterior de la unitat.
- Use a screwdriver to remove the screw securing the battery compartment cover.
- Traieu la coberta amb cura.
- Introduïu dues piles AAA d'3 V, observant la polaritat correcta (+ i -) tal com s'indica a l'interior del compartiment.
- Substituïu la tapa del compartiment de la bateria i fixeu-la amb el cargol.
Note: An accumulator level indicator is present to show battery status. Replace batteries when the indicator shows low power to maintain measurement accuracy.
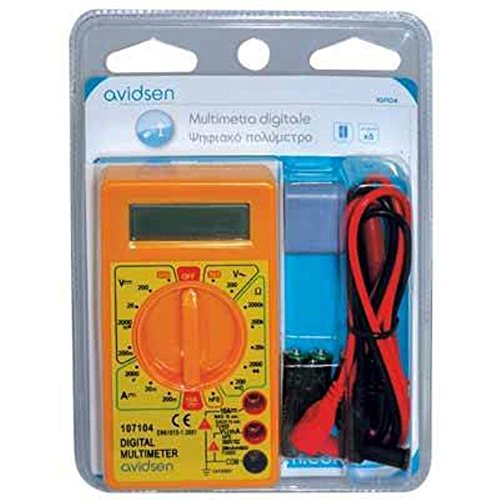
Figura 2: Avidsen 107104 Digital Multimeter shown in its retail packaging, which includes the multimeter, test leads, and batteries.
5. Instruccions de funcionament
Before taking any measurements, ensure the test leads are securely plugged into the correct input jacks.
5.1 Mesurar DC Voltage (V=)
- Introduïu el cable de prova vermell a la presa VΩmA i el cable de prova negre a la presa COM.
- Set the rotary switch to the desired DCV range (e.g., 200m, 2000m, 20, 200, 500). If the voltage is unknown, start with the highest range and decrease as needed.
- Connecteu les sondes de prova al component o circuit que s'ha de mesurar.
- Llegeix el voltage valor a la pantalla digital.
5.2 Mesurar AC Voltage (V~)
- Introduïu el cable de prova vermell a la presa VΩmA i el cable de prova negre a la presa COM.
- Set the rotary switch to the desired ACV range (e.g., 200, 500). If the voltage is unknown, start with the highest range.
- Connecteu les sondes de prova a través del voltatge de CAtage font.
- Llegeix el voltage valor a la pantalla digital.
5.3 Measuring DC Current (A=)
- For currents up to 200mA: Introduïu el cable de prova vermell a la presa VΩmA i el cable de prova negre a la presa COM.
- For currents up to 10A: Insert the red test lead into the 10A jack and the black test lead into the COM jack. Caution: Do not measure more than 10 seconds every 10 minutes when using the 10A range.
- Set the rotary switch to the desired DCA range (e.g., 2000µ, 20m, 200m, 10A).
- Turn off the power to the circuit. Open the circuit where the current is to be measured.
- Connecteu el multímetre en sèrie amb el circuit.
- Enceneu l'alimentació del circuit.
- Llegiu el valor actual a la pantalla digital.
- Turn off the power, disconnect the multimeter, and restore the circuit.
5.4 Mesura de la resistència (Ω)
- Introduïu el cable de prova vermell a la presa VΩmA i el cable de prova negre a la presa COM.
- Set the rotary switch to the desired Resistance range (e.g., 200, 2000, 20k, 200k, 2000k).
- Ensure the circuit or component to be measured is de-energized.
- Connecteu les sondes de prova a través del component.
- Llegiu el valor de la resistència a la pantalla digital.
5.5 Prova de díodes ( )
)
- Introduïu el cable de prova vermell a la presa VΩmA i el cable de prova negre a la presa COM.
- Set the rotary switch to the Diode test position.
- Connecteu la sonda vermella a l'ànode i la sonda negra al càtode del díode. Un voltatge directetage drop (typically 0.5V to 0.8V for silicon diodes) will be displayed.
- Reverse the probes. The display should show "OL" (Open Loop) for a good diode.
5.6 Prova de continuïtat ()
- Introduïu el cable de prova vermell a la presa VΩmA i el cable de prova negre a la presa COM.
- Set the rotary switch to the Continuity test position.
- Connect the test probes across the component or circuit.
- If the resistance is below a certain threshold (typically around 50Ω), the multimeter will emit an audible beep, indicating continuity. The display will also show the resistance value.
6. Manteniment
6.1 Neteja
Netegeu el cas amb l'anunciamp drap i detergent suau. No utilitzeu abrasius ni dissolvents. Assegureu-vos que el multímetre estigui completament sec abans d'utilitzar-lo.
6.2 Substitució de la bateria
Refer to section 4.1 for battery replacement instructions. Replace batteries promptly when the low battery indicator appears to ensure accurate readings.
6.3 Canvi de fusibles
If the multimeter fails to measure current, the fuse may be blown. To replace a fuse:
- Assegureu-vos que el multímetre estigui apagat i que els cables de prova estiguin desconnectats.
- Remove the battery compartment cover (refer to 4.1).
- Carefully locate the fuse(s) inside the compartment.
- Gently remove the blown fuse.
- Replace it only with a fuse of the exact specified type and rating:
- For VΩmA input: 500mA 500V Fastrapid (FØ 5 x 20 mm)
- For 10A input: 10A 500V Fastrapid (FØ 5 x 20 mm)
- Substituïu la tapa del compartiment de la bateria i fixeu-la.
7. Solució De Problemes
| Problema | Causa possible | Solució |
|---|---|---|
| Sense pantalla o pantalla tènue | Piles gastades o baixes | Replace batteries (see Section 4.1) |
| Es mostra "OL" (sobrecàrrega) | Input value exceeds selected range or meter's maximum capacity | Select a higher range or ensure input is within meter's limits. |
| Incorrect or unstable readings | Low battery, poor test lead connection, incorrect range selection, external interference | Replace batteries, check connections, select appropriate range, move away from strong electromagnetic fields. |
| Cannot measure current | Blown fuse, incorrect test lead connection (e.g., using VΩmA jack for 10A measurement) | Check and replace fuse (see Section 6.3), ensure test lead is in the correct current jack (VΩmA or 10A). |
8. Especificacions
- Visualització: 3.5-digit LCD, Max. 1999, with automatic polarity indication.
- Taxa de mesura: 2-3 updates per second.
- Font d'alimentació: 2 x 3V AAA batteries (included).
- Fusibles:
- 500mA 500V Fastrapid (for VΩmA input)
- 10A 500V Fastrapid (for 10A input)
- Doble aïllament: Sí.
- Classificació de seguretat: CAT III 300V, CAT II 500V.
- Temperatura de funcionament: 0 °C a +40 °C.
- Temperatura d'emmagatzematge: -10 °C a +50 °C.
- Dimensions: 126 mm x 70 x 27 mm.
- Pes: Approximately 210g (with batteries).
- Funcions: DC Voltage, AC Voltage, DC Current, Resistance, Diode Test, Continuity Test.
9. Garantia i Suport
Avidsen products are manufactured to high-quality standards. For warranty information or technical support, please refer to the warranty card included with your product or visit the official Avidsen weblloc web. Conserveu el rebut de compra com a comprovant de compra.


