1. Producte acabatview
The Saramonic SmartMixer is a compact, lightweight, and versatile audio mixer designed to enhance the audio quality of video recordings made with iPhone and Android smartphones. It features two 3.5mm stereo microphone inputs, one mini-XLR input, a headphone monitoring jack, phantom power capability, and an accessory shoe for mounting additional equipment. This rig provides professional-grade audio solutions for mobile content creators.

Figura 1.1: The Saramonic SmartMixer setup, showing the mixer unit with two included condenser microphones, mounted on a smartphone via a holder and a stabilizing grip.
1.1 Característiques clau
- Professional Stereo Recording: Produces studio-quality audio for smartphone video.
- Múltiples entrades: Two 3.5mm stereo mic inputs and one mini-XLR input for diverse microphone options.
- Monitorització d'auriculars: Dedicated jack for real-time audio monitoring.
- Potència fantasma: Switchable +48V phantom power for professional condenser microphones.
- Calçat d'accessoris: Integrated shoe mount for attaching video lights or other accessories.
- LCD Level Meter: Visual display for monitoring audio input levels.
- Control de volum: Knob for precise audio output level adjustment.
1.2 Contingut del paquet
- Saramonic SmartMixer Unit
- Two Condenser Microphones
- Suport per a Smartphone
- Video Stabilizing Grip
- Mini-XLR to Standard-XLR Cable
- 3.5mm Output Cable for iOS Devices
- 3.5mm Output Cable for Android Devices
- Guia de l'usuari (aquest document)
2. Instruccions de configuració
2.1 Instal·lació de la bateria
- Locate the battery compartment on the back of the SmartMixer unit.
- Obriu la coberta del compartiment.
- Introduïu una pila de 9 V, assegurant-vos de la polaritat correcta (+/-).
- Tanqueu bé la tapa del compartiment de la bateria.
2.2 Assembling the Rig
- Attach the smartphone holder to the video stabilizing grip. The holder typically screws onto the grip's standard tripod thread.
- Secure your smartphone into the holder. Ensure it is firmly gripped but not overly tightened.
- Mount the SmartMixer unit onto the accessory shoe located on top of the smartphone holder or grip. Tighten the locking mechanism to secure it.
- Insert the two included condenser microphones into the 3.5mm microphone input jacks on the SmartMixer.

Figura 2.1: The SmartMixer rig assembled and ready for use in an outdoor environment, demonstrating its portability.
2.3 Connexió al telèfon intel·ligent
- Identify the correct output cable for your smartphone: use the iOS cable for Apple devices or the Android cable for Android devices.
- Plug one end of the chosen output cable into the 'OUT' jack on the SmartMixer.
- Plug the other end of the cable into your smartphone's 3.5mm headphone jack. If your smartphone lacks a 3.5mm jack, use an appropriate adapter (e.g., Lightning to 3.5mm for newer iPhones, USB-C to 3.5mm for some Androids), which is not included with the SmartMixer.
2.4 Connecting External Microphones (Optional)
- 3.5mm Microphones: Connect any 3.5mm TRS (2-ring) microphone directly into the available 3.5mm input jacks on the SmartMixer.
- Micròfons XLR: Use the provided mini-XLR to standard-XLR cable to connect professional XLR microphones to the mini-XLR input on the SmartMixer.
2.5 Phantom Power Activation
If using a condenser microphone that requires phantom power, locate the '+48V' switch on the SmartMixer and slide it to the 'ON' position. Ensure the microphone is connected before activating phantom power.
3. Instruccions de funcionament
3.1 Engegada/apagada
Slide the 'POWER' switch to the 'ON' position to power on the SmartMixer. The LCD screen will illuminate. To power off, slide the switch to 'OFF'.
3.2 Adjusting Input Levels (Gain)
The SmartMixer features individual gain control knobs for each input. Rotate these knobs to adjust the sensitivity of the connected microphones. Monitor the LCD level meter to ensure audio levels are within the optimal range, avoiding clipping (distortion) or excessively low levels.
3.3 Monitorització d'àudio
Plug headphones into the 'MONITOR' jack on the SmartMixer to listen to the audio being recorded in real-time. This allows for accurate level setting and identification of any audio issues before recording. Adjust headphone volume using the dedicated 'VOLUME' knob.
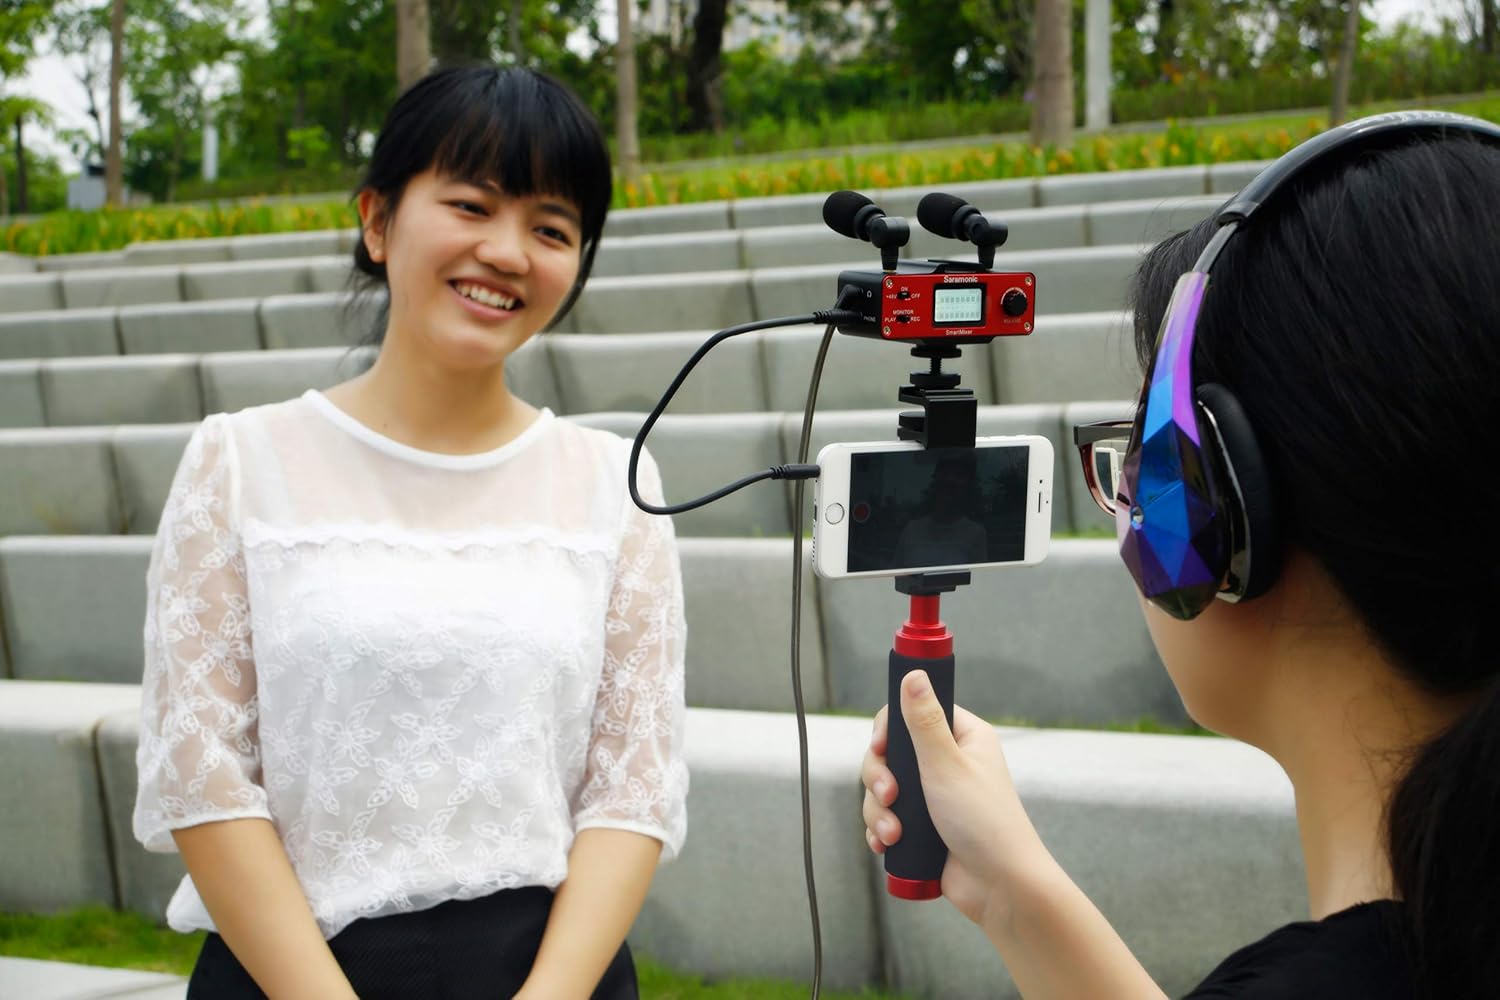
Figura 3.1: The SmartMixer in use during an interview setup, with one person wearing headphones for audio monitoring.
3.4 LCD Level Meter
The LCD screen displays a visual representation of the audio input levels. Aim for levels that peak in the yellow or green range during normal speech or sound, avoiding consistent red indicators which signify clipping and distortion.
3.5 Recording with Your Smartphone
Once the SmartMixer is set up and audio levels are adjusted, open your preferred video or audio recording application on your smartphone. The smartphone will automatically recognize the SmartMixer as an external microphone input. Begin recording as you normally would within the application.
4. Manteniment
4.1 Neteja
Wipe the SmartMixer unit and microphones with a soft, dry cloth. Avoid using liquid cleaners or solvents, as these can damage the electronic components.
4.2 Substitució de la bateria
Replace the 9V battery when the battery indicator on the LCD screen shows low power. Always use a fresh, high-quality 9V alkaline battery for optimal performance.
4.3 Emmagatzematge
When not in use, store the SmartMixer and its accessories in a cool, dry place, away from direct sunlight and extreme temperatures. Remove the battery if storing for extended periods to prevent leakage.
5. Solució De Problemes
- Sense so o volum baix:
- Ensure the SmartMixer is powered on and has a fresh 9V battery.
- Check all cable connections (microphones to mixer, mixer to smartphone) are secure.
- Verify the correct smartphone output cable (iOS/Android) is used.
- Adjust the gain knobs on the SmartMixer to increase input levels.
- Confirm that the recording application on your smartphone is set to use the external microphone.
- If using phantom-powered microphones, ensure the +48V switch is engaged.
- So distorsionat o crepitjant:
- Reduce the gain levels on the SmartMixer if the LCD meter shows consistent peaking in the red zone.
- Check for loose or damaged cables. Try swapping cables if possible.
- Ensure microphones are not too close to the sound source, causing overload.
- Test with a different 9V battery.
- SmartMixer Not Recognized by Smartphone:
- Ensure the correct output cable for your smartphone's operating system is used.
- If using a smartphone adapter (e.g., Lightning to 3.5mm), ensure it is an official or certified adapter and functioning correctly.
- Restart your smartphone and the SmartMixer.
- Line Feed Dropping Out (Intermittent Audio):
- Check all cable connections, especially the output cable to the smartphone, for looseness.
- Ensure the microphone plugs are firmly seated in their jacks on the SmartMixer.
- Test in a different environment to rule out electromagnetic interference.
6. Especificacions
| Característica | Especificació |
|---|---|
| Dimensions del producte | 11.7 x 1.3 x 3.7 polzades |
| Pes de l'article | 1.63 lliures (aprox. 0.74 kg) |
| Número de model | SmartMixer |
| Nombre de canals | 2 |
| Tecnologia de connectivitat | XLR, 3.5mm |
| Font d'alimentació | Battery Powered (1x 9V battery) |
| Fabricant | Saramonic International |
| Primera data disponible | 31 d'agost de 2015 |
7. Garantia i Suport
7.1 Informació de la garantia
The Saramonic SmartMixer includes a Garantia limitada de 1 anys from the date of purchase. This warranty covers manufacturing defects and workmanship under normal use. It does not cover damage caused by misuse, accidents, unauthorized modifications, or improper maintenance.
7.2 Atenció al client
For technical assistance, warranty claims, or product inquiries, please contact Saramonic customer support through their official website or the retailer from whom the product was purchased. Please have your proof of purchase and product model number ready when contacting support.


