Introducció
This manual provides essential information for the proper setup, operation, and maintenance of your Polk Audio SB225 Universal Bluetooth Soundbar. Please read these instructions carefully before using the product to ensure optimal performance and longevity.
1. Configuració
1.1 Desembalatge
Carefully remove all components from the packaging. Ensure all items listed below are present. If any items are missing or damaged, contact Polk Audio customer support.
- Polk Audio SB225 Soundbar
- Control remot
- Adaptador d'alimentació
- Optical Cable (may vary by region)
- RCA Stereo Audio Cable (may vary by region)
- Guia d'inici ràpid (aquest document)
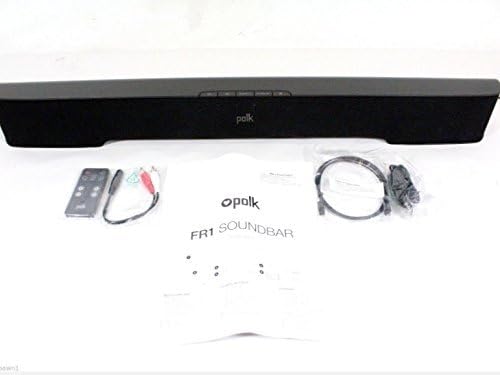
Image: The Polk Audio SB225 soundbar displayed with its remote control, power adapter, and various audio cables, indicating the contents typically found in the product packaging.
1.2 Col·locació
Position the soundbar centrally below your television for the best audio experience. Ensure there are no obstructions in front of the soundbar that could block the sound or the remote control's infrared signal. The soundbar dimensions are approximately 35 x 5 x 6 inches (W x D x H).

Imatge: A view of the Polk Audio SB225 soundbar, showcasing its sleek black design and compact form factor suitable for placement below a television.
1.3 Connexions
Connecteu la barra de so al televisor o a altres fonts d'àudio mitjançant un dels mètodes següents:
- Àudio digital òptic (recomanat): Connect one end of the optical cable to the TPTICA EN port on the soundbar and the other end to the optical digital audio output on your TV.
- Auxiliary Audio: Connect one end of the 3.5mm stereo audio cable (or RCA to 3.5mm adapter) to the AUX IN port on the soundbar and the other end to the headphone jack or RCA audio output on your TV or audio source.

Image: The rear panel of the Polk Audio SB225 soundbar, highlighting the various input ports including Optical, AUX, and the power input, along with mounting points.
1.4 Connexió d'alimentació
Connecteu l'adaptador d'alimentació a PODER input on the back of the soundbar, then plug the adapter into a wall outlet. The soundbar will enter standby mode.
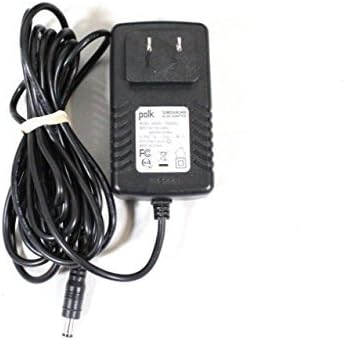
Image: The power adapter for the Polk Audio SB225 soundbar, showing the AC plug and the DC output connector.
2. Instruccions de funcionament
2.1 Encès/Apagat
Premeu el botó PODER button on the soundbar or the remote control to turn the unit on or off. The LED indicator on the soundbar will change color to indicate its status.
2.2 Selecció d'entrada
Premeu el botó ENTRADA button on the remote control or the soundbar to cycle through available audio inputs: Optical, Auxiliary, and Bluetooth.
2.3 Control de volum
Utilitza el PUJAR VOLUM (+) i BAIXAR EL VOLUM (-) buttons on the remote control or the soundbar to adjust the audio level. The soundbar features Smart Bar Technology, allowing it to learn your TV's remote control volume commands. Refer to the "Smart Bar Technology" section in the full manual for detailed instructions on programming your TV remote.
2.4 Vinculació Bluetooth
Per connectar un dispositiu Bluetooth:
- Premeu el botó BLUETOOTH button on the remote control or the soundbar. The Bluetooth indicator will flash, indicating pairing mode.
- Al dispositiu mòbil (telèfon intel·ligent, tauleta, PC), activeu el Bluetooth i cerqueu els dispositius disponibles.
- Select "Polk SB225" from the list of devices.
- Once paired, the Bluetooth indicator on the soundbar will glow solid.
Note: The soundbar can remember multiple Bluetooth devices but will only connect to one at a time.
3. Manteniment
3.1 Neteja
To clean the soundbar, use a soft, dry cloth. Do not use liquid cleaners or abrasive materials, as these may damage the finish or internal components. Ensure the soundbar is powered off and unplugged before cleaning.
3.2 Emmagatzematge
If storing the soundbar for an extended period, disconnect it from power and store it in a cool, dry place, away from direct sunlight and extreme temperatures. It is recommended to keep the original packaging for storage and transport.
4. Solució De Problemes
| Problema | Causa possible | Solució |
|---|---|---|
| No hi ha so de la barra de so. |
|
|
| El dispositiu Bluetooth no s'aparella. |
|
|
| El comandament a distància no funciona. |
|
|
| El so està distorsionat. |
|
|
5. Especificacions
- Model: SB225
- Tipus d'altaveu: Barra de so
- Tecnologia de connectivitat: Bluetooth
- Mode de sortida d'àudio: estèreo
- Configuració del canal de so envoltant: 2.0
- Potència de sortidatage: 150 watts
- Pes de l'article: 5 lliures
- Dimensions del producte: 35 x 5 x 6 polzades (A x P x A)
- Components inclosos: Remot
- Font d'alimentació: Elèctric amb cable
- Dispositius compatibles: Laptop, Smartphone, Television
- Mètode de control: Remot
6. Informació de la garantia
The Polk Audio SB225 Soundbar comes with a Limited Warranty. Please refer to the warranty card included with your product or visit the official Polk Audio weblloc web per obtenir els termes i condicions detallats sobre la cobertura de la garantia, la durada i els procediments de reclamació.
7. Suport
For technical assistance, troubleshooting not covered in this manual, or service inquiries, please contact Polk Audio customer support. Contact information can typically be found on the official Polk Audio weblloc o a l'embalatge del producte.
Assistència en línia: www.polkaudio.com/support (Exampl'enllaç, l'enllaç real pot variar)