1. Introducció
The MASTECH MY70 is a reliable and versatile digital multimeter designed for basic electrical measurements. It is suitable for a wide range of applications, including workshop use, hobby projects, and general electrical testing. This manual provides essential information for the safe and effective operation, maintenance, and troubleshooting of your MY70 multimeter.
2. Informació de seguretat
Always observe the following safety precautions to prevent personal injury and damage to the multimeter or equipment under test.
- Llegiu i enteneu totes les instruccions d'aquest manual abans d'utilitzar el multímetre.
- No supereu els valors d'entrada màxims per a cap funció.
- Tingueu precaució quan treballeu amb voltagper sobre de 30 V CA RMS, 42 V pic o 60 V CC. Aquests voltagsuposen un risc de xoc.
- Desconnecteu sempre els cables de prova del circuit abans de canviar les funcions o els rangs.
- Inspeccioneu els cables de prova per detectar danys a l'aïllament o metall exposat abans de cada ús. Substituïu-los si estan danyats.
- Assegureu-vos que la tapa de la bateria estigui ben tancada abans de fer-la funcionar.
- No feu servir el multímetre si sembla que està danyat o si la carcassa està oberta.
- Complir els codis de seguretat locals i nacionals.
This device complies with IEC 61010, CE, and RoHS standards.
3. Característiques del producte
The MASTECH MY70 Digital Multimeter offers a range of essential measurement capabilities:
- AC i DC Voltage Mesura
- Mesura de corrent AC i DC
- Mesura de Resistència
- Prova de díode
- Continuity Test with Buzzer
- Prova de transistors hFE
- Funció de retenció de dades
- Apagat automàtic
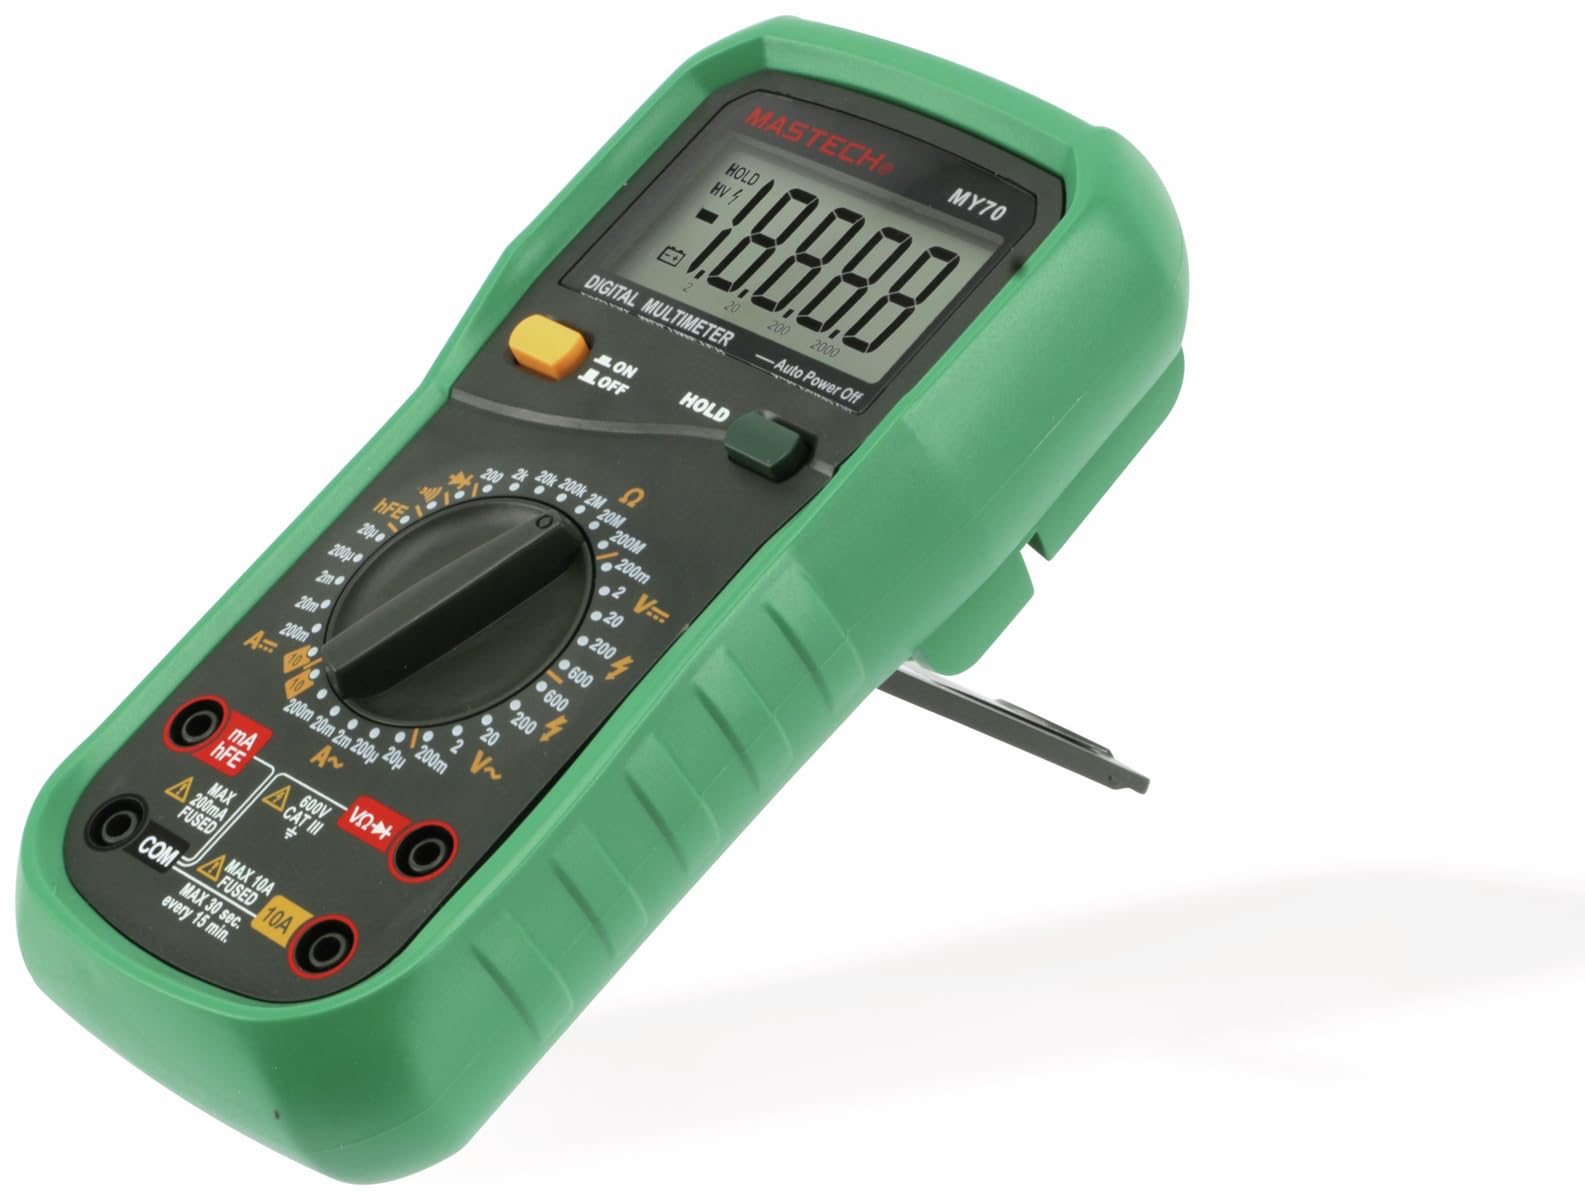
Figura 3.1: Frontal view of the MASTECH MY70 Digital Multimeter.
4. Contingut del paquet
Verifiqueu que tots els elements siguin presents al vostre paquet:
- Multímetre digital MASTECH MY70
- Cables de prova (un vermell, un negre)
- 9V Battery (NEDA 1604 or 6F22 type)
- Transistor Test Socket (hFE adapter)
- Manual d'usuari (aquest document)
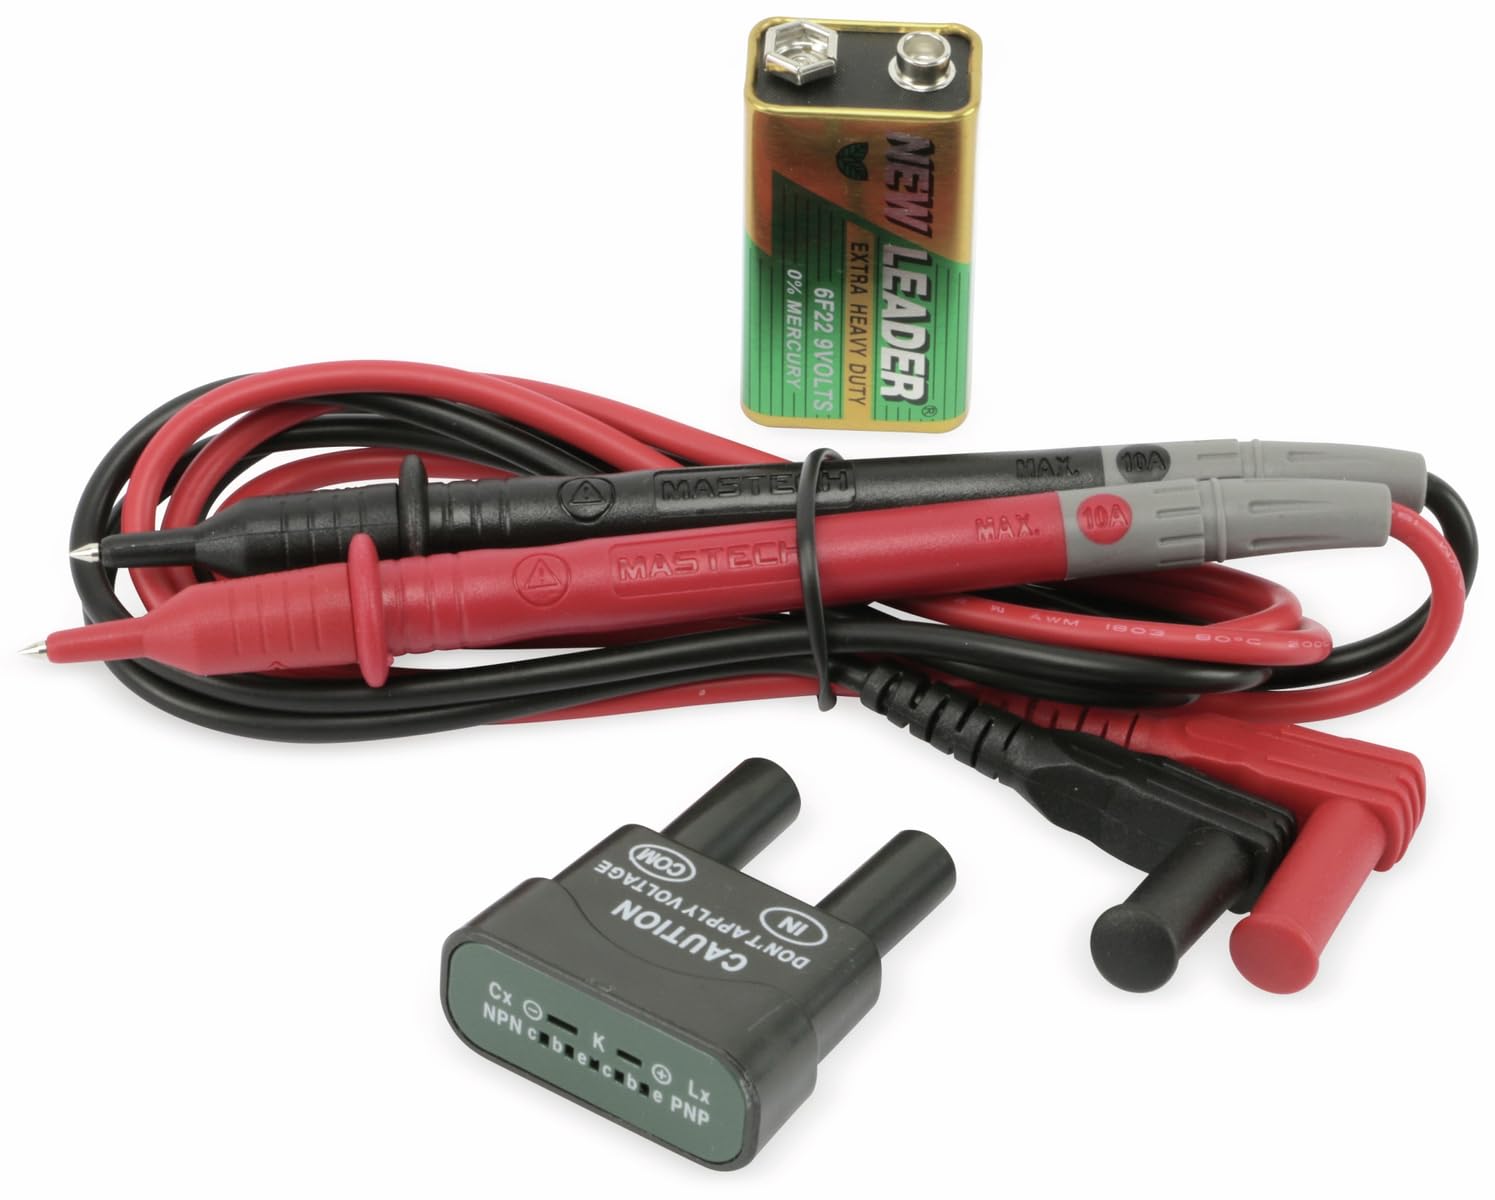
Figure 4.1: MASTECH MY70 Multimeter accessories.
5. Configuració
5.1 Instal·lació de la bateria
- Assegureu-vos que el multímetre estigui APAGAT.
- Localitzeu el compartiment de la bateria a la part posterior de la unitat.
- Unscrew the retaining screw(s) and remove the battery cover.
- Connect the 9V battery to the battery clips, observing correct polarity.
- Col·loqueu la bateria al compartiment i torneu a col·locar la tapa, fixant-la amb el(s) cargol(s).

Figura 5.1: posterior view with battery compartment.
5.2 Connexió dels cables de prova
For most measurements, connect the black test lead to the "COM" (common) jack and the red test lead to the "VΩmA" jack. For high current measurements (up to 10A), connect the red lead to the "10A" jack.
6. Instruccions de funcionament
To begin, turn the rotary switch to the desired function and range. Connect the test leads to the circuit or component under test.
6.1 DC VoltagMesura de e (V=)
- Set the rotary switch to the desired "V=" range (e.g., 20V, 200V).
- Connect the black test lead to the "COM" jack and the red test lead to the "VΩmA" jack.
- Connect the test leads in parallel across the DC voltagfont o component electrònic.
- Llegeix el voltage valor a la pantalla.
6.2 AC VoltagMesura de e (V~)
- Set the rotary switch to the desired "V~" range (e.g., 200V, 600V).
- Connect the black test lead to the "COM" jack and the red test lead to the "VΩmA" jack.
- Connect the test leads in parallel across the AC voltagfont o component electrònic.
- Llegeix el voltage valor a la pantalla.
6.3 DC Current Measurement (A=)
Precaució: Always connect the multimeter in series with the circuit when measuring current. Never connect it in parallel across a voltage font.
- Set the rotary switch to the desired "A=" range (e.g., 200µA, 10A).
- For currents up to 200mA, connect the red test lead to the "VΩmA" jack. For currents up to 10A, connect the red test lead to the "10A" jack. The black lead always connects to "COM".
- Obriu el circuit on es vol mesurar el corrent i connecteu el multímetre en sèrie.
- Llegiu el valor actual a la pantalla.
6.4 Mesura de resistència (Ω)
Precaució: Assegureu-vos que el circuit estigui desenergitzat i que tots els condensadors estiguin descarregats abans de mesurar la resistència.
- Set the rotary switch to the desired "Ω" range (e.g., 200Ω, 2MΩ).
- Connect the black test lead to "COM" and the red test lead to "VΩmA".
- Connect the test leads across the component whose resistance is to be measured.
- Llegiu el valor de resistència a la pantalla.
6.5 Prova de díodes (→|)
- Set the rotary switch to the "→|"posició.
- Connect the black test lead to "COM" and the red test lead to "VΩmA".
- Connecteu el cable vermell a l'ànode i el cable negre al càtode del díode. Un voltatge directetage drop (typically 0.5V to 0.8V for silicon diodes) will be displayed.
- Reverse the leads. The display should show "OL" (Overload) for a good diode.
6.6 Prova de continuïtat (•))))
- Set the rotary switch to the "•)))"posició.
- Connect the black test lead to "COM" and the red test lead to "VΩmA".
- Connecteu els cables de prova a través del circuit o component.
- Si la resistència és inferior a aproximadament 50 Ω, sonarà el brunzidor, indicant continuïtat.
6.7 Prova de transistor hFE
- Set the rotary switch to the "hFE" position.
- Insert the transistor (NPN or PNP) into the appropriate sockets on the transistor test adapter.
- Read the hFE (DC current gain) value on the display.
6.8 Funció de retenció de dades
Press the "HOLD" button to freeze the current reading on the display. Press it again to release the hold function and resume live readings.
7. Manteniment
7.1 Neteja
Netegeu el cas amb l'anunciamp cloth and a mild detergent. Do not use abrasives or solvents. Ensure the multimeter is completely dry before use.
7.2 Substitució de la bateria
When the battery symbol appears on the display, the 9V battery needs to be replaced. Refer to Section 5.1 for battery installation instructions.
7.3 Canvi de fusibles
If the current measurement function fails, the fuse may need replacement. The MY70 uses two fuses: a 400mA/250V (F400mA/250V) fuse for the mA range and a 10A/250V (F10A/250V) fuse for the 10A range. To replace a fuse:
- Assegureu-vos que el multímetre estigui apagat i que els cables de prova estiguin desconnectats.
- Traieu la tapa de la bateria i la bateria.
- Unscrew the additional screws holding the back case.
- Carefully separate the two halves of the case.
- Locate the blown fuse(s) and replace with fuses of the identical type and rating.
- Reassemble the case, ensuring all screws are tightened.
8. Solució De Problemes
| Problema | Causa possible | Solució |
|---|---|---|
| Sense pantalla o pantalla tènue | Bateria baixa o bateria baixa | Substituïu la bateria de 9V. |
| Es mostra "OL" (sobrecàrrega) | Input value exceeds selected range or open circuit | Select a higher range or check for an open circuit. |
| Incorrect current reading or no current reading | Blown fuse or incorrect lead connection | Check and replace fuse if necessary. Ensure leads are connected in series and to the correct jacks. |
| Inaccurate resistance reading | Component still energized or parallel components affecting reading | Ensure circuit is de-energized. Isolate the component for accurate measurement. |
9. Especificacions
| Paràmetre | Valor |
|---|---|
| Model | MY70 |
| Fabricant | mastec |
| Font d'alimentació | 9V Battery (NEDA 1604 or 6F22) |
| Dimensions (L x A x A) | 20.5 x 12.5 x 6 cm (aprox. 8.07 x 4.92 x 2.36 polzades) |
| Pes | Approx. 567 grams (1.25 lbs) |
| Normes de seguretat | IEC 61010, CE, RoHS |
| Temperatura màxima de funcionament | 60 °C (140 °F) |
| DC Voltage Rang | 200mV, 2V, 20V, 200V, 600V |
| Vol. ACtage Rang | 200 V, 600 V |
| Interval de corrent DC | 200µA, 2mA, 20mA, 200mA, 10A |
| Interval de resistència | 200Ω, 2kΩ, 20kΩ, 200kΩ, 2MΩ, 20MΩ |
10. Garantia i Suport
For warranty information and technical support, please refer to the official Mastech weblloc web o poseu-vos en contacte amb el vostre distribuïdor local. Conserveu el rebut de compra com a comprovant de compra per a reclamacions de garantia.
Manufacturer: Mastech
Número de model: MY70


