1. Introducció
This user manual provides comprehensive instructions for the installation, operation, and maintenance of your Immergas CARV2 Wireless Chronothermostat. Please read this manual thoroughly before using the device to ensure proper functionality and safety. This device is designed for precise temperature control in HVAC systems.
2. Informació de seguretat
Observeu sempre les precaucions de seguretat següents:
- Installation should only be performed by qualified personnel in accordance with local electrical codes.
- Desconnecteu l'alimentació abans de realitzar qualsevol instal·lació o manteniment.
- No exposeu el dispositiu a l'aigua ni a una humitat excessiva.
- No intenteu reparar el dispositiu vosaltres mateixos. Envieu totes les tasques de manteniment a personal de servei qualificat.
- Ensure the power supply matches the device's specifications (230 Volts).
3. Producte acabatview
The Immergas CARV2 is a wireless digital chronothermostat designed for efficient heating and cooling management. It features a clear display and intuitive controls for setting desired temperatures and programming schedules.
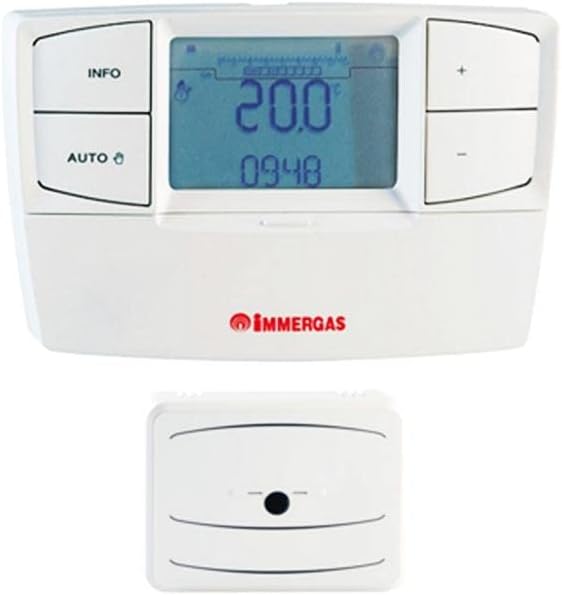
Figure 3.1: Immergas CARV2 Wireless Chronothermostat (top) showing the display with temperature and time, and control buttons (INFO, AUTO, +, -). Below it is the wireless receiver unit (bottom) with a small indicator light.
3.1 Components
- Unitat de termòstat: The main control unit with display and buttons.
- Wireless Receiver Unit: Connects to the HVAC system and communicates wirelessly with the thermostat unit.
3.2 Pantalla i botons
The thermostat unit features a digital display showing current temperature, set temperature, time, and operating mode. Control buttons include:
- Botó INFO: Accesses information screens.
- Botó AUTO: Alterna entre els modes de funcionament automàtic i manual.
- Botó +: Increases temperature setting or navigates menus.
- - Botó: Decreases temperature setting or navigates menus.
4. Configuració i instal·lació
Proper installation is crucial for optimal performance. Refer to the detailed wiring diagrams provided with the product packaging for specific connections.
4.1 Instal·lació de la unitat receptora
- Ensure power to the HVAC system is turned off at the main breaker.
- Mount the receiver unit near your boiler or heating system, ensuring it is within wireless range of the thermostat unit.
- Connect the receiver unit to your HVAC system's control wiring according to the provided wiring diagram. This typically involves connecting to the boiler's thermostat terminals.
- Secure the receiver unit to the wall or mounting surface.
4.2 Thermostat Unit Placement
- Place the thermostat unit in a central location within the heated area, away from direct sunlight, drafts, or heat sources (e.g., lamps, electrodomèstics).
- Ensure the location allows for accurate room temperature sensing.
- The thermostat unit is battery-powered (batteries not included, typically AA or AAA). Insert fresh batteries before initial use.
4.3 Emparellament inicial (si cal)
Some units may require initial pairing between the thermostat and receiver. Refer to the quick start guide for specific pairing instructions. Generally, this involves pressing a pairing button on both units within a short timeframe.
5. Instruccions de funcionament
5.1 Power On and Initial Display
Once batteries are inserted and the receiver is powered, the thermostat display will illuminate, showing the current room temperature and time.
5.2 Configuració de l'hora i la data
Access the settings menu (often by holding the INFO button) to set the correct time and date. Use the + and - buttons to adjust values and the INFO or AUTO button to confirm and move to the next setting.
5.3 Modes de funcionament
- Mode automàtic (AUTO): The thermostat follows the programmed weekly schedule. Press the AUTO button to activate this mode.
- Mode manual: Allows you to set a constant desired temperature that overrides the schedule. Press the AUTO button until the manual mode indicator appears. Use + and - to adjust the temperature.
- Mode desactivat: Turns off heating/cooling. Consult the manual for specific steps to enter this mode, often by setting a very low temperature or a dedicated off setting.
5.4 Ajust de temperatura
In manual mode, or during a temporary override in auto mode, use the + i - buttons to increase or decrease the desired temperature. The new setpoint will be displayed.
5.5 Programming Weekly Schedule
The CARV2 allows for a detailed weekly programming schedule. This typically involves setting different temperatures for various times of the day across each day of the week.
- Enter programming mode (refer to your specific model's manual, often by holding INFO or AUTO for several seconds).
- Seleccioneu el dia de la setmana que voleu programar.
- Set the desired temperature for specific time intervals (e.g., 6:00 AM - 8:00 AM, 8:00 AM - 5:00 PM, etc.).
- Repeat for all desired time intervals and days.
- Desa i surt del mode de programació.
6. Manteniment
6.1 Neteja
Clean the thermostat unit with a soft, dry cloth. Do not use abrasive cleaners, solvents, or spray directly onto the unit. Ensure no moisture enters the device.
6.2 Substitució de la bateria
When the low battery indicator appears on the display, replace the batteries immediately. Use high-quality alkaline batteries (e.g., AA or AAA, depending on model). Open the battery compartment on the back of the thermostat unit, remove old batteries, and insert new ones, observing polarity.
7. Solució De Problemes
| Problema | Causa possible | Solució |
|---|---|---|
| La pantalla està en blanc. | No power to thermostat unit (dead batteries). | Substituïu les piles. |
| El termòstat no controla la calefacció/refrigeració. | Receiver unit not powered or not paired. Incorrect wiring. | Check power to receiver. Re-pair thermostat and receiver. Verify wiring connections. |
| Les lectures de temperatura semblen inexactes. | Thermostat placed in an unsuitable location (direct sunlight, draft). | Relocate thermostat to a more central and stable temperature area. |
| Scheduled program not running. | Thermostat is in manual mode. Program not saved correctly. | Switch to AUTO mode. Re-enter and save the program. |
8. Especificacions
| Característica | Detall |
|---|---|
| Marca | Immergas |
| Número de model | 7T.81.0.000.2301 |
| Color | Blanc |
| Pes de l'article | 1 quilograms |
| Voltage | 230 Volts |
| Tecnologia de connectivitat | Sense fil |
| Font d'alimentació | Electric Cable (for receiver), Battery (for thermostat unit) |
| Tipus de controlador | Pulsador |
| Tipus de control de temperatura | Manual / Programmable |
| Usos específics del producte | HVAC |
9. Garantia i Suport
For warranty information and technical support, please refer to the documentation included with your product or contact Immergas customer service directly. Spare parts availability information is not provided at this time.
Nota: Les especificacions i les característiques del producte estan subjectes a canvis sense previ avís.


