1. Introducció
This manual provides essential instructions for the safe and efficient operation, maintenance, and troubleshooting of your Bosch EasyDrill 1200 cordless drill driver. Please read this manual thoroughly before first use and keep it for future reference.
For detailed safety warnings and guidelines, always refer to the complete safety manual provided with your tool. Pay close attention to all safety symbols and instructions.
2. Producte acabatview
The Bosch EasyDrill 1200 is a versatile cordless drill driver designed for various screwing and drilling tasks in wood, metal, and plastic. Its compact and ergonomic design makes it suitable for working in confined spaces, while the integrated LED light ensures visibility in poorly lit areas. The tool features a two-speed gearbox and 20 torque settings for precise control.
Característiques principals:
- Optimal power and speed with a two-speed gearbox and 20 torque levels for powerful screwing and fast drilling.
- Versatile use in various materials including wood, metal, and plastic.
- Integrated LED light for illuminating the work area, even in dark corners.
- Compatible with the Bosch 12V Home & Garden battery system.
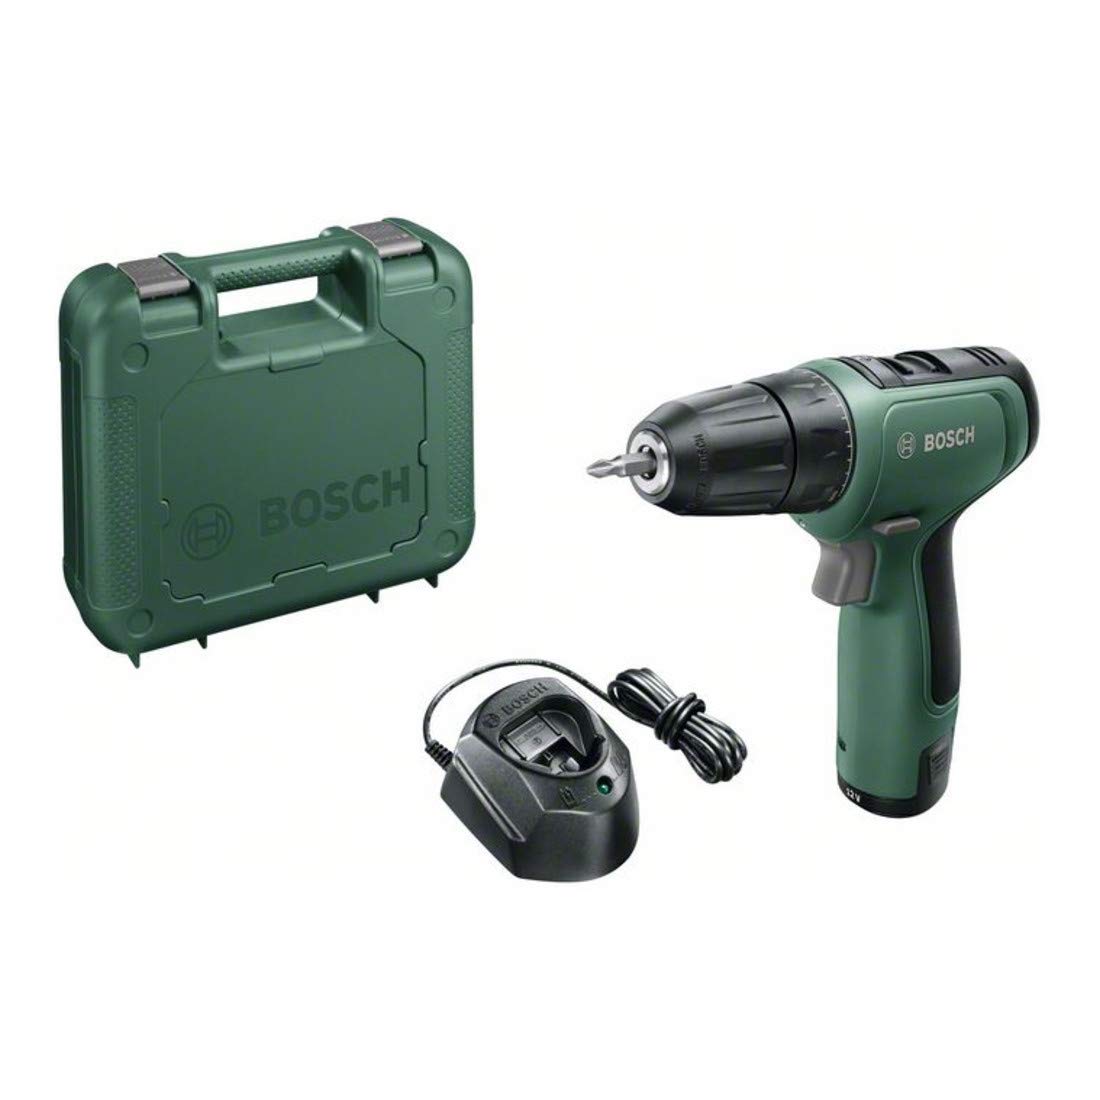
Figura 2.1: Detall view of the Bosch EasyDrill 1200 cordless drill driver, highlighting its compact design and ergonomic grip.
3. Configuració
3.1 Càrrega i instal·lació de la bateria
Ensure the battery is fully charged before first use. Connect the charger (GAL 1210 CV) to a power outlet and insert the PBA 12V 1.5Ah O-A battery. The charging indicator will show the charging status. Once charged, slide the battery into the base of the drill until it clicks securely into place.

Figure 3.1: A graphic indicating the tool's compatibility with the Bosch 12 Volt battery system.
3.2 Bit/Accessory Installation
The EasyDrill 1200 features a single-sleeve keyless chuck for quick accessory changes. To insert a drill bit or screwdriver bit, rotate the chuck counter-clockwise until the jaws are open wide enough. Insert the bit fully, then rotate the chuck clockwise to tighten it securely. Ensure the bit is centered and firmly gripped.
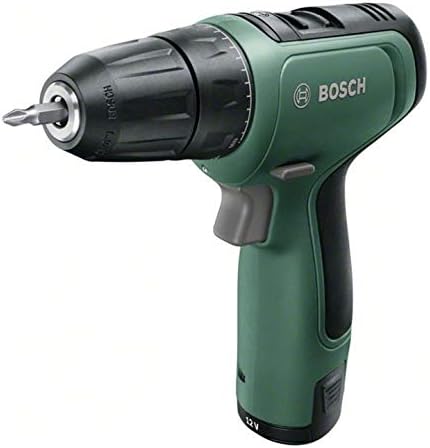
Figure 3.2: Close-up of the drill's front, showing the keyless chuck and a screwdriver bit installed.
4. Instruccions de funcionament
4.1 Engegada/apagada
Press the trigger switch to start the tool. The speed is variable depending on the pressure applied to the trigger. Release the trigger to stop the tool.
Selecció de 4.2 velocitats
The tool has two speed settings. Use the gear selector switch located on top of the tool. Position 1 (low speed) is for screwing and larger drilling diameters. Position 2 (high speed) is for smaller drilling diameters and faster drilling.
4.3 Torque Setting
Adjust the torque ring, located behind the chuck, to select one of the 20 torque levels. Lower settings are for smaller screws and softer materials to prevent overtightening or stripping. Higher settings are for larger screws and harder materials. The drill symbol setting is for drilling operations, providing maximum torque.
4.4 Direcció de rotació
The forward/reverse switch, located above the trigger, controls the direction of rotation. Push it to the left for forward rotation (screwing in, drilling) and to the right for reverse rotation (unscrewing, removing bits). The center position locks the trigger for safety.
4.5 Llum LED integrada
The integrated LED light automatically illuminates the work area when the trigger is pressed, providing better visibility in dark or confined spaces.

Figure 4.1: An individual using the Bosch EasyDrill 1200 to drill inside a cabinet, with the integrated LED light illuminating the work area.

Figure 4.2: An individual using the Bosch EasyDrill 1200 to drill into a wooden fence post, demonstrating its application in outdoor projects.

Figure 4.3: A hand operating the Bosch EasyDrill 1200 to drill a hole into a metal 'Wifi Free' sign, illustrating its use on various materials.
5. Manteniment
5.1 Neteja
Regularly clean the ventilation slots on the tool to prevent overheating. Use a soft, dry cloth to wipe down the tool. Do not use water or chemical cleaning agents.
5.2 Cura de la bateria
Store batteries in a cool, dry place away from direct sunlight. Do not expose batteries to extreme temperatures. If not used for extended periods, charge the battery periodically to maintain its lifespan.
5.3 Emmagatzematge
Store the drill driver and its accessories in the provided carrying case in a dry, secure location, out of reach of children.
6. Solució De Problemes
6.1 L'eina no s'inicia
- Check if the battery is fully charged and correctly inserted.
- Ensure the forward/reverse switch is not in the center (locked) position.
6.2 La bateria no es carrega
- Verify the charger is properly connected to a power outlet and the battery.
- Check for any damage to the charger or battery.
- Assegureu-vos que la bateria estigui dins del rang de temperatura recomanat per carregar.
6.3 Rendiment reduït
- Ensure the correct speed and torque settings are selected for the task.
- Check if the drill bit or screwdriver bit is sharp and suitable for the material.
- The battery might require recharging.
6.4 Bit Slipping in Chuck
- Assegureu-vos que el mandril estigui ben ajustat al voltant de la broca.
- The bit shank should be clean and free of oil or debris.
7. Especificacions
| Característica | Especificació |
|---|---|
| Volum nominaltage | 12 V |
| Capacitat de la bateria | 1.5 Ah |
| Max Screw Diameter | 6 mm |
| Diàmetre màxim de perforació (fusta) | 20 mm |
| Max Drilling Diameter (Metal) | 8 mm |
| No-load Speed (1st/2nd Gear) | 0-400 / 0-1500 rpm |
| Max Torque | 30 Nm |
| Pes amb bateria | 0.94 kg |
| Número de model | 06039D3001 |
| Dimensions del producte (L x A x A) | 20 x 20 x 20 cm |
| Piles incloses | Sí |
| Font d'alimentació | Funciona amb bateria |
| Material | Plàstic |
| Color | Verd |
| Mida màxima del mandril | 10 mm |
8. Garantia i Suport
8.1 Informació de la garantia
This Bosch EasyDrill 1200 is covered by a 2-year manufacturer's warranty. Please retain your proof of purchase for any warranty claims. The warranty covers defects in materials and workmanship under normal use.
8.2 Atenció al client
For technical assistance, spare parts, or service, please visit the official Bosch website or contact your local Bosch service center. Contact information can typically be found on the Bosch website or in the product packaging. Do not attempt to repair the tool yourself, as this may void the warranty and pose safety risks.


