1. Introducció
This manual provides essential information for the safe and effective operation, maintenance, and troubleshooting of your VONROC Radial Miter Saw MS502AC. Please read these instructions carefully before using the tool and keep them for future reference. This radial miter saw is designed for precise cutting of wood and wood-like materials.
2. Instruccions de seguretat
Observeu sempre les precaucions de seguretat bàsiques per reduir el risc d'incendi, descàrrega elèctrica i lesions personals. Familiaritzeu-vos amb tots els controls i l'ús correcte de l'eina.
- Seguretat personal: Always wear appropriate personal protective equipment (PPE) including safety glasses, hearing protection, and a dust mask. Do not wear loose clothing or jewelry that could get caught in moving parts.
- Seguretat de l'àrea de treball: Mantingueu la vostra zona de treball neta i ben il·luminada. Les zones desordenades o fosques conviden als accidents. No feu servir eines elèctriques en atmosferes explosives, com ara en presència de líquids, gasos o pols inflamables.
- Seguretat elèctrica: Ensure the power supply matches the specifications on the tool's rating plate. Avoid body contact with earthed or grounded surfaces. Do not expose power tools to rain or wet conditions.
- Ús i cura de l'eina: Do not force the tool. Use the correct tool for your application. Disconnect the plug from the power source before making any adjustments, changing accessories, or storing power tools.
- Seguretat de la fulla: Ensure the blade is sharp and correctly installed. Never attempt to remove jammed material while the blade is moving. Always use the blade guard.
3. Producte acabatview i Components
The VONROC MS502AC Radial Miter Saw features a powerful motor, a 254mm blade, integrated laser guide, LED work light, and adjustable table extensions for versatile cutting operations.

Figura 3.1: Mésview of the VONROC Radial Miter Saw MS502AC. This image displays the complete saw with its main components, including the motor housing, blade guard, handle, base, and table extensions.
- Carcassa del motor: Inclou un motor de 2000 W.
- Protector de fulla: Protector retràctil per a la seguretat durant el funcionament.
- Mànec: Empunyadura ergonòmica per a un major control.
- Base and Turntable: Provides stability and allows for miter angle adjustments.
- Extensions de taula: Extendable supports for longer workpieces.
- Guia làser: Projects a line onto the workpiece for precise cutting.
- Llum de treball LED: Il·lumina la zona de tall.
- Bossa de recollida de pols: Attaches to the dust port for debris collection.
- Peça Clamp: Assegura el material durant el tall.
4. Configuració
Proper setup ensures safe and accurate operation of your miter saw.
4.1 Desembalatge i muntatge
- Traieu amb cura tots els components de l'embalatge.
- Inspect the saw for any damage that may have occurred during transit. Do not operate a damaged tool.
- Mount the saw securely to a stable workbench using appropriate fasteners.
- Attach the dust collection bag to the dust port.
4.2 Installing the Saw Blade
The saw comes with a pre-mounted 254mm blade. If a blade change is necessary, follow these steps:
- Desconnecteu la serra de la font d'alimentació.
- Engage the spindle lock to prevent the blade from rotating.
- Use the provided wrench to loosen the blade retaining bolt.
- Traieu amb cura la fulla antiga, observant la direcció de rotació.
- Install the new 254mm blade (60 teeth recommended for fine cuts) ensuring the teeth point in the correct direction for cutting.
- Tighten the blade retaining bolt securely and release the spindle lock.
4.3 Adjusting Table Extensions
The adjustable table extensions provide support for longer workpieces.
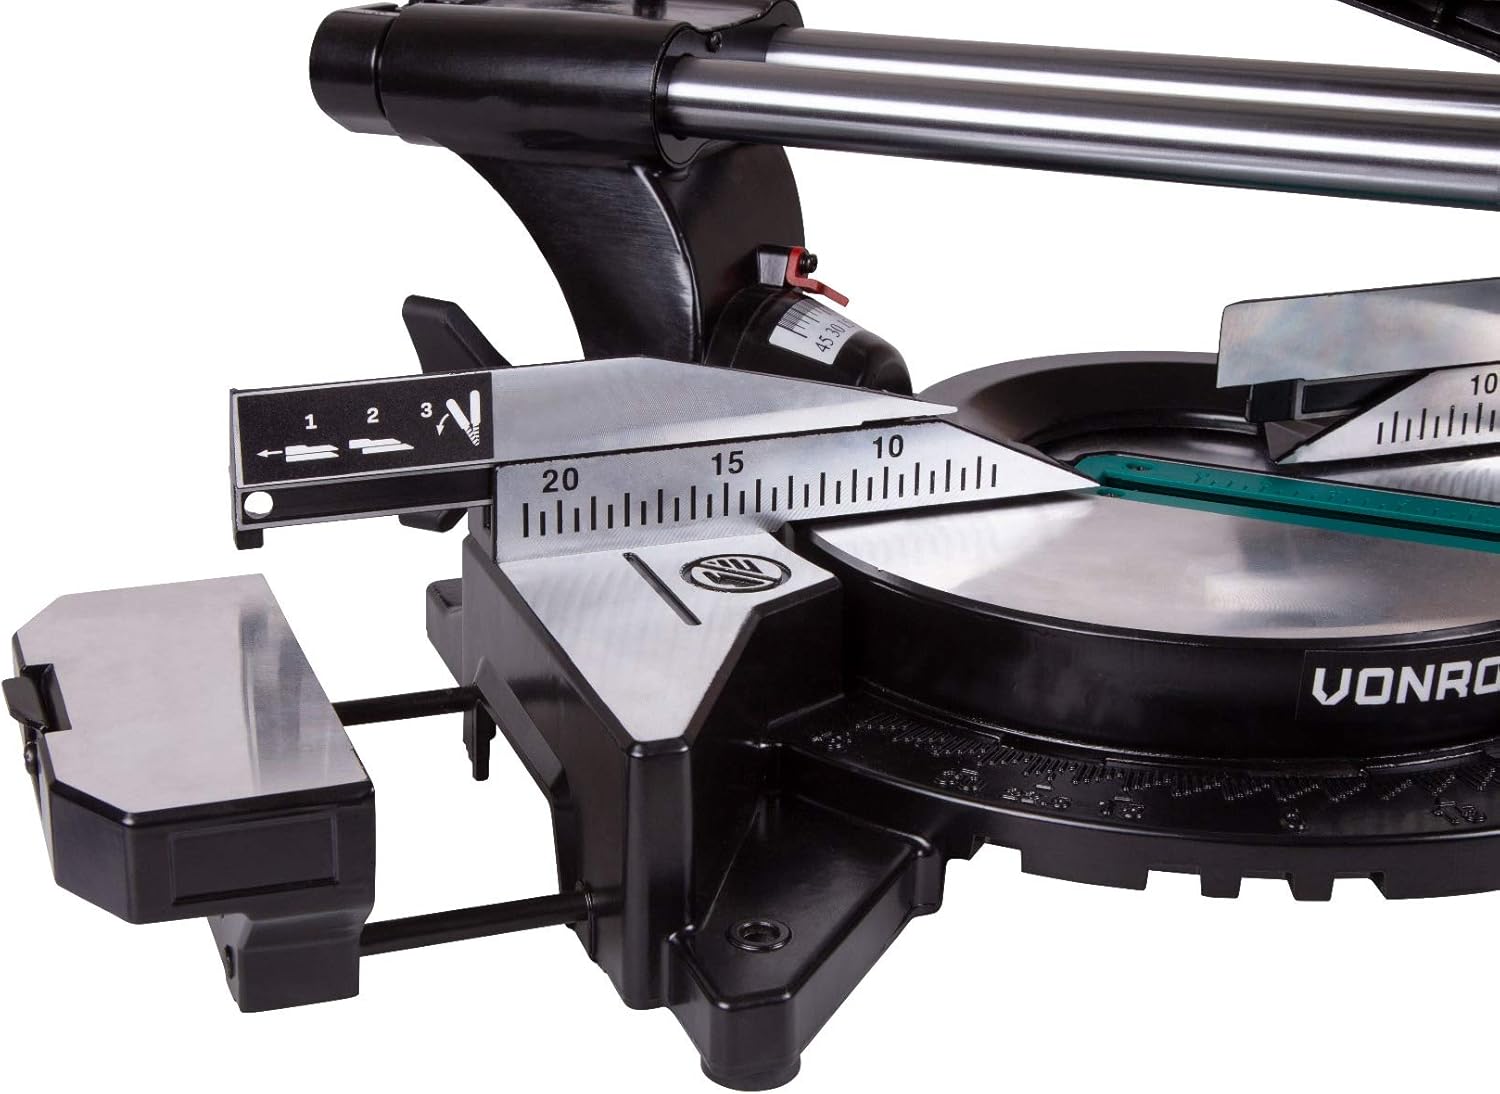
Figure 4.1: Detail of the adjustable table extension. This image shows the extendable support arms that can be pulled out to support longer workpieces, enhancing stability and safety during cuts.
- Loosen the locking knobs for the table extensions.
- Pull out the extensions to the desired length to support your workpiece.
- Tighten the locking knobs to secure the extensions in place.
5. Instruccions de funcionament
This section details how to operate your VONROC Radial Miter Saw for various cutting tasks.
5.1 Funcionament bàsic

Figure 5.1: User operating the VONROC Radial Miter Saw. This image illustrates the saw in action, with a user carefully guiding the blade through a wooden workpiece, demonstrating a typical cutting scenario.
- Place the workpiece firmly against the fence and secure it with the workpiece clamp.
- Ensure the blade guard is functioning correctly.
- Switch on the laser guide and LED light for improved visibility and cut line indication.
- Start the saw using the power switch. The soft start electronics will ensure a smooth power-up.
- Slowly lower the saw head into the workpiece, allowing the blade to reach full speed before making contact.
- Push the saw head through the workpiece at a controlled, steady rate.
- Once the cut is complete, release the power switch and allow the blade to stop completely before raising the saw head.
5.2 Miter Cuts
Miter cuts are angled cuts across the face of the workpiece.

Figure 5.2: Miter angle adjustment on the saw. This image shows the saw's turntable being rotated to set a miter angle, with an arrow indicating the range of motion from -45° to +45°.
- Afluixeu la maneta de bloqueig de la mitra.
- Rotate the turntable to the desired miter angle (e.g., 0°, 15°, 22.5°, 30°, 45°).
- Lock the turntable securely in place.
- Proceed with the cut as described in Basic Operation.
5.3 talls de bisell
Bevel cuts are angled cuts through the thickness of the workpiece.

Figure 5.3: Bevel angle adjustment on the saw. This image illustrates the saw head tilting to set a bevel angle, with an arrow indicating the 0° to 45° range of motion.
- Afluixeu el botó de bloqueig del bisell.
- Tilt the saw head to the desired bevel angle (up to 45°).
- Lock the saw head securely in place.
- Proceed with the cut as described in Basic Operation.
5.4 Compound Cuts
Compound cuts involve both a miter and a bevel angle simultaneously.
- Set the desired miter angle as described in Section 5.2.
- Set the desired bevel angle as described in Section 5.3.
- Ensure both angles are securely locked.
- Proceed with the cut as described in Basic Operation.
5.5 Using the Laser Guide and LED Light

Figure 5.4: Close-up of the laser guide and LED work light. This image highlights the integrated laser projecting a red line for cut guidance and the LED light illuminating the cutting area for enhanced precision and visibility.
The integrated laser projects a clear line onto your workpiece, indicating the exact cutting path. The LED light illuminates the work area, which is particularly useful in dimly lit environments. Activate these features using their respective switches before starting a cut.
6. Manteniment
Un manteniment regular garanteix la longevitat i el rendiment òptim de la serra de tall biaixat.
- Neteja: After each use, disconnect the saw from power and clean off dust and debris using a brush or compressed air. Pay special attention to the blade guard, motor vents, and sliding mechanisms.
- Inspecció de la fulla: Inspeccioneu regularment la fulla de la serra per detectar si està afilada, danyat o si li falten dents. Substituïu immediatament les fulles desafilades o danyades.
- Lubricació: Periodically lubricate the sliding guide arms and pivot points with a suitable lubricant to ensure smooth operation.
- Bossa de pols: Empty the dust collection bag regularly to maintain effective dust extraction.
7. Solució De Problemes
Aquesta secció tracta els problemes habituals que podeu trobar amb la vostra serra de tall biaixat.
| Problema | Causa possible | Solució |
|---|---|---|
| La serra no arrenca | Sense subministrament d'alimentació; Interruptor defectuós; Protecció de sobrecàrrega activada | Comproveu la connexió d'alimentació; contacteu amb el centre de servei; deixeu que el motor es refredi |
| La fulla no talla suaument o crema llenya | Dull or damaged blade; Incorrect blade for material; Feed rate too fast | Replace blade; Use appropriate blade; Reduce feed rate |
| Talls imprecisos | Loose fence or miter/bevel settings; Blade wobble; Workpiece not secured | Tighten all adjustments; Check blade installation; Secure workpiece firmly |
| Vibració excessiva | Loose blade; Damaged blade; Unstable mounting | Check blade tightness; Replace blade; Secure saw to workbench |
| Guia làser no visible | Laser switch off; Batteries depleted (if applicable); Excessive ambient light | Turn on laser; Replace batteries; Work in a less brightly lit area |
8. Especificacions
Technical data for the VONROC Radial Miter Saw MS502AC.
| Característica | Especificació |
|---|---|
| Model | MS502AC |
| Entrada de potència | 2000W |
| Voltage | 230 V |
| Velocitat sense càrrega | 4500 rpm |
| Diàmetre de la fulla | 254 mm |
| Max. Cutting Width (90°) | 340 mm |
| Profunditat màxima de tall (90°) | 90 mm |
| Angles de mitra | 0°, 15°, 22.5°, 30°, 45° (left/right) |
| Angles de bisell | 0° a 45° (esquerra) |
| Dimensions (L x A x A) | 82 x 48 x 41 cm |
| Pes | 14.3 kg |
| Característiques especials | Soft Start, Laser Guide, LED Work Light, Depth Adjustment |
| Certificació | CE |
9. Garantia i Suport
VONROC products are designed and manufactured to high-quality standards. For warranty information, please refer to the documentation provided with your purchase or visit the official VONROC website. For technical support, spare parts, or service inquiries, please contact VONROC customer service through their official channels.
Always ensure to use genuine VONROC spare parts and accessories to maintain product performance and warranty validity.


