1. Informació de seguretat
Read all instructions carefully before beginning installation. Failure to follow these instructions may result in electrical shock, fire, or personal injury.
- Desconnecteu sempre l'alimentació a l'interruptor automàtic o a la caixa de fusibles abans de la instal·lació o el manteniment.
- Tot el cablejat ha de complir amb els codis elèctrics nacionals i locals. Si no esteu familiaritzat amb el cablejat, consulteu un electricista qualificat.
- Assegureu-vos que el lloc d'instal·lació pugui suportar el pes del ventilador (aproximadament 3.53 kg).
- No feu funcionar el ventilador amb les pales o la carcassa danyades.
- Maintain a minimum clearance of 7 feet (2.1 meters) from the floor to the bottom edge of the fan blades.
- No introduïu objectes a la trajectòria de les aspes del ventilador.
2. Contingut del paquet
Verify that all components listed below are present before beginning installation. If any parts are missing or damaged, do not proceed with installation and contact customer support.
- Muntatge de la carcassa del motor
- Fan Blades (4) - Reversible white/bleached oak
- Suports de fulla (4)
- Downrod
- Dosser
- Suport de muntatge
- Muntatge del kit de llum
- Mushroom Globe Glass
- Cadenes de tracció (2)
- Paquet de maquinari (cargols, volanderes, femelles de cable)
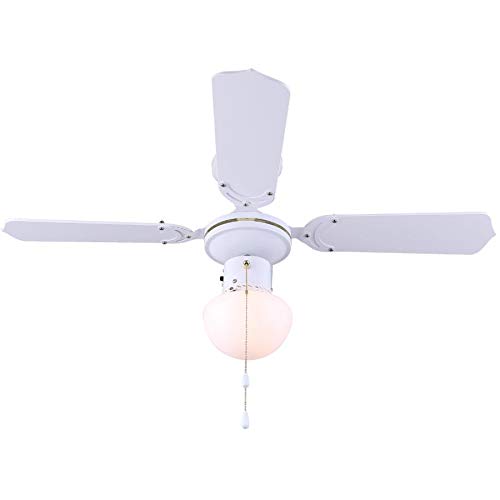
Figura 2.1: Mésview of the Canarm Unity Ceiling Fan with Light, displaying the motor housing, four blades, and the central mushroom globe light.
3. Configuració i instal·lació
Es recomana la instal·lació per part d'un professional. Assegureu-vos que l'alimentació estigui desconnectada al disjuntor abans de continuar.
3.1 Muntatge del ventilador
- Fixeu el suport de muntatge a la caixa de connexions del sostre. Assegureu-vos que la caixa de connexions estigui ben fixada a l'estructura de l'edifici i que pugui suportar el pes del ventilador.
- Feed the electrical wires from the junction box through the center hole of the mounting bracket.
- Attach the downrod to the motor housing, ensuring all screws are tightened.
- Carefully lift the fan assembly and hang it from the mounting bracket using the hook provided on the downrod.
3.2 Connexions elèctriques
Connect the fan's electrical wires to the household wiring according to the following:
- Connect the green/bare copper wire (ground) from the fan to the ground wire from the junction box.
- Connect the white wire (neutral) from the fan to the white wire from the junction box.
- Connect the black wire (hot for fan) from the fan to the black wire from the junction box.
- Connect the blue wire (hot for light) from the fan to the black or blue wire from the junction box (if separate light switch).
- Secure all connections with wire nuts and ensure no loose strands of wire are exposed.
3.3 Fixació de les aspes del ventilador
- Attach each blade to a blade bracket using the provided screws. Ensure the desired blade finish (white or bleached oak) is facing downwards.
- Secure each blade assembly to the motor housing using the screws provided. Ensure all screws are tight.
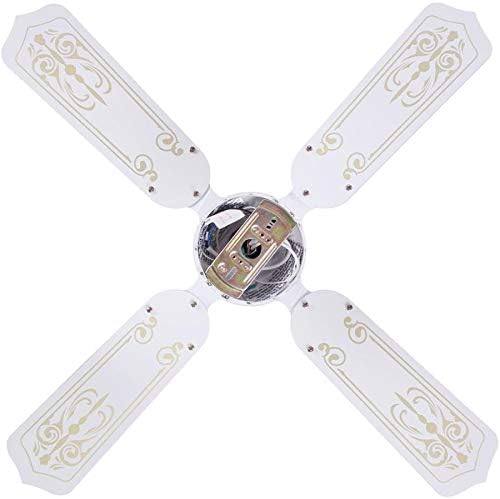

Figure 3.3: Images showing the blade attachment points on the motor housing (left) and the assembled blades from a top-down perspective (right).
3.4 Instal·lació del kit de llums
- Connect the light kit wires to the corresponding wires from the fan motor housing (usually white to white, blue to black).
- Secure the light kit assembly to the bottom of the motor housing with the provided screws.
- Install the appropriate light bulb(s) (not included) into the sockets.
- Carefully attach the mushroom globe glass to the light kit by twisting or securing with screws, depending on the design.

Figura 3.4: Primer pla view of the fan's light kit with the mushroom globe glass.
3.5 passos finals
- Carefully slide the canopy up against the ceiling and secure it with the provided screws.
- Resta l'alimentació al disjuntor.
4. Instruccions de funcionament
The Canarm Unity ceiling fan is operated by two pull chains.
- Control de velocitat del ventilador: One pull chain controls the fan speed. Pull the chain repeatedly to cycle through the three available speeds (High, Medium, Low) and Off.
- Control de la llum: The second pull chain controls the light. Pull the chain to turn the light On or Off.
- Blade Reversal: To change the direction of the fan blades (e.g., for summer cooling or winter heat circulation), locate the slide switch on the motor housing. With the fan off, slide the switch to the opposite position. This fan features reversible white/bleached oak blades.

Figure 4.1: The Canarm Unity fan installed, demonstrating its function within a living space.
5. Manteniment
Un manteniment regular garanteix un rendiment òptim i allarga la vida útil del ventilador de sostre.
- Neteja: Netegeu periòdicament les aspes del ventilador i la carcassa del motor amb un drap suau iamp tela. No utilitzeu netejadors abrasius ni dissolvents.
- Cargols de tensió: Check all screws on the blade attachments and mounting hardware annually. Tighten any loose screws to prevent wobbling or noise.
- Substitució de bombetes: Disconnect power before replacing light bulbs. Allow bulbs to cool before handling. Use bulbs of the correct wattage and type as specified in the fan's electrical ratings.
6. Solució De Problemes
Abans d'intentar qualsevol reparació, assegureu-vos que l'alimentació estigui desconnectada al disjuntor.
| Problema | Causa possible | Solució |
|---|---|---|
| El ventilador no arrenca | No power to the fan; Loose wire connections; Motor malfunction | Check circuit breaker/fuse; Verify all wire connections are secure; Contact a qualified electrician or customer support. |
| La llum no funciona | Bulb faulty or loose; Loose wire connections; Light kit malfunction | Replace bulb; Tighten bulb; Check light kit wiring; Contact customer support. |
| El ventilador trontolla | Cargols de la fulla solts; Fulles desequilibrades; Suport de muntatge solt | Tighten all blade screws; Ensure blades are balanced (balancing kit may be needed); Verify mounting bracket is secure. |
| Funcionament sorollós | Loose screws; Motor bearings; Canopy rubbing ceiling | Check and tighten all screws; Ensure canopy is not touching the ceiling; If motor noise persists, contact customer support. |
7. Especificacions
| Marca | Canarm |
| Número de model | CF2336411L |
| Dimensions del producte | 91.44 x 91.44 x 20.32 cm (36 x 36 x 8 polzades) |
| Pes de l'article | 3.53 kg |
| Color | Blanc |
| Nombre de fulles | 4 |
| Acabat de la fulla | Reversible White/Bleached Oak |
| Nombre de velocitats | 3 |
| Potència/Wattage | 60 watts |
| Tipus de muntatge | Muntatge Downrod |
| Tipus de controlador | Control de cadena de tracció |
8. Garantia i Suport
This product is covered by the manufacturer's standard warranty. Please refer to the warranty card included in your original packaging for specific terms and conditions.
For technical assistance, missing parts, or warranty claims, please contact Canarm customer support. Contact information can typically be found on the manufacturer's weblloc web o a l'embalatge del producte.
Conserveu aquest manual per a futures consultes.


