1. Introducció
This manual provides comprehensive instructions for setting up, operating, and troubleshooting your Foscam WD-R1200U WiFi Range Extender. This device is designed to expand your existing WiFi network coverage, eliminate dead zones, and provide stable, high-speed internet access throughout your home or office.
The Foscam WD-R1200U supports both 2.4GHz and 5GHz bands, offering speeds up to 1200Mbps. It features an intelligent signal indicator for optimal placement and a simple one-button setup. With its high compatibility, it works with all 802.11 b/g/n and 802.11ac standard routers or gateways.
2. Producte acabatview

Figure 2.1: Foscam WD-R1200U WiFi Range Extender
This image shows the Foscam WD-R1200U WiFi Range Extender, a compact black device with four external antennas, plugged into a white wall outlet. The front panel features several green LED indicator lights for 2.4G, 5G, and signal strength.
The Foscam WD-R1200U is a wall-plug design, making it easy to integrate into any environment. It features:
- Quatre antenes externes: For enhanced signal transmission and reception.
- Indicadors LED: Lights for 2.4G, 5G, WPS, and power, providing visual feedback on device status and signal strength.
- Ports Ethernet: Two 10/100Mbps Ethernet ports for wired connections to devices like PCs, smart TVs, or gaming consoles.
- Botó WPS: For quick and easy setup with compatible routers.
- Botó de restabliment: Located on the side, used to restore factory default settings.
3. Configuració
The Foscam WD-R1200U WiFi Range Extender can be set up using either a mobile phone or a PC. Choose the method that best suits your needs.
3.1. Mobile Phone Setup
Follow these steps to set up your extender using a mobile phone:
- Encès: Plug the extender into a power outlet within 2 meters (6.56 feet) of your router. Wait approximately 5 seconds until the 2.4G and 5G LED lights turn solid green. If the lights do not turn green, press and hold the "Reset" button on the side of the product for more than 8 seconds.
- Connect to Extender SSID: On your mobile phone, turn off mobile data. Go to your WiFi settings and connect to the extender's WiFi network name (SSID). This will typically be "wifi-5g-XXXX" or "wifi-2.4g-XXXX", where "XXXX" are the last 4 letters of the MAC Address found at the back of the product. Choose either the 2.4G or 5G network to connect.
- Access Management Page: Llançament a web browser (e.g., Chrome, Firefox, Safari) on your phone and enter
192.168.188.1in the address bar. If a 403 error occurs, refresh the page or contact seller support. - Introduïu la contrasenya predeterminada: On the login page, enter the default password:
admin(must be lower case). - Select Home WiFi Network: The extender will scan for available networks. Select your home WiFi network name (SSID) that you wish to extend.
- Enter Home WiFi Password: Enter the password for your home WiFi network. Ensure the password is correct.
- Set Extender SSID and Password: You can choose to keep the default extender SSID (original SSID + Pro-2.4G/5G) or change it. You can also change the default router password.
- Inicia la connexió: Després de reviewing the settings, click "Start Connect" and wait 30-60 seconds for the extender to configure.
- Verifica la connexió: Once the configuration is complete, the first three indicator lights on the extender should be solid green, indicating successful setup. You can now connect your devices to the extender's new WiFi network name (SSID) that you set in the previous step.
Video 3.1: Mobile Phone Quick Start Guide for Foscam WiFi Extender (2.4Ghz & 5Ghz)
This video demonstrates the step-by-step process of setting up the Foscam WiFi Range Extender using a mobile phone, covering initial power-on, connecting to the extender's network, accessing the web interface, and configuring the extension settings.
3.2. PC Setup
Follow these steps to set up your extender using a PC:
- Encès: Plug the extender into a power outlet within 2 meters (6.56 feet) of your router. Wait approximately 5 seconds until the 2.4G and 5G LED lights turn solid green. If the lights do not turn green, press and hold the "Reset" button on the side of the product for more than 8 seconds.
- Connect to Extender SSID: On your PC, go to your WiFi settings and connect to the extender's WiFi network name (SSID). This will typically be "wifi-5g-XXXX" or "wifi-2.4g-XXXX", where "XXXX" are the last 4 letters of the MAC Address found at the back of the product. Choose either the 2.4G or 5G network to connect.
- Access Management Page: Llançament a web browser (e.g., Chrome, Firefox, Safari) on your PC and enter
192.168.188.1in the address bar. If a 403 error occurs, refresh the page or contact seller support. - Introduïu la contrasenya predeterminada: On the login page, enter the default password:
admin(must be lower case). - Scan and Select Host Router SSID: The extender will scan for available networks. Select your home WiFi network name (SSID) that you wish to extend.
- Enter Home WiFi Password: Enter the password for your home WiFi network. Ensure the password is correct.
- Set Extender SSID and Password: You can choose to keep the default extender SSID (original SSID + Pro-2.4G/5G) or change it. You can also change the default router password.
- Inicia la connexió: Després de reviewing the settings, click "Start Connect" and wait 30-60 seconds for the extender to configure.
- Verifica la connexió: Once the configuration is complete, the first three indicator lights on the extender should be solid green, indicating successful setup. You can now connect your devices to the extender's new WiFi network name (SSID) that you set in the previous step.
Video 3.2: PC Quick Start Guide for Foscam WiFi Extender (2.4Ghz & 5Ghz)
This video illustrates the setup process for the Foscam WiFi Range Extender using a personal computer, detailing how to connect to the extender's network, access its configuration page, and extend your existing WiFi signal.
4. Modes de funcionament
The Foscam WD-R1200U primarily operates in Repeater mode to extend your existing WiFi signal. It also offers functionality through its Ethernet ports.
- Mode de repetidor: This is the default and primary function. The extender receives your existing WiFi signal and re-broadcasts it, effectively extending the coverage area. This is ideal for eliminating WiFi dead zones and improving signal strength in areas far from your main router.
- Mode de punt d'accés (AP): While not explicitly detailed in the quick setup, the presence of Ethernet ports suggests the ability to function as an Access Point. In AP mode, the extender connects to your router via an Ethernet cable and then broadcasts a new wireless network, converting a wired connection into a wireless one.
- Connexió per cable: The two Ethernet ports allow you to connect wired devices (e.g., desktop computers, gaming consoles, smart TVs) to the extender, providing them with network access even if they lack wireless capabilities.

Figure 4.1: Eliminating WiFi Dead Zones
This diagram illustrates how the Foscam WiFi Range Extender boosts your network signal to achieve maximum WiFi coverage and penetration, effectively eliminating dead zones in your home.
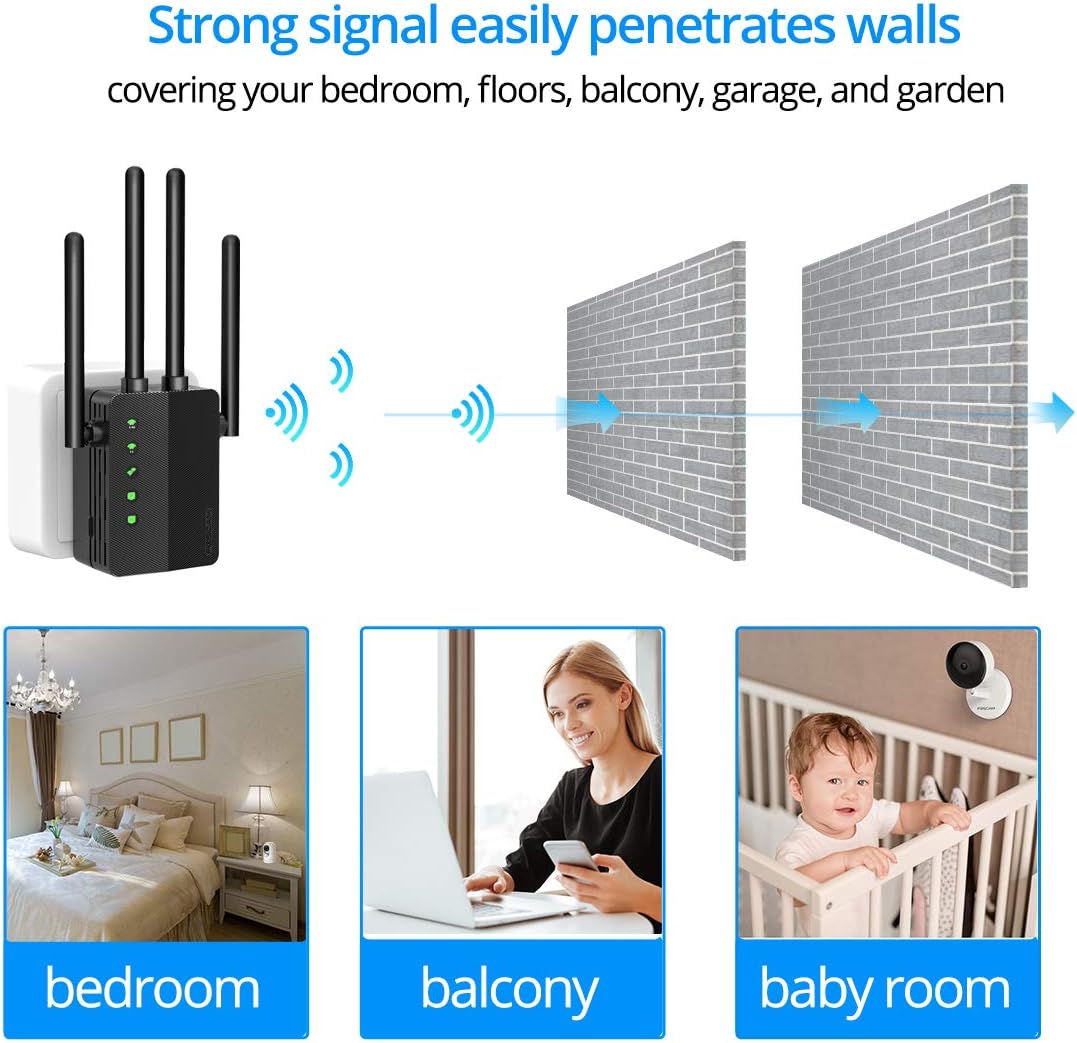
Figure 4.2: Strong Signal Penetration
This image demonstrates the extender's ability to provide strong signal penetration through walls, covering various areas like bedrooms, balconies, and baby rooms.

Figura 4.3: Compatibilitat universal
This diagram highlights the universal compatibility of the Foscam WiFi Extender with a wide range of devices, including IP cameras, laptops, phones, tablets, TV boxes, smart TVs, and PCs, across both 2.4GHz and 5GHz bands.
5. Manteniment
To ensure optimal performance and longevity of your Foscam WD-R1200U WiFi Range Extender, consider the following maintenance tips:
- Col·locació: Ensure the extender is placed in a well-ventilated area, away from direct sunlight, heat sources, and obstructions that could block the signal.
- Neteja: Regularly clean the exterior of the device with a soft, dry cloth. Avoid using liquid cleaners or aerosols.
- Actualitzacions de firmware: Check the Foscam official website periodically for firmware updates. Keeping the firmware updated can improve performance, add new features, and enhance security.
- Restablir el dispositiu: If you experience persistent issues or wish to reconfigure the extender from scratch, you can perform a factory reset by pressing and holding the "Reset" button for more than 8 seconds until the lights flash.
6. Solució De Problemes
If you encounter issues with your Foscam WD-R1200U WiFi Range Extender, refer to the following common problems and solutions:
| Problema | Causa possible | Solució |
|---|---|---|
| No power/LED indicators off | Power outlet issue, device malfunction. | Ensure the extender is securely plugged into a working power outlet. Try a different outlet. If still no power, contact support. |
| Cannot connect to extender's SSID | Extender not powered on, incorrect SSID selected, mobile data enabled (for phone setup). | Verify extender is powered on and 2.4G/5G lights are green. Ensure mobile data is off on your phone. Double-check the SSID name. |
| Cannot access management page (192.168.188.1) | Not connected to extender's network, browser cache issue, IP conflict. | Confirm your device is connected to the extender's SSID. Clear your browser's cache and cookies, or try a different browser. Perform a factory reset if necessary. |
| No internet after setup | Incorrect host router password, extender too far from router, host router issues. | Verify the password for your main router is correct during setup. Relocate the extender closer to your main router. Check if your main router has internet access. |
| Weak or unstable extended signal | Poor placement, interference from other devices. | Relocate the extender to an optimal position, ideally halfway between your router and the desired coverage area, using the intelligent signal indicator. Avoid placing near large metal objects or other electronics. |
7. Especificacions
- Model: WD-R1200U
- Marca: FOSCAM
- Estàndard de comunicació sense fils: 802.11a/b/g/n, 802.11ac
- Velocitat de transferència de dades: Up to 1200Mbps (300Mbps for 2.4GHz, 880Mbps for 5GHz)
- Classe de banda de freqüència: Doble banda (2.4 GHz i 5 GHz)
- Antenes: Four 2dBi antennas
- Àrea de cobertura: Over 1200 sq.ft.
- Protocols de seguretat: WEP, WPA/WPA2, WPA-PSK/WPA2-PSK
- Característiques especials: Intelligent Signal Indicator, One Button Setup (WPS), Ethernet Ports
- Dimensions del producte: 7.28 x 3.74 x 2.17 polzades
- Pes de l'article: 5.6 unces
- Primera data disponible: 14 de gener de 2020
8. Garantia i Suport
For warranty information, please refer to the documentation included with your product or visit the official Foscam website. For technical support or further assistance, please contact Foscam customer service.
You can also find additional resources and FAQs on the Foscam support page: Foscam Support


