Introducció
This manual provides essential information for the safe and efficient operation of your Overmax MULTIPIC 3.5 Projector. Please read it thoroughly before use and retain it for future reference.
Informació de seguretat
ADVERTÈNCIA: Per reduir el risc d'incendi o descàrrega elèctrica, no exposeu aquest aparell a la pluja o la humitat.
- Do not block any ventilation openings. Ensure adequate space around the projector for proper airflow.
- No instal·leu a prop de cap font de calor com ara radiadors, registres de calor, estufes o altres aparells (inclosos amplificadors) que produeixen calor.
- Protegiu el cable d’alimentació perquè no es pugui caminar ni pessigar, sobretot als endolls, endolls i el punt on surten de l’aparell.
- Utilitzeu només accessoris/accessoris especificats pel fabricant.
- Desendolleu aquest aparell durant les tempestes llamps o quan no l'utilitzeu durant llargs períodes.
- Demaneu tot el servei a personal de servei qualificat. El manteniment és necessari quan l'aparell s'ha fet malbé d'alguna manera, com ara el cable d'alimentació o l'endoll està danyat, s'ha vessat líquid o han caigut objectes a l'aparell, l'aparell ha estat exposat a la pluja o la humitat, no funciona amb normalitat. , o s'ha deixat caure.
- No mireu directament a la lent del projector quan estigui encès.amp està activat.
Contingut del paquet
Verifiqueu que tots els elements siguin presents al paquet:
- Overmax MULTIPIC 3.5 Projector
- Control remot
- Cable d'alimentació
- Cable HDMI
- Cable AV (RCA)
- Manual d'usuari (aquest document)
Producte acabatview
Familiarize yourself with the projector's components and connection ports.

Figura 1: Overmax MULTIPIC 3.5 Projector and Remote Control. This image displays the projector from the front-right angle, showing the lens, the Overmax logo, ventilation grilles, and the included remote control.

Figura 2: Top Panel Controls. This image highlights the manual focus and keystone correction dials, along with the directional pad and function buttons on the top surface of the projector.

Figura 3: Rear Connection Panel. This view shows the AV input, two HDMI ports (HDMI1, HDMI2), and a USB port for connecting various devices.

Figura 4: Side VGA Port. This image displays the VGA (D-sub) input port located on the side of the projector, used for connecting older computers or monitors.
Configuració
1. Col·locació inicial
Place the projector on a stable, flat surface or mount it on a tripod or ceiling. Ensure the projector is positioned at an appropriate distance from the projection surface to achieve the desired screen size.
2. Connexió d'alimentació
- Connecteu el cable d'alimentació a l'entrada d'alimentació del projector.
- Connecteu l'altre extrem del cable d'alimentació a una presa de corrent adequada.
- Premeu el botó d'encesa del projector o del comandament a distància per encendre el dispositiu.
3. Connexió de dispositius externs
The MULTIPIC 3.5 supports various input sources:
- HDMI: Use an HDMI cable to connect devices like laptops, Blu-ray players, or gaming consoles to the HDMI1 or HDMI2 ports.
- USB: Inseriu una unitat USB al port USB per reproduir contingut multimèdia files directament.
- VGA: Connect older computers using a VGA cable to the D-sub port.
- DE: Use the included AV cable to connect devices with composite video and stereo audio outputs.
4. Connexió Wi-Fi
To access online features like YouTube or screen mirroring, connect the projector to a Wi-Fi network.
- Navegueu fins al menú de configuració del projector.
- Select "Network" or "Wi-Fi settings".
- Trieu la xarxa Wi-Fi que vulgueu de la llista.
- Introduïu la contrasenya de xarxa si se us demana.

Figura 5: Projector Wi-Fi Connectivity. This image illustrates the projector's ability to connect wirelessly to a Wi-Fi router for internet access and streaming.
5. Screen Mirroring (Miracast / AirPlay)
The projector supports wireless display from compatible smartphones, tablets, and computers.
- Assegureu-vos que tant el projector com el dispositiu mòbil estiguin connectats a la mateixa xarxa Wi-Fi.
- On the projector, select the Miracast or AirPlay input source.
- On your mobile device, activate the screen mirroring function (e.g., "Smart View" on Android, "Screen Mirroring" on iOS).
- Select the projector from the list of available devices.
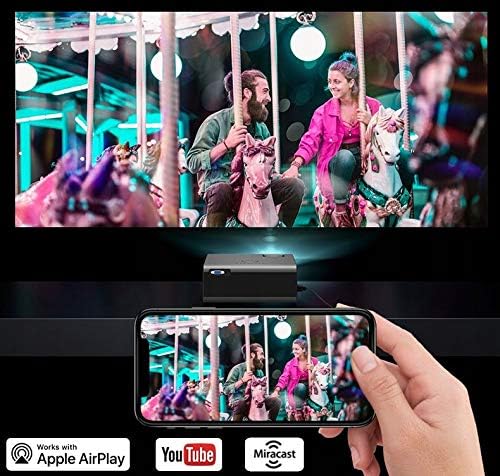
Figura 6: Wireless Screen Mirroring. This image demonstrates a smartphone wirelessly casting its display to the projector, utilizing Miracast or AirPlay functionality.
Instruccions de funcionament
1. Controls bàsics
The projector can be controlled using the on-device buttons or the included remote control.
- Botó d'encesa: Encén o apaga el projector.
- Botó Font: Cycles through input sources (HDMI1, HDMI2, USB, VGA, AV, Miracast/AirPlay).
- Botons de navegació (amunt/avall/esquerra/dreta/d'acord): S'utilitza per navegar pels menús i confirmar seleccions.
- Botó de menú: Accedeix al menú principal de configuració.
- Botó Enrere/Sortida: Torna a la pantalla anterior o surt del menú actual.
2. Ajust de la imatge
- Focus: Rotate the focus ring on the projector lens (refer to Figure 2) until the image appears sharp and clear.
- Correcció Keystone: Adjust the keystone dial (refer to Figure 2) to correct trapezoidal distortion if the projector is not perfectly perpendicular to the screen.
- Relació d'aspecte: In the settings menu, you can change the aspect ratio between 16:9 and 4:3 to match your content. The image can also be rotated 180 degrees for ceiling mounting.

Figura 7: Display Resolution Example. This image illustrates the native 1280x720 resolution capability of the projector, providing clear visuals.
3. Configuració d'àudio
The built-in speaker can be adjusted for different audio profiles:
- Access the audio settings in the main menu.
- Select from three preset modes: Music, Voice, or Movie.
- An advanced equalizer is available for fine-tuning audio parameters.
- For external audio, connect speakers or headphones to the audio output port.
4. Using Built-in Applications
The projector comes with pre-installed applications like YouTube and KoalaTV.
- Ensure the projector is connected to a Wi-Fi network.
- From the main interface, select the desired application icon.
- Use the remote control to navigate and select content within the application.
Manteniment
1. Lamp La vida
El projector lamp is designed for extended operation, with an estimated lifespan of up to 50,000 hours. No regular lamp replacement is typically required under normal usage conditions.

Figura 8: Internal Optical System. This diagram illustrates the sophisticated optical components and light path within the projector, contributing to its image quality and lamp longevitat.
2. Neteja
- Lent: Netegeu suaument la lent del projector amb un drap suau i sense borrissol dissenyat específicament per a superfícies òptiques. No utilitzeu productes de neteja abrasius.
- Exterior: Clean the projector's exterior with a soft, dry cloth. For stubborn marks, a slightly damp es pot fer servir un drap, seguit d'un drap sec.
- Obertures de ventilació: Periodically check and clean the ventilation grilles to prevent dust buildup, which can affect performance and lifespan. Use a soft brush or compressed air.
Resolució de problemes
| Problema | Causa possible | Solució |
|---|---|---|
| No es mostra cap imatge | Power not connected; Incorrect input source; Cable not properly connected. | Check power cable; Select correct input source (HDMI, USB, VGA, AV); Ensure all cables are securely connected. |
| La imatge és borrosa | Enfocament no ajustat; Projector massa a prop/lluny de la pantalla. | Adjust the focus ring on the lens; Reposition the projector for optimal distance. |
| La imatge és trapezoïdal | Keystone not corrected. | Ajusteu el dial de correcció de la distorsió trapezoidal. |
| Sense so | Volume too low; Muted; Incorrect audio output selected; External device audio issue. | Increase volume; Unmute; Check audio settings; Verify audio output on connected device. |
| Connexió Wi-Fi inestable | Weak signal; Incorrect password; Router issue. | Ensure projector is within Wi-Fi range; Re-enter password; Restart router and projector. |
| El comandament a distància no funciona | Batteries depleted; Obstruction between remote and projector; Remote sensor blocked. | Replace batteries; Remove obstructions; Ensure remote is pointed at the projector's IR sensor. |
Especificacions
| Característica | Detall |
|---|---|
| Model | MULTIPIC 3.5 |
| Marca | Sobremàx |
| Tecnologia de visualització | LED |
| Resolució nativa | 1280 x 720 (HD) |
| Resolució suportada | Up to 1920 x 1080 (Full HD) |
| Brillantor | 2200 lúmens |
| Relació de contrast | 1500:1 |
| Mida màxima de la imatge | 150 polzades |
| Lamp La vida | Fins a 50,000 hores |
| Connectivitat | 2x HDMI, 1x USB, 1x VGA (D-sub), 1x AV, Wi-Fi, Bluetooth, IR |
| Característiques especials | Built-in Wi-Fi, YouTube, Miracast, AirPlay, Keystone Correction, Advanced Equalizer |
| Formats de suports admesos | MPEG4, DIVX, XVID, AVI, WMA, MP3, JPEG, BMP, PNG, MOV |
| Relació d'aspecte | 16:9, 4:3 |
| Dimensions (L x A x A) | 21.5 x 18.5 x 8.7 cm |
| Pes | 1.5 kg |
| Tipus de muntatge | Tripod, Ceiling Mount |
Garantia i Suport
For warranty information and technical support, please refer to the official Overmax weblloc web o contacteu directament amb el seu servei d'atenció al client. Conserveu el rebut de compra com a comprovant de compra.
Per obtenir més ajuda, visiteu el Overmax official weblloc.


