1. Introducció
This manual provides essential instructions for the safe and efficient operation, maintenance, and troubleshooting of your Krups Virtuoso XP442C11 Semi-Automatic Espresso Machine. Please read this manual thoroughly before first use and keep it for future reference.
The Krups Virtuoso XP442C11 is designed to deliver authentic espresso and various coffee beverages with ease. Its compact design and 15-bar pump system ensure optimal flavor extraction and a rich crema.
2. Instruccions de seguretat importants
- Connecteu sempre l'aparell a una presa de terra.
- No submergiu l'aparell, el cable d'alimentació o l'endoll en aigua o cap altre líquid.
- Mantenir l'aparell fora de l'abast dels nens.
- Desendolleu la màquina abans de netejar-la i quan no l'utilitzeu.
- No feu servir l'aparell si el cable d'alimentació o l'endoll està danyat.
- Feu servir només aigua freda i fresca al dipòsit d'aigua.
- Aneu amb compte quan manipuleu superfícies calentes i vapor.
3. Components mésview
Familiaritzeu-vos amb les parts principals de la vostra màquina d'espresso:
- Tauler de control: Power button, single shot button, double shot button, steam button.
- Maneta de vapor: Controls steam for frothing milk.
- Portafiltre: Conté cafè mòlt.
- Cistelles de filtre: For single shot, double shot, and ESE pods.
- Dipòsit d'aigua: Dipòsit extraïble per al subministrament d'aigua.
- Safata de degoteig: Collects excess water and coffee.
- Vareta de vapor: Per fer escuma de llet i dispensar aigua calenta.
- Escalfador de copes: Situat a la part superior de la màquina.

Figura 3.1: Frontal view of the Krups Virtuoso XP442C11 espresso machine, showing the control panel and portafilter.

Figura 3.2: lateral view of the espresso machine, highlighting the removable water tank.

Figure 3.3: The portafilter, various filter baskets, and coffee tamper included with the machine.
4. Configuració i primer ús
4.1 Desembalatge
- Traieu tots els materials d'embalatge i les pel·lícules protectores de la màquina.
- Place the machine on a stable, flat, heat-resistant surface.
- Assegureu-vos una ventilació adequada al voltant de l'aparell.
4.2 Omplir el dipòsit d'aigua
- Traieu el dipòsit d'aigua de la part posterior de la màquina.
- Fill the tank with fresh, cold water up to the 'MAX' level indicator.
- Torneu a col·locar el dipòsit d'aigua de manera segura.
4.3 Preparació de la màquina (primer ús)
Before making coffee, the machine must be primed to fill the internal circuits with water.
- Connecteu la màquina a una presa de corrent.
- Premeu el botó d'engegada (U) to turn on the machine. The indicator lights will flash.
- Col·loqueu un recipient sota la vareta de vapor.
- Turn the steam knob to the steam position (icona de vapor) and let water flow through the wand until a steady stream appears.
- Turn the steam knob back to the closed position. The machine is now primed and ready for use.
5. Instruccions de funcionament
5.1 Elaboració d'espresso
- Ensure the water tank is filled and the machine is powered on and preheated (indicator lights solid).
- Select the appropriate filter basket (single or double shot) and place it in the portafilter.
- Add finely ground coffee to the filter basket. For a single shot, use approximately 7g; for a double shot, use approximately 14g.
- Tamp the coffee grounds firmly and evenly using the tampeh.
- Netegeu l'excés de cafè de la vora del portafiltre.
- Introduïu el portafiltre al capçal de preparació i gireu-lo cap a la dreta fins que quedi ben bloquejat.
- Place your cup(s) on the drip tray under the portafilter spouts.
- Premeu el botó de tret únic (icona de copa) o doble tir (two cups icon) button. The machine will start brewing.
- La màquina s'aturarà automàticament quan s'assoleixi el volum programat.

Figure 5.1: Adding ground coffee to the portafilter.

Figura 5.2: Tamping the coffee grounds evenly in the portafilter.
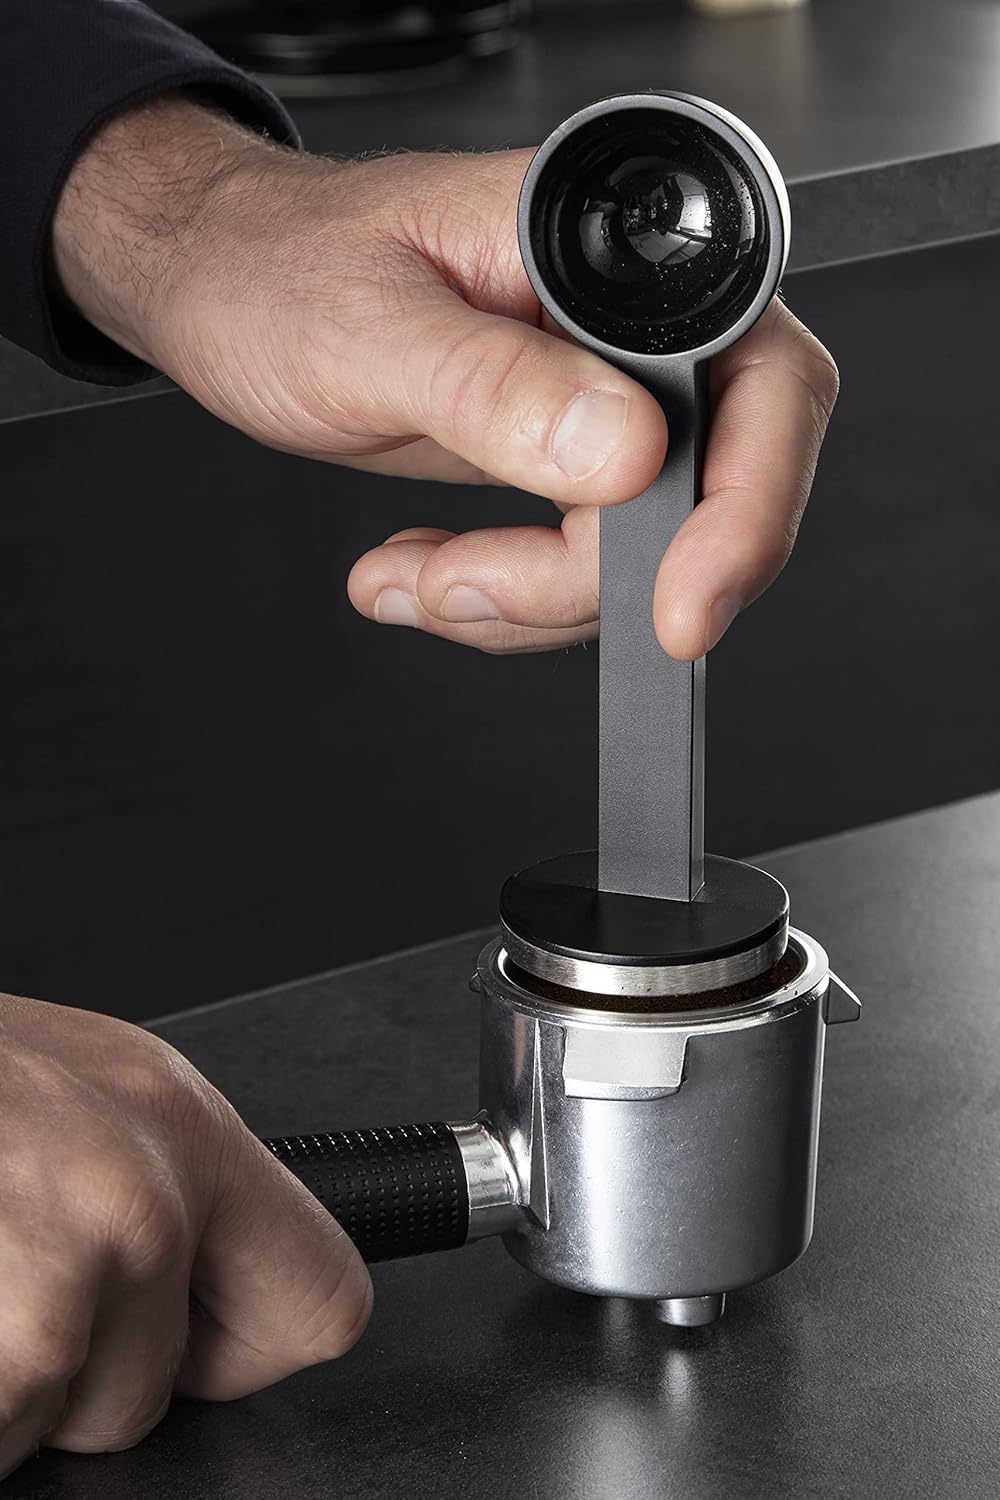
Figure 5.3: Inserting and locking the portafilter into the brewing head.
5.2 Escuma de llet (cappuccino/cafè amb llet)
- Fill a milk pitcher with cold milk (dairy or non-dairy). Do not fill more than one-third of the pitcher.
- Premeu el botó de vapor (icona de vapor) on the control panel. The light will flash and then become solid when the machine is ready for steaming.
- Col·loca la vareta de vapor just a sota de la superfície de la llet.
- Turn the steam knob to the steam position (icona de vapor).
- Move the pitcher up and down gently to create foam. Once desired foam is achieved, immerse the wand deeper to heat the milk.
- When the milk reaches the desired temperature (around 60-70°C), turn the steam knob back to the closed position.
- Netegeu immediatament la lança de vapor després de cada ús (vegeu la secció Manteniment).

Figure 5.4: Using the steam wand to froth milk for a cappuccino or latte.

Figure 5.5: Adjusting the steam knob to control steam output.
5.3 Funció d'aigua calenta
- Assegureu-vos que la màquina estigui engegada i preescalfada.
- Col·loqueu una tassa sota la vareta de vapor.
- Turn the steam knob to the steam position (icona de vapor). Hot water will dispense from the wand.
- Turn the steam knob back to the closed position when the desired amount of hot water is dispensed.

Figure 5.6: Dispensing hot water for tea or other beverages.
5.4 Programming Cup Volume
You can customize the volume of your single and double espresso shots:
- Ensure the machine is preheated and ready.
- Prepare the portafilter with ground coffee as usual.
- Press and hold the desired cup button (single or double shot) until the desired volume of coffee is dispensed into your cup.
- Release the button. The new volume is now programmed for that button.
6. Manteniment i Neteja
6.1 Neteja diària
- Portafiltres i cistelles de filtre: Després de cada ús, traieu el portafiltre, llenceu els mòlts de cafè i esbandiu el portafiltre i la cistella del filtre amb aigua corrent.
- Vareta de vapor: Immediatament després d'escumar la llet, netegeu la boquilla de vapor amb un drap.amp cloth to remove any milk residue. Briefly open the steam valve to purge any milk from inside the wand.
- Safata de degoteig: Empty and rinse the drip tray regularly.
- Exterior: Netegeu l'exterior de la màquina amb un damp tela. No utilitzeu netejadors abrasius.
6.2 Descalcificació
Descaling is crucial for maintaining machine performance and longevity. The frequency depends on water hardness and usage. Refer to your local water hardness information. Krups recommends using a suitable descaling solution.
- Prepare the descaling solution according to the manufacturer's instructions and fill the water tank.
- Col·loqueu un recipient gran sota el portafiltre i la vareta de vapor.
- Follow the specific descaling procedure outlined in the full product manual or on the Krups website. This typically involves running the solution through the brewing head and steam wand.
- After descaling, rinse the water tank and run several tanks of fresh water through the machine to remove any descaling solution residue.
7. Solució De Problemes
| Problema | Causa possible | Solució |
|---|---|---|
| No es dispensa cafè. | Water tank empty, machine not primed, portafilter clogged. | Fill water tank, prime the machine, clean portafilter/filter basket. |
| El cafè és massa feble o aquós. | Coffee too coarse, not enough coffee, insufficient tamping. | Utilitzeu una mòlta més fina, augmenteu la quantitat de cafè, tamp amb més fermesa. |
| No surt vapor de la vareta. | Steam button not pressed, wand clogged. | Press steam button, clean steam wand. |
| Fuites de màquina. | Water tank not seated correctly, seals worn. | Re-seat water tank, contact customer support for seal replacement. |
8. Especificacions
- Marca: KRUPS
- Número de model: XP442C
- Dimensions (L x A x A): 53 x 28 x 14.3 cm
- Pes: 3.3 quilos
- Capacitat: 1 litre (dipòsit d'aigua)
- Potència: 1000 watts
- Voltage: 220 Volts
- Material: Stainless Steel (front), Plastic
- Característiques especials: Milk frother, Removable water tank
9. Vídeo del producteview
Aquest vídeo ofereix una visió generalview of a Krups espresso machine, demonstrating features such as authentic espresso extraction with rich crema, 15-bar pressure pump for optimal aroma development, a milk frothing nozzle for creamy cappuccinos, rapid 40-second preheating, and electronic temperature regulation for ideal brewing. It also highlights manual selection for perfect control over your coffee.
10. Garantia i Suport
Your Krups Virtuoso XP442C11 espresso machine comes with a manufacturer's warranty. Please refer to the warranty card included in your product packaging for specific terms and conditions, including the warranty period and coverage details.
For technical assistance, spare parts, or repair services, please contact Krups customer support. You can find contact information on the official Krups weblloc web o a través del vostre distribuïdor local.
Recursos en línia: For additional information, FAQs, and support, visit the official Krups weblloc.


