Walfront 30A Solar Charge Controller User Manual
Model: BSC3048
Intelligent Regulator for 12V/24V/36V/48V Battery Systems
1. Introducció
This manual provides essential information for the safe and efficient operation of your Walfront BSC3048 Solar Charge Controller. Please read this manual thoroughly before installation and use to ensure optimal performance and longevity of the product.
1.1 Precaucions de seguretat
- Ensure all connections are correct and secure before applying power.
- Do not attempt to repair or modify the controller yourself. Refer to qualified personnel.
- Install the controller in a well-ventilated, dry environment, away from direct sunlight and moisture.
- Connecteu sempre primer la bateria, després el panell solar i finalment la càrrega. Desconnecteu-ho en ordre invers.
- Utilitzeu l'equip de protecció individual (EPI) adequat durant la instal·lació.
2. Producte acabatview
The Walfront BSC3048 is an intelligent solar charge controller designed for various battery types and voltage systems (12V/24V/36V/48V). It features automatic voltage recognition and customizable parameters for flexible battery management.

Figura 2.1: Frontal view of the Walfront BSC3048 Solar Charge Controller, showing the LCD display, USB ports, and control buttons.
2.1 Característiques clau
- Automatic identification of 12V/24V/36V/48V system voltage.
- Compatibility with sealed, gel, flooded, lithium iron, and ternary lithium batteries.
- Customizable charging parameters for other battery types.
- Dual USB 5V/2A output for charging external devices.
- LCD display for real-time monitoring of system status.
- Integrated protection functions against overcharge, over-discharge, short circuit, and reverse polarity.
3. Instal·lació i configuració
Follow these steps carefully to install your solar charge controller. Incorrect wiring can damage the controller, battery, or solar panel.
3.1 Wiring Sequence
- Connecteu la bateria: Connect the battery to the controller's battery terminals (positive to positive, negative to negative). The controller will automatically detect the battery voltage. Ensure the battery is charged enough for the controller to recognize it.
- Connecteu el panell solar: Connect the solar panel to the controller's solar panel terminals (positive to positive, negative to negative).
- Connect the Load: Connect the DC load to the controller's load terminals (positive to positive, negative to negative).

Figura 3.1: lateral view illustrating the connection terminals for battery, solar panel, and load.
Important: Disconnect in the reverse order: first load, then solar panel, then battery.
4. Funcionament
Pantalla LCD i botons 4.1
The controller features an LCD display that shows real-time system information and two buttons for navigation and settings adjustment.

Figure 4.1: Close-up of the LCD display, showing battery voltage (e.g., 14.4V) and charging status icons.
The display typically shows battery voltage, charging current, discharging current, and various status icons (solar charging, load discharging, battery level, etc.).
4.2 Configuració del tipus de bateria
The controller supports various battery types. The default setting is for sealed lead-acid batteries. To change the battery type or customize parameters:
- Press and hold the menu button (usually the left button) for 5 seconds to enter the settings menu.
- Utilitzeu els botons de navegació per desplaçar-vos per les opcions.
- Select the desired battery type (e.g., GEL, FLOODED, LI-ION, LiFePO4) or parameter to adjust.
- Confirm your selection or adjustment.
Refer to the detailed parameter table in the full manual for specific voltage settings for each battery type if customization is required.
5. Manteniment
Un manteniment regular garanteix la longevitat i el rendiment òptim del vostre controlador de càrrega solar.
- Neteja: Keep the controller clean and free from dust. Use a dry cloth to wipe the surface.
- Connexions: Comproveu periòdicament totes les connexions del cablejat per assegurar-vos que estiguin ben ajustades i que no estiguin corroses. Les connexions soltes poden causar sobreescalfament i danys.
- Ventilació: Ensure the installation area has adequate ventilation to prevent overheating. The controller's fins are designed for heat dissipation.
- Salut de la bateria: Monitor your battery's health and electrolyte levels (for flooded batteries) as per the battery manufacturer's recommendations.
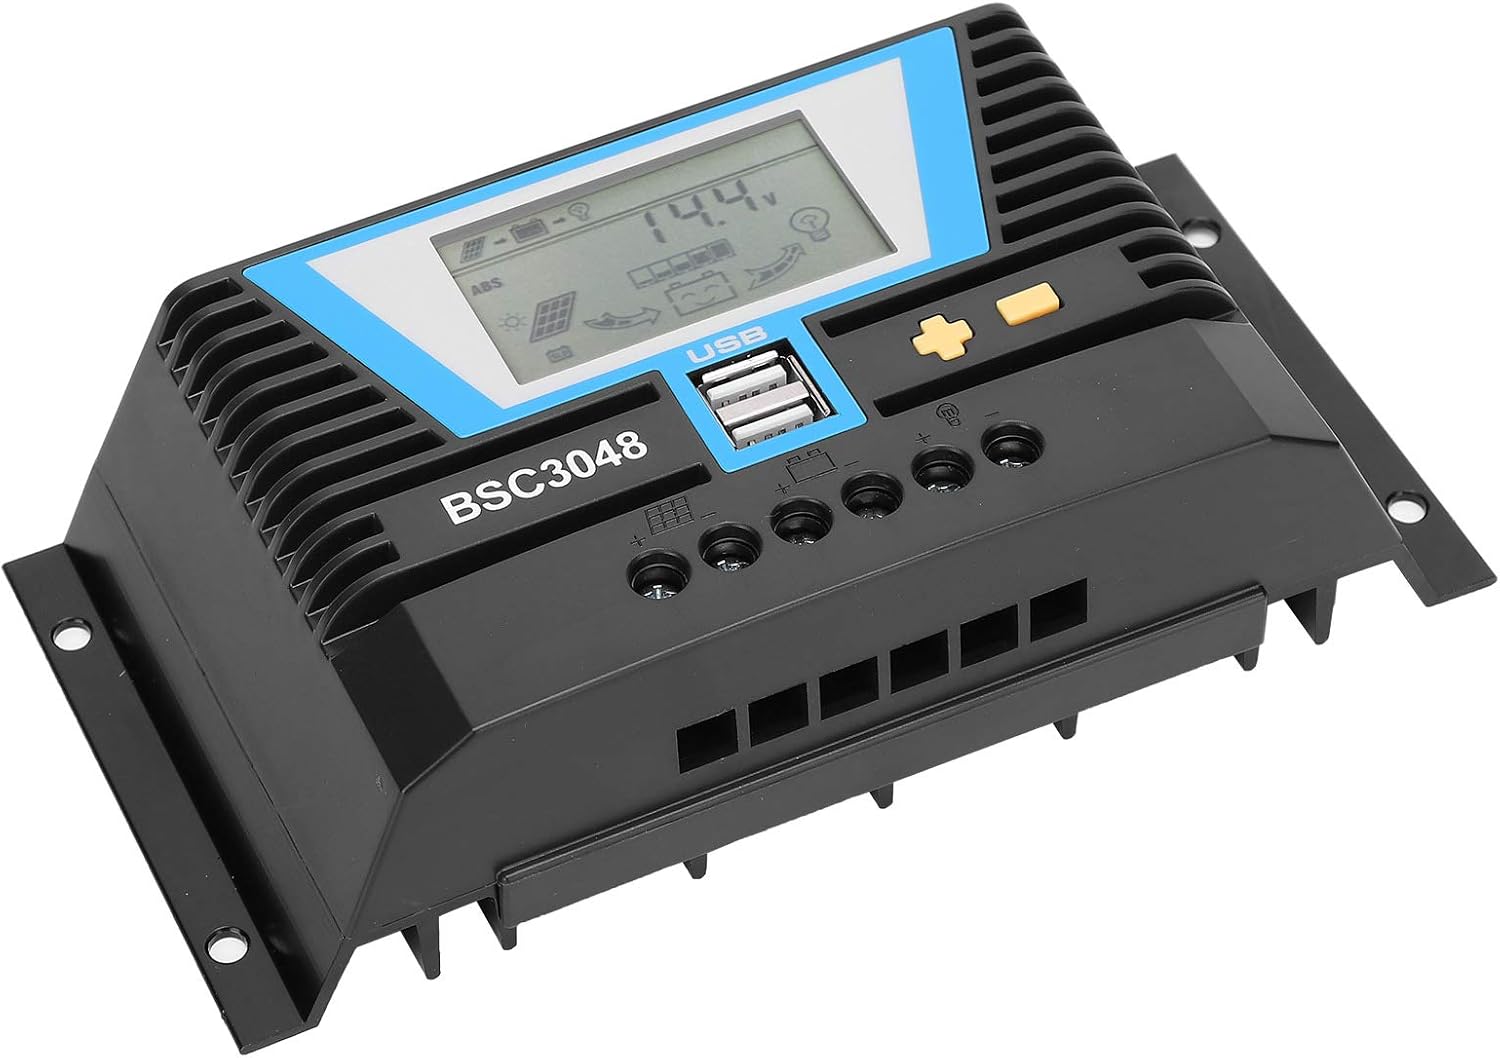
Figura 5.1: Angle view highlighting the heat dissipation fins on the controller's casing.
6. Solució De Problemes
If you encounter issues with your solar charge controller, refer to the following common problems and solutions.
| Problema | Causa possible | Solució |
|---|---|---|
| La pantalla del controlador està apagada. | Bateria no connectada o de baix volumtage. | Check battery connections. Ensure battery voltage is above the minimum operating voltage. |
| La bateria no es carrega. | Solar panel not connected, insufficient sunlight, or faulty panel/wiring. | Check solar panel connections. Ensure adequate sunlight. Test solar panel voltage. |
| La càrrega no funciona. | Load disconnected, over-discharge protection, or faulty load. | Check load connections. Ensure battery is sufficiently charged. Test the load directly. |
| Error Code E11 (as reported by a user review). | Specific error code, possibly related to internal fault or sensor issue. | While this manual does not list specific error codes, an E11 error may indicate a system fault. Try disconnecting all power (solar, battery, load) for a few minutes, then reconnect in the correct sequence (battery first). If the error persists, contact Walfront customer support. |
7. Especificacions
| Paràmetre | Valor |
|---|---|
| Corrent nominal | 30A |
| Voltage | 12V/24V/36V/48V (detecció automàtica) |
| Vol. d'entrada del panell solartage | ≤100V |
| Pèrdua estàtica | ≤20mA |
| Caiguda de pressió del bucle | ≤0.3V |
| Sortida USB | 5 V/2 A x 2 |
| Temperatura de treball | -20 ℃ a + 55 ℃ |
| Nivell impermeable | IP30 |
| Humitat relativa | ≤95%, sense condensació |
| Mida del cable del terminal | 6AWG/16mm² |
| Material | Plàstic d'enginyeria |
| Pes de l'article | 1.07 lliures (484 grams) |
8. Garantia i Suport
For warranty information and technical support, please refer to the documentation provided with your purchase or contact Walfront customer service directly. This manual does not contain specific warranty terms or contact details.
Podeu visitar el Botiga Walfront a Amazon per obtenir més informació sobre el producte.


