Introducció
Gràcies per la compraasing the Explore Scientific Radio Controlled Projection Clock. This device offers precise timekeeping through radio control, an internal temperature display, and a convenient projection feature to display the time on your wall or ceiling. This manual provides detailed instructions for setup, operation, and maintenance to ensure optimal performance of your clock.
Informació de seguretat
- Llegiu atentament totes les instruccions abans d'utilitzar.
- No exposeu la unitat a temperatures extremes, llum solar directa o humitat elevada.
- Eviteu deixar caure la unitat ni sotmetre-la a impactes forts.
- No intenteu desmuntar ni reparar la unitat vosaltres mateixos. Encarregueu tot el manteniment a personal qualificat.
- Feu servir només l'adaptador de corrent especificat (si escau) i les piles.
- Mantenir fora de l'abast dels nens.
Contingut del paquet
- Explore Scientific Radio Controlled Projection Clock (Model RDP1001GYE000)
- Bateries (incloses)
- AC Power Adapter (Optional, not explicitly stated as included but mentioned in features)
- Manual d'usuari (Aquest document)
Producte acabatview
Familiarize yourself with the various parts and controls of your projection clock.

Figura 1: Frontal view of the clock, displaying time, date, and temperature, with control buttons below the screen.
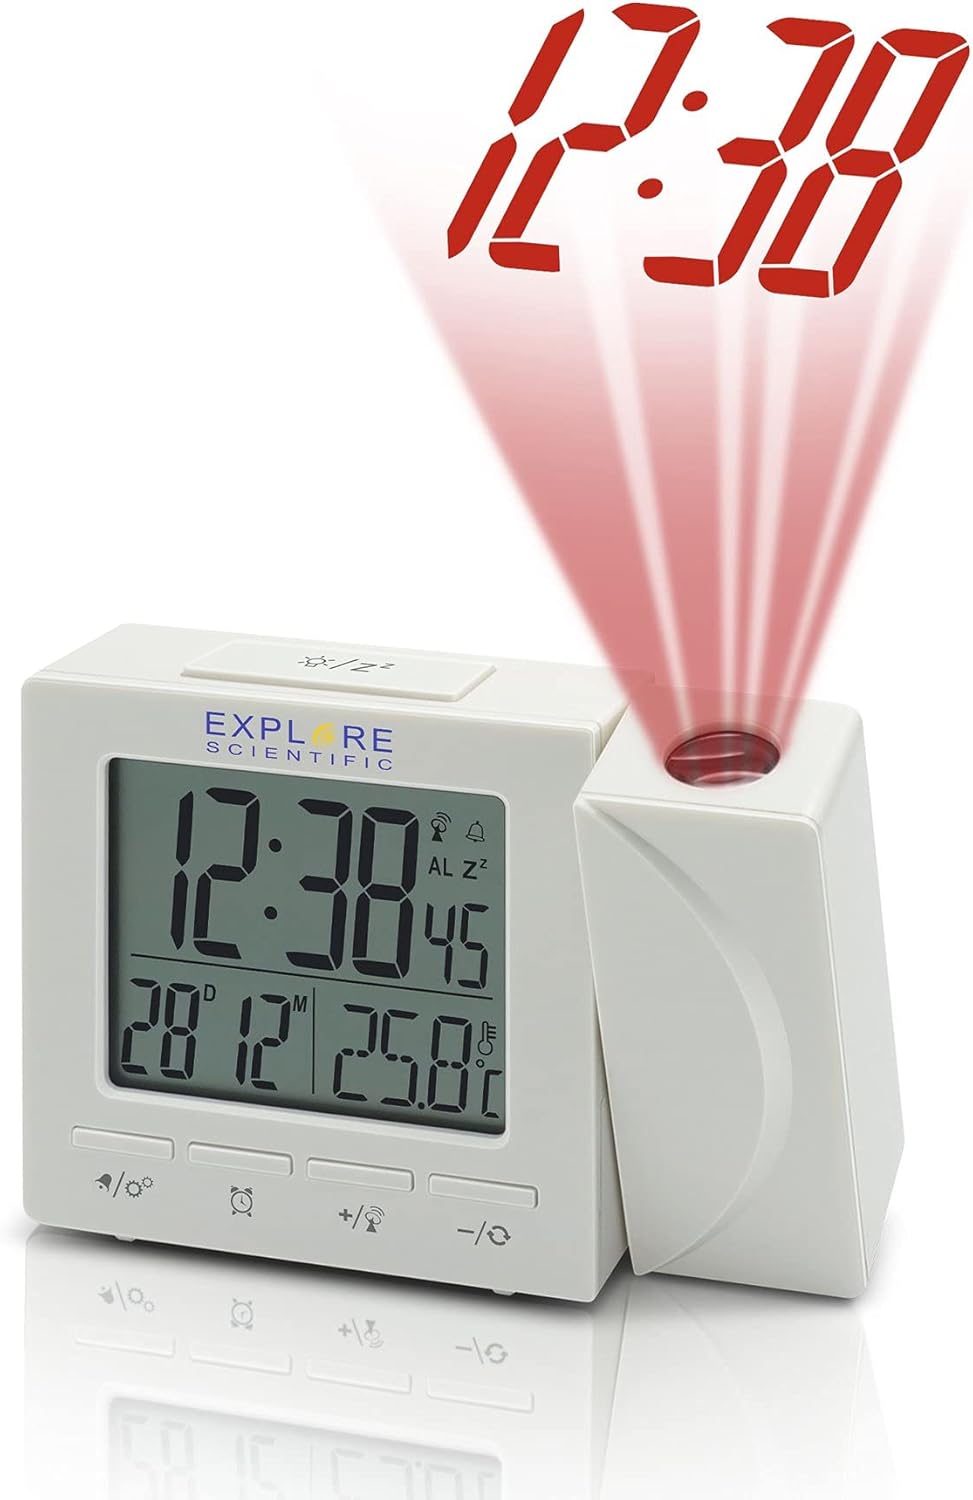
Figura 2: lateral view of the clock, illustrating the time projection feature with red digits.
Components:
- Pantalla digital: Shows time, date, day of the week, and indoor temperature.
- Lent de projecció: Projects the time onto a wall or ceiling.
- Botons de control:
- MODE/SET: To switch display modes and enter setting mode.
- ALARM/SNOOZE: To set alarms and activate snooze.
- +/°C/°F: To adjust values up and switch temperature units.
- -/12/24: To adjust values down and switch time format.
- PROJECTION ON/OFF/FLIP: To control projection and flip its orientation.
- Compartiment de la bateria: Located at the back/bottom for backup batteries.
- Presa DC IN: Per connectar l'adaptador de corrent altern.
Configuració
1. Engegar la unitat:
The clock can be powered by batteries for backup or continuously by the AC power adapter.
- Instal·lació de la bateria: Open the battery compartment cover. Insert the included batteries, observing the correct polarity (+ and -). Close the cover. Batteries provide backup power and allow for temporary use without the adapter.
- AC Power Adapter (Optional): For continuous display and projection, connect the AC power adapter to the DC IN jack on the back of the unit and plug it into a standard wall outlet.
2. Initial Setup and Radio Control Synchronization:
Upon first power-up or after a reset, the clock will attempt to synchronize with the NIST WWVB radio signal for accurate time.
- Col·loca el rellotge a prop d'una finestra per a una millor recepció.
- The radio control icon will flash during synchronization. This process may take several minutes or even hours depending on signal strength and location.
- Once synchronized, the icon will become solid, and the time will be automatically set.
- If synchronization fails, you may need to manually set the time (see Operating section).
3. Setting Temperature Unit (°F/°C):
Premeu el botó +/°C/°F button to toggle between Celsius and Fahrenheit temperature display.
4. Setting 12/24 Hour Format:
Premeu el botó -/12/24 per canviar entre els formats de 12 hores (amb indicador AM/PM) i 24 hores.
En funcionament
1. Manual Time and Date Setting:
If radio control synchronization is not desired or fails, you can manually set the time and date.
- Manteniu premut el botó MODE/SET botó fins que la pantalla parpellegi.
- Utilitza el + or - botons per ajustar el valor intermitent (per exemple, hora, minut, any, mes, dia).
- Premeu MODE/SET de nou per confirmar la configuració i passar al paràmetre següent.
- Repeat until all settings are complete. The clock will exit setting mode automatically after a few seconds of inactivity.
2. Alarm Function:
The clock features a dual alarm and snooze function.
- Configuració de l'hora de l'alarma: Premeu el botó ALARMA/SNOOZE button once to display Alarm 1 time. Press and hold ALARMA/SNOOZE to enter Alarm 1 setting mode. Use + or - to adjust hour/minute, then press ALARMA/SNOOZE to confirm. Repeat for Alarm 2.
- Activació/desactivació de l'alarma: Mentre viewa l'hora de l'alarma, premeu ALARMA/SNOOZE repeatedly to toggle Alarm 1 ON/OFF, Alarm 2 ON/OFF, or both ON/OFF. An alarm icon will appear on the display when active.
- Funció de posposar: Quan soni l'alarma, premeu el botó ALARMA/SNOOZE button to activate snooze. The alarm will temporarily stop and sound again after approximately 5-10 minutes.
- Aturar l'alarma: To stop the alarm completely, press any other button (except ALARM/SNOOZE for snooze) or let it ring for its duration.
3. Projection Control:
The projection feature allows you to display the time on a surface.
- Projecció ON/OFF: Premeu el botó PROJECTION ON/OFF/FLIP botó per activar o desactivar la projecció.
- Volteig de 180°: Manteniu premut el botó PROJECTION ON/OFF/FLIP button to rotate the projected image 180 degrees, useful for ceiling projection or different viewangles d'ajust.
- Ajust del focus: Rotate the focus ring on the projection lens (if available) to sharpen the projected image.
4. Weekday Display Language:
The clock supports five language options for the weekday display: German (GE), English (EN), French (FR), Italian (IT), and Dutch (DU).
To change the language, enter the manual time setting mode (as described above) and cycle through the options when the weekday language setting appears.
Manteniment
- Neteja: Netegeu la unitat amb un drap suau i sec. No utilitzeu productes de neteja abrasius ni dissolvents.
- Substitució de la bateria: Replace batteries when the display dims or the clock functions become erratic. Always replace all batteries at the same time with new ones of the same type. Dispose of old batteries responsibly.
- Emmagatzematge: Si guardeu el rellotge durant un període prolongat, traieu-ne les piles per evitar fuites.
Resolució de problemes
| Problema | Causa possible | Solució |
|---|---|---|
| La pantalla està en blanc o tènue. | Low or dead batteries; AC adapter not connected or faulty. | Replace batteries. Ensure AC adapter is securely connected and working. |
| L'hora és incorrecta o no s'estableix automàticament. | Recepció deficient del senyal de ràdio; cal configuració manual. | Move the clock closer to a window or to a different location. Manually set the time if radio control is consistently poor. |
| La projecció és borrosa. | Desenfocat. | Adjust the focus ring on the projection lens. |
| L'alarma no sona. | Alarm not activated; incorrect alarm time set. | Ensure the alarm icon is displayed. Verify the alarm time is set correctly. |
Especificacions
- Model: RDP1001GYE000
- Tipus de visualització: Digital
- Format horari: 12/24 Hour Selectable
- Unitat de temperatura: ° F / ° C Commutable
- Radiocontrol: NIST WWVB Receiver
- Projecció: 180 Degree Rotatable Projection Head
- Alarma: Dual Alarm with Snooze Function
- Weekday Display Languages: GE, EN, FR, IT, DU
- Il·luminació de fons: Blau
- Font d'alimentació: Batteries (Included), AC Adaptor (Optional)
- Dimensions: Aproximadament 7 x 5 x 2 polzades (dimensions del paquet)
- Pes: Aproximadament 8 unces
- Material: Estirol acrilonitril butadiè
- UPC: 811803033214
Garantia i Suport
Explore Scientific products are designed for quality and reliability. For specific warranty information, please refer to the warranty card included with your purchase or visit the official Explore Scientific website. If you encounter any issues or require technical assistance, please contact Explore Scientific customer support.
Per a consultes generals o assistència, podeu visitar el Explore Scientific brand page on Amazon or the seller's page if purchased from a third-party seller.


