1. Introducció
This manual provides comprehensive instructions for the assembly, operation, and maintenance of your SilverStone GD09 Home Theater PC (HTPC) computer case. The GD09 is engineered for space efficiency and broad compatibility, supporting full-size components within a compact form factor suitable for living room environments.
Si us plau, llegiu aquest manual detingudament abans de començar la instal·lació per garantir una configuració correcta i maximitzar el rendiment i la longevitat del vostre sistema.
2. Característiques clau
- Disseny de pressió d'aire positiva per a una refrigeració excel·lent, un funcionament silenciós i la prevenció de la pols.
- Supports SSI-CEB, ATX, and Micro-ATX motherboards.
- Compatible with SilverStone RA02 rackmount ears (sold separately).
- Includes quick-access dust filters for easy maintenance.
- Incredible 358mm depth to fit comfortably inside most home theater cabinets.
3. Especificacions
| Característica | Especificació |
|---|---|
| Número de model | SST-GD09B |
| Dimensions (LxWxH) | 14.09 x 17.32 x 6.69 polzades (358 x 440 x 170 mm) |
| Pes de l'article | 9.26 lliures (4.2 kg) |
| Material | Aluminum (Faux Aluminum Design) |
| Compatibilitat amb la placa base | SSI-CEB, ATX, Micro-ATX |
| Tipus de muntatge de la font d'alimentació | Front Mount (ATX) |
| Mètode de refrigeració | Aire |
| Compatibilitat amb la mida del ventilador | 120mm (front, side), 80mm (rear) |
| Ports d'E / S frontals | 2x USB 3.0, entrada/sortida d'àudio |
4. Configuració i instal·lació
4.1. General acabatview
The SilverStone GD09 is designed for horizontal placement, blending seamlessly with home theater components. Its internal layout is optimized for standard PC hardware.

Figura 1: Frontal view of the SilverStone GD09 HTPC case, showcasing its faux aluminum design and accessible front I/O ports.

Figura 2: posterior view of the SilverStone GD09, highlighting the motherboard I/O shield area, expansion slots, and power supply bay.
4.2. Obertura de la caixa
- Locate the two thumbscrews at the rear of the case. Unscrew them to loosen the top panel.
- Slide the top panel backward and then lift it off to access the internal components.

Figure 3: Illustration of removing the top panel by sliding it back after unscrewing the rear thumbscrews.
4.3. Instal·lació de la placa base
- Instal·leu la protecció d'E/S a l'obertura posterior de la carcassa.
- Align your ATX, Micro-ATX, or SSI-CEB motherboard with the standoffs inside the case.
- Fixeu la placa base amb els cargols proporcionats.

Figure 4: Internal layout showing the motherboard mounting area and various internal bays.
4.4. Instal·lació de la font d'alimentació
- The GD09 supports standard ATX power supplies.
- Mount the power supply in the designated front-right compartment of the case.
- Fixeu la font d'alimentació amb els cargols de la part posterior de la carcassa.
4.5. Instal·lació de la unitat
The case features versatile drive mounting options, including removable drive cages.
- Identify the 3.5-inch and 2.5-inch drive bays. The main drive cage can accommodate up to two 3.5-inch drives.
- An additional cage is provided for one 3.5-inch or two 2.5-inch drives, mounting behind the power supply.
- Secure drives to the cages using the appropriate screws.
- Reinstall the drive cages into their respective positions within the chassis.

Figure 5: Close-up of a removable drive cage, illustrating mounting points for storage devices.
4.6. Instal·lació de la targeta gràfica
- The GD09 supports graphics cards up to 340mm in length.
- Ensure your graphics card's height (depth) is compatible, especially when considering power connectors. For thicker cards, a 90-degree power adapter may be beneficial to prevent cable bending.
- Install the graphics card into the appropriate PCIe slot on your motherboard and secure it with the expansion slot screw.
4.7. Configuració del sistema de refrigeració
The GD09 features a positive air pressure design to enhance cooling performance and minimize dust accumulation. It supports multiple fan configurations.
- The case includes quick-access dust filters for easy cleaning. These are located on the side panels where intake fans are typically mounted.
- The case supports up to two 120mm fans in the front, two 120mm fans on the side, and two 80mm fans at the rear for exhaust.
- For optimal cooling, ensure proper airflow direction: intake fans at the front/side and exhaust fans at the rear.
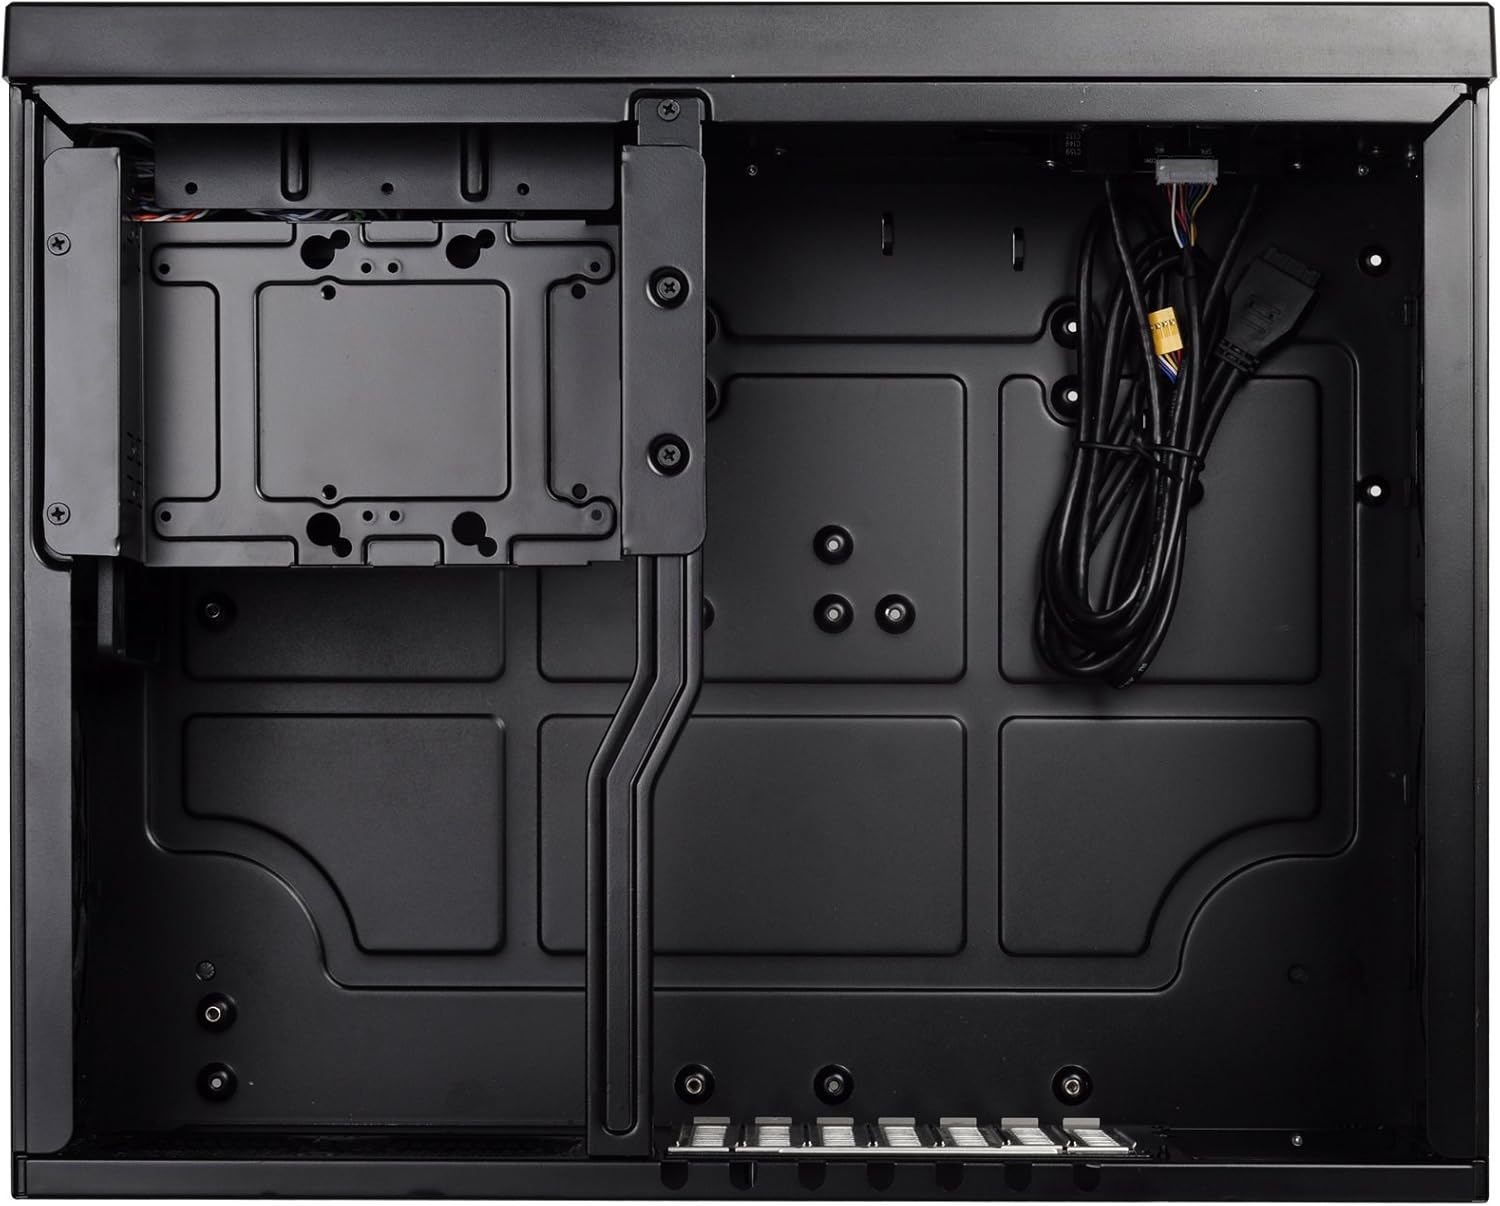
Figure 6: Detail of a removable dust filter, designed for easy cleaning and maintenance.
5. Instruccions de funcionament
5.1. Panell d'E/S frontal
El panell frontal proporciona un accés convenient als ports i controls essencials:
- Botó d'encesa: Press to power on/off the system.
- Botó de restabliment: Premeu per reiniciar el sistema.
- Ports USB 3.0 (x2): Per a la transferència de dades d'alta velocitat amb dispositius compatibles.
- Entrada/Sortida d'àudio: Per connectar auriculars, micròfons o altres dispositius d'àudio.
6. Manteniment
6.1. Neteja del filtre de pols
Regular cleaning of the dust filters is crucial for maintaining optimal airflow and preventing dust buildup inside the case.
- Gently pull the quick-access dust filters from their slots on the side panels.
- Clean the filters using compressed air, a soft brush, or by rinsing them with water (ensure they are completely dry before reinstallation).
- Reinsert the clean filters back into their respective slots.
6.2. Neteja general
Use a soft, dry cloth to wipe down the exterior of the case. Avoid abrasive cleaners or solvents that may damage the finish.
7. Solució De Problemes
If you encounter issues with your system, consider the following basic troubleshooting steps:
- Sense energia: Assegureu-vos que tots els cables d'alimentació (de la font d'alimentació a la paret, de la font d'alimentació a la placa base, de la CPU i de la GPU) estiguin connectats correctament. Comproveu l'interruptor d'alimentació de la font d'alimentació.
- Sense pantalla: Verify that your monitor cable is connected to the graphics card (not the motherboard integrated graphics, unless intended) and that the graphics card is properly seated and powered.
- Sobreescalfament: Check fan connections and ensure they are spinning. Clean dust filters. Verify CPU cooler installation. Ensure adequate airflow within the case.
- Component no detectat: Reseat the component (e.g., RAM, GPU, storage drive). Check power and data cables.
For more complex issues, consult the manuals for your individual components or contact SilverStone support.
8. Garantia i Suport
For detailed warranty information, technical support, and product registration, please visit the official SilverStone Technology weblloc web o poseu-vos en contacte amb el seu departament d'atenció al client. Conserveu el comprovant de compra per a reclamacions de garantia.


