1. Introducció
Thank you for choosing the WilTec XPOtool 1280W Wall and Ceiling Sander. This manual provides essential information for the safe operation, setup, maintenance, and troubleshooting of your new tool. Please read these instructions carefully before use and keep them for future reference.
2. Instruccions generals de seguretat
ADVERTÈNCIA: llegiu totes les advertències, instruccions, il·lustracions i especificacions de seguretat proporcionades amb aquesta eina elèctrica. L'incompliment de totes les instruccions que s'indiquen a continuació pot provocar descàrregues elèctriques, incendis i/o lesions greus.
- Seguretat de l'àrea de treball: Mantingueu la zona de treball neta i ben il·luminada. Les zones desordenades o fosques conviden als accidents. No feu servir eines elèctriques en atmosferes explosives, com ara en presència de líquids, gasos o pols inflamables.
- Seguretat elèctrica: Els endolls de les eines elèctriques han de coincidir amb la presa de corrent. No modifiqueu mai l'endoll de cap manera. No utilitzeu cap adaptador d'endoll amb eines elèctriques amb connexió a terra. Eviteu el contacte corporal amb superfícies amb connexió a terra.
- Seguretat personal: Always wear eye protection. Use dust masks, non-skid safety shoes, hard hats, or hearing protection for appropriate conditions. Do not overreach. Keep proper footing and balance at all times.
- Ús i cura de les eines elèctriques: No forceu l'eina elèctrica. Feu servir l'eina elèctrica adequada per a la vostra aplicació. Desconnecteu l'endoll de la font d'alimentació abans de fer qualsevol ajust, canviar accessoris o guardar eines elèctriques.
- Recollida de pols: This tool features an integrated dust collection system. Ensure the dust bag is properly attached and emptied regularly to maintain efficiency and reduce airborne dust.
3. Producte acabatview
The XPOtool 1280W Wall and Ceiling Sander is designed for efficient sanding of large surfaces such as plasterboard, wood, and other materials. It features a powerful motor, variable speed control, and an integrated vacuum system for a cleaner working environment.
Components:
- Main Sander Unit
- Mànec auxiliar
- Mànega de recollida de pols
- Bossa de recollida de pols
- Sanding Discs (various grits)
- Cable d'alimentació

Figura 1: Acabatview of the XPOtool 1280W Wall and Ceiling Sander, including the main unit, auxiliary handle, dust collection hose, dust bag, and several sanding discs.
4. Configuració
4.1 Fixació de la nansa auxiliar
- Locate the auxiliary handle and the designated mounting point on the sander body.
- Screw the auxiliary handle firmly into place. Ensure it is securely fastened for stable operation.
4.2 Connecting the Dust Collection System
- Connect one end of the dust collection hose to the dust outlet port on the sander.
- Attach the other end of the hose to the inlet of the dust collection bag.
- Ensure all connections are tight to prevent dust leakage and maximize suction efficiency.
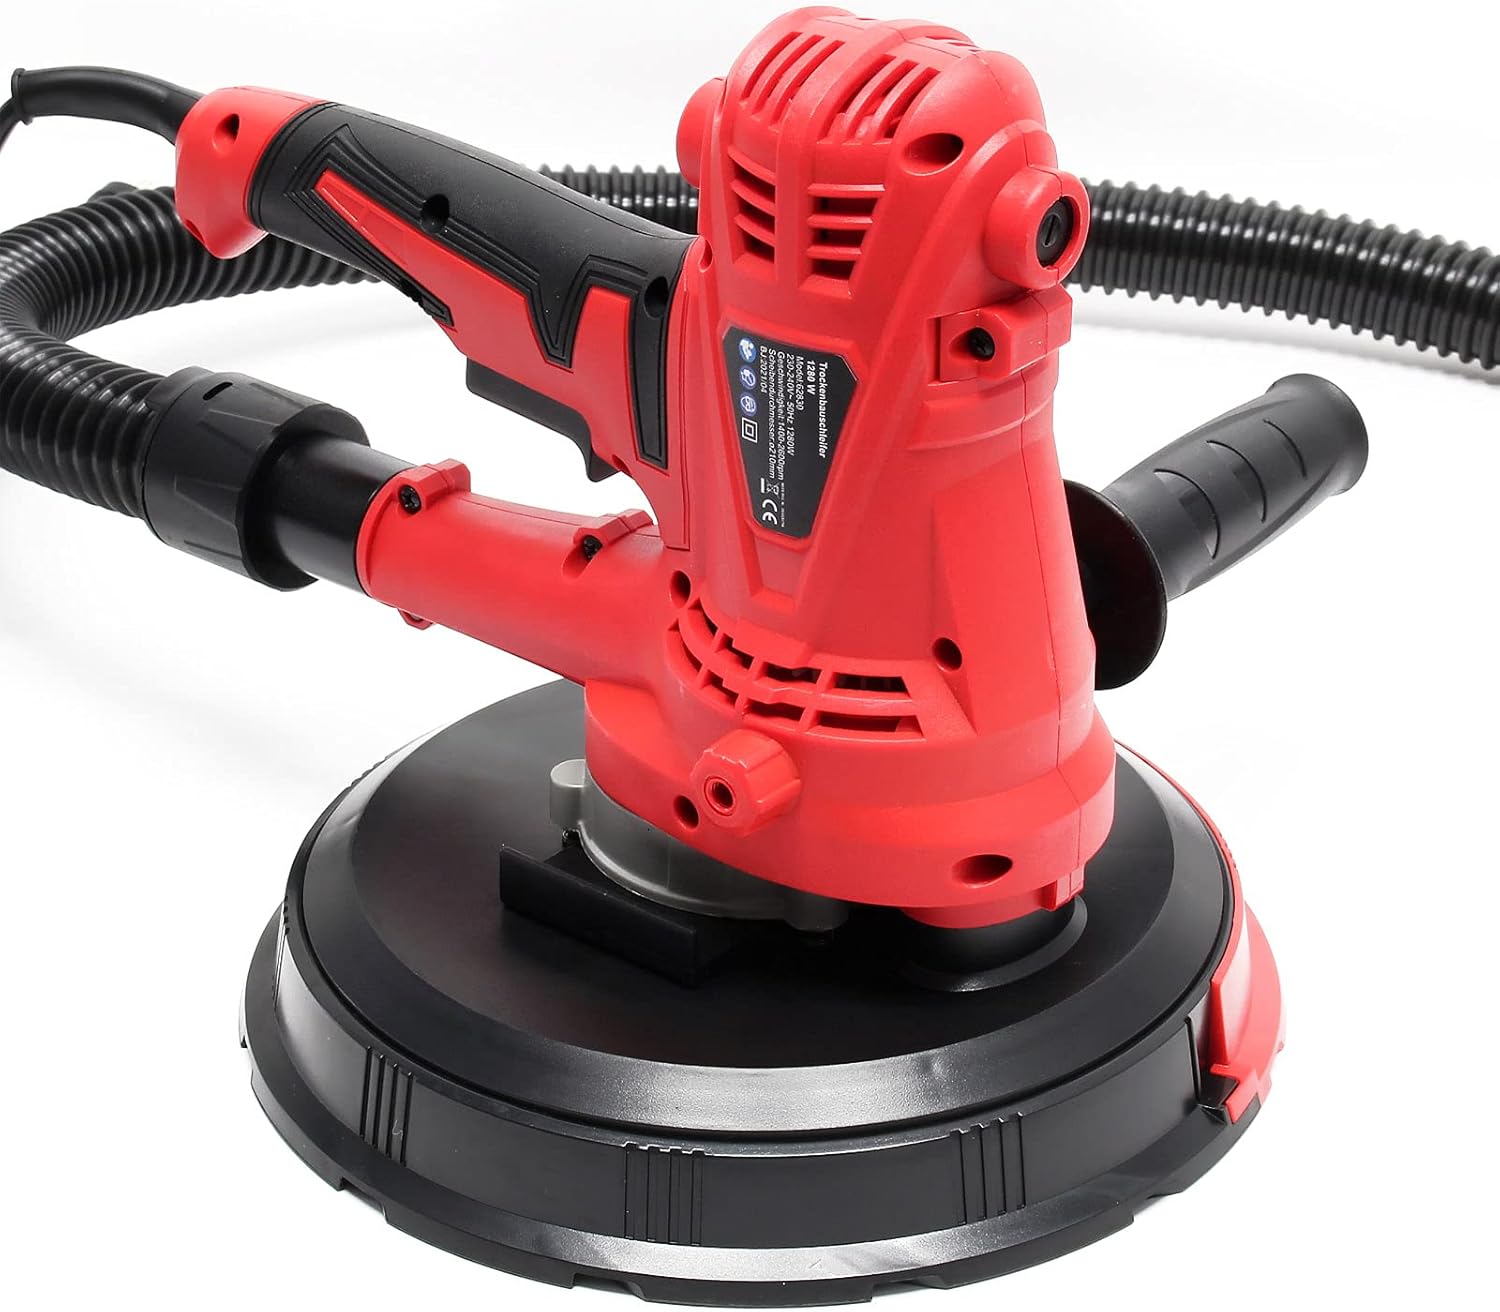
Figura 2: lateral view of the sander demonstrating the attachment point for the dust collection hose.
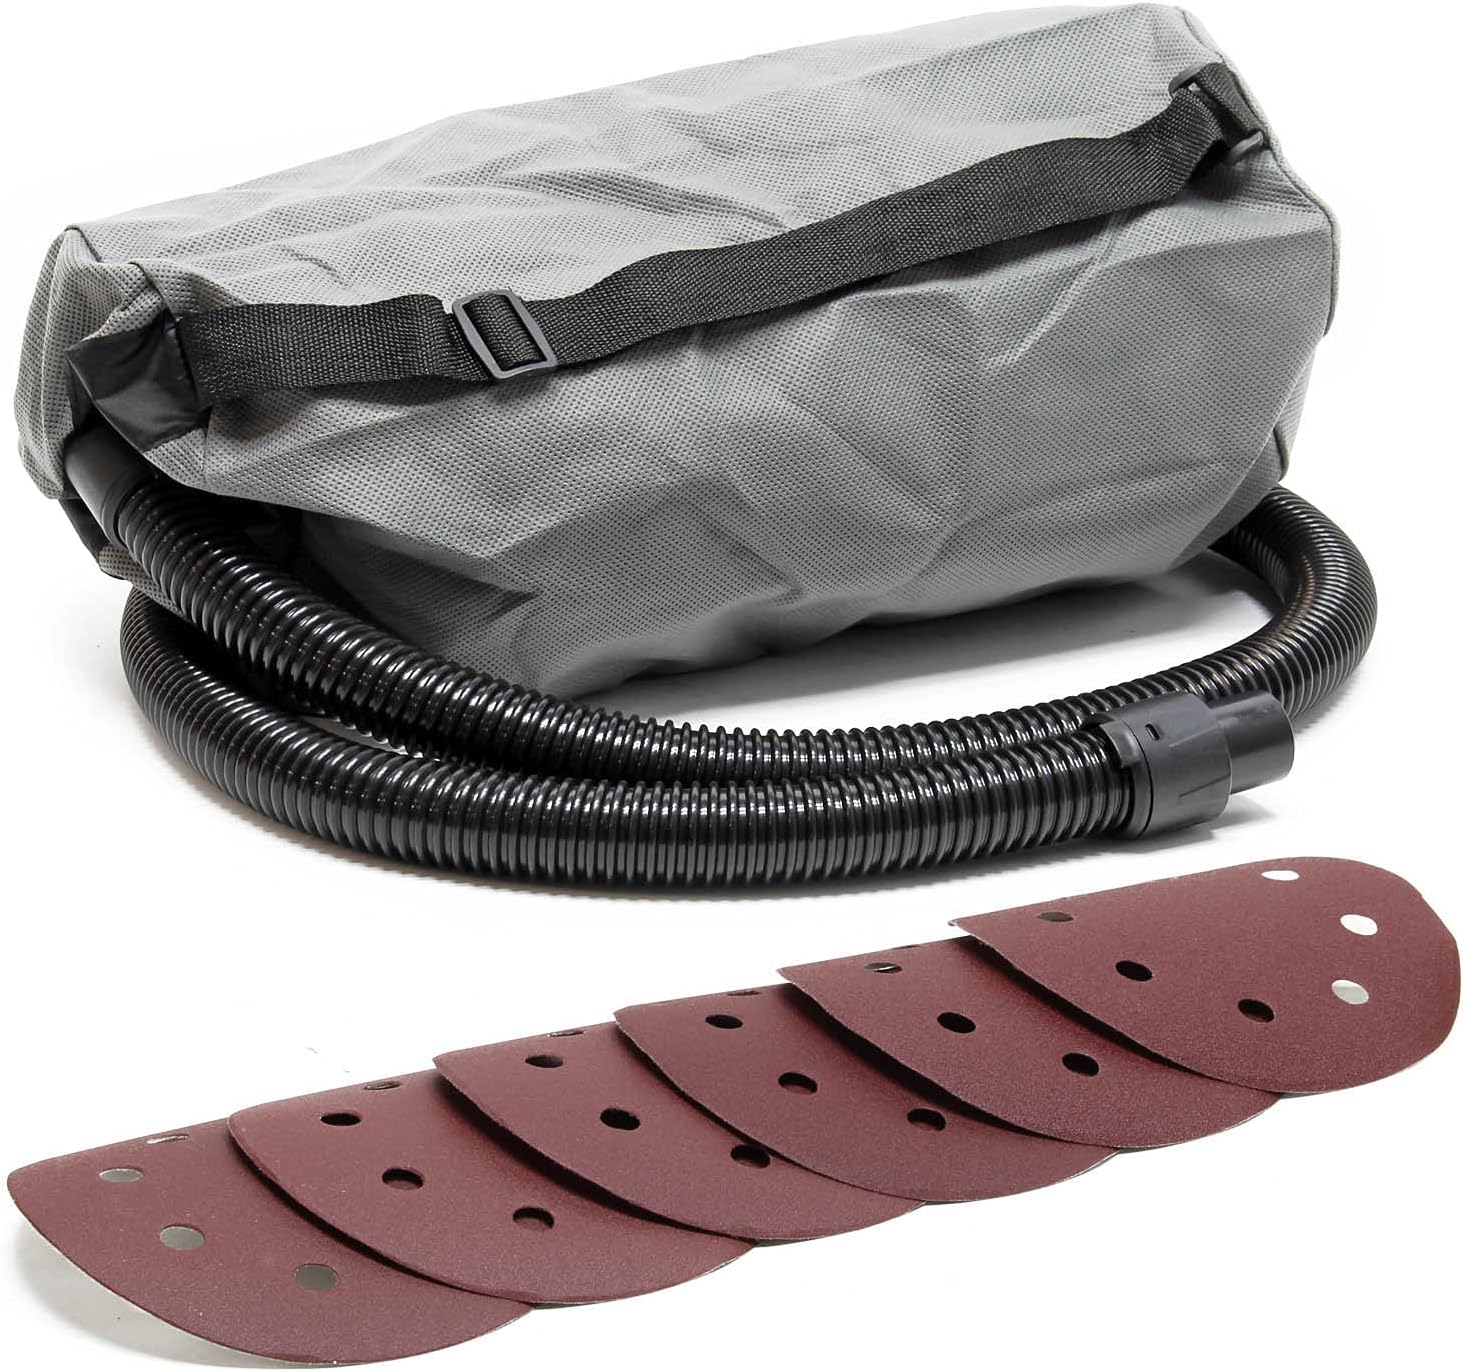
Figura 3: The dust collection bag and various sanding discs included with the sander.
4.3 Installing Sanding Discs
- Assegureu-vos que la polidora estigui desendollada de la font d'alimentació.
- The sanding pad uses a hook-and-loop fastening system. Align the holes on the sanding disc with the holes on the sanding pad.
- Premeu fermament el disc de polir sobre el coixinet per fixar-lo.
- Per treure-ho, simplement desenganxeu el disc de la coixinet.

Figura 4: A baix view of the sander, showing the hook-and-loop sanding pad for disc attachment.
4.4 Connexió d'alimentació
Connect the power cord to a suitable electrical outlet. The sander is equipped with an extra-long 4-meter power cord for extended reach.
5. Instruccions de funcionament
5.1 Engegada/apagada
- Ensure the sander is properly set up and connected to power.
- To turn on the sander, press the power switch. The integrated soft-start function will ensure a smooth startup.
- To turn off, release or press the power switch again, depending on the switch type (toggle or momentary with lock).
5.2 Ajust de la velocitat
The sander features five variable speed levels, adjustable between 1400 and 2600 revolutions per minute. Use the speed adjustment dial to select the appropriate speed for your material and application.
- Lower speeds are suitable for delicate surfaces or fine finishing.
- Higher speeds are effective for aggressive material removal on robust surfaces.

Figura 5: Primer pla view of the sander's controls, including the variable speed dial and power switch.
5.3 Using the Integrated Vacuum System
The integrated vacuum system directly collects sanding dust into the attached dust bag, significantly reducing airborne particles. The suction power is adjustable up to 98% for optimal dust management.
- Ensure the dust bag is empty before starting work.
- Monitor the dust bag and empty it when it becomes full to maintain effective suction.
5.4 Tècniques de poliment
- Poliment general: Apply even, moderate pressure. Move the sander in smooth, overlapping passes across the surface.
- Parets i sostres: The 215mm sanding disc and 360° rotatable head are ideal for large surfaces. The auxiliary handle provides enhanced control.
- Edges and Corners: The removable sanding cover allows access to joints, corners, and edges. Carefully remove the cover when working in these areas.
5.5 LED Light (Optional)
The device allows for the connection of an external LED lamp (not included). If an LED lamp is connected, it can be activated via a dedicated switch to illuminate dark work areas.
6. Manteniment
6.1 Cleaning the Dust Bag
Regularly empty the dust collection bag to maintain optimal suction performance and prevent clogging. Detach the bag, empty its contents, and reattach it securely.
6.2 Cleaning the Sanding Pad and Discs
Inspect the sanding pad for wear or damage. Replace if necessary. Remove any dust or debris from the hook-and-loop surface to ensure proper adhesion of new sanding discs. Replace sanding discs when they become worn or lose their abrasive quality.
6.3 Neteja general
Després de cada ús, netegeu l'exterior de la polidora amb un drap net i sec.amp cloth. Do not use harsh chemicals or abrasive cleaners. Ensure ventilation openings are clear of dust and debris to prevent overheating. The motor is protected by a specially designed blade that helps prevent dust ingress.
7. Solució De Problemes
| Problema | Causa possible | Solució |
|---|---|---|
| La polidora no arrenca | No power supply; Faulty power cord/plug; Power switch issue | Check power connection and outlet; Inspect power cord for damage; Contact customer support if switch is faulty. |
| Reduced sanding performance | Worn sanding disc; Incorrect grit for material; Insufficient pressure | Replace sanding disc; Use appropriate grit; Apply even, moderate pressure. |
| Mala recollida de pols | Dust bag full; Hose clogged; Loose connections | Empty dust bag; Clear any blockages in the hose; Secure all hose connections. |
| Vibració / soroll excessius | Damaged sanding pad; Loose components; Motor issue | Inspect sanding pad for damage; Check for loose screws; Discontinue use and contact support if motor issue is suspected. |
8. Especificacions
| Característica | Especificació |
|---|---|
| Marca | WilTec |
| Número de model | 62830 |
| Poder | 1280W |
| Voltage | 230 Volts |
| Font d'alimentació | Elèctric amb cable |
| Diàmetre del disc | 215 mm |
| Velocitat variable | 5 levels (1400 - 2600 RPM) |
| Velocitat de rotació màxima | 10000 RPM (Note: This might refer to motor speed, not disc speed) |
| Integrated Vacuum | Yes, with adjustable suction up to 98% |
| Pes de l'article | 3.42 quilos |
| Dimensions del paquet | 30.5 x 30.5 x 28.9 cm |
| Discs de poliment inclosos | 8 discs (2x G150, 2x G180, 2x G240, 2x G400) |
| Longitud del cable d'alimentació | 4 metres |
9. Garantia i Suport
For warranty information, technical support, or spare parts inquiries, please refer to the purchase documentation or contact your retailer. Keep your proof of purchase for any warranty claims.


