1. Producte acabatview
Thank you for choosing the Arlux Lighting Onyx R2 Round Recessed LED Spot Light. This product is designed for indoor use, providing efficient and modern illumination. This manual provides essential information for the safe installation, operation, and maintenance of your new LED spot light.
Informació de seguretat
- Llegiu atentament totes les instruccions abans de la instal·lació i l'ús.
- La instal·lació ha de ser realitzada per un electricista qualificat d'acord amb els codis i les normatives elèctriques locals.
- Ensure the power supply is disconnected at the main circuit breaker before installation, maintenance, or cleaning.
- No modifiqueu el producte de cap manera. Les modificacions no autoritzades poden anul·lar la garantia i plantejar riscos per a la seguretat.
- Aquest producte està dissenyat només per a ús en interiors. No l'exposeu a la humitat ni a temperatures extremes.
- No mireu directament a la font de llum LED quan estigui encesa, ja que això pot causar fatiga o danys oculars.
- Mantenir els materials d'embalatge fora de l'abast dels nens.
2. Contingut del paquet
Verifiqueu que tots els components siguin presents i no estiguin danyats abans de continuar amb la instal·lació.
- 1 x Arlux Lighting Onyx R2 Round Recessed LED Spot Light
- 1 x LED Driver (Power Supply)
- Maquinari de muntatge

Image 2.1: The Arlux Lighting Onyx R2 Recessed LED Spot Light shown with its separate LED driver (power supply) and connecting cable.
3. Especificacions
| Marca | Arlux Lighting |
| Model | Onyx R2 |
| Tipus | Recessed LED Spot Light |
| Forma | Ronda |
| Consum d'energia | 18 watts |
| Flux lluminós | 1550 lúmens |
| Temperatura de color | 4000 Kelvin (blanc neutre) |
| Material | Alumini |
| Color | Blanc |
| Pes de l'article | 390 grams |
| Tipus d'instal·lació | Muntatge al sostre (encastat) |
| Font d'alimentació | Elèctric amb cable |
| Usos específics | Ceiling illumination for indoor spaces |
4. Configuració i instal·lació
4.1 Llista de comprovació prèvia a la instal·lació
- Eines necessàries: Drill, hole saw (appropriate diameter for recess), wire strippers, screwdriver, voltage provador.
- Font d'alimentació: Ensure the electrical circuit is compatible with the spot light's power requirements (18W).
- Ceiling Space: Verify sufficient clearance above the ceiling for the fixture and driver.
- La seguretat primer: Always turn off the main power supply at the circuit breaker before starting any electrical work.
4.2 Passos d'instal·lació
- Prepara el sostre: Using an appropriate hole saw, cut a circular opening in the ceiling at the desired installation location. Refer to the product specifications for the exact cutout diameter (typically around Ø200-210mm for a Ø225mm fixture).
- Connecteu el controlador: Connect the AC input wires from your household electrical supply to the input terminals of the LED driver. Ensure correct polarity (Live, Neutral, Earth) as indicated on the driver. Secure connections firmly.
- Connect the Spot Light: Plug the DC output cable from the LED driver into the corresponding input port on the back of the Onyx R2 spot light. This connection is typically a simple plug-and-play connector.
- Insert the Spot Light: Gently push the spring clips on the sides of the spot light upwards and insert the fixture into the prepared ceiling opening. The spring clips will hold the light securely in place.
- Comprovació final: Ensure the spot light is flush with the ceiling surface and securely mounted.
- Restaura l'alimentació: Torneu a encendre l'alimentació principal a l'interruptor.
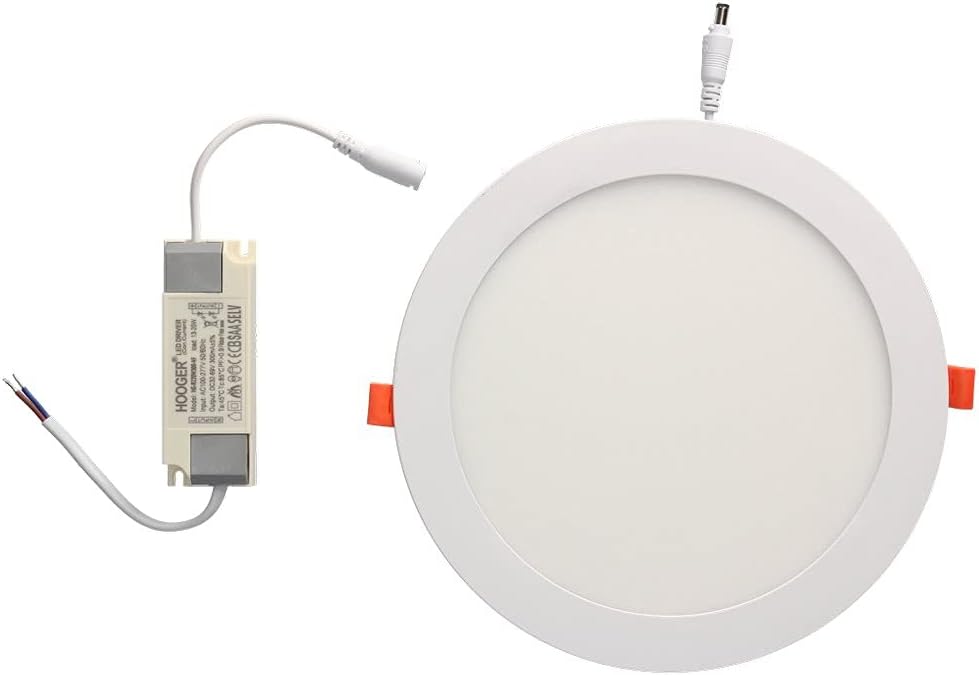
Image 4.1: The Arlux Lighting Onyx R2 Recessed LED Spot Light shown installed flush within a ceiling, providing ambient lighting.
5. Instruccions de funcionament
The Arlux Lighting Onyx R2 Recessed LED Spot Light operates immediately upon receiving power. It is typically controlled by a standard wall switch connected to the electrical circuit.
- Activació/desactivació: Feu servir l'interruptor de paret connectat a la làmpada per encendre o apagar la llum.
- Dimecres: This model is not specified as dimmable. Attempting to use it with a non-compatible dimmer switch may cause damage or malfunction.
6. Manteniment
The Arlux Lighting Onyx R2 LED Spot Light requires minimal maintenance.
- Neteja: Ensure the power is off before cleaning. Wipe the surface of the light with a soft, dry, or slightly damp drap. No utilitzeu netejadors abrasius, dissolvents ni productes químics agressius, ja que poden danyar l'acabat o els components elèctrics.
- Longevitat del LED: LED lights have a long lifespan and do not require bulb replacement. If the light stops functioning, refer to the troubleshooting section.
7. Solució De Problemes
If you encounter issues with your Arlux Lighting Onyx R2 LED Spot Light, please consult the following table before contacting support.
| Problema | Causa possible | Solució |
|---|---|---|
| La llum no s'encén | Sense font d'alimentació Connexió de cablejat solta Controlador LED defectuós Faulty light fixture | Comproveu l'interruptor de circuit i l'interruptor de paret. Verify all wiring connections are secure (power off first). Test the driver if possible, or replace it. If driver is functional, the fixture may be faulty; contact support. |
| La llum parpelleja | Font d'alimentació inestable Cablejat solt Incompatible dimmer switch (if used) | Ensure stable power. Check for loose connections. Remove dimmer switch if not compatible, or replace with a compatible LED dimmer. |
| La llum és tènue | Font d'alimentació incorrecta Voltage gota | Ensure the correct LED driver is used. Consult an electrician to check for voltage issues in your electrical system. |
8. Garantia i Suport
Information regarding specific warranty terms for the Arlux Lighting Onyx R2 Round Recessed LED Spot Light is not available in the provided product details. For warranty inquiries or technical support, please contact your retailer or the manufacturer directly.
Spare parts availability information is also not available. Please contact your point of purchase for assistance with replacement components.


