1. Introducció
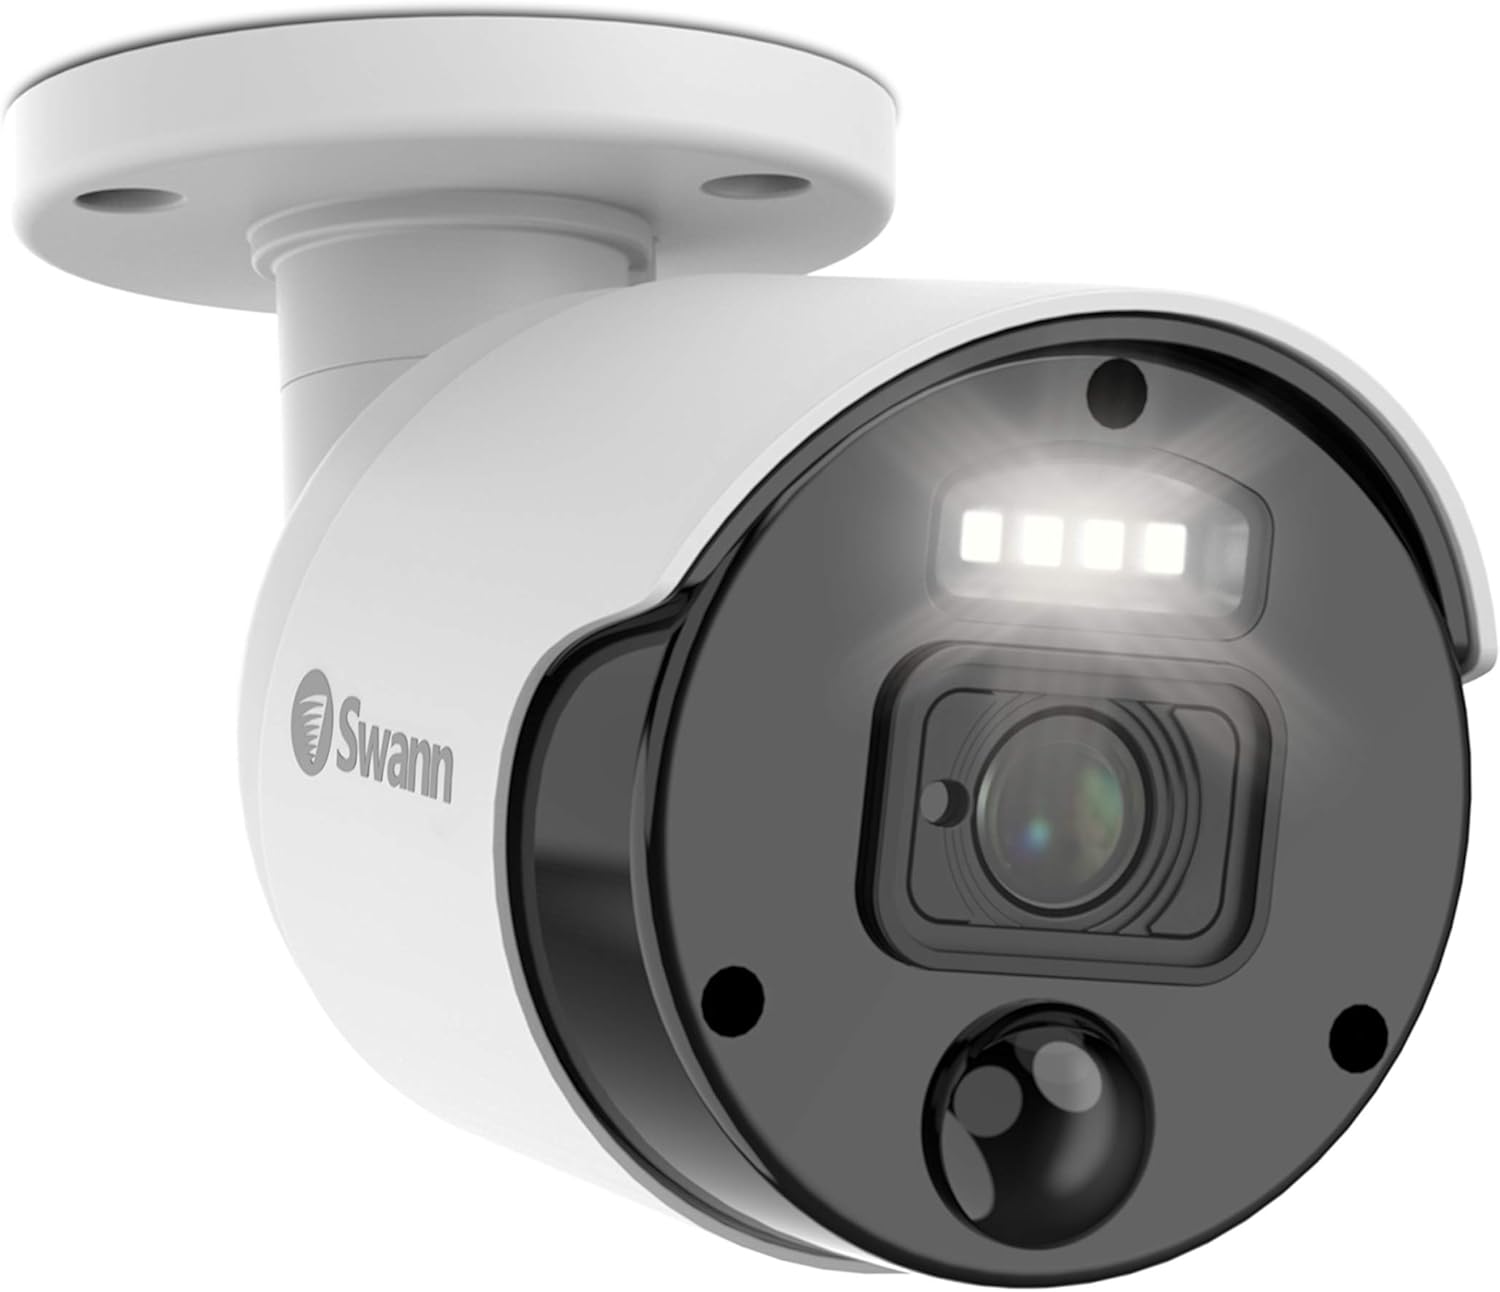
This manual provides comprehensive instructions for the Swann NVR 4K Bullet Camera, Model SONHD-875WLB-JP. This advanced security camera system offers 4K resolution, thermal and motion detection, color night vision, and robust weather resistance. Please read this manual carefully before installation and operation to ensure proper use and optimal performance.
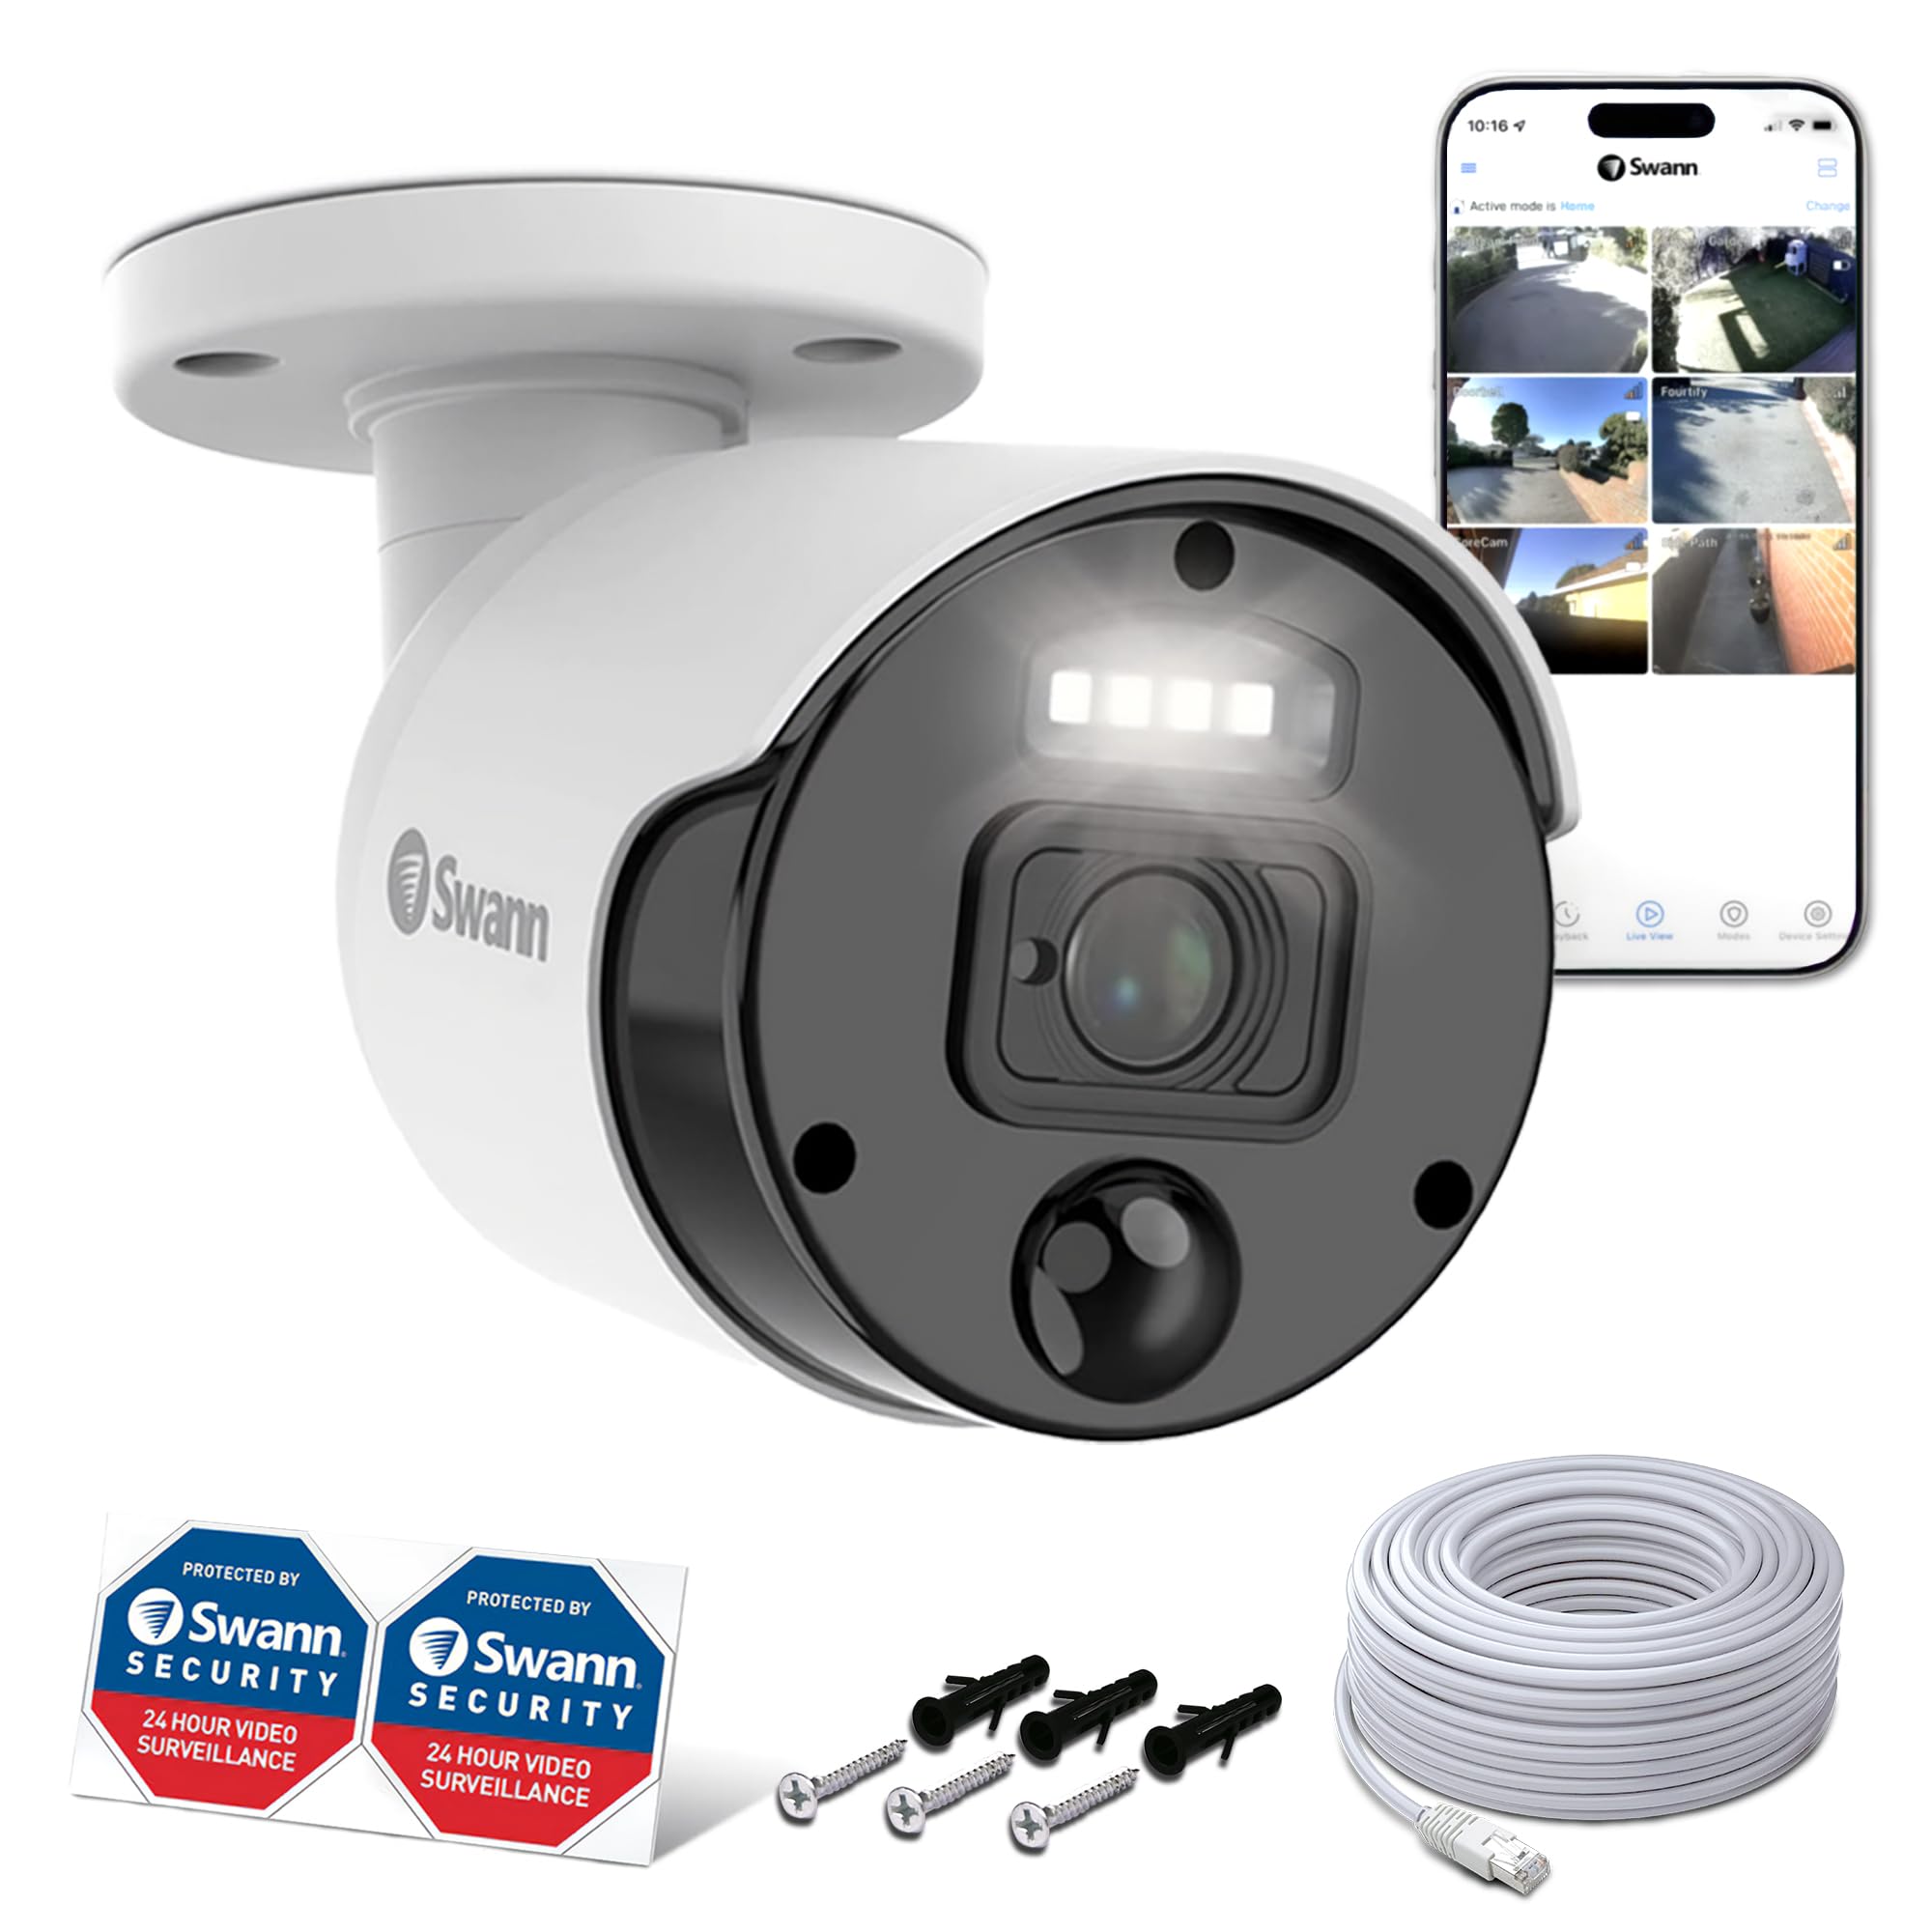
The Swann NVR 4K Bullet Camera, a high-resolution surveillance solution.
2. Configuració
2.1 Unboxing and Checking Contents
Before beginning installation, carefully open the package and verify that all components are present and undamaged. The package typically contains the NVR recorder, cameras, LAN cables, power adapters, mouse, and documentation.

The product packaging for the Swann NVR system.
All components laid out after unboxing, including cameras, cables, and the NVR recorder.
2.2 Connecting the Monitor and Recorder
Connect your monitor to the NVR recorder using the provided HDMI cable. Ensure a secure connection at both ends.
2.3 Powering On the Recorder
Connect the power adapter to the recorder and then plug it into a wall outlet. Turn on the recorder using the power switch. The Swann logo will appear on the monitor. Please wait a moment for the system to boot up.
Warning: Avoid using multi-outlet power strips as they may cause unstable operation due to insufficient power. Always connect the recorder directly to a wall outlet.
2.4 Connexió del ratolí
Connect the included USB mouse to one of the USB ports on the front or rear of the recorder. Both USB ports are functional.
2.5 Connexió de les càmeres
Connect each camera to the NVR recorder using the provided LAN cables. Ensure all cameras are connected and displaying video on the monitor before proceeding with installation.

A Swann NVR 4K Bullet Camera showing its LAN cable connection.
2.6 Waterproof Installation for Camera Cables
For outdoor camera installations, it is crucial to properly install the waterproof caps on the LAN cable connections to prevent water ingress. Follow these steps:
- Thread the camera cable through the small cap, then the large cap, and finally the rubber cap.
- Attach the rubber ring to the camera cable connector.
- Connect the LAN cable to the camera cable.
- Push the rubber cap over the connection, then screw the large cap onto the camera cable connector to secure it.
- Finally, screw the small cap onto the large cap to complete the waterproof seal.
Note: The rubber cap should protrude 3-5mm from the small cap for proper sealing.
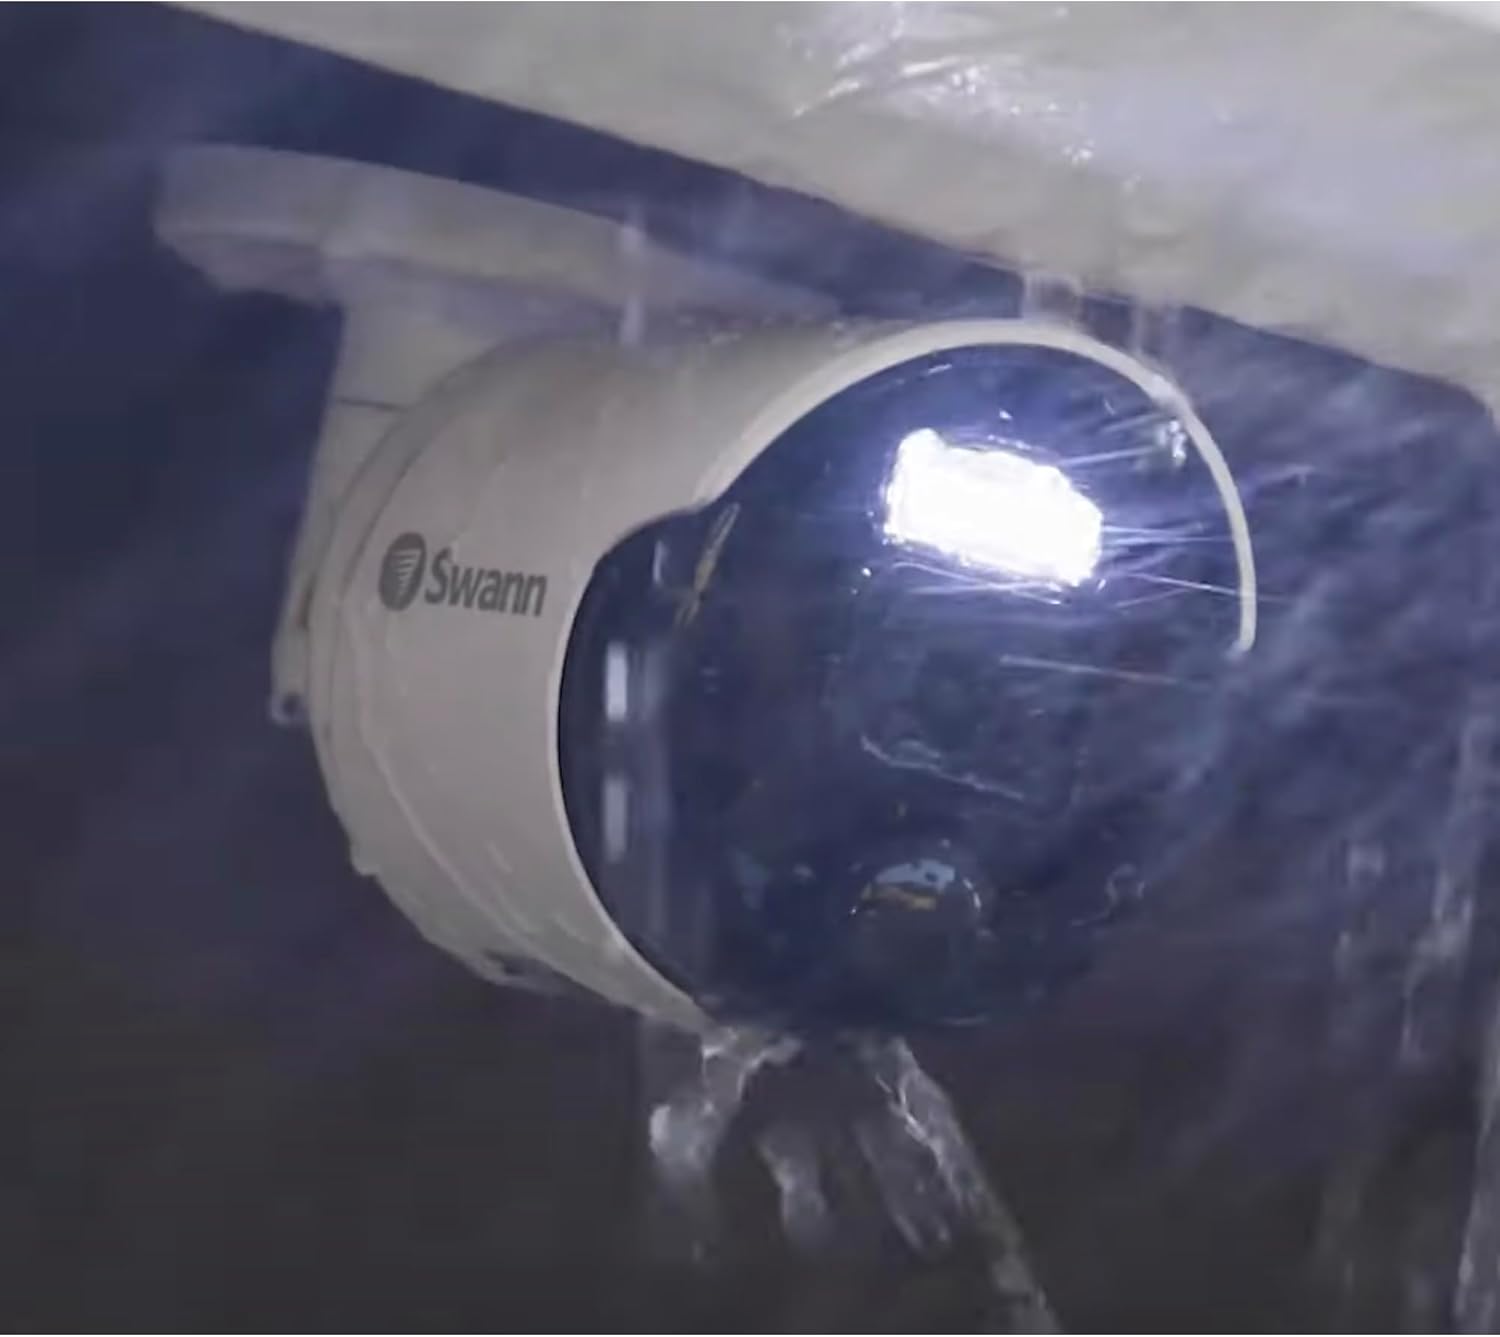
The IP66-rated camera is designed for outdoor use, but should be installed under eaves or in locations not directly exposed to heavy rain.
Important: While the camera is IP66 rated for dust and water resistance, it is not completely waterproof. For outdoor installations, place the camera under eaves or in areas not directly exposed to rain. Humidity can cause the camera lens to fog up, which is not a malfunction and is not covered by the product warranty. Your understanding is appreciated.
2.7 Guia de vídeo de configuració
This video demonstrates the unboxing, connection of the monitor, power, mouse, and cameras for the Swann NVR system.
This video provides instructions on how to properly install the waterproof caps for the camera cables during outdoor setup.
3. Funcionament del sistema
3.1 Assistent de configuració inicial
Upon first power-on, the system will display a setup wizard. Follow the on-screen prompts to configure the following:
- Selecció d'idioma: Trieu el vostre idioma preferit.
- Creació de contrasenya: Create a strong password (at least 6 characters, including numbers and letters). Re-enter to confirm.
- Adreça electrònica: Enter your email for password recovery and notifications. Be careful with '.' (dot) placement.
- Zona horària: Select your local time zone (e.g., GMT+9:00 Seoul, Tokyo, Osaka, Sapporo).
- Data i hora: If connected to the internet, click 'Update Now' to synchronize. If not connected, manually set the date and time.
After completing these steps, click 'Finish' to apply the settings. The system may restart.
3.2 Network Connection Check
Verify the network connection status by checking the icon at the bottom right of the monitor. A green checkmark indicates a successful connection.
Warning: Mobile routers are not supported. Please use a Wi-Fi router connected via a wired LAN.
3.3 App Setup and Device Pairing
A view càmera footage on your smartphone, download the Swann Security app from Google Play or the App Store. Create an account by entering your name, email, and password. After successful registration, you can pair your NVR device by scanning the QR code on the recorder. Follow the in-app instructions to complete the pairing process.

Screenshot of the Swann Security app interface, showing multiple camera views.
Note: Only one account can be registered per recorder. Multiple devices can log in to the same account, but simultaneous connections are limited to 3 devices to prevent communication speed degradation or live image display issues.
3.4 Operating Video Guide
This video guides you through the initial software setup of the NVR recorder, including language, password, email, and time zone settings.
This video demonstrates how to set up the Swann Security app on your smartphone and pair it with your NVR system.
4. Manteniment
4.1 HDD Formatting
To format the Hard Disk Drive (HDD) and delete all recorded data:
- From the menu at the bottom left of the screen, select 'Setup'.
- From the menu on the left side of the screen, select 'Device'.
- Select the submenu 'HDD' at the top.
- Check the checkbox next to the HDD and click 'Format HDD'.
- Enter the password you set for the recorder and click 'Authenticate'.
- Read the displayed warning and click 'OK'. The formatting process will begin. Please wait until it completes.
Note: Formatting may take some time. If you wish to completely erase recorded data, disconnect the cameras before formatting the HDD.
4.2 Resetting Settings
To reset the recorder's settings to factory defaults (without deleting recorded data):
- From the menu at the bottom left of the screen, select 'Setup'.
- From the menu on the left side of the screen, select 'Advanced Settings'.
- Select the submenu 'Maintain' at the top.
- Click 'Load Defaults'. In the displayed window, click 'All' and then 'Save'.
The registered settings will be initialized, and the system will restart. Please wait for the process to complete. Once the setup wizard screen appears, new settings can be registered.
5. Solució De Problemes
5.1 Playback Issues
If playback functionality does not work correctly, it may be due to a decrease in communication speed between your smartphone, router, and recorder. Please try the following three solutions:
- Uninstall and reinstall the Swann Security app.
- Reinicieu el vostre encaminador.
- Perform an NVR recorder initialization (refer to the 'Recorder Initialization Guide' video).
If the playback function still does not work after trying the above three steps, please contact our support center.
5.2 Guia de vídeo per a la resolució de problemes
This video provides guidance on troubleshooting common issues with the NVR system, particularly focusing on playback problems.
6. Especificacions
| Característica | Especificació |
|---|---|
| Resolució | Max 4K (8MP) |
| Camp de View | 80 graus |
| Micròfon | Sí |
| Interval d'àudio | 5 metres |
| Distància de visió nocturna | Max 40m (monochrome), 10m (color) |
| Filtre de tall IR | Sí |
| Sensor PIR | Sí |
| Interval del sensor PIR | 7 metres |
| Sirena | No |
| Classificació impermeable | IP66 |
| Temperatura de funcionament | -30 °C a 50 °C |
| Material | Plàstic |
| Dimensions (LxWxH) | 14.2 x 7.1 x 7.1 cm |
| Pes | 790 g |
| Connectivitat | Sense fil, Ethernet |
| Ús recomanat | Visió nocturna |
7. Garantia
This Swann NVR 4K Bullet Camera comes with a 1-year warranty. Please retain your proof of purchase for warranty claims.
8. Suport
For any inquiries or technical assistance, please contact our support center via email:
If you find it difficult to install the camera yourself, UNIQ offers an installation service. Please visit the UNIQ official website for more details and a free estimate.


