1. Introducció
This manual provides essential information for the safe and efficient installation, operation, and maintenance of the GEWISS P-COMFORT GWD6916 Wired Load Management Relay. Please read this manual thoroughly before attempting any installation or operation.
The GEWISS P-COMFORT GWD6916 is designed to manage electrical loads in an installation, optimizing energy consumption and preventing overloads. It is a wired version, ensuring reliable communication and control.
Informació de seguretat
- Instal·lació professional: Installation and maintenance must be performed by qualified personnel in accordance with local electrical codes and regulations.
- Desconnecteu l'alimentació: Desconnecteu sempre l'alimentació principal abans de realitzar qualsevol procediment d'instal·lació, cablejat o manteniment.
- Voltage: Assegureu-vos el subministrament voltage matches the device's specifications (250 Volt).
- Condicions ambientals: No exposeu el dispositiu a la humitat, temperatures extremes ni ambients corrosius.
2. Contingut del paquet
Verifiqueu que tots els elements estiguin presents i no estiguin danyats en obrir el paquet:
- 1 x GEWISS P-COMFORT GWD6916 Wired Load Management Relay
- 1 x Manual d'instruccions (aquest document)
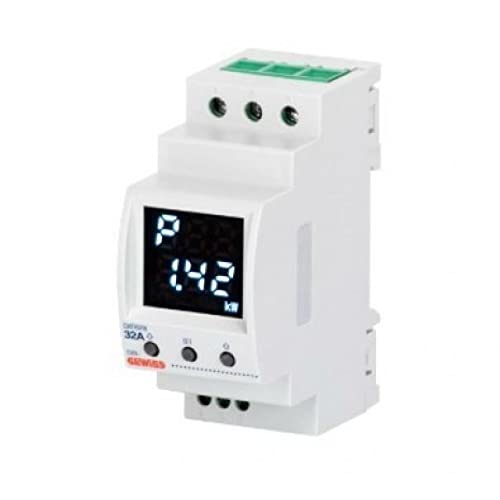
Imatge 1: Frontal view of the GEWISS P-COMFORT GWD6916 Wired Load Management Relay. The image shows the compact housing, terminal blocks for wiring, and indicator lights.
3. Instal·lació
Follow these steps for proper installation of the GEWISS P-COMFORT GWD6916 relay.
3.1 Muntatge
- Seleccioneu la ubicació: Choose a suitable location within an electrical enclosure, ensuring adequate ventilation and protection from environmental factors.
- Muntatge: The relay is designed for DIN rail mounting. Securely attach the device to the DIN rail until it clicks into place.
3.2 Cablejat
Avís: Ensure power is disconnected before proceeding with wiring.
- Font d'alimentació: Connect the main power supply (250 Volt) to the designated input terminals as indicated on the device's wiring diagram.
- Connexions de càrrega: Connect the loads to be managed by the relay to the output terminals. Ensure correct polarity and current ratings are observed.
- Entrada de control: Connect the control signal (e.g., from a master load management unit or energy meter) to the dedicated control input terminals. This signal dictates when loads should be shed or reconnected.
- Posada a terra: Ensure proper grounding of the device and associated electrical components.
Refer to the detailed wiring diagram printed on the device or included in the packaging for specific terminal assignments.
4. Funcionament
Once installed and wired correctly, the GEWISS P-COMFORT GWD6916 relay operates automatically based on the control input it receives.
4.1 Power-Up and Initial Check
- Restaura l'alimentació: After completing all wiring and safety checks, restore power to the installation.
- Llums indicadores: Observe the indicator lights on the relay. A power indicator should illuminate, confirming the device is receiving power. Other indicators will show the status of the loads being managed.
4.2 Load Management Function
The relay functions by switching connected loads ON or OFF in response to a control signal. Typically, this signal originates from a central load management system that monitors total energy consumption. When the total consumption exceeds a predefined threshold, the control system signals the relay to disconnect non-essential loads (load shedding) to prevent an overload. When consumption drops, the loads are reconnected.
4.3 Indicadors d'estat
The relay features LED indicators to provide visual feedback on its operational status:
- LED d'alimentació: Indicates that the device is powered ON.
- LED d'estat: May indicate operational status, errors, or communication status with the control unit. Refer to the device's specific documentation for LED behavior.
- Load Status LEDs: Individual LEDs may indicate the ON/OFF status of each controlled load.
5. Manteniment
The GEWISS P-COMFORT GWD6916 relay is designed for reliable, long-term operation with minimal maintenance.
- Neteja: Netegeu periòdicament l'exterior del dispositiu amb un drap suau i sec. No utilitzeu productes de neteja abrasius ni dissolvents.
- Inspecció: Annually, or as required by local regulations, have a qualified electrician inspect the wiring connections for tightness and signs of wear or damage.
- Sense peces reparables per l'usuari: The device contains no user-serviceable parts. Do not attempt to open or repair the unit.
6. Solució De Problemes
If you encounter issues with your GEWISS P-COMFORT GWD6916 relay, refer to the following common problems and solutions:
| Problema | Causa possible | Solució |
|---|---|---|
| Device has no power (Power LED off) | No power supply, loose wiring, tripped circuit breaker. | Check main power supply. Verify wiring connections. Reset circuit breaker. |
| Loads are not switching ON/OFF as expected | Incorrect control signal, faulty wiring to loads, internal fault. | Verify the control signal from the master unit. Check wiring to loads. If problem persists, consult a qualified electrician. |
| Sorolls o olors inusuals | Internal component failure, overheating. | Immediately disconnect power. Do not attempt to operate. Contact a qualified electrician or Gewiss support. |
For issues not listed above or if troubleshooting steps do not resolve the problem, contact a qualified electrician or Gewiss technical support.
7. Especificacions
| Característica | Detall |
|---|---|
| Model | GWD6916 |
| Marca | Gewiss |
| Tipus | Wired Load Management Relay |
| Voltage | 250 Volts |
| Dimensions (L x A x A) | 10 x 8 x 4 cm |
| Pes | 60 g |
| Muntatge | Carril DIN |
8. Garantia i Suport
The GEWISS P-COMFORT GWD6916 is covered by a standard manufacturer's warranty. Please refer to the warranty card included with your purchase or visit the official Gewiss weblloc web per obtenir informació detallada sobre els termes i condicions de la garantia.
For technical assistance, product inquiries, or warranty claims, please contact Gewiss customer support through their official channels. Ensure you have your product model number (GWD6916) and purchase details available when contacting support.
Gewiss Oficial Weblloc: www.gewiss.com


