1. Introducció
Gràcies per la compraasing the Adler AD 1184 Portable Digital Radio. This manual provides essential information for the safe and efficient operation of your device. Please read it thoroughly before use and keep it for future reference.
2. Instruccions de seguretat
Per garantir un funcionament segur i evitar danys, observeu les següents precaucions de seguretat:
- No exposeu la ràdio a la pluja, la humitat ni a temperatures extremes.
- Avoid placing the unit near heat sources such as radiators, stoves, or other heat-producing appliances.
- Assegureu-vos que hi hagi una ventilació adequada al voltant de la unitat. No bloquegeu cap obertura de ventilació.
- Utilitzeu només l'adaptador d'alimentació subministrat amb la unitat.
- No intenteu desmuntar ni modificar la unitat. Encarregueu tot el manteniment a personal qualificat.
- Clean the unit only with a soft, dry cloth. Do not use liquid cleaners or aerosol sprays.
- Mantingueu la unitat allunyada de camps magnètics forts.
3. Producte acabatview
3.1 Panell frontal i comandament a distància

Davant view of the Adler AD 1184 Digital Radio, showcasing the display, control knobs, speaker grille, and the included remote control.
3.2 Panell posterior

posterior view of the Adler AD 1184 Digital Radio, showing the telescopic antenna, power input, and product information label.
3.3 Accessoris inclosos
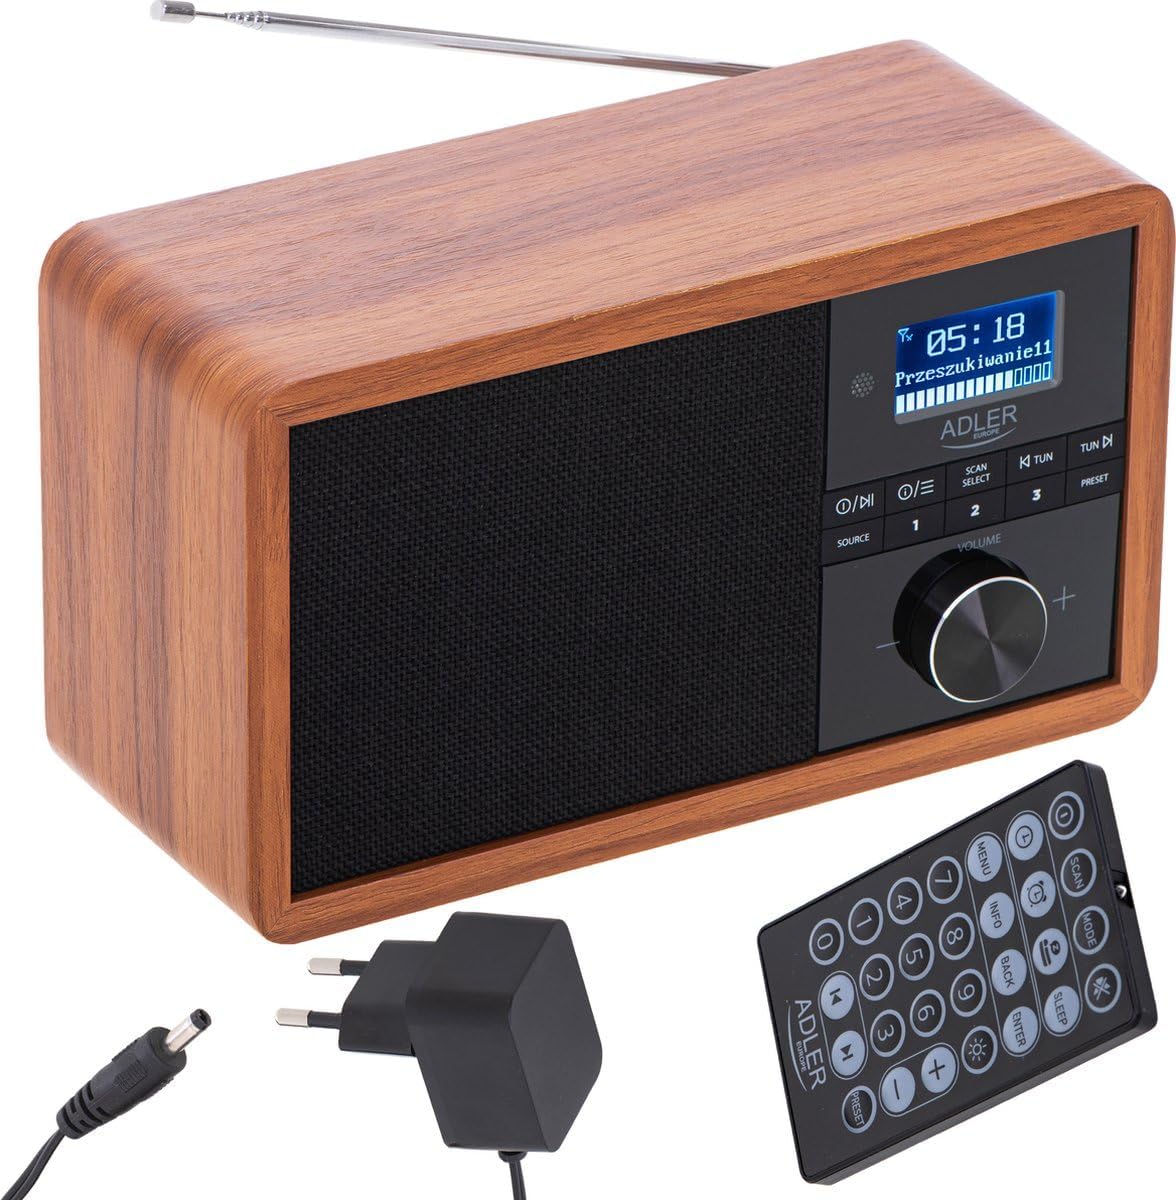
The Adler AD 1184 Digital Radio with its remote control and power adapter, illustrating the complete package.
4. Configuració
4.1 Desembalatge
Carefully remove the radio and all accessories from the packaging. Retain the packaging for future transport or storage.
4.2 Connexió d'alimentació
- Introduïu el connector de CC de l'adaptador de corrent a la presa DC IN de la part posterior de la ràdio.
- Connecteu l'adaptador d'alimentació a una presa de corrent estàndard.
4.3 Configuració de l'antena
Extend the telescopic antenna fully for optimal FM and DAB/DAB+ reception. Adjust its position for the best signal quality.
4.4 Encès inicial
Premeu el botó PODER button on the front panel or remote control to turn on the radio. The display will light up.
5. Instruccions de funcionament
5.1 Controls bàsics
- Botó d'encendre: Encén o apaga la unitat.
- Botó de VOLUM: Gireu per ajustar el nivell de so.
- Botó SOURCE: Press to cycle through available modes (DAB, FM, Bluetooth).
- Botó MENÚ: Accesses the menu options for the current mode.
- Botó ESCANEJA/SELECCIONA: Initiates a scan for radio stations or confirms a selection in the menu.
- TUN-/TUN+ Buttons: Used for manual tuning or navigating through lists.
- PRESET Buttons (1-3): Quickly recall stored favorite stations.
5.2 Funcionament de la ràdio DAB/DAB+
- Premeu el botó FONT button until DAB mode is selected.
- The radio will automatically perform a full scan for available DAB/DAB+ stations on first use. If not, press ESCANEAR.
- Utilitza el TUN-/TUN+ botons per navegar per la llista d'emissores disponibles.
- Premeu SELECCIONA per triar una estació.
- Per emmagatzemar una emissora com a preajust, manteniu premuda una de les PRESET buttons (1-3) until the display confirms.
5.3 Funcionament de la ràdio FM
- Premeu el botó FONT button until FM mode is selected.
- To auto-scan for stations, press ESCANEARLa ràdio escanejarà i s'aturarà a la següent emissora forta.
- For manual tuning, use the TUN-/TUN+ botons.
- Per emmagatzemar una emissora com a preajust, manteniu premuda una de les PRESET buttons (1-3) until the display confirms.
5.4 Mode Bluetooth
- Premeu el botó FONT button until Bluetooth mode is selected. The display will show "Pairing" or similar.
- Al dispositiu amb Bluetooth (telèfon intel·ligent, tauleta, ordinador portàtil), activeu el Bluetooth i cerqueu els dispositius disponibles.
- Select "AD 1184" from the list of devices.
- Un cop emparellat, pots reproduir àudio des del dispositiu a través de la ràdio.
- Use your connected device or the radio's controls to adjust volume and playback.
5.5 Configuració de l'hora i la data
The radio typically synchronizes time and date automatically via DAB signal. If manual setting is required, access the System Settings menu (usually via the MENÚ button) and navigate to Time/Date options.
5.6 Alarma i temporitzador de son
Refer to the remote control for dedicated ALARM and SLEEP buttons. Press the ALARMA button to set an alarm time and source. Press the DORMIR button to set a timer for the radio to automatically turn off.
5.7 Ús del comandament a distància
The remote control provides full functionality for the radio. Ensure the remote's battery is inserted correctly. Point the remote towards the front of the radio for optimal response.
6. Manteniment i cura
- Desendolleu sempre la ràdio de la presa de corrent abans de netejar-la.
- Feu servir un drap suau i sec per netejar les superfícies exteriors.
- No utilitzeu netejadors abrasius, ceres o dissolvents, ja que poden danyar l'acabat.
- Mantingueu la unitat lliure de pols i deixalles.
7. Solució De Problemes
| Problema | Causa possible | Solució |
|---|---|---|
| Sense poder | Adaptador de corrent no connectat; presa de corrent defectuosa. | Check power adapter connection; Try a different outlet. |
| Mala recepció de ràdio | Antena no estesa; Senyal feble; Interferències. | Extend and adjust antenna; Relocate the radio; Perform a full scan. |
| S'ha produït un error en l'aparellament de Bluetooth | Radio not in pairing mode; Device too far; Bluetooth off on device. | Ensure radio is in Bluetooth mode; Move device closer; Enable Bluetooth on your device. |
| Sense so | Volum massa baix; Silenciament activat; Font incorrecta seleccionada. | Increase volume; Check mute status; Select correct source. |
8. Especificacions tècniques
- Marca: Adler
- Número de model: 1184 dC
- Color: Black (Wood finish)
- Connectivitat: Bluetooth
- Característiques especials: Sense fil
- Dispositius compatibles: Smartphone, tablet, laptop
- Dimensions (L x A x A): 24.1 x 21.5 x 12 cm
- Tecnologia d'afinació: FM, DAB/DAB+ (Digital Radio)
- Tecnologia de visualització: LCD/LED
9. Garantia i Suport
For warranty information and technical support, please refer to the warranty card included with your product or contact your local retailer or the manufacturer's customer service. Keep your proof of purchase for any warranty claims.


