Introducció
This manual provides detailed instructions for the setup and operation of your Geevon Atomic Alarm Clock with Color Display. This device offers precise timekeeping, indoor temperature and humidity monitoring, calendar functions, and moon phase display, designed for convenience in your bedroom, office, or living space.

Imatge: Frontal view of the Geevon Atomic Alarm Clock displaying current time, day, date, indoor temperature, indoor humidity, and moon phase.
Contingut del paquet
Si us plau, comproveu el paquet per veure si hi ha els elements següents:
- Geevon Atomic Alarm Clock Unit
- Adaptador de corrent alterna
- Manual d'instruccions
Note: 3 AAA batteries are required for backup power and are not included.
Característiques del producte
- Cronometratge atòmic: Automatically adjusts time and date via WWVB radio broadcast from NIST in Fort Collins, Colorado. Includes automatic Daylight Saving Time (DST) updates.
- Pantalla multifuncional: Large LCD color display shows time, date, day of the week, indoor temperature, indoor humidity, and moon phases.
- Retroil·luminació ajustable: Three levels of adjustable brightness (100%, 50%, Off) for clear visibility day and night. Requires AC power for backlight function.
- Alarma amb funció de posposició: Features a 5-minute snooze function.
- Modes d'alimentació dual: Operates with the included AC power adapter or 3 AAA batteries (not included) for backup. A low battery indicator will appear on the screen when batteries need replacement.
- Col·locació versàtil: Equipped with a built-in stand bracket for tabletop use and a hanging hole for wall mounting.
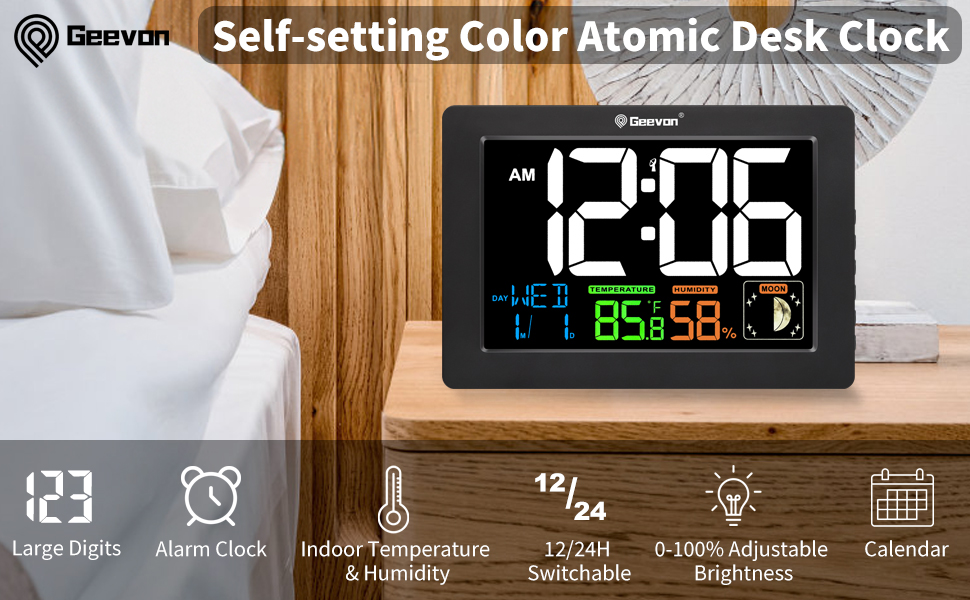
Image: Visual representation of the clock's multi-functional display, highlighting features like atomic time, temperature, humidity, and moon phase.
Configuració
- Insereix les piles: Open the battery compartment on the back of the clock and insert 3 new AAA batteries (not included). These batteries serve as a backup in case of power outage.
- Connecteu l'alimentació de CA: Plug the AC power adapter into the clock's power input port and then into a standard electrical outlet. The display will illuminate.
- Initial Atomic Signal Reception: Upon initial power-up, the clock will automatically attempt to receive the WWVB atomic radio signal. This process may take several minutes to several hours depending on your location and environmental conditions. During this time, the backlight may turn off.
- Manual Time Zone Selection: If the atomic signal is not received or you wish to set the time manually, proceed to the "Operating Instructions" section.

Imatge: Part posterior view of the clock, showing the battery compartment and the integrated kickstand for tabletop use, along with a wall-mount option.
Video: This video demonstrates the initial setup of the Geevon Atomic Alarm Clock, including inserting batteries and connecting the power adapter, followed by a demonstration of manual time setting.
Instruccions de funcionament
Botons mésview
The control buttons are located on the side of the clock:
- LIGHT/SNOOZE Button: On top of the clock, activates backlight and snooze function.
- Botó amunt: Adjusts values upwards, also used to activate/deactivate alarm.
- Botó ABAIX: Adjusts values downwards, also switches between °F and °C.
- Botó SET: Enters and confirms settings.
- Botó ALARMA: Enters and confirms alarm settings.
- ATOMIC Button: Initiates manual atomic signal receiving.

Image: Close-up of the side of the clock, indicating the function of each button.
Configuració manual de l'hora
- Press and hold the "SET" button for approximately 3 seconds until the 12/24Hr format starts flashing.
- Use the "UP" or "DOWN" buttons to select your preferred time format (12Hr or 24Hr).
- Press "SET" to confirm and move to the Time Zone setting.
- Use "UP" or "DOWN" to select your time zone (e.g., PST, MST, CST, EST).
- Press "SET" to confirm and move to the Hour setting.
- Use "UP" or "DOWN" to adjust the hour.
- Press "SET" to confirm and move to the Minute setting.
- Use "UP" or "DOWN" to adjust the minutes.
- Press "SET" to confirm and move to the Year setting.
- Use "UP" or "DOWN" to adjust the year.
- Press "SET" to confirm and move to the Month setting.
- Use "UP" or "DOWN" to adjust the month.
- Press "SET" to confirm and move to the Day setting.
- Use "UP" or "DOWN" to adjust the day.
- Press "SET" to confirm and exit the time setting mode.
Configuració d'alarma
- Press and hold the "ALARM" button for approximately 3 seconds until the alarm hour starts flashing.
- Use the "UP" or "DOWN" buttons to adjust the alarm hour.
- Press "ALARM" to confirm and move to the alarm minute setting.
- Use "UP" or "DOWN" to adjust the alarm minutes.
- Press "ALARM" to confirm and exit the alarm setting mode.
- To activate the alarm, press the "ALARM" button once to display the set alarm time. While the alarm time is displayed, press the "UP" button. A bell icon will appear on the screen, indicating the alarm is active.
- To deactivate the alarm, press the "ALARM" button once to display the set alarm time. While the alarm time is displayed, press the "UP" button. The bell icon will disappear, indicating the alarm is inactive.
Funció de posposar
When the alarm sounds, press the "LIGHT/SNOOZE" button on the top of the clock or the "SNOOZE" button on the side to activate the 5-minute snooze function. The alarm will sound again after 5 minutes.
Temperature Unit Switch (°F/°C)
In normal display mode, press the "DOWN" button to switch the indoor temperature display between Fahrenheit (°F) and Celsius (°C).
Ajust de la llum de fons
When the clock is powered by the AC adapter, press the "LIGHT/SNOOZE" button on the top of the clock to cycle through three backlight brightness levels: 100%, 50%, and Off.

Image: Comparison of the clock's display at different backlight settings (Off, 50%, 100%).
Opcions d'ubicació
The Geevon Atomic Alarm Clock offers flexible placement options:
- Taula: Utilize the built-in stand bracket on the back of the unit to place it on any flat surface, such as a desk, nightstand, or shelf.
- Muntatge en paret: Use the integrated hanging hole to mount the clock securely on a wall.

Image: The clock displayed as a wall clock, emphasizing its atomic time synchronization feature.
Resolució de problemes
| Problema | Causa possible | Solució |
|---|---|---|
| Clock not displaying or dim display. | No AC power, low backup batteries, backlight set to Off. | Ensure AC adapter is securely plugged in. Replace AAA backup batteries. Press LIGHT/SNOOZE button to adjust backlight brightness. |
| Atomic time not synchronizing. | Weak WWVB signal, interference, incorrect time zone. | Place the clock near a window, away from electronic devices that may cause interference. Ensure the correct time zone is selected. Manually initiate signal reception by holding the "ATOMIC" button. If signal is consistently weak, set time manually. |
| Time is incorrect after atomic synchronization. | Configuració incorrecta de la zona horària. | Verify and correct the time zone setting as described in the "Manual Time Setting" section. |
| L'alarma no sona. | Alarm not activated, volume too low (if applicable). | Ensure the alarm is activated (bell icon visible). Check if there are any volume settings (this model does not have explicit volume control, but it's a general troubleshooting tip). |
Especificacions
- Número de model: 22145-EUA
- Marca: Geevon
- Tipus de visualització: LCD
- Color: Negre
- Dimensions del producte: 6.1" (L) x 4.3" (H) x 0.98" (W)
- Font d'alimentació: AC/DC Adapter (included), 3 x AAA Batteries (not included) for backup
- Material: Acrilonitril butadiè estirè (ABS), metall, plàstic
- Interval de temperatura interior: De 14 °F a 122 °F (-10 °C a 50 °C)
- Interval d'humitat interior: del 20% al 95%
- Característiques especials: Adjustable Brightness, Atomic Alarm Clock, Auto Time Set, Large Display, Temperature Humidity Display, Moon Phases
Garantia i Suport
This Geevon product comes with a 1-year warranty from the date of purchase. For any issues, questions, or technical support, please contact Geevon customer service. We offer lifetime consulting service.
Contact information can typically be found on the product packaging or the official Geevon weblloc.


