1. Introducció
Thank you for choosing the Xigmatek Lux M Micro-ATX Mini Tower PC Case. This manual provides detailed instructions for the installation, operation, and maintenance of your new PC chassis. Please read this manual carefully before beginning the assembly process to ensure proper installation and to maximize the performance and longevity of your system.
The Lux M case is designed to offer a robust and aesthetically pleasing housing for your computer components, featuring a tempered glass side panel, a metallic front panel with a unique cut-out pattern, and pre-installed fixed RGB fans for optimal cooling and visual appeal. It supports Micro-ATX and Mini-ITX motherboards and is compatible with various cooling solutions, including water cooling.
2. Informació de seguretat
Si us plau, observeu les següents precaucions de seguretat durant la instal·lació i el funcionament:
- Desconnecteu sempre l'alimentació de la presa de corrent abans d'instal·lar o treure qualsevol component per evitar descàrregues elèctriques.
- Handle all components with care. Avoid touching circuit boards directly; hold them by their edges.
- Feu servir una corretja antiestàtica quan manipuleu components electrònics sensibles per evitar danys per descàrrega electrostàtica (ESD).
- Keep the case and components away from liquids, excessive heat, and direct sunlight.
- Assegureu-vos que hi hagi una ventilació adequada al voltant de la carcassa de l'ordinador per evitar el sobreescalfament.
- Mantingueu les peces petites i els cargols fora de l'abast dels nens.
3. Contingut del paquet
Verifiqueu que tots els articles siguin presents al vostre paquet. Si falta algun article o està malmès, poseu-vos en contacte amb el vostre distribuïdor.
- Xigmatek Lux M Micro-ATX Mini Tower PC Case
- Accessory box (containing screws, standoffs, cable ties, etc.)
- Manual d'usuari (aquest document)
4. Producte acabatview
Familiarize yourself with the various parts of your Xigmatek Lux M PC case.
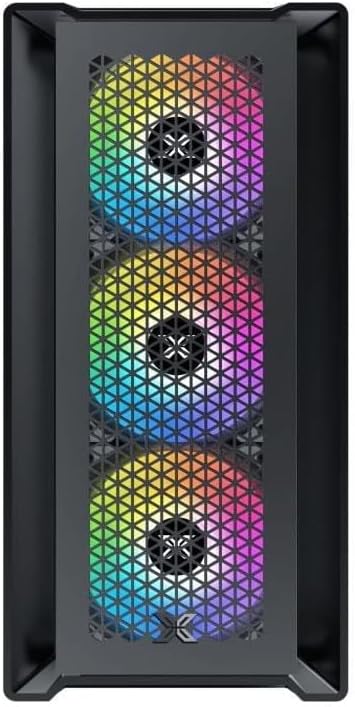
Figura 4.1: Frontal View. This image displays the front of the Xigmatek Lux M case, highlighting the metallic mesh panel with a triangular design and the three pre-installed 120mm fixed RGB fans.

Figure 4.2: Angled Top-Front View. This perspective shows the tempered glass side panel, offering a clear view of the interior, and the top panel with its I/O ports (USB, audio) and power button.
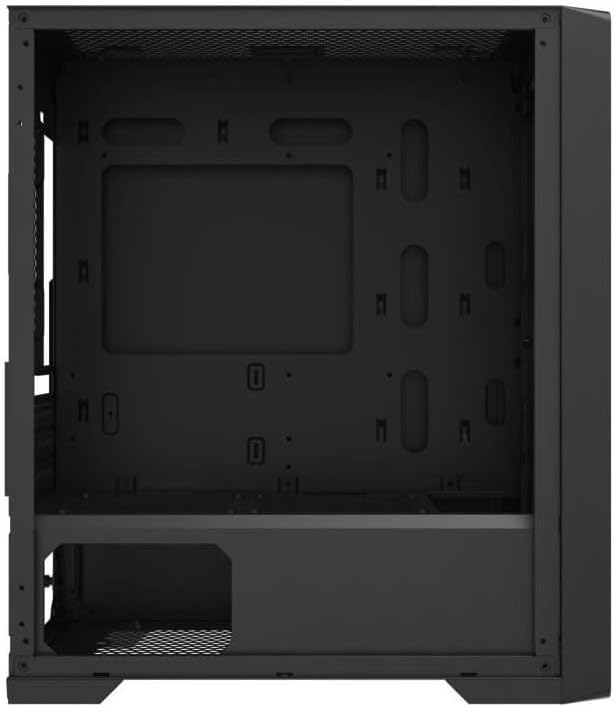
Figura 4.3: Distribució interior. The internal structure of the case, featuring the motherboard mounting tray, cutouts for cable management, and the power supply shroud at the bottom.
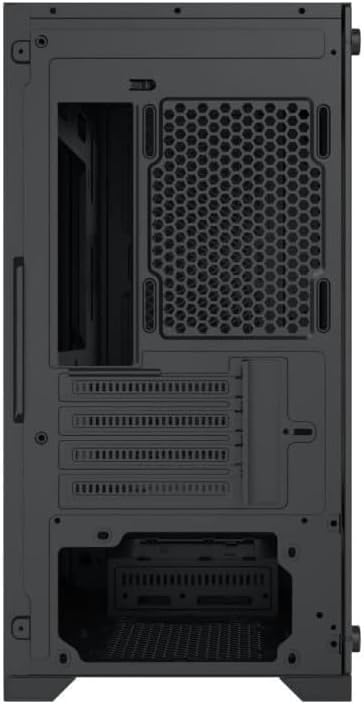
Figura 4.4: posterior View. This image illustrates the rear of the case, including the expansion slots for graphics cards and other add-in cards, the rear fan mounting area, and the power supply mounting bracket.
5. Configuració i instal·lació
Follow these steps to install your computer components into the Xigmatek Lux M case.
5.1. Preparació del cas
- Col·loqueu la caixa sobre una superfície plana i estable.
- Remove the tempered glass side panel by unscrewing the thumb screws and carefully lifting it off. Set it aside on a soft, non-abrasive surface.
- Remove the opposite steel side panel by unscrewing the thumb screws and sliding it backward.
5.2. Instal·lació de la placa base
The Lux M supports Micro-ATX and Mini-ITX motherboards.
- Instal·leu la protecció d'E/S (si no està preinstal·lada a la placa base) a l'obertura posterior de la carcassa.
- Alineeu la placa base amb els separadors preinstal·lats. Assegureu-vos que tots els forats dels cargols de la placa base coincideixin amb els separadors.
- Secure the motherboard using the provided motherboard screws. Do not overtighten.
5.3. Instal·lació de la font d'alimentació (PSU)
The PSU mounts at the rear bottom of the case.
- Slide the PSU into its designated compartment from the rear of the case.
- Align the PSU's screw holes with the holes on the case's rear panel.
- Secure the PSU with the provided screws.
5.4. Storage Drive Installation (2.5"/3.5" Drives)
The case supports 2x 2.5"/3.5" storage drives.
- Locate the drive cage beneath the PSU shroud or dedicated 2.5" mounting points behind the motherboard tray.
- For 3.5" HDDs, slide the drive into a drive tray (if applicable) and secure it with screws.
- For 2.5" SSDs, secure them directly to the mounting points using the provided screws.
5.5. Graphics Card (VGA) and Expansion Card Installation
La carcassa admet targetes gràfiques de fins a 320 mm de longitud.
- Traieu les cobertes de les ranures d'expansió necessàries de la part posterior de la carcassa.
- Insert your graphics card or other expansion card into the appropriate PCIe slot on your motherboard.
- Secure the card to the case using the expansion slot screws.
5.6. Cooling System Installation (Optional)
The Lux M comes with 4x 120mm X24F fixed RGB fans. It supports additional cooling options.
- Refredador de CPU: Max height of 160mm. Install your CPU cooler according to its manufacturer's instructions.
- Suport del radiador: The case supports radiators of 360mm, 240mm, or 120mm. Refer to your radiator's manual for installation. Common mounting locations include the front and top panels.
5.7. Gestió de cables
Aprofita els retalls de cables i els punts d'amarratge que hi ha darrere de la safata de la placa base per organitzar els cables. Això millora la circulació del flux i l'estètica.
5.8. Assemblea Final
- Once all components are installed and cables are managed, reattach the steel side panel and secure it with thumb screws.
- Carefully reattach the tempered glass side panel and secure it with thumb screws.
6. Instruccions de funcionament
After completing the installation, connect your peripherals (monitor, keyboard, mouse) and power cable to the PC. Press the power button located on the top panel of the case to start your system.
The pre-installed X24F RGB fans feature fixed RGB lighting, which will illuminate automatically upon system power-on. No additional software or controller is required for their basic operation.
Ensure that the case's ventilation is not obstructed to maintain optimal airflow and cooling performance.
7. Manteniment
Un manteniment regular ajuda a garantir la longevitat i el rendiment òptim dels components del teu PC.
- Neteja de pols: Periodically clean dust filters (if present) and the interior of the case using compressed air or a soft brush. Dust accumulation can hinder airflow and lead to overheating.
- Neteja exterior: Netegeu les superfícies exteriors amb un damp cloth. Avoid harsh chemicals that may damage the finish or tempered glass.
- Vidre temperat: Clean the tempered glass panel with a glass cleaner and a microfiber cloth to avoid scratches and streaks.
8. Solució De Problemes
Si teniu problemes durant o després de la instal·lació, tingueu en compte els passos habituals següents per resoldre problemes:
- Sense energia:
- Assegureu-vos que el cable d'alimentació estigui connectat correctament tant a la font d'alimentació com a la presa de corrent.
- Check that the PSU switch is in the 'ON' position.
- Verifiqueu que el cable de l'interruptor d'alimentació del panell frontal estigui connectat correctament a la capçalera del panell frontal de la placa base.
- Fans Not Spinning / RGB Not Lighting:
- Ensure all fan power cables are securely connected to the motherboard or a fan controller.
- For RGB, confirm that any necessary RGB headers are connected to the motherboard (though the included fans are fixed RGB and should light up with power).
- Sense sortida de pantalla:
- Verify that your monitor cable is connected to the graphics card (if installed) and not the motherboard's integrated graphics port.
- Torneu a col·locar la targeta gràfica a la ranura PCIe.
- Sobreescalfament:
- Assegureu-vos que tots els ventiladors de la caixa girin i estiguin orientats correctament per a un flux d'aire òptim (entrada/sortida).
- Clean any dust filters and internal components.
- Verify that the CPU cooler is properly seated and making good contact with the CPU.
For more complex issues, consult your component manuals or seek assistance from Xigmatek support or a qualified technician.
9. Especificacions
| Característica | Especificació |
|---|---|
| Marca | Xigmatek |
| Nom del model | Lux M |
| Número de model | EN48540 |
| Tipus de cas | Mini Torre |
| Compatibilitat amb la placa base | Micro-ATX, Mini-ITX |
| Material | Tempered Glass (side panel), Metal (front panel) |
| Color | Negre |
| Ventiladors preinstal·lats | 4 x 120mm X24F Fixed RGB Fans |
| Suport del radiador | 360 mm, 240 mm, 120 mm |
| Alçada màxima del refrigerador de la CPU | 160 mm |
| Longitud màxima de VGA | 320 mm |
| Longitud màxima de la PSU | 165 mm |
| Badies d'emmagatzematge | 2x 2.5"/3.5" |
| Característiques especials | RGB Lighting, Triangular Mesh Front Design |
10. Garantia i Suport
Xigmatek products are manufactured to the highest quality standards. For warranty information and technical support, please refer to the warranty card included with your product or visit the official Xigmatek weblloc web. Si us plau, conserveu el comprovant de compra per a reclamacions de garantia.
For further assistance, you may contact Xigmatek customer support through their official channels.