1. Introducció
Gràcies per la compraasing the DOOMAY Digital Alarm Clock. This compact and versatile alarm clock is designed for convenience and readability, featuring an adjustable LCD display, snooze function, weekend mode, and temperature display. This manual will guide you through the setup, operation, and maintenance of your new alarm clock to ensure optimal performance.
2. Informació de seguretat
- Mantingueu el dispositiu allunyat de l'aigua i d'ambients amb molta humitat.
- Avoid exposing the clock to direct sunlight or extreme temperatures.
- No intenteu desmuntar ni reparar el dispositiu vosaltres mateixos. Demaneu el servei tècnic a personal qualificat.
- Use only the specified battery type (2 x AAA batteries).
- Traieu les piles si no heu d'utilitzar el dispositiu durant un període prolongat per evitar fuites.
- Mantingueu les piles fora de l'abast dels nens.
3. Contingut del paquet
- DOOMAY Digital Alarm Clock (1 unit)
- AAA Batteries (2 units)
- Manual d'usuari (aquest document)
4. Producte acabatview
Familiarize yourself with the components and controls of your DOOMAY Digital Alarm Clock.
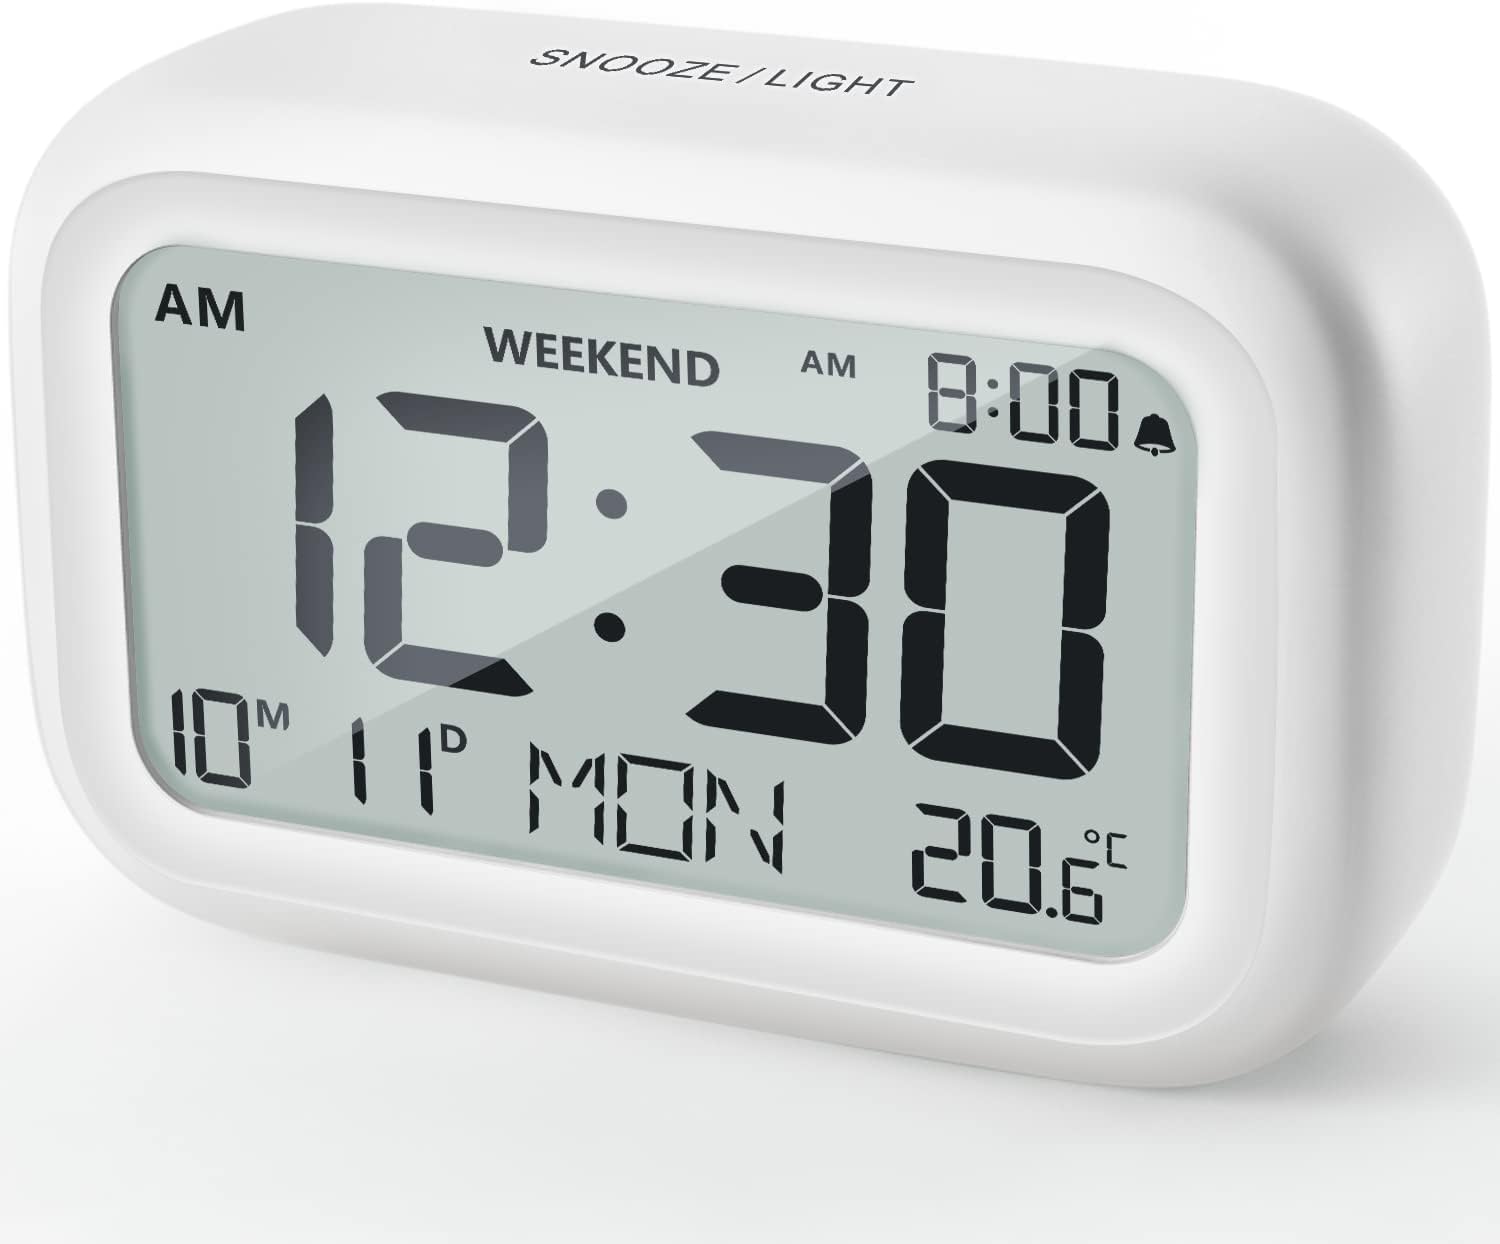
Figura 4.1: Frontal View of the Alarm Clock
This image displays the front of the DOOMAY Digital Alarm Clock, highlighting its large, clear LCD screen. The screen shows the current time (12:30), AM indicator, day of the week (MON), date (10th month, 11th day), and indoor temperature (20.6°C). The top of the clock has a "SNOOZE/LIGHT" button.

Figura 4.2: Característiques clauview
This diagram illustrates the main functionalities of the alarm clock: 12/24H time display, calendar, alarm setting, adjustable volume, snooze function, backlight, weekend mode, and temperature display. The clock itself is shown on a wooden table, displaying 7:00 AM, Friday, and 28.8 degrees.

Figure 4.3: Back Panel Controls
This image shows the rear of the alarm clock, detailing the various control buttons and the battery compartment. Buttons are clearly labeled for: 12/24H time format, Alarm setting, Weekend mode, Date setting, Minus (-) for decreasing values, Plus (+) for increasing values, and °C/°F for temperature unit selection. The battery compartment is visible, designed for two AAA batteries.
Controls i visualització:
- Pantalla LCD: Shows time, date, day of week, AM/PM indicator, alarm status, and temperature.
- SNOOZE/LIGHT Button (Top): Activates snooze function during alarm; illuminates backlight for 5 seconds.
- 12/24H Button (Back): Alterna entre els formats de 12 hores i 24 hores.
- ALARM Button (Back): Entra al mode de configuració de l'alarma.
- WEEKEND Button (Back): Activates/deactivates weekend mode.
- DATE Button (Back): Enters date setting mode.
- MINUS (-) Button (Back): Decreases values during setting; adjusts alarm volume.
- PLUS (+) Button (Back): Increases values during setting; adjusts alarm volume.
- °C/°F Button (Back): Alterna entre les unitats de temperatura Celsius i Fahrenheit.
5. Configuració
5.1 Instal·lació de la bateria
- Obriu la tapa del compartiment de la bateria situada a la part posterior del rellotge.
- Introduïu dues (2) piles AAA, assegurant-vos de la polaritat correcta (+ i -).
- Tanqueu bé la tapa del compartiment de la bateria.
- The display will light up, and the clock will be ready for initial setup. A low battery symbol will appear when batteries need replacement. If the display shows "8888" flashing, it's also an indication to change batteries.
5.2 Configuració inicial de la data i l'hora
- Establir hora:
- Premeu el botó 12/24H button to switch between 12-hour (with AM/PM) and 24-hour formats.
- Manteniu premut el botó 12/24H durant 3 segons per entrar al mode de configuració de l'hora. Els dígits de les hores parpellejaran.
- Utilitza el + or - botons per ajustar l'hora.
- Premeu el botó 12/24H Premeu el botó de nou per confirmar l'hora i passar a la configuració dels minuts. Els dígits dels minuts parpellejaran.
- Utilitza el + or - botons per ajustar el minut.
- Premeu el botó 12/24H button one more time to exit time setting.
- Establir data:
- Manteniu premut el botó DATA button for 3 seconds to enter date setting mode. The year digits will flash.
- Utilitza el + or - botons per ajustar l'any.
- Premeu el botó DATA button again to confirm the year and move to month setting.
- Adjust the month using + or -.
- Premeu DATA again to move to day setting.
- Adjust the day using + or -.
- Premeu DATA one more time to exit date setting. The day of the week will automatically adjust.
6. Instruccions de funcionament
6.1 Configuració de l'alarma
- Manteniu premut el botó ALARMA durant 3 segons. Els dígits de l'hora de l'alarma parpellejaran.
- Utilitza el + or - botons per configurar l'hora d'alarma desitjada.
- Premeu el botó ALARMA button again to confirm the hour and move to minute setting. The alarm minute digits will flash.
- Utilitza el + or - buttons to set the desired alarm minute.
- Premeu el botó ALARMA button one more time to exit alarm setting. The alarm icon (bell symbol) will appear on the display, indicating the alarm is active.
- To turn the alarm ON/OFF, simply press the ALARMA button once. The bell icon will appear/disappear.
6.2 Funció de repetició
When the alarm sounds, gently tap the large SNOOZE / LIGHT button on the top of the clock. The alarm will pause for 9 minutes and then sound again. This can be repeated multiple times.

Figure 6.1: Activating Snooze
This image demonstrates how to activate the snooze function by touching the top of the alarm clock. The text highlights that this action provides an additional 9 minutes of sleep after the alarm sounds.
To completely turn off the alarm after it sounds (without snoozing), press any button on the back of the clock.
6.3 Weekend Mode
The weekend mode allows the alarm to sound only from Monday to Friday, preventing it from ringing on Saturday and Sunday.

Figure 6.2: Weekend Mode Activated
This image shows the alarm clock display with the "WEEKEND" indicator prominently displayed, signifying that the weekend mode is active. The accompanying text clarifies that in this mode, the alarm will only sound from Monday to Friday, ensuring undisturbed weekends.
- To activate Weekend Mode, press the CAP DE SETMANA button once. The "WEEKEND" indicator will appear on the display.
- To deactivate Weekend Mode, press the CAP DE SETMANA button again. The "WEEKEND" indicator will disappear.
6.4 Adjustable Alarm Volume
The alarm clock offers two volume levels: Low (70 dB) and High (85 dB).

Figure 6.3: Alarm Volume Levels
This image visually represents the two available alarm volume settings: L01 (85 dB) for a louder alarm and L02 (70 dB) for a softer alarm. The alarm clock is shown in a bedroom setting, emphasizing its use as a bedside device.
- Mentre esteu en el mode de visualització de l'hora normal, premeu la tecla + or - buttons to cycle between the two alarm volume levels. The current volume level will be briefly displayed.
6.5 Funció de retroiluminació
To illuminate the display in low light conditions, simply tap the SNOOZE / LIGHT button on the top of the clock. The backlight will activate for approximately 5 seconds, providing clear visibility of the time and other information.
Figure 6.4: Backlight in Action
This image provides a side-by-side comparison of the alarm clock's display. On the left, the clock is shown in a well-lit environment. On the right, the same clock is shown in a dark setting with its 5-second backlight activated, demonstrating how the display becomes clearly visible at night.
6.6 Visualització de la temperatura
The clock displays the indoor temperature. You can switch between Celsius (°C) and Fahrenheit (°F) units.
- To change the temperature unit, press the ° C / ° F botó a la part posterior del rellotge.
7. Manteniment
7.1 Neteja
Wipe the clock with a soft, dry cloth. Do not use abrasive cleaners or solvents, as they may damage the surface.
7.2 Substitució de la bateria
When the low battery indicator appears on the display, or if the display shows "8888" flashing, it is time to replace the batteries. Follow the steps in Section 5.1 Battery Installation to replace the two AAA batteries.
8. Solució De Problemes
| Problema | Causa possible | Solució |
|---|---|---|
| La pantalla està en blanc o tènue. | Les bateries estan esgotades o instal·lades incorrectament. | Canvieu les piles per piles AAA noves, assegurant-vos de la polaritat correcta. |
| L'alarma no sona. | Alarm is not activated, or Weekend Mode is ON. | Ensure the alarm icon is displayed. Check if Weekend Mode is active and deactivate if necessary. |
| Snooze function not working. | Not tapping the SNOOZE/LIGHT button correctly. | Ensure a firm, brief tap on the top SNOOZE/LIGHT button when the alarm is sounding. |
| L'hora/data és incorrecta. | Not set correctly or batteries were removed. | Refer to Section 5.2 Initial Time and Date Setting to re-set. |
9. Especificacions
| Característica | Detall |
|---|---|
| Número de model | 5293 Regne Unit |
| Marca | DOOMAY |
| Dimensions (L x A x A) | 10.9 x 3.81 x 6.9 cm (4.29 x 1.5 x 2.72 polzades) |
| Pes | 127.01 grams (0.28 lliures) |
| Material | Acrilonitril butadiè estirè (ABS) |
| Font d'alimentació | 2 piles AAA (incloses) |
| Tipus de visualització | LCD digital |
| Nivells de volum d'alarma | Low (70 dB), High (85 dB) |
| Durada de la posposar | 9 minuts |
| Durada de la llum de fons | 5 segons |
| Unitats de temperatura | Celsius (°C) / Fahrenheit (°F) |
10. Garantia i Suport
DOOMAY products are designed for reliability and performance. For any questions, technical support, or warranty claims, please contact your retailer or visit the official DOOMAY weblloc web per obtenir ajuda. Si us plau, conserveu el comprovant de compra per a la garantia.
For further information, you may visit the brand's Amazon store page: DOOMAY Store on Amazon


