1. Introducció
This manual provides comprehensive instructions for the installation, operation, and maintenance of your Rampage ZUKO Metal Panel Gaming Case. Please read this manual carefully before using the product to ensure proper functionality and to prevent damage.
El Rampage ZUKO is a gaming computer case designed for optimal performance and aesthetics. It features a robust metal panel construction, a tempered glass side panel, and comes equipped with a pre-installed 600W 80 Plus Bronze certified power supply and four LED fans for efficient cooling and visual appeal.
2. Informació de seguretat
- Always disconnect the power supply from the wall outlet before performing any installation, maintenance, or cleaning procedures.
- Handle internal components with care to avoid electrostatic discharge (ESD) damage. Consider using an anti-static wrist strap.
- Do not open the power supply unit (PSU) as it contains high voltage components.
- Assegureu-vos que hi hagi una ventilació adequada al voltant de la carcassa per evitar el sobreescalfament.
- Mantingueu el producte allunyat de l'aigua, la humitat i les temperatures extremes.
- Avoid placing heavy objects on the case.
3. Contingut del paquet
Verifiqueu que tots els elements siguin presents al paquet:
- Rampage ZUKO Gaming Case with pre-installed 600W 80 Plus Bronze PSU
- 4 x Pre-installed LED Fans (3 front, 1 rear)
- Caixa d'accessoris (que conté cargols, brides i altres peces petites)
- Manual d'usuari (aquest document)
4. Producte acabatview
Familiarize yourself with the key features and components of your Rampage ZUKO case.
4.1 Extern View

El Rampage ZUKO case features a sleek design with a metal front panel and a tempered glass side panel, allowing for a clear view of internal components and LED lighting.
4.2 Tauler frontal

The front panel incorporates a mesh design for optimal airflow, behind which three LED fans are mounted. The top I/O panel provides convenient access to essential ports and controls.
4.3 Panell d'E/S superior

The top I/O panel includes:
- Botó d'engegada
- Botó de restabliment
- LED Control Button (for fan lighting)
- Conector d'auriculars
- Connector de micròfon
- 2 x ports USB 2.0
- 1 x port USB 3.0
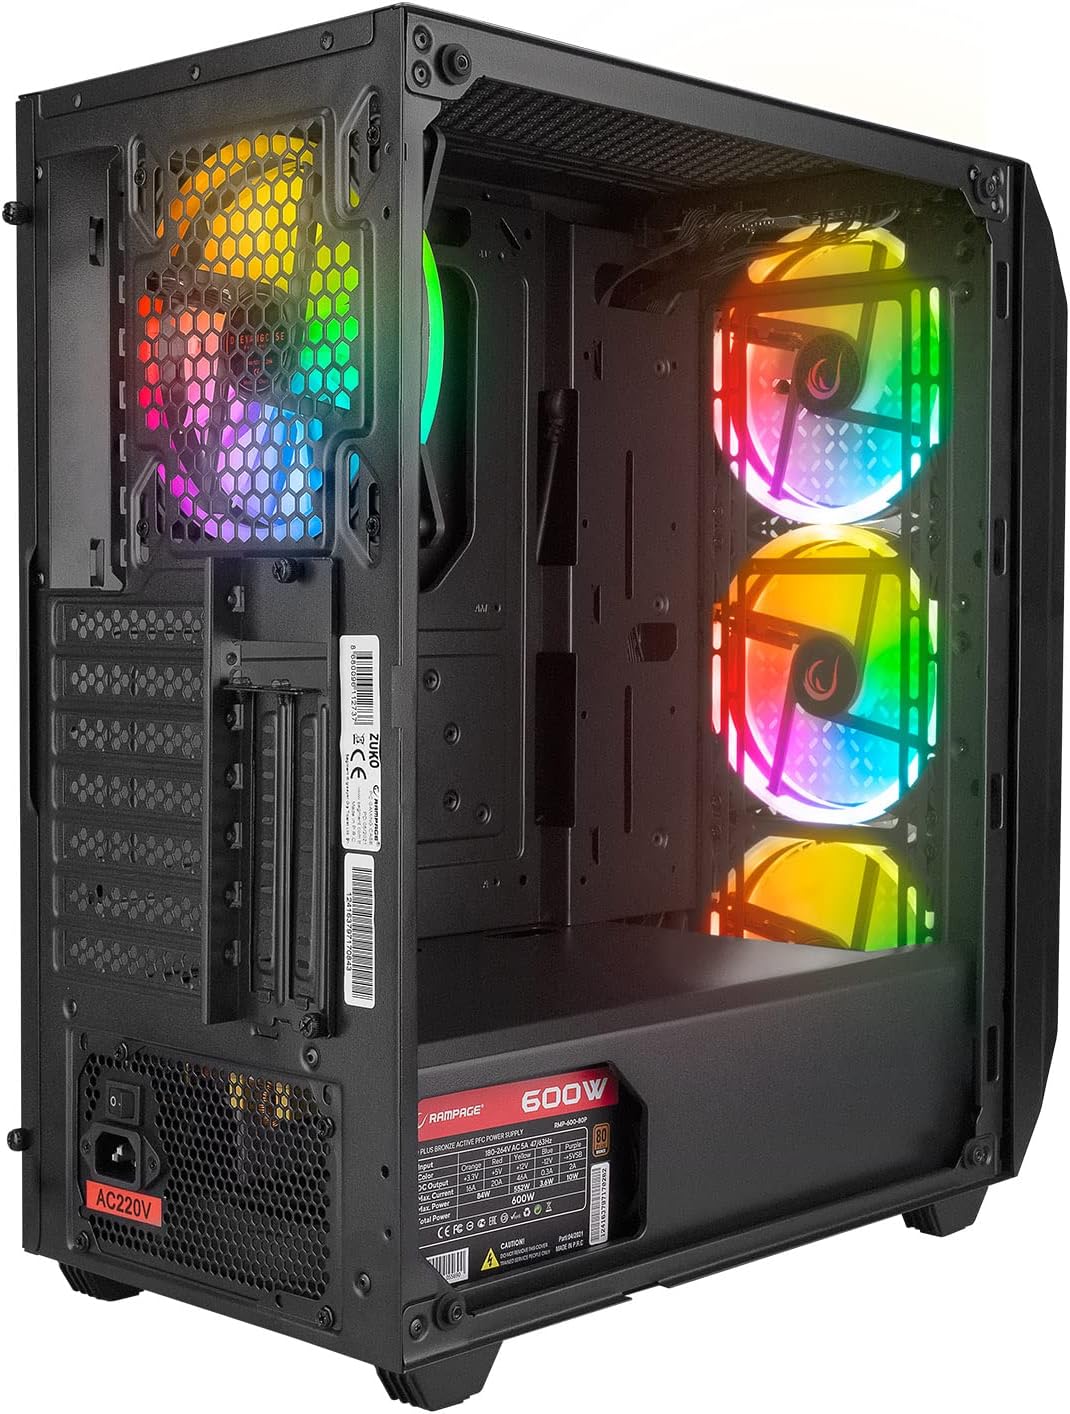
4.4 Panell posterior

The rear panel features a pre-installed exhaust LED fan, multiple expansion slots for add-in cards, and the cutout for the integrated power supply unit.
4.5 Disseny intern
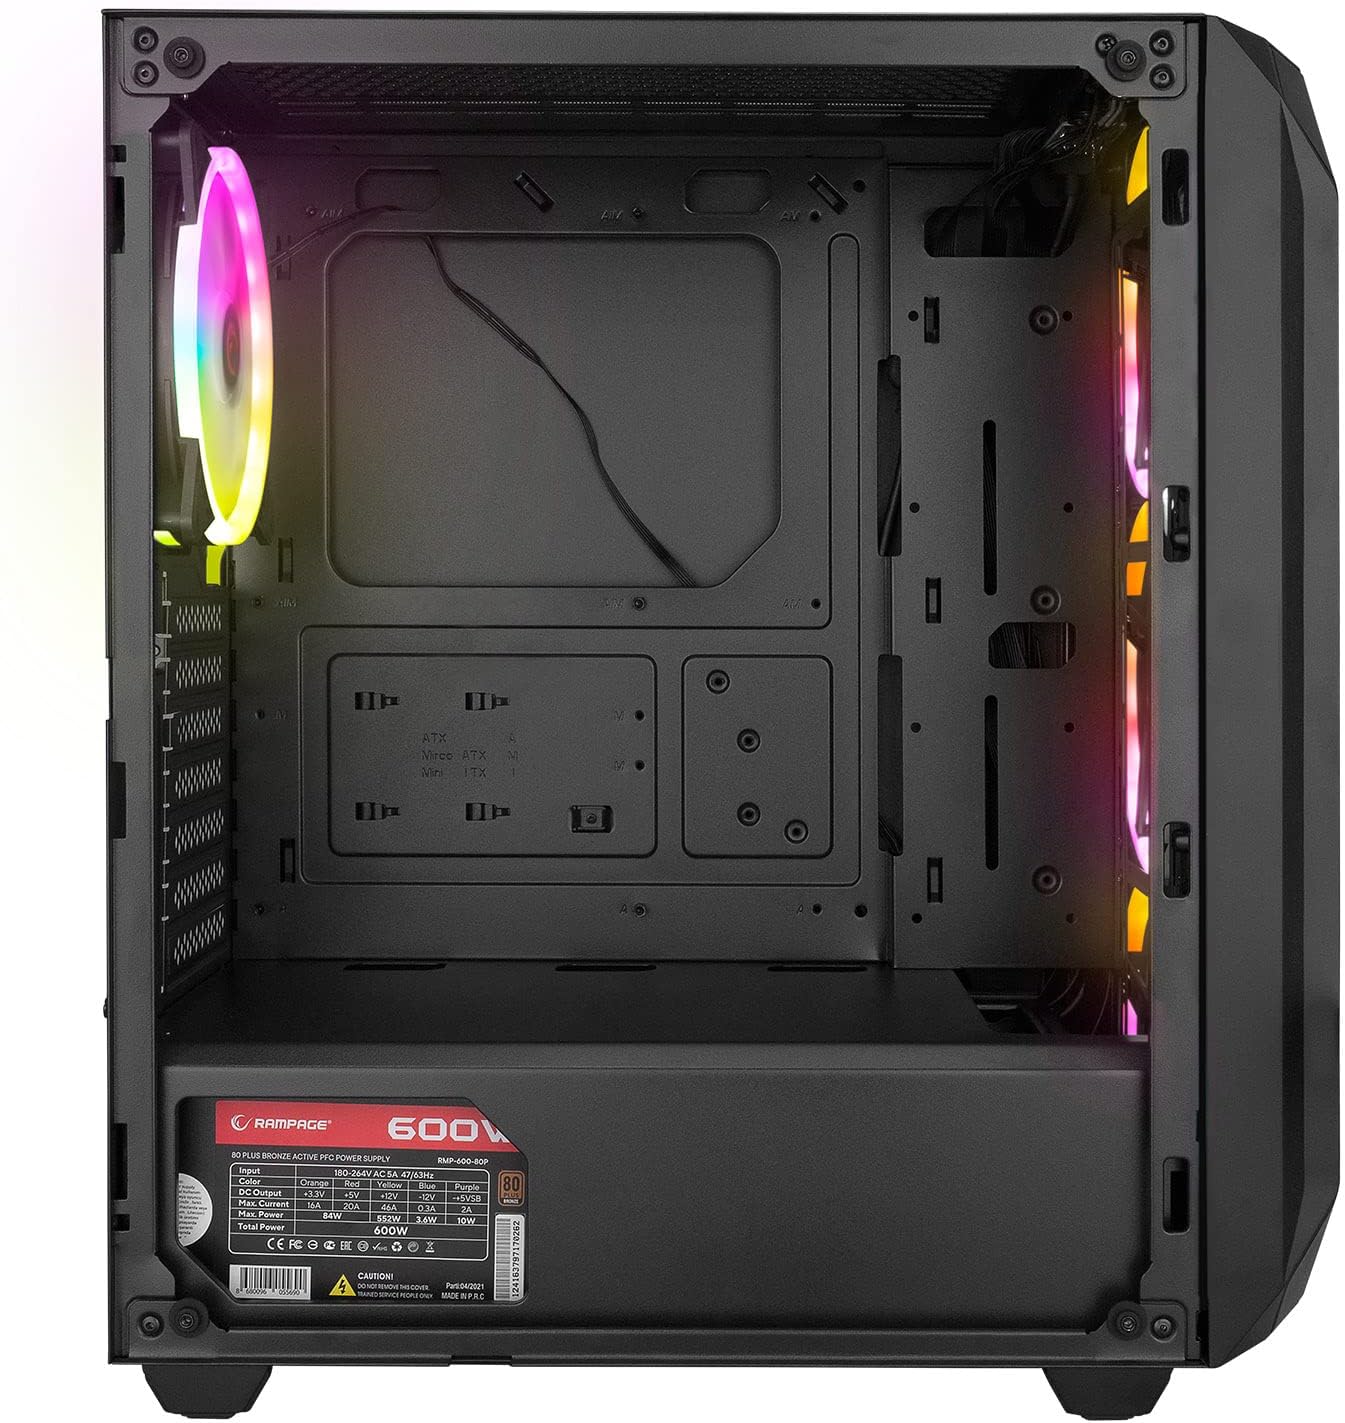
The interior provides ample space for standard ATX, Micro-ATX, and Mini-ITX motherboards, graphics cards, and storage drives. A dedicated shroud covers the power supply, aiding in a clean build and improved airflow.
4.6 Unitat d'alimentació (PSU)
The case comes with a pre-installed 600W 80 Plus Bronze certified power supply, providing reliable and efficient power to your components.
5. Configuració i instal·lació
Follow these steps to install your computer components into the Rampage ZUKO case.
5.1 Preparació del cas
- Col·loqueu la caixa sobre una superfície plana i estable.
- Remove the tempered glass side panel by unscrewing the four thumb screws and carefully lifting it away. Place it on a soft, non-abrasive surface to prevent scratches.
- Remove the right-side metal panel by unscrewing the two thumb screws at the rear and sliding it backward.
5.2 Instal·lació de la placa base
- Install the I/O shield (if not pre-installed on your motherboard) into the cutout at the rear of the case.
- Alinea la placa base amb els separadors de l'interior de la carcassa. Assegura't que els separadors coincideixin amb el format de la placa base (ATX, Micro-ATX, Mini-ITX).
- Fixeu la placa base amb els cargols proporcionats.
5.3 Instal·lació de la unitat d'emmagatzematge
- Locate the 2.5" SSD/HDD mounting points behind the motherboard tray or in the PSU shroud area.
- Locate the 3.5" HDD drive cage (usually under the PSU shroud).
- Mount your storage drives using the appropriate screws.
5.4 Instal·lació de la targeta gràfica i la targeta d'expansió
- Traieu les cobertes de les ranures d'expansió necessàries de la part posterior de la carcassa.
- Insert your graphics card or other expansion cards into the corresponding PCIe slots on your motherboard.
- Fixeu les targetes amb cargols.
5.5 Gestió de cables
Utilize the cable routing holes and tie-down points behind the motherboard tray to manage cables. This improves airflow and aesthetics.
5.6 Connexió dels cables del panell frontal
Connect the front panel cables (Power SW, Reset SW, HDD LED, Power LED, USB 2.0, USB 3.0, HD Audio, and LED control button cable) to the corresponding headers on your motherboard. Refer to your motherboard manual for exact pin layouts.
6. Instruccions de funcionament
6.1 Encès
- Ensure all components are correctly installed and all necessary power cables are connected.
- Connect the power cord to the PSU and then to a wall outlet.
- Gireu l'interruptor d'alimentació de la font d'alimentació a la posició "ON".
- Press the Power Button on the top I/O panel of the case.
6.2 LED Fan Control
El Rampage ZUKO case includes pre-installed LED fans. Use the dedicated LED Control Button on the top I/O panel to cycle through available lighting modes or turn the LEDs on/off. Please note that some models may feature fixed LED colors or limited lighting patterns, as reported by some users. The functionality of the LED button depends on the specific fan controller integrated with the fans.
7. Manteniment
Un manteniment regular ajuda a garantir un rendiment òptim i una major longevitat de la carcassa de l'ordinador.
7.1 Neteja dels filtres de pols
The case is equipped with dust filters (e.g., on the top and under the PSU). Periodically remove and clean these filters to prevent dust buildup, which can restrict airflow and lead to overheating. Clean them with compressed air or by rinsing with water and allowing them to dry completely before reinstallation.
7.2 Neteja general
Netegeu l'exterior de la carcassa amb un drap suau iamp cloth. Avoid using harsh chemicals or abrasive materials that could damage the finish or tempered glass. For internal cleaning, use compressed air to remove dust from components and fans.
8. Solució De Problemes
Aquesta secció tracta problemes comuns que podeu trobar.
8.1 Sense poder
- Ensure the power cord is securely connected to both the PSU and the wall outlet.
- Verify that the PSU's power switch is in the 'ON' position.
- Check all internal power connections, especially the 24-pin motherboard power and 8-pin CPU power cables.
- Confirm that the front panel Power SW cable is correctly connected to the motherboard header.
8.2 Fans Not Spinning / LEDs Not Working
- Comproveu que els cables d'alimentació del ventilador estiguin connectats correctament a la placa base o al controlador del ventilador.
- Ensure the LED control cable from the front panel is connected to the appropriate header (if applicable) or the fan controller.
- As noted in Section 6.2, some models may have fixed LED colors or limited functionality, meaning the LED button might not change colors but only cycle through patterns or turn them on/off.
8.3 Problemes de sobreescalfament
- Ensure all case fans are spinning correctly and oriented for proper airflow (front fans intake, rear fan exhaust).
- Clean any dust buildup from the dust filters and internal components.
- Verifiqueu que hi hagi prou espai al voltant de la carcassa per a la circulació de l'aire.
9. Especificacions
| Característica | Especificació |
|---|---|
| Marca | Rampedat |
| Model | ZUKO |
| Tipus de cas | Gaming Mid-Tower |
| Material | Metall, Vidre temperat |
| Color | Negre |
| Dimensions (paquet) | 50 x 47.4 x 27.4 cm |
| Pes del producte | 8.5 quilos |
| Font d'alimentació preinstal·lada | 600W 80 Plus Bronze |
| Ventiladors preinstal·lats | 4 x LED Fans (3 Front, 1 Rear) |
| Suport de la placa base | ATX, Micro ATX, Mini ITX |
| Ports d'E / S frontals | 2 x USB 2.0, 1 x USB 3.0, HD Audio (Headphone/Mic), Power, Reset, LED Control |
| Mètode de refrigeració | Aire |
| Ús recomanat | Jocs |
10. Garantia i Suport
For warranty information and technical support, please refer to the warranty card included with your product or visit the official Rampedat weblloc web. Conserveu el comprovant de compra per a reclamacions de garantia.