1. Introducció
Thank you for choosing the hygger 4-in-1 Submersible UV Filter Pump. This device is designed to maintain a healthy and clear aquatic environment by providing water purification, filtration, oxygenation, and water circulation. It is suitable for both freshwater and saltwater aquariums ranging from 40 to 80 gallons.
Please read this manual thoroughly before installation and operation to ensure proper use and longevity of the product.
2. Instruccions de seguretat
- Always disconnect power to all aquarium equipment before performing any maintenance, installation, or handling the pump.
- This pump is designed for submersible use only. Ensure it is fully submerged in water during operation.
- No feu funcionar la bomba si el cable d'alimentació o l'endoll estan danyats.
- Do not use this pump for purposes other than those specified in this manual.
- Mantenir fora de l'abast dels nens.
- Assegureu-vos que el voltage rating of the pump matches your local power supply (120 Volts).
3. Contingut del paquet
Verifiqueu que tots els components estiguin presents i no estiguin danyats en obrir l'envàs:
- hygger 4-in-1 Submersible UV Filter Pump unit
- Rainwater pipe assembly
- Oxygenation part (aerator tube and connector)
- Activated carbon filter cotton (2 pieces)
- Ventoses per muntar

Figura 1: Components i dimensions del producte.
4. Producte acabatview
The hygger 4-in-1 filter pump integrates multiple functions into a single compact unit:
- Purificació d'aigua: Built-in 8-watt UV bulb helps eliminate green water and harmful bacteria.
- Aigua filtrada: Activated carbon filter cotton removes impurities and odors.
- Water Circulation & Oxygenation: The 6-watt water pump ensures constant water movement and can be configured for increased oxygen levels.
- Flux ajustable: Maximum flow rate of 210 GPH with adjustable output.

Figure 2: Internal structure and water flow.
5. Configuració i instal·lació
Before installation, ensure the aquarium is clean and filled with water to the desired level.
5.1 Attaching Filter Media
- Unscrew the bottom cover of the pump unit.
- Insert the activated carbon filter cotton pieces into the designated slots inside the pump body.
- Securely reattach the bottom cover.
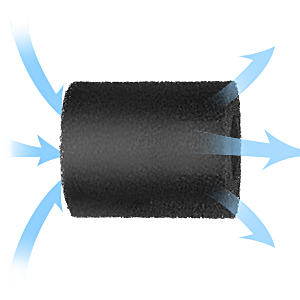
Figure 3: Activated Carbon Filter Cotton.
5.2 Rainwater Pipe Installation
For surface agitation and natural oxygenation:
- Connect the elbow joint to the pump's water outlet.
- Attach the rainwater pipe sections to the elbow joint, ensuring a secure fit.
- Position the pump inside the aquarium using the suction cups, ensuring the rainwater pipe is above the water surface for a waterfall effect.
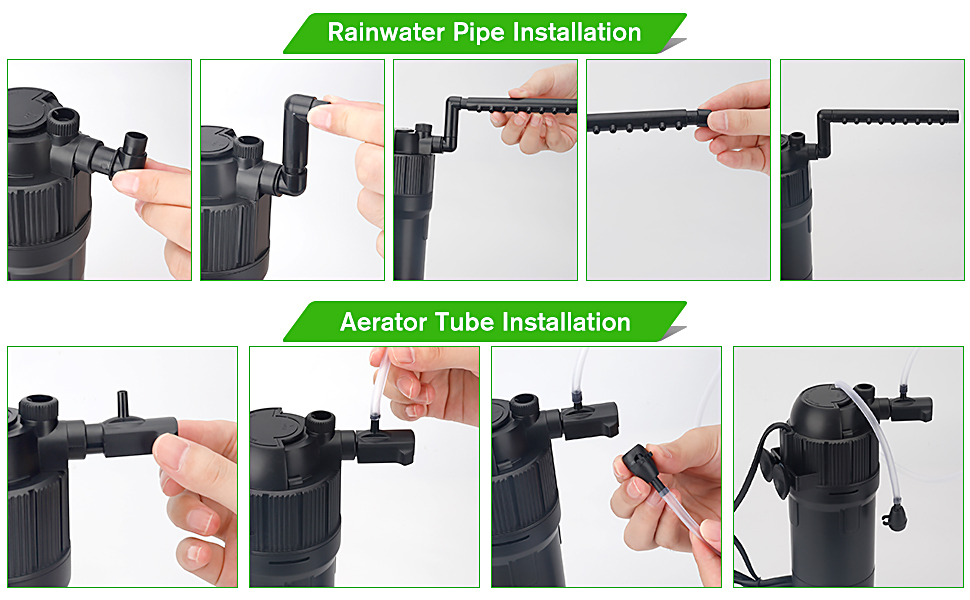
Figure 4: Rainwater Pipe Installation Steps.
5.3 Aerator Tube Installation (for increased oxygen)
For direct air injection and increased dissolved oxygen:
- Connect the aerator tube connector to the pump's water outlet.
- Attach the flexible aerator tube to the connector.
- Position the pump inside the aquarium using the suction cups. The aerator tube should extend above the water surface to draw in air.
- Adjust the intake valve on the aerator tube to control the air volume.
Figure 5: Aerator Tube Installation and Air Volume Adjustment.
5.4 Col·locació general
- Ensure the pump is fully submerged in water before plugging it in.
- Use the strong suction cups to firmly attach the pump to the aquarium glass.
- The 180° adjustable water outlet allows for various angles of placement, suitable for both high and low water levels.

Figure 6: Various Installation Methods.
6. Instruccions de funcionament
6.1 Engegada/apagada
Once installed and fully submerged, plug the pump into a suitable power outlet. The pump will begin operating immediately.
6.2 UV Light Timer Function
The pump features a built-in timer for the UV light, controlled by the inline switch on the power cord. This allows for energy saving and extends the UV bulb's lifespan.
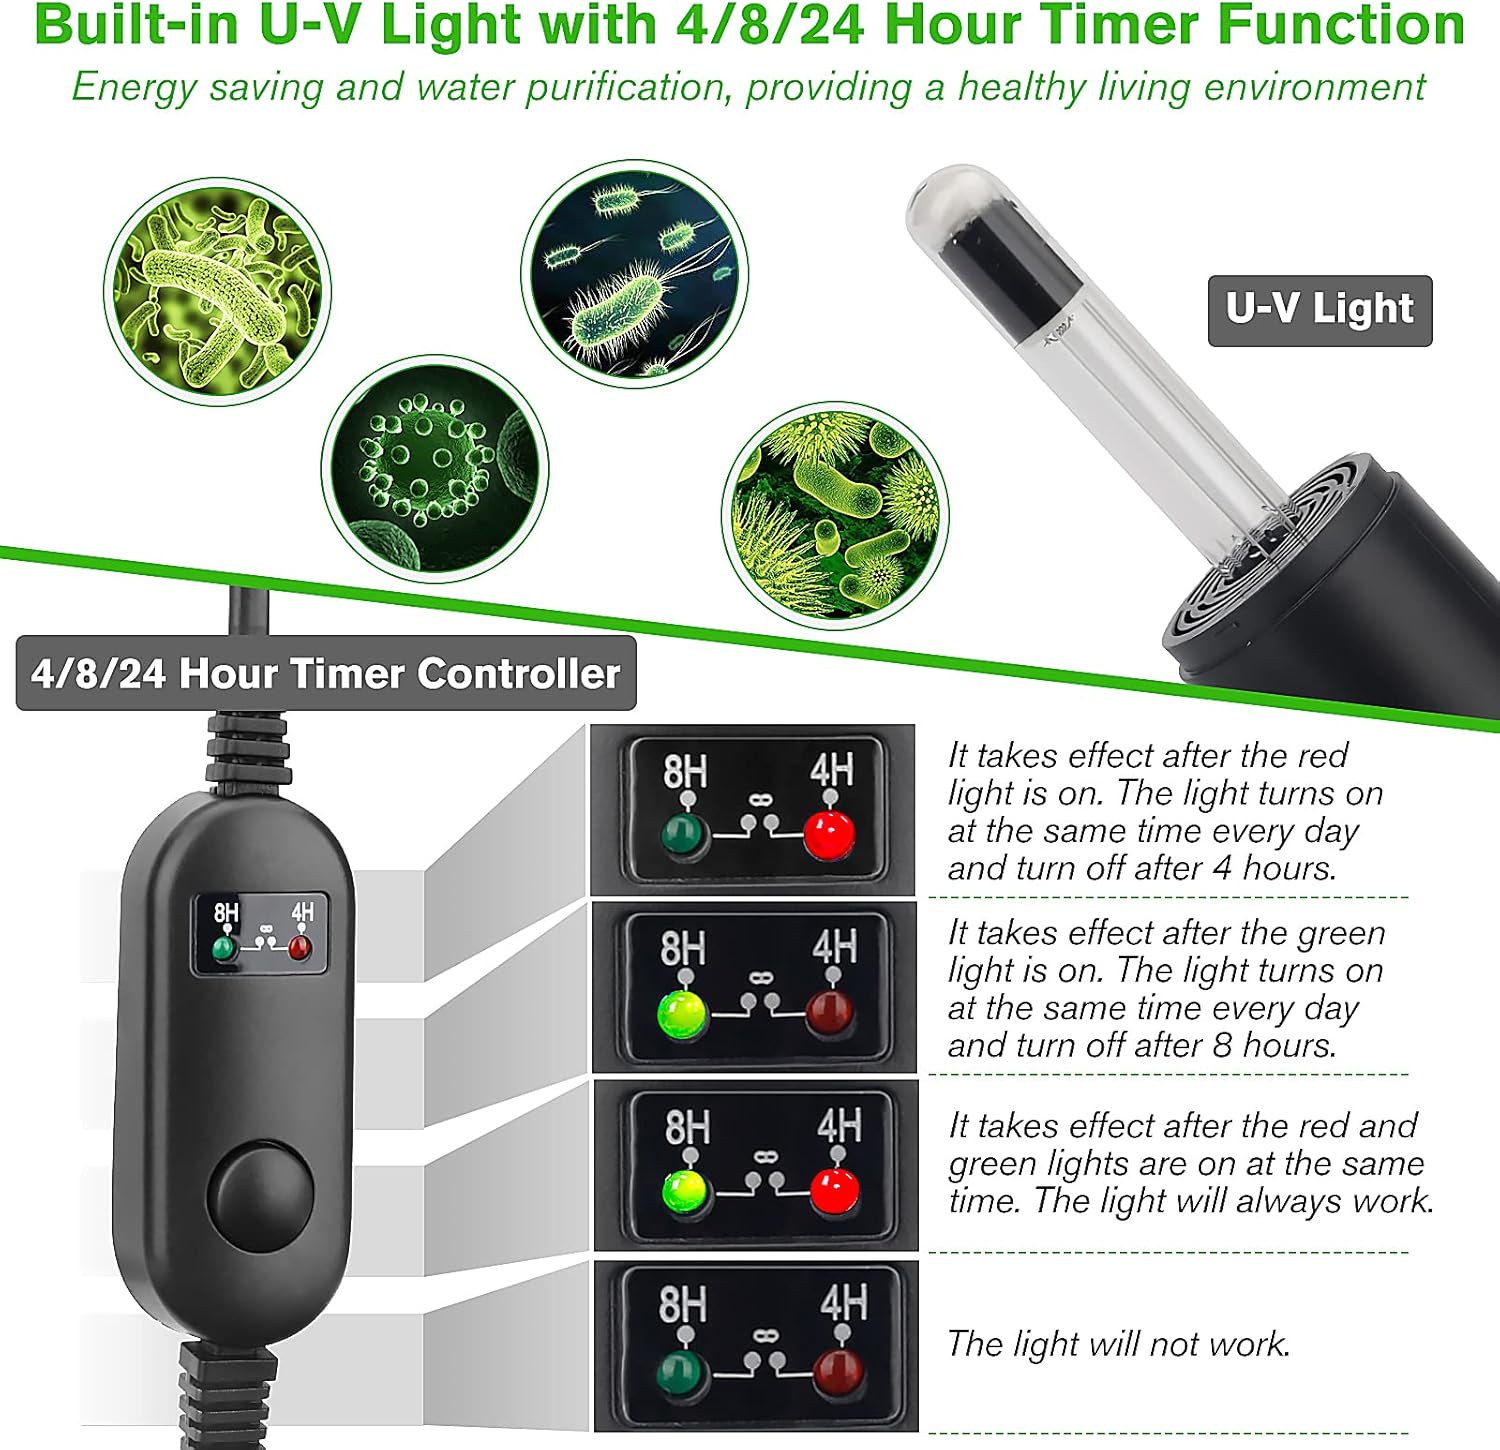
Figure 7: UV Light Timer Controller.
- 4 hores: Press the button until the red indicator light is on. The UV light will operate for 4 hours and then turn off, repeating daily at the same time.
- 8 hores: Press the button until the green indicator light is on. The UV light will operate for 8 hours and then turn off, repeating daily at the same time.
- 24 Hours (Continuous): Press the button until both red and green indicator lights are on. The UV light will operate continuously.
- Apagat: Press the button until no indicator lights are on. The UV light will not operate.
6.3 Ajust del cabal d'aigua
The water flow rate can be adjusted by rotating the knob located on the top of the pump unit. Turn clockwise to decrease flow and counter-clockwise to increase flow.
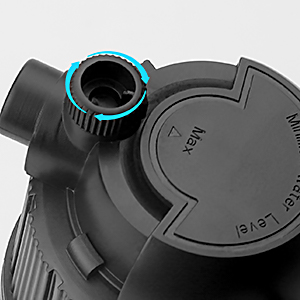
Figure 8: Water Flow Adjustment Knob.
6.4 Adjusting Water Outlet Direction
The water outlet can be rotated 180° to direct the water flow as desired, accommodating various aquarium setups and water levels.
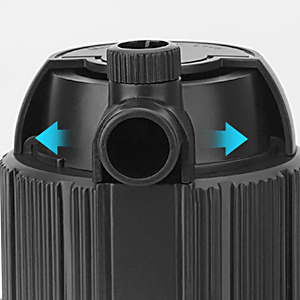
Figure 9: Water Outlet Direction Adjustment.
7. Manteniment
Regular maintenance ensures optimal performance and extends the life of your filter pump.
7.1 Cleaning the Filter Pump
- Desconnecteu l'alimentació: Always unplug the pump from the power outlet before cleaning.
- Remove from Aquarium: Carefully remove the pump from the aquarium.
- Desmuntar: Unscrew the bottom cover and separate the pump components.
- Neteja del medi filtrant: Rinse the activated carbon filter cotton under clean aquarium water (not tap water, to preserve beneficial bacteria) or replace it if heavily soiled.
- Impulsor net: Remove the impeller cover and carefully clean the impeller and its housing with a small brush to remove any debris or buildup.
- Clean UV Quartz Sleeve: Gently wipe the quartz sleeve surrounding the UV bulb with a soft cloth to remove algae or mineral deposits. Do not touch the UV bulb directly with bare hands.
- Torneu a muntar: Reassemble all components in reverse order, ensuring all seals are properly seated.
7.2 UV Bulb Replacement
The UV bulb has a limited lifespan and should be replaced periodically (typically every 6-12 months, depending on usage) to maintain effectiveness.
- Desconnecteu l'alimentació: Desendolleu la bomba.
- Access UV Bulb: Carefully disassemble the pump to access the UV bulb and its quartz sleeve.
- Traieu la bombeta antiga: Gently pull out the old UV bulb. Avoid touching the new bulb with bare hands; use gloves or a soft cloth.
- Inseriu una bombeta nova: Insert the new UV bulb into the socket.
- Torneu a muntar: Reassemble the pump, ensuring the quartz sleeve and all seals are correctly in place.
8. Solució De Problemes
| Problema | Causa possible | Solució |
|---|---|---|
| La bomba no funciona | No power; Impeller jammed; Airlock | Check power connection; Clean impeller; Ensure pump is fully submerged and free of air. |
| Flux d'aigua feble | Clogged filter media; Clogged impeller; Flow adjustment set too low | Clean/replace filter media; Clean impeller; Adjust flow knob. |
| La llum UV no funciona | UV bulb burned out; Timer setting incorrect; Electrical connection issue | Replace UV bulb; Check timer setting on inline controller; Ensure proper power connection. |
| Green water persists | UV bulb ineffective/old; Overfeeding; Excessive light; Insufficient UV run time | Replace UV bulb; Reduce feeding; Limit light exposure; Increase UV timer duration. |
| Soroll excessiu | Impeller obstructed or damaged; Pump not fully submerged; Vibration against tank glass | Clean/inspect impeller; Ensure full submersion; Reposition pump using suction cups. |
9. Especificacions
- Model: B0B3R6X3V5
- Marca: hygger
- Funcions: 4-in-1 (Water Purification, Filtration, Oxygenation, Circulation)
- Bombeta UV Wattage: 8 watts
- Pump Wattage: 6 watts
- Voltage: 120 Volts
- Cabal màxim: 210 GPH (3.5 galons per minut)
- Mida de tanc recomanada: 40-80 galons
- Material: Plàstic
- Pes de l'article: 1.81 lliures
- Dimensions del paquet: 13.54 x 3.78 x 3.35 polzades
10. Garantia i Suport
This hygger product is covered by a standard manufacturer's warranty. For specific warranty details, please refer to the product packaging or contact hygger customer support directly. If you encounter any issues or have questions regarding your filter pump, please visit the official hygger weblloc web o poseu-vos en contacte amb el seu departament d'atenció al client per obtenir ajuda.
For further support, you may also refer to the product page on Amazon: hygger 4-in-1 Submersible UV Filter Pump on Amazon


