1. Introducció
This manual provides comprehensive instructions for the setup, operation, and maintenance of your Tibuta 15.6 Inch WiFi Digital Photo Frame. Please read this manual thoroughly before using the device to ensure proper functionality and to maximize your user experience.

Image 1.1: Tibuta 15.6 Inch WiFi Digital Photo Frame in use, showing its touchscreen capabilities and companion app integration.
2. Informació de seguretat
Observeu les següents precaucions de seguretat per evitar danys al dispositiu o lesions personals:
- No exposeu el dispositiu a l'aigua ni a una humitat excessiva.
- Avoid placing the device near heat sources or in direct sunlight for extended periods.
- Utilitzeu només l'adaptador d'alimentació subministrat.
- No intenteu desmuntar o reparar el dispositiu vosaltres mateixos. Contacteu amb l'assistència al client per obtenir assistència.
- Mantingueu el dispositiu allunyat dels nens i de les mascotes.
3. Contingut del paquet
Verifiqueu que tots els elements siguin presents al paquet:
- Tibuta 15.6 Inch WiFi Digital Photo Frame
- Adaptador d'alimentació
- Manual d'usuari (aquest document)
- Dempeus
4. Producte acabatview
Familiaritzeu-vos amb els components del vostre marc de fotos digital.
4.1 Davant View

Imatge 4.1: Frontal view and key features of the Tibuta 15.6 Inch Digital Photo Frame.
- 15.6 Inch HD Touch Screen: High-definition display with 1280x800 resolution and IPS technology for wide viewangles d'ajust.
- Interfície de pantalla tàctil: Allows for direct interaction with the frame's menus and settings.
4.2 Darrera View i Ports

Imatge 4.2: posterior view of the Tibuta Digital Photo Frame with labeled ports and features.
- Interruptor d'alimentació: Encén o apaga el dispositiu.
- Muntat a la paret: Mounting points for wall installation.
- Ampelevadors: Integrated speakers for audio playback.
- Ranura per a targetes Micro SD: Admet targetes Micro SD de fins a 128 GB per a un emmagatzematge ampliat.
- Presa per a auriculars: Per connectar dispositius d'àudio externs.
- Port USB tipus A: For connecting USB drives or other peripherals.
- Port mini USB: For data transfer (if applicable).
- Port d'alimentació de CC: Es connecta a l'adaptador de corrent.
- Stand: Attachable stand for desktop placement.
5. Configuració
5.1 Encès inicial
- Attach the stand to the back of the photo frame for stable placement on a flat surface.
- Connecteu l'adaptador de corrent al port d'alimentació de CC a la part posterior del marc.
- Connecteu l'adaptador de corrent a una presa de corrent.
- Press the Power Switch to turn on the device.
- Follow the on-screen prompts to select your language, time zone, and connect to a Wi-Fi network.
5.2 Connexió a Wi-Fi
- From the main menu, navigate to "Settings" and then "Wi-Fi".
- Seleccioneu la xarxa Wi-Fi que vulgueu de la llista.
- Enter the Wi-Fi password using the on-screen keyboard.
- Tap "Connect". Once connected, a Wi-Fi icon will appear on the screen.
5.3 Installing the Companion App
To share photos and videos remotely, download the dedicated companion app.

Image 5.1: Download the Uhale App from Google Play or the App Store.
- On your smartphone or tablet, open the Google Play Store (for Android devices) or the Apple App Store (for iOS devices).
- Cerca "Uhale App" (or the specified app name in your frame's instructions).
- Baixeu i instal·leu l'aplicació.
- Follow the in-app instructions to pair your device with the digital photo frame. This typically involves entering a unique code displayed on your photo frame.
6. Instruccions de funcionament
6.1 Sharing Photos and Videos via App
Once the frame is connected to Wi-Fi and paired with the app:
- Obriu l'aplicació complementària al vostre telèfon intel·ligent.
- Select the photos or videos you wish to share.
- Tap the "Send" or "Share" button within the app.
- The selected media will be transferred to your digital photo frame and displayed.
The frame supports various display modes, including timing, zooming, and cropping, which can often be adjusted via the app or directly on the frame's settings.
6.2 Using External Storage (Micro SD Card)
The frame has 16GB of built-in storage and supports Micro SD cards up to 128GB.
- Insert a Micro SD card into the designated slot on the back of the frame.
- The frame will automatically detect the card.
- Navigate to the "Gallery" or "Files" section on the frame to access content from the Micro SD card.
- Podeu copiar files from the Micro SD card to the internal storage or play them directly.
6.3 Automatic Rotation (Gravity Sensing)
The frame features gravity sensing for automatic rotation, adjusting the display orientation based on how the frame is positioned (landscape or portrait).
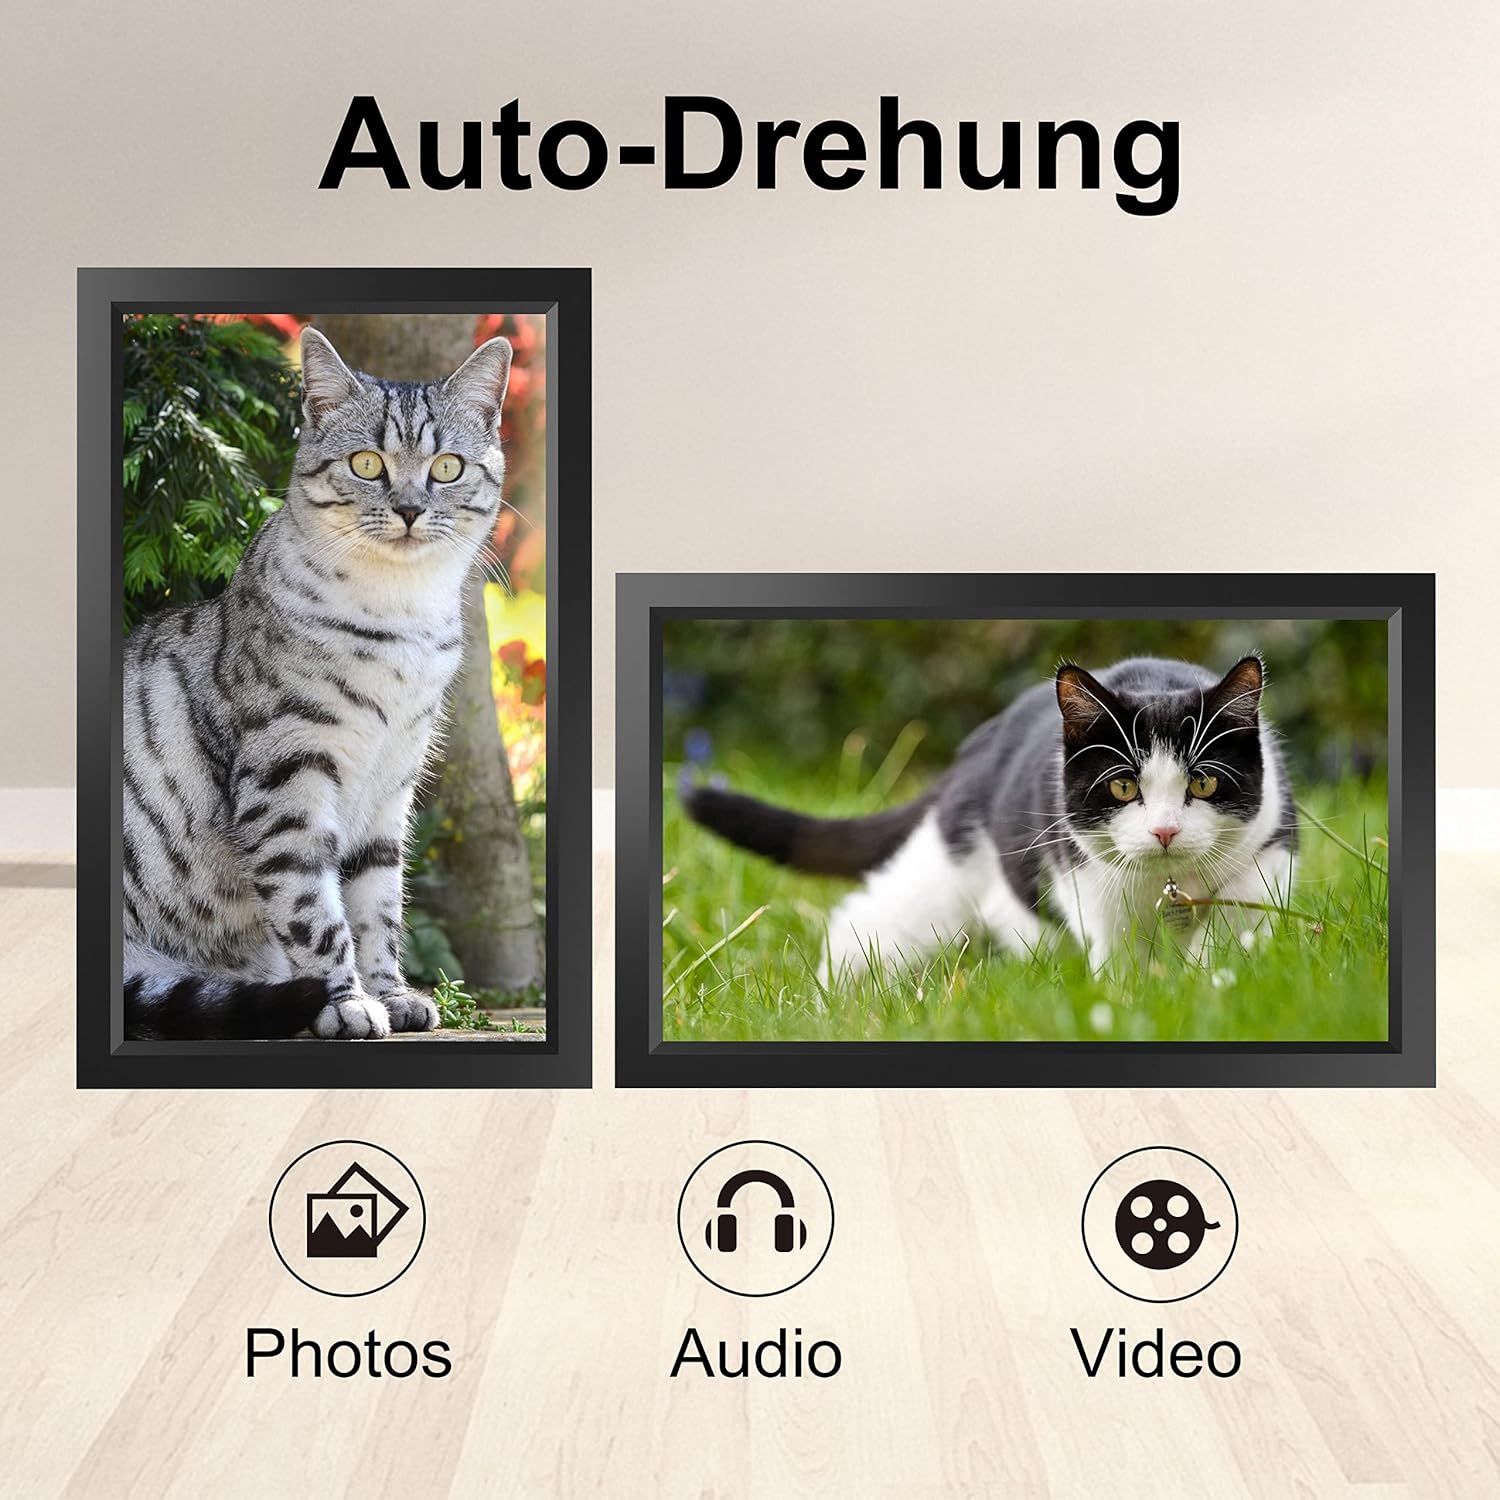
Image 6.1: Automatic display rotation based on frame orientation.
Ensure the gravity sensing feature is enabled in the frame's settings if you wish to utilize this functionality.
6.4 Configuració de la pantalla
Personalitza el teu viewing experience through the frame's settings menu:
- Interval de presentació de diapositives: Adjust how long each photo is displayed.
- Efectes de transició: Choose different effects between photos.
- Brillantor: Ajusteu la brillantor de la pantalla.
- Sleep Mode/Timer: Set schedules for the frame to turn on/off automatically.
- Zoom/Crop: Options to adjust how photos fit the screen.
7. Manteniment
7.1 Neteja de la pantalla
To clean the touchscreen, gently wipe it with a soft, lint-free cloth. For stubborn smudges, slightly dampNetegeu el drap amb aigua o una solució netejadora de pantalles. Eviteu utilitzar productes químics agressius o materials abrasius.
7.2 Atenció general
- Keep the frame in a dry environment.
- Protect it from dust by occasionally wiping the frame's body with a soft cloth.
- Eviteu deixar caure el dispositiu o sotmetre-lo a forts impactes.
8. Solució De Problemes
| Problema | Causa possible | Solució |
|---|---|---|
| El marc no s'encén. | L'adaptador de corrent no està connectat o està defectuós. | Ensure the power adapter is securely connected to both the frame and a working power outlet. Try a different outlet. |
| No es pot connectar a la Wi-Fi. | Incorrect password, out of range, or network issue. | Verify the Wi-Fi password. Move the frame closer to the router. Restart your router. |
| No apareixen les fotos/vídeos. | App not paired, incorrect file format, or storage issue. | Ensure the app is correctly paired. Check if the media files are in a supported format. Verify sufficient storage space on the frame or SD card. |
| La pantalla tàctil no respon. | Error temporal de programari. | Restart the frame by holding the power button or unplugging and replugging the power adapter. |
| Automatic rotation not working. | Feature disabled or sensor issue. | Check the frame's settings to ensure gravity sensing/auto-rotation is enabled. |
9. Especificacions
| Característica | Detall |
|---|---|
| Número de model | TID15.6 |
| Mida de la pantalla | 15.6 polzades |
| Tipus de visualització | Pantalla tàctil IPS |
| Resolució | 1280 x 800 |
| Emmagatzematge intern | 16 GB (aprox. 20,000 fotos) |
| Emmagatzematge extern | Targeta micro SD de fins a 128 GB |
| Connectivitat | Wi-Fi |
| Característiques especials | Gravity Sensing Automatic Rotation, Touchscreen |
| Dimensions (L x A x A) | 39.12 x 24.64 x 2.51 cm |
| Pes | 1.48 kg |
| Font d'alimentació | Battery Powered (includes 1 Lithium Ion battery) |
Nota: les especificacions estan subjectes a canvis sense previ avís.
10. Garantia i Suport
10.1 Garantia del producte
The Tibuta Digital Photo Frame comes with a one-year product warranty. This warranty covers manufacturing defects and operational issues arising from normal use. If any issues arise during this period, please contact our after-sales support team for assistance.
10.2 Atenció al client
For technical support, warranty claims, or any other inquiries, please refer to the contact information provided on the Tibuta official website or your purchase documentation. When contacting support, please have your model number (TID15.6) and purchase date available.


