1. Introducció
Thank you for choosing the Estink 4-Channel Car Audio Amplifier, Model GM-D9500F. This amplifier is designed to enhance your in-car audio experience with powerful and clear sound. Featuring an aluminum alloy shell for efficient heat dissipation, this 4-channel amplifier can drive multiple speakers, providing flexible audio configurations for your vehicle. Please read this manual thoroughly before installation and operation to ensure proper use and to maximize the performance and longevity of your device.
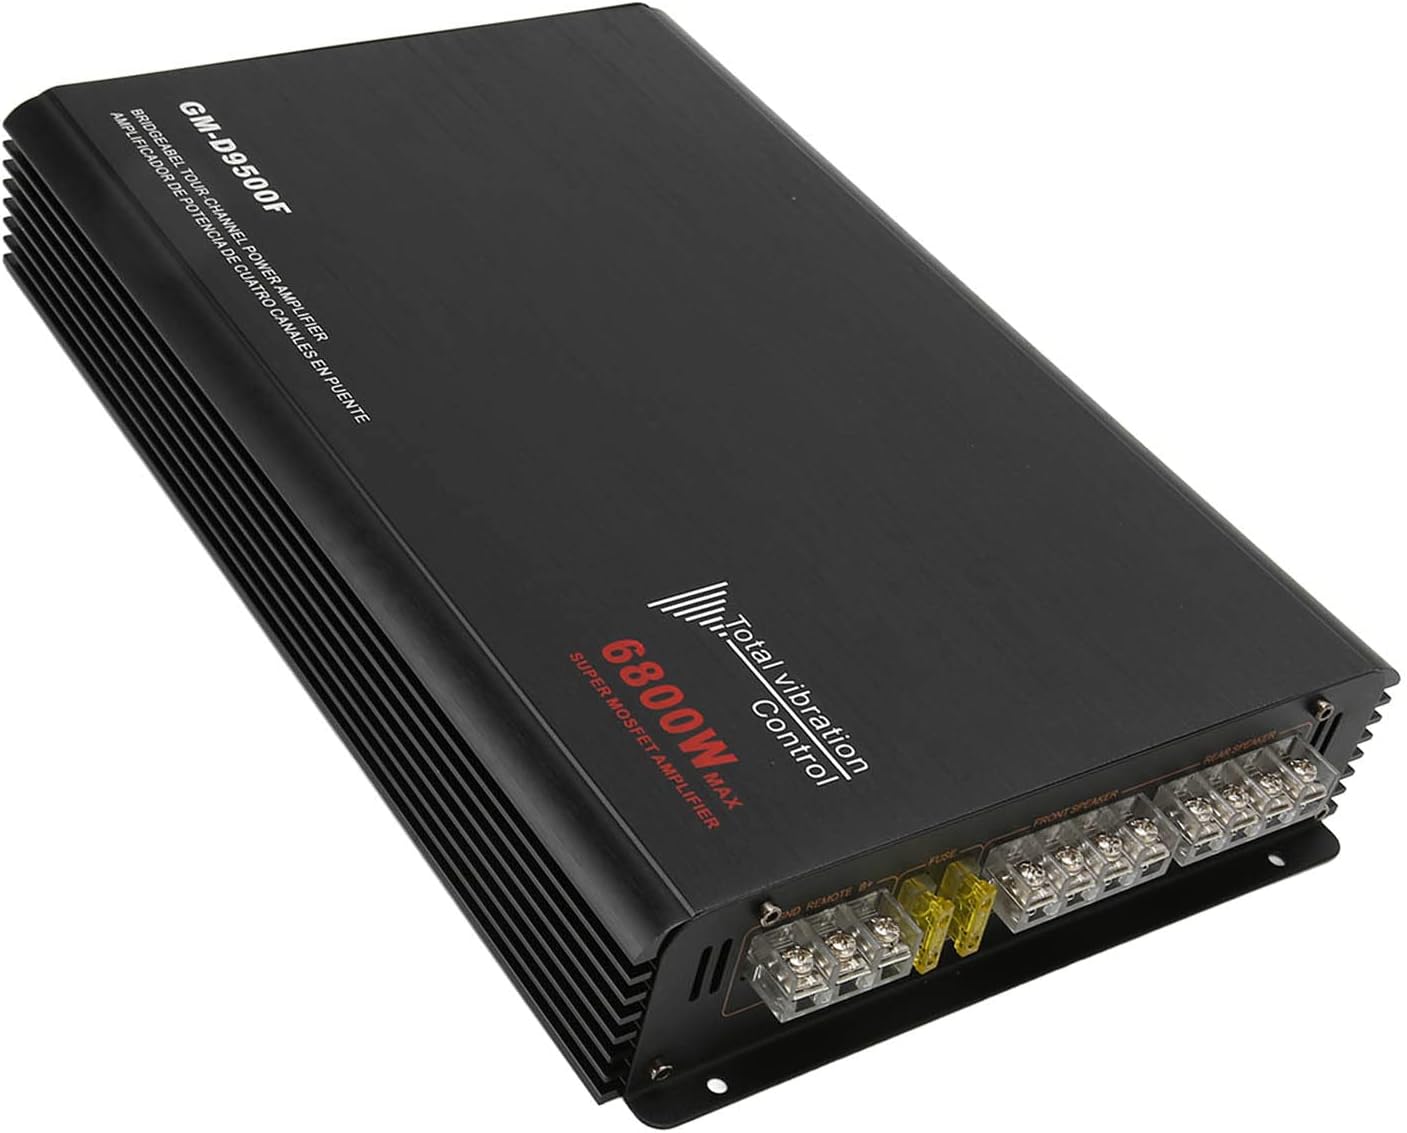
Imatge 1.1: Part superior view of the Estink GM-D9500F Car Audio Ampmés viu.
2. Informació de seguretat
- Always disconnect the vehicle's battery before installing or servicing any car audio equipment to prevent electrical shock or damage.
- Ensure all wiring is properly insulated and secured to prevent short circuits and potential fire hazards.
- Instal·leu el amplifier in a location that allows for adequate ventilation. Avoid mounting in enclosed spaces where heat can build up.
- Use appropriate fuse ratings as specified. Never replace a fuse with one of a higher amperage.
- Funcionant el amplifier with a lower impedance load than recommended can cause overheating. While this may not immediately damage internal circuitry, it can trigger the thermal protection circuit, shutting down the amplifier. Continuous operation under such conditions can reduce the ampvida útil del vividor.
- Consulteu un instal·lador professional d'àudio per a cotxes si no teniu cap dubte sobre alguna part del procés d'instal·lació.
3. Contingut del paquet
Si us plau, comproveu el paquet per veure si hi ha els elements següents:
- 1 x Estink 4-Channel Car Audio Amplifier (GM-D9500F)
- 2 x Fuses (Inserts)
- 4 x cargols de muntatge
- 1 x Manual d'usuari

Image 3.1: The Estink Car Audio Amplifier shown with its included fuses and mounting screws.
4. Característiques del producte
- 4-Channel Design: Capable of driving four speakers, supporting configurations for coaxial speakers or a set of speakers with separate treble units.
- Sortida d'alta potència: Each channel can easily drive 4Ω speaker loads when used in stereo mode.
- Durable Aluminum Alloy Shell: Provides robust protection and efficient heat dissipation, ensuring stable performance.
- Connexió fàcil: Features an ACC line connection option for vehicles without a dedicated power amplifier control line output.
- Bridgeable Channels: Allows for higher power output to subwoofers or other demanding speakers.
5. Component Identification (Panel Features)
Familiarize yourself with the various connections and controls on your ampmés viu:
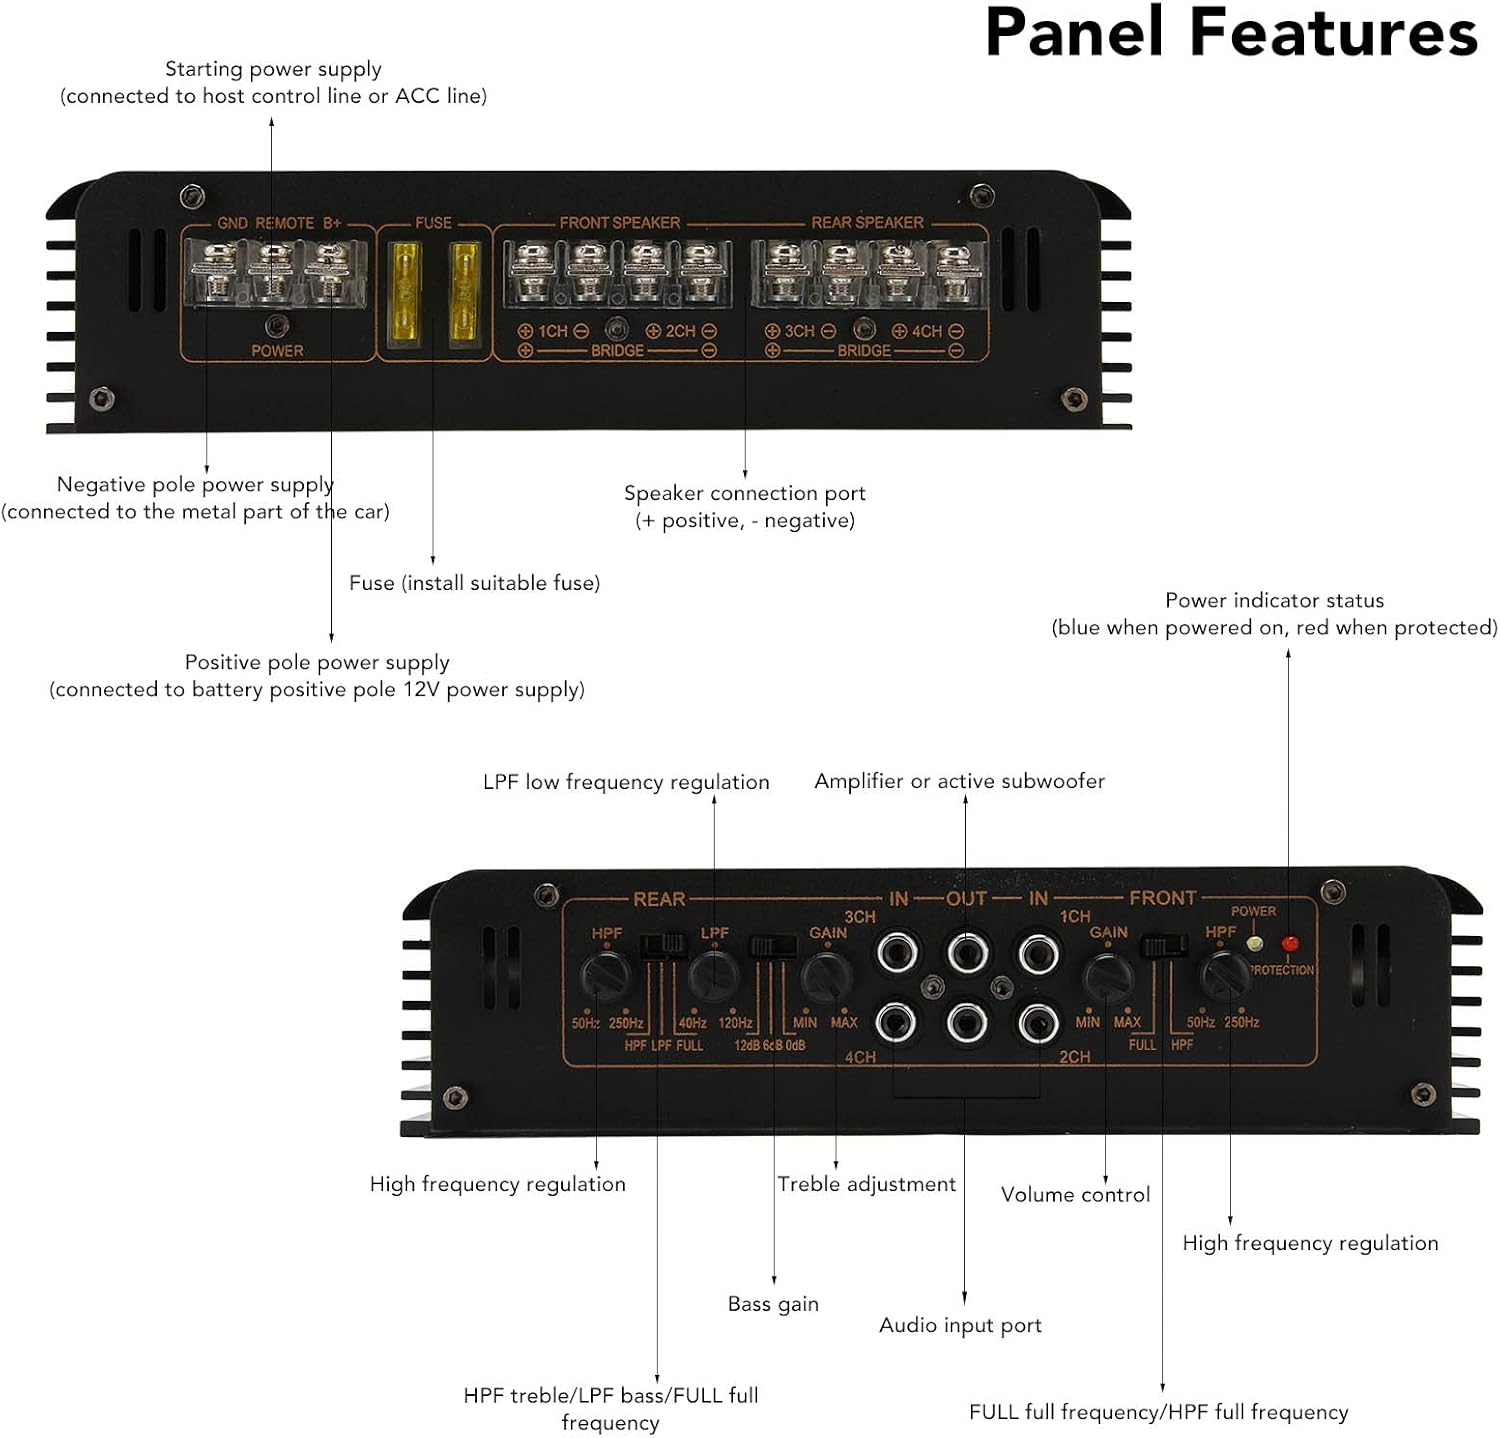
Image 5.1: Detailed diagram of the amplifier's input and output panels.
Left Panel (Power & Speaker Connections):
- GND: Negative power supply terminal. Connect to the metal part of the car chassis.
- COMANDAMENT: Starting power supply (ACC line). Connect to the vehicle's host control line or ACC line.
- B+: Positive power supply terminal. Connect to the battery positive 12V power supply.
- FUSIBLE: Fuse holder. Install suitable fuses here.
- FRONT SPEAKER (1CH, 2CH): Speaker connection ports for front channels (positive and negative).
- REAR SPEAKER (3CH, 4CH): Speaker connection ports for rear channels (positive and negative).
- PONT: Terminals for bridged speaker connections.
Right Panel (Audio Controls):
- LPF (Low Pass Filter) Frequency Regulation: Adjusts the cutoff frequency for low-pass audio output.
- HPF (High Pass Filter) Frequency Regulation: Adjusts the cutoff frequency for high-pass audio output.
- GUANY: Input sensitivity control. Adjusts the amplifier's input level to match the head unit's output.
- AJUSTE D'AGUS: Controls the high-frequency output level.
- BASS GAIN: Controls the low-frequency output level.
- CONTROL DE VOLUM: Ajusta el volum de sortida general.
- AUDIO INPUT PORT (IN): RCA input jacks for connecting to your head unit's audio output.
- POWER INDICATOR STATUS: Blue indicates power on, Red indicates protection mode.
6. Instal·lació
Una instal·lació correcta és crucial per a un rendiment i una seguretat òptims. Seguiu aquests passos amb atenció:
6.1 Muntatge del Ampmés viu
- Choose a secure, well-ventilated location in your vehicle, away from direct sunlight, heat sources, and moisture. Ensure there is enough space around the ampLificador per a la circulació d'aire.
- Mark the mounting holes using the amplifier as a template.
- Drill pilot holes if necessary, being careful not to damage any vehicle wiring or components.
- Assegureu-vos el amplificador utilitzant els cargols de muntatge proporcionats.
6.2 Connexions de cablejat
Abans de fer qualsevol connexió, assegureu-vos que la bateria del vehicle estigui desconnectada.

Image 6.1: Rear panel connections for power, ground, remote, and speakers.
- Connexió a terra (GND): Connect the GND terminal to a clean, unpainted metal surface on the vehicle's chassis. Ensure a solid, low-resistance connection.
- Positive Power (B+) Connection: Connect the B+ terminal directly to the positive terminal of the vehicle's battery. Use a power cable of appropriate gauge and install an inline fuse (not supplied) within 18 inches (45 cm) of the battery.
- Remote (REMOTE) Connection: Connect the REMOTE terminal to the remote output of your car's head unit. If your vehicle host does not have a power amplifier control line output, you can connect this power amplifier to the key switch ACC line on the vehicle.
- Connexions d'altaveus: Connect your speakers to the FRONT SPEAKER (1CH, 2CH) and REAR SPEAKER (3CH, 4CH) terminals. Ensure correct polarity (+ to + and - to -). For bridged mode, refer to the markings on the amplifier panel. The minimum load impedance recommended for subwoofers in bridged mode is 3Ω, and for full range speakers, it is 4Ω.
- Audio Input (RCA) Connection: Connect the RCA audio input cables from your head unit's pre-out to the amplifier's AUDIO INPUT PORT (IN).
7. Instruccions de funcionament
Un cop el amplifier is installed and wired, you can power it on and adjust the settings.
7.1 Encès inicial
- Torneu a connectar la bateria del vehicle.
- Turn on your car's ignition and head unit. The amplifier's power indicator should illuminate blue. If it illuminates red, refer to the Troubleshooting section.
7.2 Adjusting Audio Settings
- Control GAIN: Start with the GAIN control set to minimum. Gradually increase it until you achieve a clear, undistorted sound at your desired volume level from the head unit. Avoid setting the gain too high, as this can introduce distortion.
- LPF/HPF Frequency Regulation: Adjust these filters based on your speaker type and desired sound. LPF is typically used for subwoofers, allowing only low frequencies to pass. HPF is used for full-range or component speakers to block low frequencies that they cannot reproduce effectively.
- TREBLE/BASS GAIN: Fine-tune these controls to adjust the high and low-frequency response to your preference. Make small adjustments and listen for the desired effect.
- CONTROL DE VOLUM: Use this to set the overall output volume of the ampmés viu.
8. Especificacions
| Característica | Especificació |
|---|---|
| Marca | Estink |
| Model | GM-D9500F |
| Tipus d'element | Àudio del cotxe Ampmés viu |
| Material | Aliatge d'alumini |
| Nombre de canals | 4 |
| Maximum Output Power (4Ω) | 60W RMS x 4CH |
| Maximum Output Power (2Ω) | 80W RMS x 4CH |
| Bridge Connection Power | 160W RMS x 2CH |
| Minimum Load Impedance (Bridged Subwoofer) | 3Ω |
| Minimum Load Impedance (Bridged Full Range) | 4Ω |
| Tipus de muntatge | Muntatge en superfície |
| Potència de sortida (total) | 240 watts (RMS) |
9. Solució De Problemes
Si teniu problemes amb el vostre amplifier, consulteu els següents problemes i solucions habituals:
- Amplifier does not power on:
- Check the power (B+), ground (GND), and remote (REMOTE) connections for proper wiring and secure contact.
- Verify that the inline fuse near the battery and the fuses on the amplifier are intact. Replace any blown fuses with the correct amperage.
- Ensure the vehicle's ignition and head unit are on.
- Power indicator is red (Protection Mode):
- Això indica el amplifier has detected an issue and entered protection mode. Common causes include overheating, short circuits in speaker wiring, or an impedance load that is too low.
- Check for proper ventilation around the amplifier. Allow it to cool down.
- Inspect all speaker wires for any shorts (bare wires touching each other or the vehicle chassis).
- Verify that the speaker impedance matches the amplifier's specifications (minimum 3Ω for bridged subwoofers, 4Ω for bridged full range).
- Sense so o so distorsionat:
- Check all RCA audio input connections from the head unit to the ampmés viu.
- Ensure speaker wires are correctly connected and not reversed in polarity.
- Adjust the GAIN control. If set too high, it can cause distortion.
- Check the head unit's volume and settings.
10. Manteniment
To ensure the longevity and optimal performance of your Estink Car Audio Amplificador, seguiu aquestes senzilles pautes de manteniment:
- Neteja: Netegeu periòdicament el amplifier's exterior with a soft, dry cloth to remove dust and dirt. Avoid using harsh chemicals or abrasive cleaners.
- Ventilació: Assegureu-vos que el amplifier's cooling fins are free from obstructions to allow for proper airflow and heat dissipation.
- Connexions: Occasionally check all power, ground, remote, and speaker connections to ensure they remain secure and free from corrosion.
11. Garantia i Suport
For warranty information or technical support, please refer to the documentation provided at the time of purchase or contact Estink customer service through the retailer where the product was purchased. Keep your purchase receipt as proof of purchase.