1. Introducció
This manual provides detailed instructions for the installation, operation, and maintenance of your APNX C1 Mid-Tower ATX PC Case. Please read this manual thoroughly before beginning assembly to ensure proper setup and optimal performance. This case is designed to accommodate a wide range of PC components, offering excellent cooling capabilities and a user-friendly building experience.

Figure 1: The APNX C1 Mid-Tower ATX PC Case, showcasing its mesh front panel and pre-installed ARGB fans.
2. Característiques clau
- Rendiment de refrigeració superior: Equipped with 4 pre-installed 30mm APNX FP1 fans (3x 140mm front, 1x 120mm rear) and support for up to 11 total fan slots.
- Extensive Liquid Cooling Support: Accommodates 360mm liquid coolers on both the top and side panels, with additional support at the rear.
- High-End Component Compatibility: Designed to fit the latest GPUs up to 395mm in length and powerful CPU coolers.
- Construcció robusta: Features a thick steel frame for enhanced durability and stability.
- Estètica Premium: Curved edges, a high-quality finish, and a full tempered glass side panel for a modern look.
- Disseny fàcil d'utilitzar: Quick-release panels facilitate easy installation and maintenance.
- Integrated ARGB Control: Includes a 5-port PWM ARGB control hub for managing Addressable RGB fans and lighting.
- Gestió eficient de cables: Offers 40mm of internal depth for tidy cable routing, improving airflow and aesthetics.
3. Configuració i instal·lació
3.1 Desembalatge
Carefully remove the PC case from its packaging. Inspect the case for any signs of damage that may have occurred during shipping. It is recommended to retain all packaging materials for future transport or in case warranty service is required.
3.2 Accés a l'interior
The APNX C1 features quick-release panels for convenient access to the interior. Gently pull the side panels to detach them from the chassis, exposing the internal compartments for component installation.

Figura 2: Explotat view illustrating the quick-release panels and modular design for easy installation.
3.3 Instal·lació de la placa base
Install your ATX, Micro ATX, or Mini-ITX motherboard onto the pre-installed standoffs within the case. Secure the motherboard using the appropriate screws. Ensure the I/O shield is properly seated before mounting the motherboard.
3.4 Instal·lació de la font d'alimentació
Mount the power supply unit (PSU) in the designated bottom compartment. Secure it with screws from the rear of the case. Route the necessary power cables through the provided cutouts for efficient cable management.
3.5 Instal·lació de la unitat d'emmagatzematge
Install 2.5-inch SSDs or 3.5-inch HDDs into the available drive bays. The case provides multiple mounting options; refer to the internal structure for specific locations and securing mechanisms.
3.6 Instal·lació de la targeta gràfica (GPU)
Insert your graphics card into the appropriate PCIe slot on the motherboard. The APNX C1 supports GPUs up to 395mm in length. Secure the GPU with screws at the rear expansion slots.
3.7 Cooling System Installation (Fans & Liquid Coolers)
The case includes 4 pre-installed FP1 ARGB fans (three 140mm fans at the front and one 120mm fan at the rear). Additional fans can be installed in the remaining slots, supporting up to 11 total fans. For liquid cooling, the case supports 360mm radiators on both the top and side panels. Ensure proper fan orientation for optimal airflow (intake/exhaust).
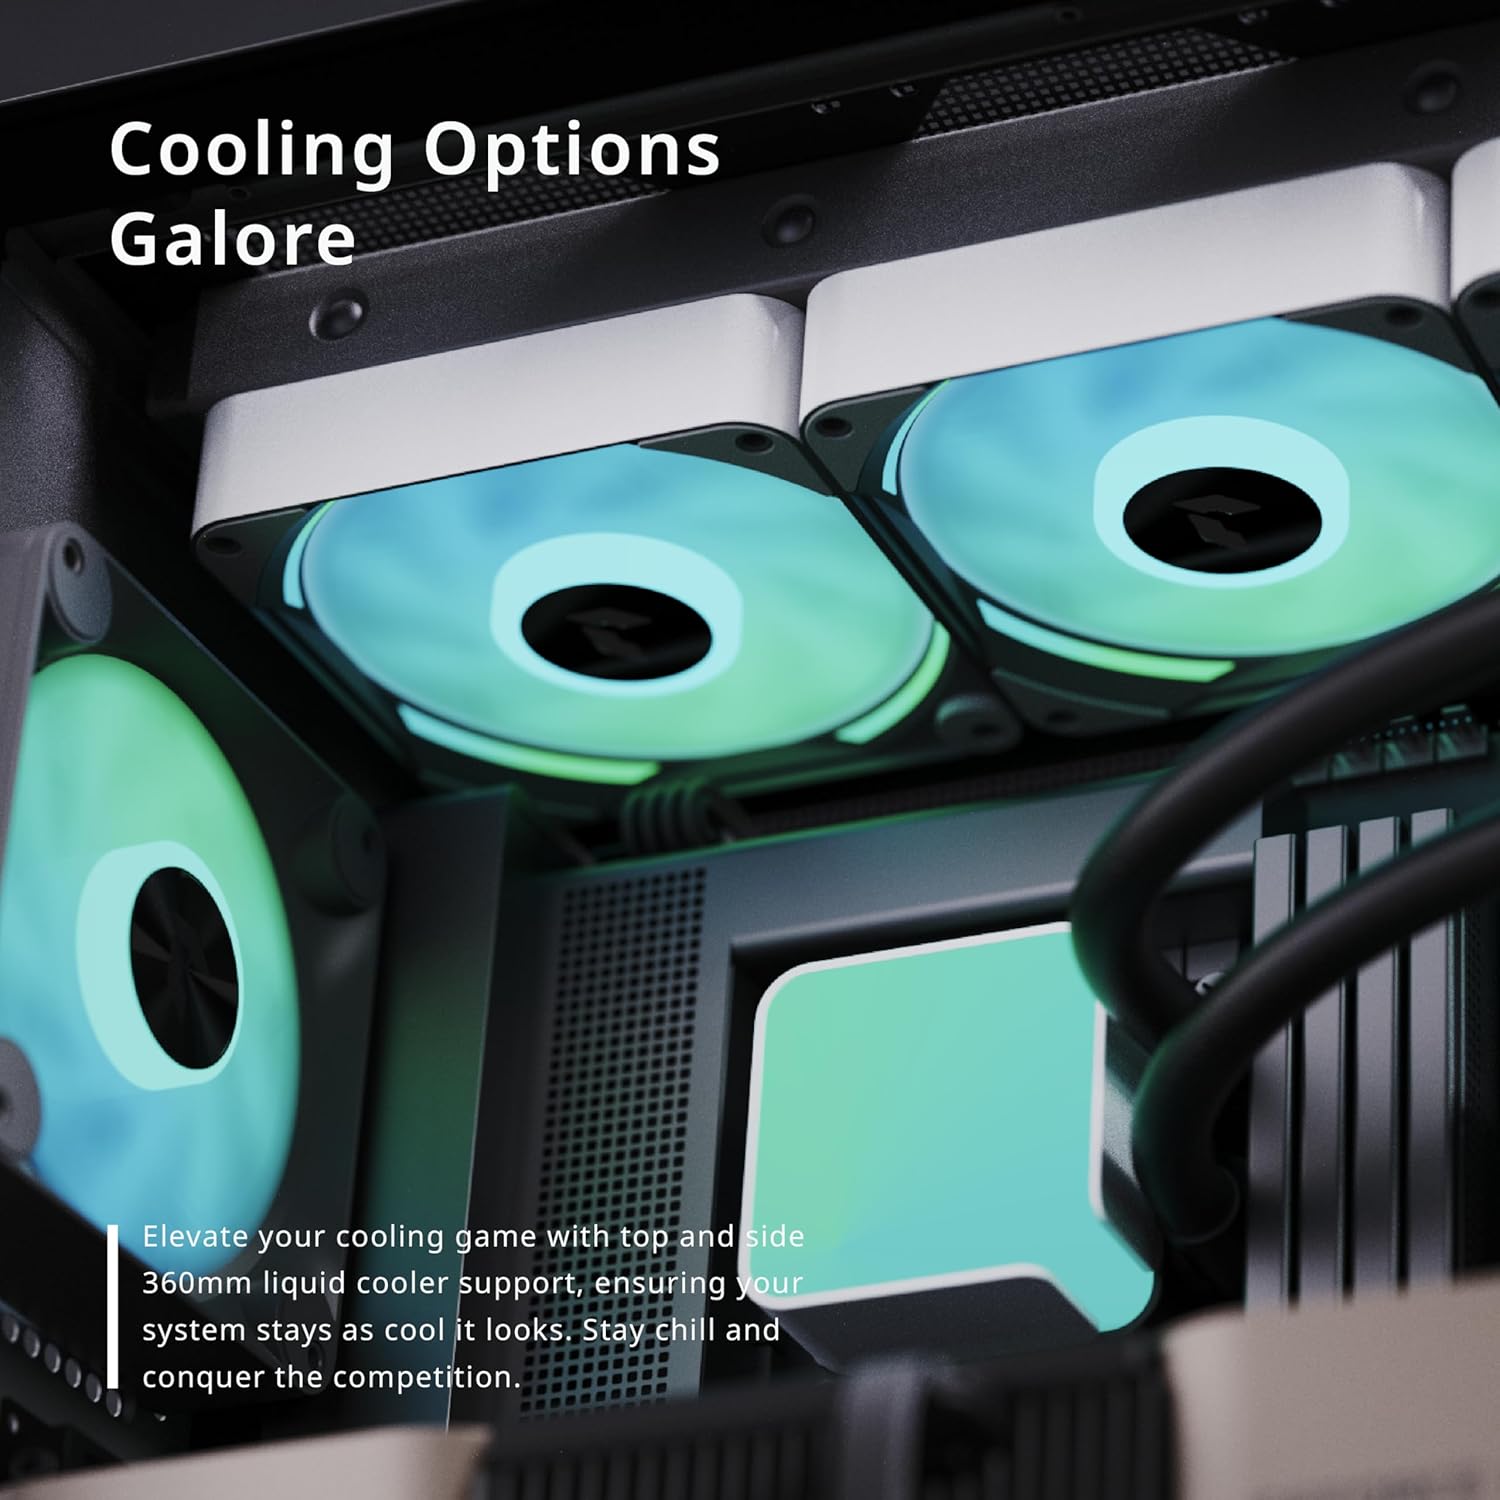
Figure 3: Top panel of the APNX C1, demonstrating support for a 360mm liquid cooler.
3.8 Gestió de cables
Utilize the 40mm internal cable management depth behind the motherboard tray to route and secure all cables. This practice improves internal airflow and contributes to a cleaner build aesthetic.
3.9 Connecting the PWM ARGB Control Hub
Connect the pre-installed fans and any additional Addressable RGB (ARGB) components to the included 5-port PWM ARGB control hub. Ensure the control hub is connected to your motherboard's PWM header for fan speed control and the ARGB header for lighting synchronization. Refer to your motherboard manual for header locations.

Figura 4: Interior view highlighting the pre-installed fans and the area for cable management.
4. Instruccions de funcionament
4.1 Encès/Apagat
Press the power button located on the top panel of the case to turn your system on or initiate a graceful shutdown.
4.2 Ports d'E/S frontals
The top panel provides convenient access to various input/output ports, including USB 2.0, USB 3.0, and audio jacks, for connecting peripherals and accessories.

Figure 5: Close-up of the top I/O panel, showing power button, USB ports, and audio jacks.
4.3 Control d'il·luminació ARGB
The Addressable RGB (ARGB) lighting of the pre-installed fans and any other connected ARGB components can be controlled via your motherboard's dedicated software (e.g., ASUS Aura Sync, MSI Mystic Light, Gigabyte RGB Fusion) or through a dedicated ARGB button on the case, if connected and configured.
Vídeo 1: Un overview of the APNX C1 ATX PC Case, demonstrating its cooling performance and design features.
5. Manteniment
5.1 Neteja
Regularly clean the dust filters and fan blades to ensure optimal airflow and cooling efficiency. Dust accumulation can impede performance and increase operating temperatures. Use compressed air to remove dust from hard-to-reach areas and a soft, damp cloth for exterior surfaces. Ensure the system is powered off and unplugged before cleaning.
5.2 Cura del ventilador
Periodically inspect all fans to ensure their blades are free from obstructions. If a fan exhibits unusual noise or ceases to function, check for dust buildup or any physical damage. Replace damaged fans as necessary.
6. Solució De Problemes
6.1 El sistema no s'encén
- Verify that all power cables are securely connected to the motherboard, graphics card, and power supply unit (PSU).
- Ensure the main power switch on the PSU is in the 'ON' position.
- Check the front panel header connections to the motherboard (Power SW, Reset SW, etc.) to ensure they are correctly seated.
6.2 Fans Not Spinning / RGB Not Working
- Confirm that all fans are correctly connected to the PWM ARGB control hub.
- Ensure the control hub itself is properly connected to both the motherboard's PWM header (for fan speed) and ARGB header (for lighting).
- Check your motherboard's BIOS/UEFI settings and operating system software for fan speed and RGB control configurations.
6.3 Poor Airflow / High Temperatures
- Clean all dust filters and fan blades regularly to prevent airflow restrictions.
- Ensure that all fans are oriented correctly, with intake fans drawing air into the case and exhaust fans expelling hot air.
- Verify that no internal cables or components are obstructing critical airflow paths.
7. Especificacions
| Característica | Especificació |
|---|---|
| Marca | APNX |
| Nom del model | C1-BK-v1 |
| Tipus de cas | Torre mitja |
| Compatibilitat amb la placa base | ATX, Micro ATX, Mini-ITX |
| Material | Vidre temperat, acer |
| Ventiladors preinstal·lats | 3x 140mm FP1 ARGB (Front), 1x 120mm FP1 ARGB (Rear) |
| Max Fan Slots | 11 |
| Suport de refrigeració líquida | Top: 360mm, Side: 360mm, Rear: 120mm |
| Longitud màxima de la GPU | 395 mm |
| Cable Management Depth | 40 mm |
| Ports d'E / S frontals | USB 2.0 x5, USB 3.0 x2, Audio |
| Pes de l'article | 25.9 lliures |
8. Garantia i Suport
For detailed warranty information, technical assistance, or customer support, please visit the official APNX website or contact their customer service department. It is important to retain your proof of purchase, such as a receipt or invoice, as it will be required for any warranty claims.


