1. Introducció
This manual provides comprehensive instructions for the installation, operation, and maintenance of your Kolink Unity Peak ARGB Midi Tower Showcase. Please read this manual thoroughly before beginning assembly to ensure correct setup and to prevent damage to the product or other components. Keep this manual for future reference.
The Kolink Unity Peak is designed to accommodate high-performance PC components, featuring extensive mesh paneling for optimal airflow and tempered glass panels to showcase your build. It supports ATX motherboards and offers versatile cooling options.
2. Informació de seguretat
Observe the following safety guidelines to prevent injury and damage to your system:
- Manejar amb cura: The tempered glass panels are fragile. Avoid impacts and place the case on a stable, flat surface during assembly.
- Vores esmolades: Be aware of potential sharp edges inside the case. Wear protective gloves if necessary.
- Seguretat elèctrica: Ensure all power is disconnected from components before installation or removal.
- Electricitat estàtica: Descarregueu l'electricitat estàtica tocant un objecte metàl·lic connectat a terra abans de manipular els components interns.
- Ventilació: Do not obstruct the ventilation openings of the case to ensure proper airflow and prevent overheating.
3. Contingut del paquet
Si us plau, verifiqueu que tots els elements siguin presents al paquet:
- Kolink Unity Peak ARGB Midi Tower Showcase
- Caixa d'accessoris (que conté cargols, separadors, brides per a cables, etc.)
- Manual d'usuari (aquest document)
- ARGB Controller (may be pre-installed or included in accessory box)
4. Especificacions
| Característica | Detall |
|---|---|
| Nom del model | Unity Peak |
| Tipus de cas | Torre del Midi |
| Dimensions (LxWxH) | 20.67 x 10.63 x 20.67 polzades (52.5 x 27 x 52.5 cm) |
| Pes | 2.2 lliures (aprox. 1 kg) |
| Material | Vidre temperat, acer, plàstic |
| Compatibilitat amb la placa base | ATX, Micro ATX, Mini ITX |
| Ranures d'expansió | 7 |
| Ports d'E / S frontals | 2x USB 3.0, 2x USB 2.0, HD Audio (Mic/Headphone), Power Button, Reset Button, ARGB Control Button |
| Suport del ventilador (frontal) | 3x 120 mm / 3x 140 mm |
| Suport del ventilador (superior) | 3x 120 mm / 2x 140 mm |
| Suport del ventilador (posterior) | 1x 120 mm |
| Suport del radiador (davanter) | Fins a 360 mm |
| Suport del radiador (superior) | Fins a 360 mm |
| Suport del radiador (posterior) | 120 mm |
| Drive Bays | 2x 3.5" HDD, 2x 2.5" SSD (or 4x 2.5" SSD) |
| Longitud màxima de la GPU | 380 mm |
| Alçada màxima del refrigerador de la CPU | 165 mm |
| Tipus de PSU | ATX (muntatge inferior) |
5. Configuració i instal·lació
5.1. Preparació del cas
- Desempaquetar la caixa: Carefully remove the Kolink Unity Peak from its packaging. Inspect for any shipping damage.
- Traieu els panells laterals: The case features tempered glass side panels. Locate the thumbscrews on the rear of the case securing these panels. Unscrew them and carefully slide the glass panels off. Place them on a soft, flat surface to prevent scratches or breakage.

Imatge 5.1: Frontal esquerre view of the Kolink Unity Peak ARGB Midi Tower Showcase, illustrating the tempered glass side and front panels.
5.2. Instal·lació de la placa base
- Instal·leu separadors: Ensure the correct standoffs are installed for your motherboard form factor (ATX, Micro-ATX, Mini-ITX). The Unity Peak typically has ATX standoffs pre-installed.
- Instal·leu l'escut d'E/S: If your motherboard came with a separate I/O shield, install it into the rear opening of the case before mounting the motherboard.
- Muntar la placa base: Carefully align your motherboard with the standoffs and the I/O shield. Gently lower it into place. Secure the motherboard using the provided screws. Do not overtighten.
5.3. Instal·lació de la font d'alimentació
- Posició PSU: The power supply unit (PSU) is installed at the bottom rear of the case, within the PSU shroud.
- Font d'alimentació segura: Slide the PSU into its designated bay from the rear of the case. Align the screw holes and secure it with the provided screws.
5.4. Instal·lació de la unitat d'emmagatzematge
The Kolink Unity Peak supports both 3.5" HDDs and 2.5" SSDs.
- Discs durs de 3.5 polzades: Locate the drive cage beneath the PSU shroud. Slide the 3.5" drives into the trays and secure them with screws.
- SSD de 2.5 polzades: SSDs can be mounted on dedicated brackets behind the motherboard tray or on the 3.5" drive trays. Secure them with screws.
5.5. Targeta gràfica i targetes d'expansió
- Treure les cobertes de les ranures: Remove the necessary PCIe slot covers from the rear of the case corresponding to your expansion card(s).
- Instal·lar targeta: Align the card with the PCIe slot on the motherboard and press down firmly until it clicks into place. Secure the card to the case with screws.
5.6. Instal·lació del ventilador i del radiador
The Unity Peak offers extensive cooling options:
- Davant: Supports up to three 120mm or 140mm fans, or a radiator up to 360mm.
- A dalt: Supports up to three 120mm or two 140mm fans, or a radiator up to 360mm.
- posterior: Supports one 120mm fan or a 120mm radiator.
Install fans or radiators by aligning them with the mounting holes and securing them with the appropriate screws. Ensure proper airflow direction for optimal cooling.

Imatge 5.2: De dalt a baix view highlighting the extensive mesh paneling and mounting options for fans and radiators on the top and front of the case.
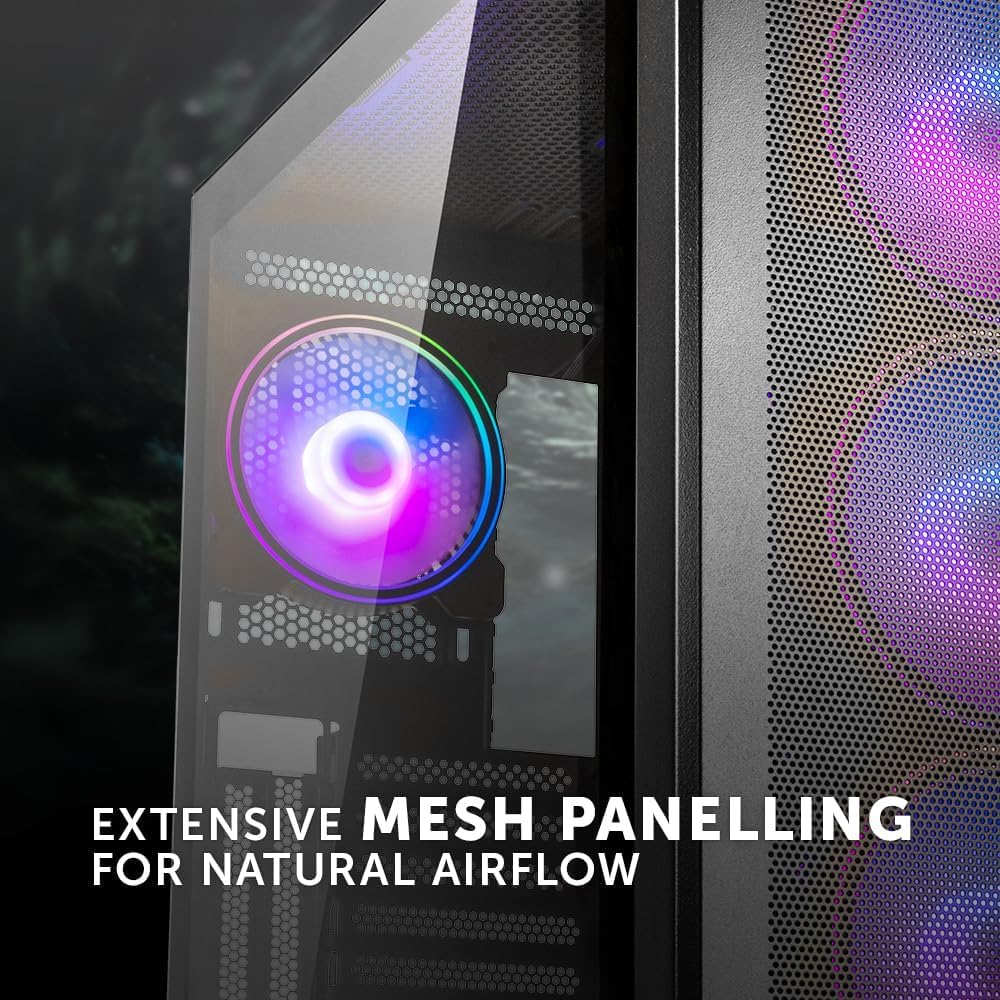
Image 5.3: Detail of the extensive mesh paneling designed for natural airflow, visible on the front and top of the case.
5.7. Gestió de cables
The case provides a dedicated 24mm space behind the motherboard tray for cable routing. Utilize the cutouts and cable tie points to organize and secure cables. This improves airflow and aesthetics.

Imatge 5.4: Interior view of the case, illustrating the dedicated space behind the motherboard tray for efficient cable routing.
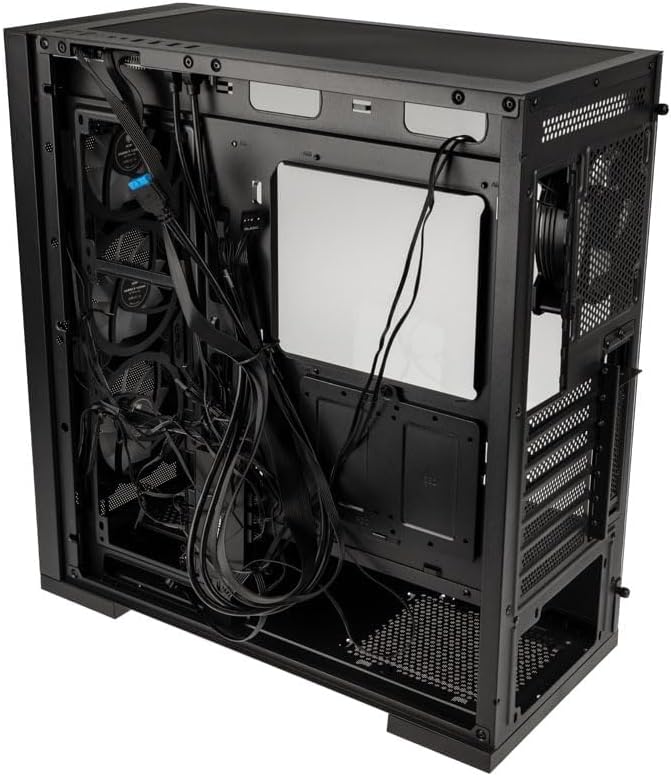
Image 5.5: Rear perspective of the case, displaying the area behind the motherboard tray where cables can be neatly organized and secured.
5.8. Connecting Front I/O Panel
Connect the cables from the front I/O panel to the corresponding headers on your motherboard. These include:
- USB 3.0 (2x)
- USB 2.0 (2x)
- HD Audio (for microphone and headphone jacks)
- Power Switch, Reset Switch, Power LED, HDD LED
- ARGB Control (if applicable, connect to motherboard ARGB header or included controller)

Imatge 5.6: Detallada view of the fully-featured front I/O panel, including USB 3.0, USB 2.0, audio jacks, and control buttons.
6. Instruccions de funcionament
6.1. Engegar el sistema
- Ensure all components are correctly installed and all cables are securely connected.
- Connect the power cable to your power supply and a wall outlet.
- Gireu l'interruptor d'alimentació de la font d'alimentació a la posició "ON".
- Press the power button on the front I/O panel of your Kolink Unity Peak case to start your system.
6.2. Control d'il·luminació ARGB
The Kolink Unity Peak ARGB fans can be controlled via the integrated ARGB controller or by connecting them to a compatible motherboard's ARGB header (3-pin, 5V). If using the integrated controller, use the dedicated ARGB button on the front I/O panel or the included remote control (if applicable) to cycle through lighting modes and colors.
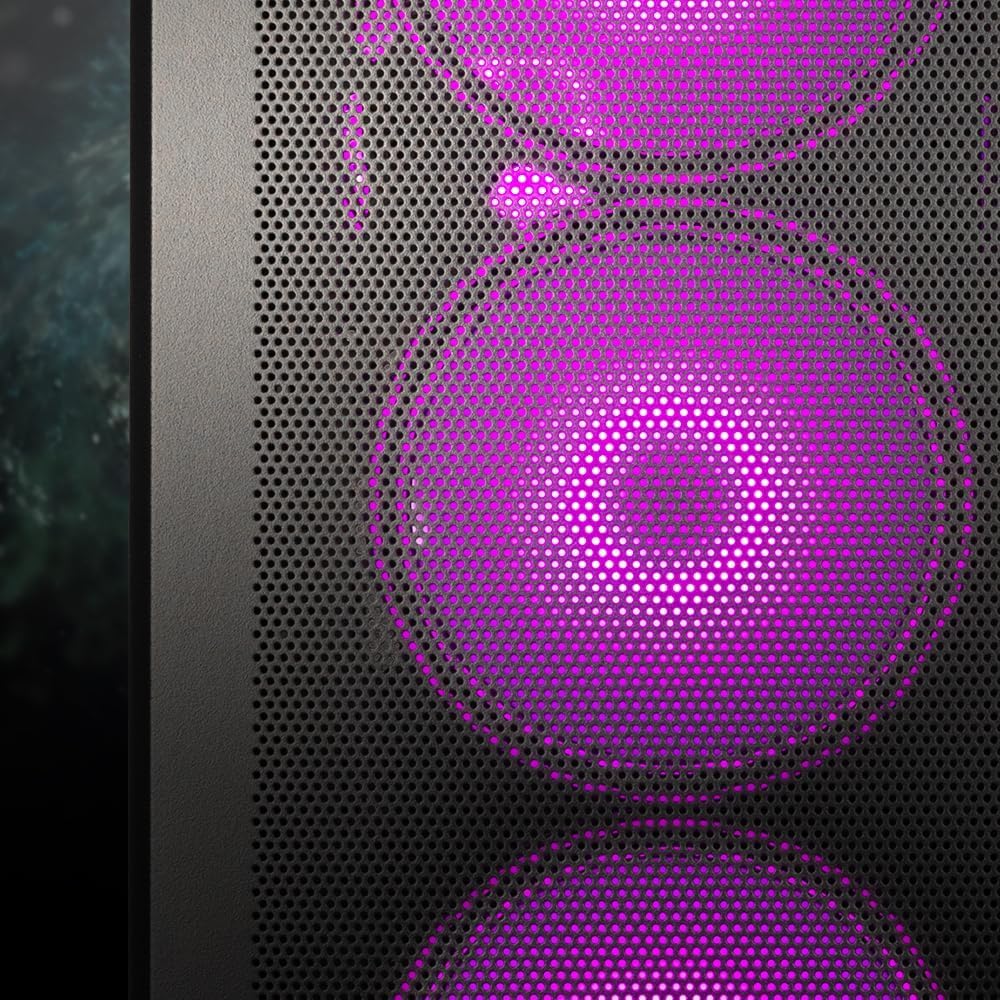
Image 6.1: Detail of the front panel showcasing the vibrant ARGB lighting of the pre-installed fans.
7. Manteniment
Un manteniment regular ajuda a garantir un rendiment òptim i una llarga vida útil dels components del teu PC.
- Filtres de pols: The Kolink Unity Peak includes removable dust filters (e.g., on the top and bottom). Periodically remove and clean these filters with compressed air or water (ensure they are completely dry before reinstallation).
- Neteja exterior: Wipe down the exterior surfaces, including tempered glass panels, with a soft, lint-free cloth. For glass, a mild glass cleaner can be used sparingly. Avoid abrasive cleaners.
- Neteja interior: Use compressed air to remove dust buildup from internal components, fans, and radiators. Ensure the system is powered off and unplugged before cleaning.
- Optimització del flux d'aire: Periodically check that cables are not obstructing airflow paths and that fans are spinning freely.
8. Solució De Problemes
Aquesta secció tracta problemes comuns que podeu trobar.
- El sistema no s'encén:
- Check if the PSU is switched 'ON' at the back.
- Assegureu-vos que el cable d'alimentació estigui connectat correctament a la font d'alimentació i a la presa de corrent.
- Verifiqueu que el cable de l'interruptor d'alimentació del panell frontal estigui connectat correctament a la placa base.
- Confirm all internal power cables (24-pin ATX, CPU, GPU, etc.) are properly seated.
- Els ventiladors no giren / L'ARGB no s'il·lumina:
- Comproveu les connexions d'alimentació del ventilador a la placa base o al controlador del ventilador.
- Verify ARGB cables are correctly connected to the ARGB controller or motherboard ARGB header.
- If using an ARGB controller, ensure it is receiving power (usually SATA power).
- Front USB Ports Not Functioning:
- Ensure the USB 3.0 and USB 2.0 headers from the front panel are correctly connected to the corresponding headers on your motherboard.
- Flux d'aire deficient / Temperatures altes:
- Check fan orientation; ensure intake fans pull air in and exhaust fans push air out.
- Netegeu els filtres de pols i els components interns.
- Comproveu que no hi hagi cables que obstrueixin el flux d'aire.
9. Garantia i Suport
Kolink products are manufactured to high-quality standards. For information regarding warranty terms and conditions, please refer to the warranty card included with your product or visit the official Kolink website. For technical support or further assistance, please contact your retailer or Kolink customer service.
Nota: Els detalls específics de la garantia poden variar segons la regió i el distribuïdor. Conserveu el comprovant de compra.


