1. Introducció
This manual provides detailed instructions for the installation, operation, and maintenance of your Kolink Unity Solar ARGB Mesh Midi Tower Case. Please read this manual thoroughly before beginning installation to ensure proper setup and safe usage. This case is designed to house standard PC components, offering efficient cooling and customizable ARGB lighting.
2. Informació de seguretat
- Desconnecteu sempre l'alimentació de la presa de corrent abans d'instal·lar o treure qualsevol component.
- Manipuleu tots els components amb cura per evitar danys per descàrrega electrostàtica (ESD). Penseu en la possibilitat d'utilitzar una polsera antiestàtica.
- Avoid placing the case in direct sunlight, near heat sources, or in environments with excessive dust or humidity.
- No intenteu modificar la carcassa ni els seus components. Les modificacions no autoritzades poden anul·lar la garantia i plantejar riscos per a la seguretat.
- Keep small parts, such as screws, away from children.
3. Contingut del paquet
Verifiqueu que tots els elements siguin presents al paquet:
- Kolink Unity Solar ARGB Mesh Midi Tower Case
- Accessory Box (containing screws, cable ties, and standoffs)
- Manual d'usuari (aquest document)
4. Producte acabatview
The Kolink Unity Solar ARGB Mesh Midi Tower Case features a mesh front panel for optimal airflow, pre-installed ARGB fans, and a tempered glass side panel to showcase your build.
4.1 Extern Views

Figura 4.1.1: Frontal view of the Kolink Unity Solar ARGB Mesh Midi Tower Case, highlighting the mesh front panel and three illuminated ARGB fans.
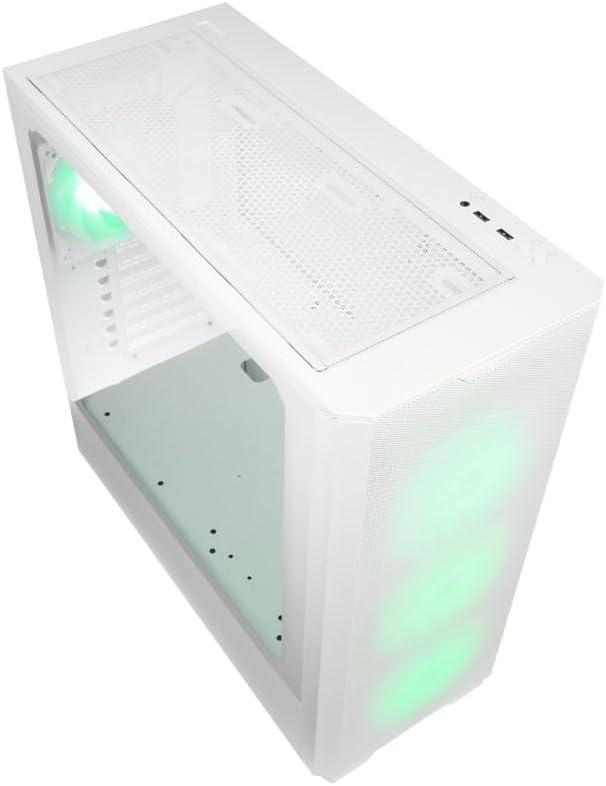
Figura 4.1.2: A dalt view of the case, showing the top mesh panel and front I/O ports.
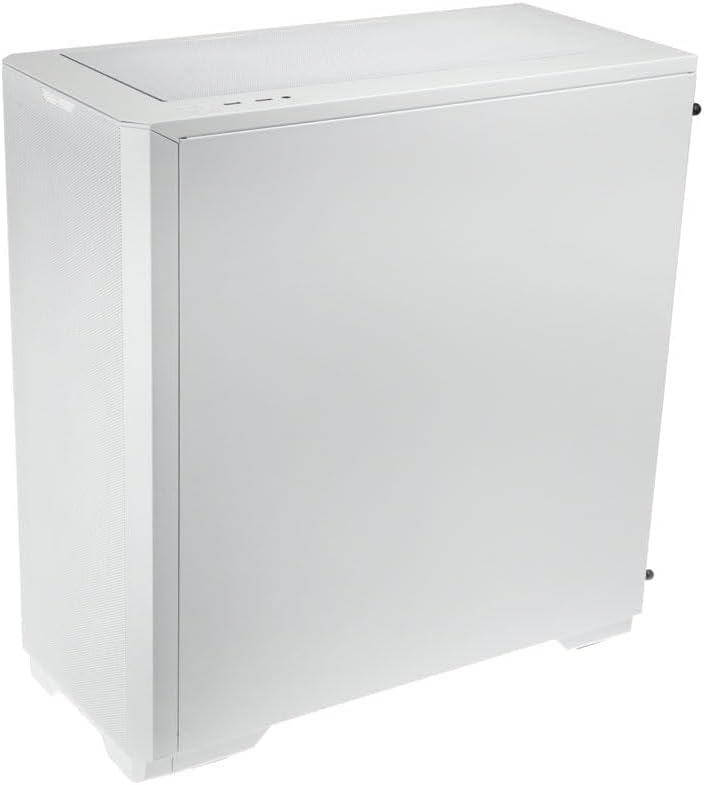
Figura 4.1.3: Part posterior view of the case, illustrating the solid right side panel.

Figura 4.1.4: Composite image showing the front, rear, and tempered glass side panel of the case.
4.2 Ports d'E/S frontals

Figura 4.2.1: Close-up of the top-mounted front I/O panel, featuring audio jacks, USB ports, and control buttons.
The front I/O panel typically includes:
- Botó d'engegada
- Botó de restabliment
- Ports USB 3.0 (x1)
- Ports USB 2.0 (x2)
- Preses d'àudio HD (auriculars/micròfon)
- ARGB Control Button (for pre-installed fans)
4.3 Disseny intern

Figura 4.3.1: Interior view of the case, showing the motherboard tray, front fan mounts, and PSU shroud.

Figura 4.3.2: Another interior view, highlighting the rear fan mount and the spacious main chamber.

Figura 4.3.3: Close-up of the pre-installed ARGB fans at the front of the case.

Figura 4.3.4: View behind the motherboard tray, showing space for cable management and drive mounts.
5. Guia de configuració i instal·lació
Follow these steps to install your PC components into the Kolink Unity Solar case.
5.1 Preparació del cas
- Col·loqueu la caixa sobre una superfície plana i estable.
- Remove the tempered glass side panel by unscrewing the thumbscrews at the rear and carefully pulling it away. Set it aside on a soft, non-abrasive surface.
- Remove the solid right side panel by unscrewing its thumbscrews and sliding it off.
5.2 Instal·lació de la placa base
- Install the I/O shield (if applicable) into the rear opening of the case.
- Ensure the correct standoffs are installed for your motherboard form factor (ATX, Micro-ATX, Mini-ITX). Adjust or add standoffs as needed using the provided tools.
- Carefully align your motherboard with the standoffs and I/O shield.
- Secure the motherboard with the provided screws. Do not overtighten.
5.3 Instal·lació de la unitat d'alimentació (PSU).
- Localitzeu la zona de muntatge de la font d'alimentació a la part inferior posterior de la carcassa.
- Slide your PSU into the designated bay from the rear of the case.
- Align the PSU with the screw holes and secure it with the provided screws.
5.4 Storage Drive Installation (HDDs/SSDs)
The case supports multiple storage drives. Refer to the accessory box for specific mounting hardware.
- SSD de 2.5 polzades: Mount directly onto the SSD trays located behind the motherboard tray or on the PSU shroud. Secure with screws.
- Discs durs de 3.5 polzades: Install into the drive cage located under the PSU shroud. Slide the drive into the tray and secure it.
5.5 Graphics Card (GPU) and Expansion Card Installation
- Traieu les cobertes de les ranures PCIe necessàries de la part posterior de la carcassa.
- Inseriu la targeta gràfica o altres targetes d'expansió a les ranures PCIe corresponents de la placa base.
- Secure the cards with the provided screws or retention clips.
5.6 Gestió de cables i connexions
- Connect all necessary power cables from the PSU to your motherboard, CPU, GPU, and storage drives.
- Connect the front I/O cables (USB, Audio, Power/Reset switches, ARGB control) to their respective headers on the motherboard. Refer to your motherboard manual for header locations.
- Route cables through the cutouts and tie-down points behind the motherboard tray to maintain a clean interior and optimize airflow. Use the included cable ties.
- Ensure the pre-installed ARGB fans are connected to the integrated ARGB controller or directly to an ARGB header on your motherboard (if supported).
6. Operating the ARGB Lighting
The Kolink Unity Solar case comes with pre-installed ARGB fans. You can control their lighting effects in two ways:
- Case ARGB Button: Use the dedicated ARGB control button on the front I/O panel to cycle through various lighting modes and colors.
- Programari de la placa base: If your motherboard has a 3-pin 5V ARGB header and compatible software (e.g., ASUS Aura Sync, MSI Mystic Light, Gigabyte RGB Fusion), you can connect the case's ARGB controller to the motherboard and synchronize lighting effects with other components. Refer to your motherboard manual for instructions on ARGB header connection and software usage.
7. Manteniment
Un manteniment regular ajuda a garantir un rendiment òptim i una llarga vida útil dels components del teu PC.
- Filtres de pols: The case features removable dust filters on the front, top, and bottom. Periodically remove and clean these filters with compressed air or by rinsing them with water (ensure they are completely dry before reinstallation).
- Neteja interior: Use compressed air to remove dust from inside the case, especially from fan blades, heatsinks, and other components. Perform this cleaning in a well-ventilated area.
- Neteja exterior: Netegeu les superfícies exteriors amb un damp drap. Eviteu productes químics agressius o netejadors abrasius.
8. Solució De Problemes
Si teniu problemes, consulteu els passos habituals següents per a la resolució de problemes:
- PC not powering on: Double-check all power connections from the PSU to the motherboard, CPU, and GPU. Ensure the front panel power switch cable is correctly connected to the motherboard header. Verify the PSU switch is in the 'ON' position.
- Fans not spinning/ARGB not lighting up: Check fan power connections and ARGB connections. Ensure ARGB cables are connected to the correct 3-pin 5V ARGB headers (not 4-pin 12V RGB headers). If using the case controller, ensure it is powered.
- Sense sortida de pantalla: Ensure your graphics card is properly seated in its PCIe slot and all necessary power cables are connected. Verify your monitor cable is connected to the graphics card, not the motherboard's integrated graphics port (unless you are using integrated graphics).
9. Especificacions
Key specifications for the Kolink Unity Solar ARGB Mesh Midi Tower Case:
| Característica | Especificació |
|---|---|
| Marca | ESTIC TRUCANT |
| Nom del model | Unity Solar |
| Número de model de l'article | UNITYSOLARWHT |
| Tipus de cas | Torre mitja |
| Color | Blanc |
| Compatibilitat amb la placa base | ATX, Micro ATX, Mini ITX |
| Mètode de refrigeració | Aire |
| Tipus de muntatge de la font d'alimentació | Muntatge inferior |
| Nombre de ports USB 2.0 | 2 |
| Ports USB totals | 2 (Note: Product description indicates 1x USB 3.0, 2x USB 2.0. Please verify with product packaging.) |
| Baies interiors totals | 4 (Mixed 2.5"/3.5" support) |
| Pes de l'article | 2.2 lliures |
10. Garantia i Suport
For warranty information and technical support, please refer to the official KOLINK weblloc web o poseu-vos en contacte amb el vostre distribuïdor. Conserveu el comprovant de compra per a reclamacions de garantia.


