1. Introducció
This manual provides comprehensive instructions for the assembly, installation, and operation of your Mount-It! Anti-Theft Tablet Floor Stand. This stand is designed to securely display tablets in commercial environments such as retail stores, trade shows, hotels, and educational institutions. It features a universal enclosure, anti-theft locking mechanisms, and adjustable viewangles d'ajust.

Imatge 1.1: Frontal view of the Mount-It! Anti-Theft Tablet Floor Stand.

Image 1.2: The tablet floor stand positioned in a commercial reception area, demonstrating its application.
2. Informació important de seguretat
Si us plau, llegiu atentament totes les instruccions abans del muntatge i l'ús. Si no seguiu aquestes instruccions, podeu patir danys materials o lesions personals.
- Assegureu-vos que tots els components siguin presents i no estiguin danyats abans de començar el muntatge.
- Do not exceed the maximum weight capacity of 2.2 lbs (1 kg) for the tablet enclosure.
- Munteu el suport sobre una superfície plana i estable.
- Mantingueu els nens i les mascotes allunyats durant el muntatge.
- Use only the provided hardware. Do not substitute parts.
- Reviseu periòdicament tots els cargols i connexions per assegurar-vos que estiguin ben ajustats i segurs.
3. Contingut del paquet
Verify that all parts listed below are included in your package. If any parts are missing or damaged, please contact Mount-It! customer support.
- Lockable Tablet Stand (main assembly)
- Assembly Hardware Kit (screws, washers, etc.)
- Keys for Tablet Enclosure Lock
- Keys for Lower Cabinet Lock
- Tablet Spacers/Pads for universal fit
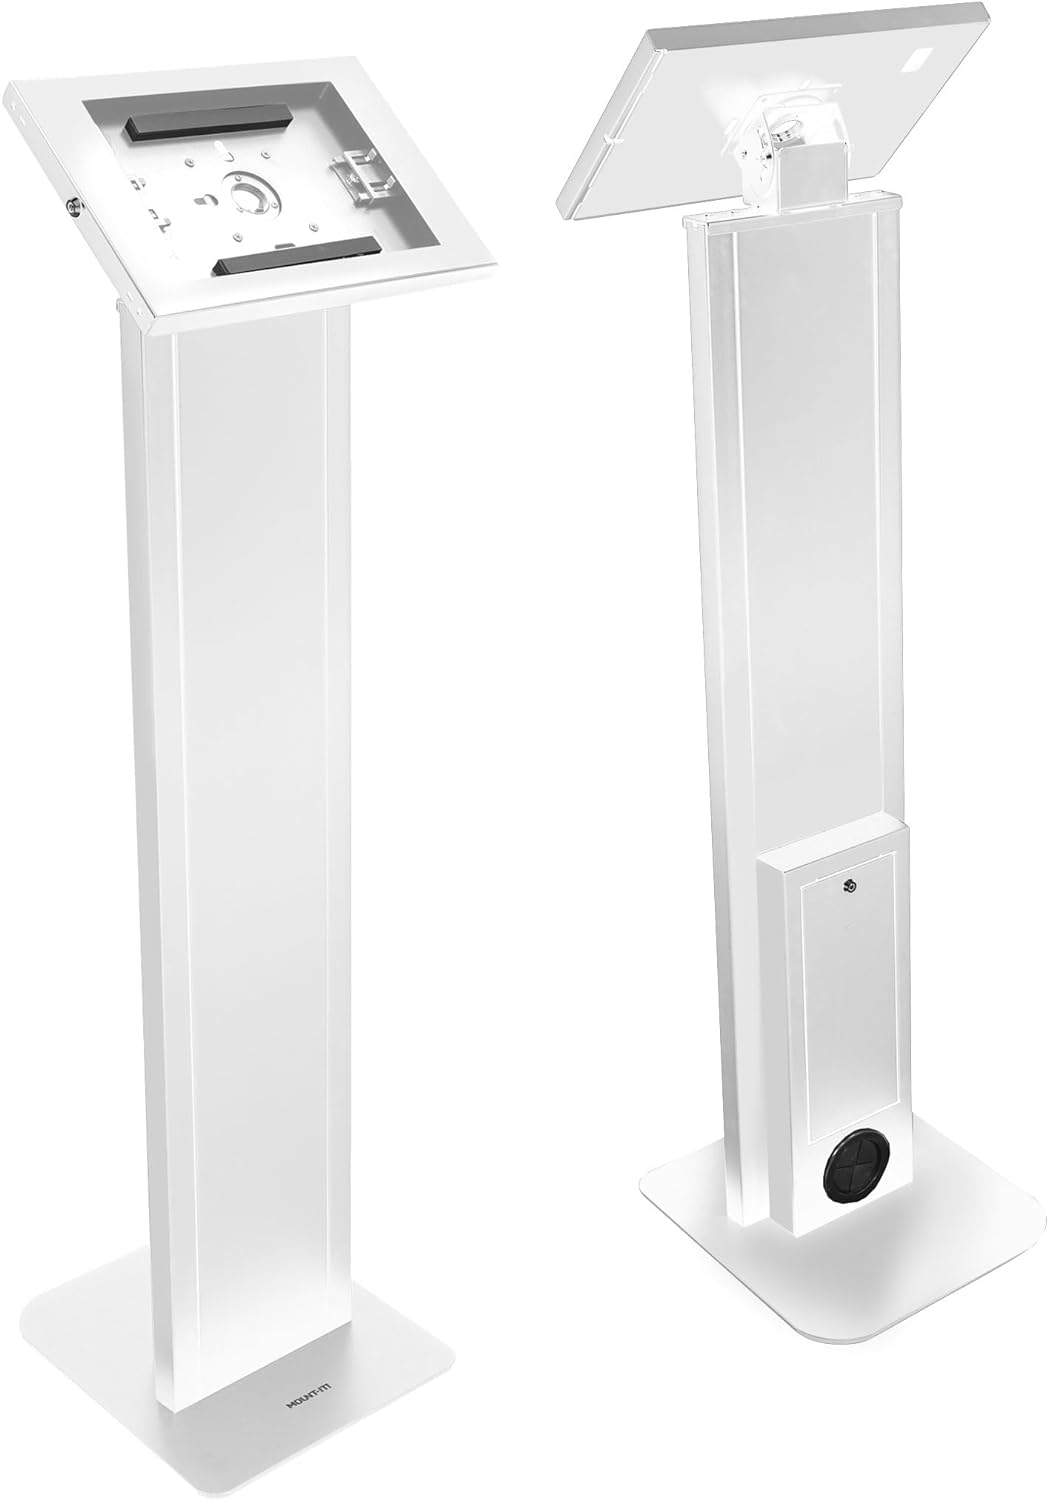
Imatge 3.1: Davant i darrere views of the assembled stand, showing the tablet enclosure and the lower cabinet.
4. Setup and Tablet Installation
4.1 Muntatge del suport
The Mount-It! Tablet Floor Stand typically arrives partially assembled. Follow these steps to complete the assembly:
- Enganxeu la base: Secure the main column to the freestanding base using the provided screws and tools. Ensure the base is oriented correctly for stability.
- Attach the Tablet Enclosure: Connect the tablet enclosure to the top of the main column. Ensure all connections are firm.
- Secure the Locks: Confirm that the locking mechanisms for both the tablet enclosure and the lower cabinet are functioning correctly with the provided keys.
4.2 Installing Your Tablet
The universal enclosure is compatible with various iPad models, including iPad Pro (10.5", 11"), iPad Air (10.5", 10.9"), iPad 10 (10.9"), iPad 9 (10.2"), iPad 8 (10.2"), and iPad 7 (10.2").
- Unlock the Enclosure: Use the key to unlock and open the tablet enclosure.
- Adjust Sliders: The enclosure features adjustable sliders. Position these sliders to securely hold your specific iPad model. Refer to Image 4.1 for guidance.

Image 4.1: Illustration of the adjustable sliders within the tablet enclosure, designed to accommodate various iPad sizes.
- Insereix la tauleta: Carefully place your iPad into the enclosure, ensuring it is centered and held firmly by the sliders.
- Tanca i bloqueja: Close the enclosure and use the key to lock it securely.
4.3 Gestió de cables
The stand includes internal cable routing to keep power cords organized and out of sight.
- Route the tablet's charging cable through the designated opening in the enclosure and down through the stand's column.
- The cable can exit through the opening at the base of the stand, or be connected to a power strip stored in the lockable lower cabinet.

Image 4.2: Visual guide for routing the power cable through the stand's column for a tidy setup.
5. Instruccions de funcionament
5.1 Anti-Theft Security
The tablet enclosure is equipped with a key lock to prevent unauthorized removal of the tablet.
- To lock, close the enclosure and insert the key into the lock cylinder. Turn the key clockwise to secure.
- To unlock, insert the key and turn counter-clockwise.

Image 5.1: Detail of the key-operated security lock on the tablet enclosure, designed to protect the device from theft.
5.2 Ajustable ViewAngles
The tablet enclosure offers both tilt and rotation adjustments for optimal viewing.
- Ajust d'inclinació: The enclosure can be tilted from 0° to 75° to achieve the desired viewing angle. Loosen the adjustment knob, set the angle, and re-tighten.
- Rotació: The enclosure can rotate 90° between portrait and landscape orientations. Gently rotate the enclosure to switch between modes.

Image 5.2: Illustration demonstrating the 0° to 75° tilt range and 90° rotation capability of the tablet enclosure.
5.3 Lockable Lower Cabinet
A lockable cabinet is integrated into the stand's column, providing secure storage for power adapters, cables, or other small accessories.
- Use the separate key to open and close the lower cabinet door.
- Ensure the cabinet is locked when not in use to maintain security.

Image 5.3: The lower cabinet shown open, revealing space for a power strip or other small items. Note: Power cord and source are not included.
6. Manteniment
To ensure the longevity and proper function of your tablet floor stand, follow these simple maintenance guidelines:
- Neteja: Netegeu el suport amb un drap suauamp drap. Eviteu productes de neteja abrasius o dissolvents que puguin danyar l'acabat.
- Inspecció: Reviseu periòdicament tots els cargols, perns i connexions per assegurar-vos que estiguin ben ajustats. Torneu a apretar-los si cal.
- Mecanisme de bloqueig: Keep the lock mechanisms clean and free of debris. Do not force keys if they feel stiff.
7. Solució De Problemes
Consulteu aquesta secció per obtenir solucions a problemes comuns que podeu trobar.
| Problema | Causa possible | Solució |
|---|---|---|
| Tablet does not fit securely in the enclosure. | Sliders are not adjusted correctly for the tablet size. | Unlock the enclosure, adjust the internal sliders to firmly grip your tablet, then re-lock. Ensure your tablet model is compatible. |
| Enclosure lock is stiff or not working. | Debris in the lock cylinder; key is bent or damaged. | Ensure the key is fully inserted and not bent. Clean the lock cylinder if visible debris is present. Do not force the key. Contact support if the issue persists. |
| La posició de peu es nota inestable. | Base screws are loose; stand is on an uneven surface. | Check and tighten all assembly screws, especially those connecting the column to the base. Move the stand to a flat, level surface. |
8. Especificacions
Technical details for the Mount-It! Anti-Theft Tablet Floor Stand MI-3880B_G10:
- Número de model: MI-3880B_G10
- Dimensions del producte: 41.75 x 12.75 x 5.25 polzades (106 x 32.4 x 13.3 cm)
- Pes de l'article: 33.6 lliures (15.2 kg)
- Color: Blanc
- Material: Acer d'alta resistència
- Dispositius compatibles: Tablets (specifically iPad Pro 10.5", 11"; iPad Air 10.5", 10.9"; iPad 10 10.9"; iPad 9 10.2"; iPad 8 10.2"; iPad 7 10.2")
- Capacitat de pes: 2.2 lliures (1 kg)
- Rang inclinat: 0° a 75°
- Rotació: 90° (retrat a paisatge)

Image 8.1: Detailed dimensions of the tablet floor stand, including height, base, and enclosure measurements.

Image 8.2: Visual guide illustrating the compatibility of the stand with different iPad, iPad Air, and iPad Pro models and their screen sizes.

Image 8.3: Various configurations of the tablet enclosure to accommodate different iPad models, including options for home button access, hard button cover, no home button access, and camera cutouts.
9. Garantia i atenció al client
Mount-It! stands behind the quality of its products.
- Garantia de per vida: This Mount-It! tablet kiosk with freestanding base comes with a Lifetime Warranty.
- Atenció al client: Our knowledgeable and responsive US-based customer support team is available to answer any questions you may have during standard business hours.
For assistance, please visit the official Mount-It! weblloc web o consulteu l'embalatge del producte per obtenir informació de contacte.


