1. Introducció
Thank you for choosing the Yakima Hangout 2 Bike Rack. This manual provides essential information for the safe and proper installation, operation, and maintenance of your new bike rack. Please read all instructions carefully before use and retain this manual for future reference.
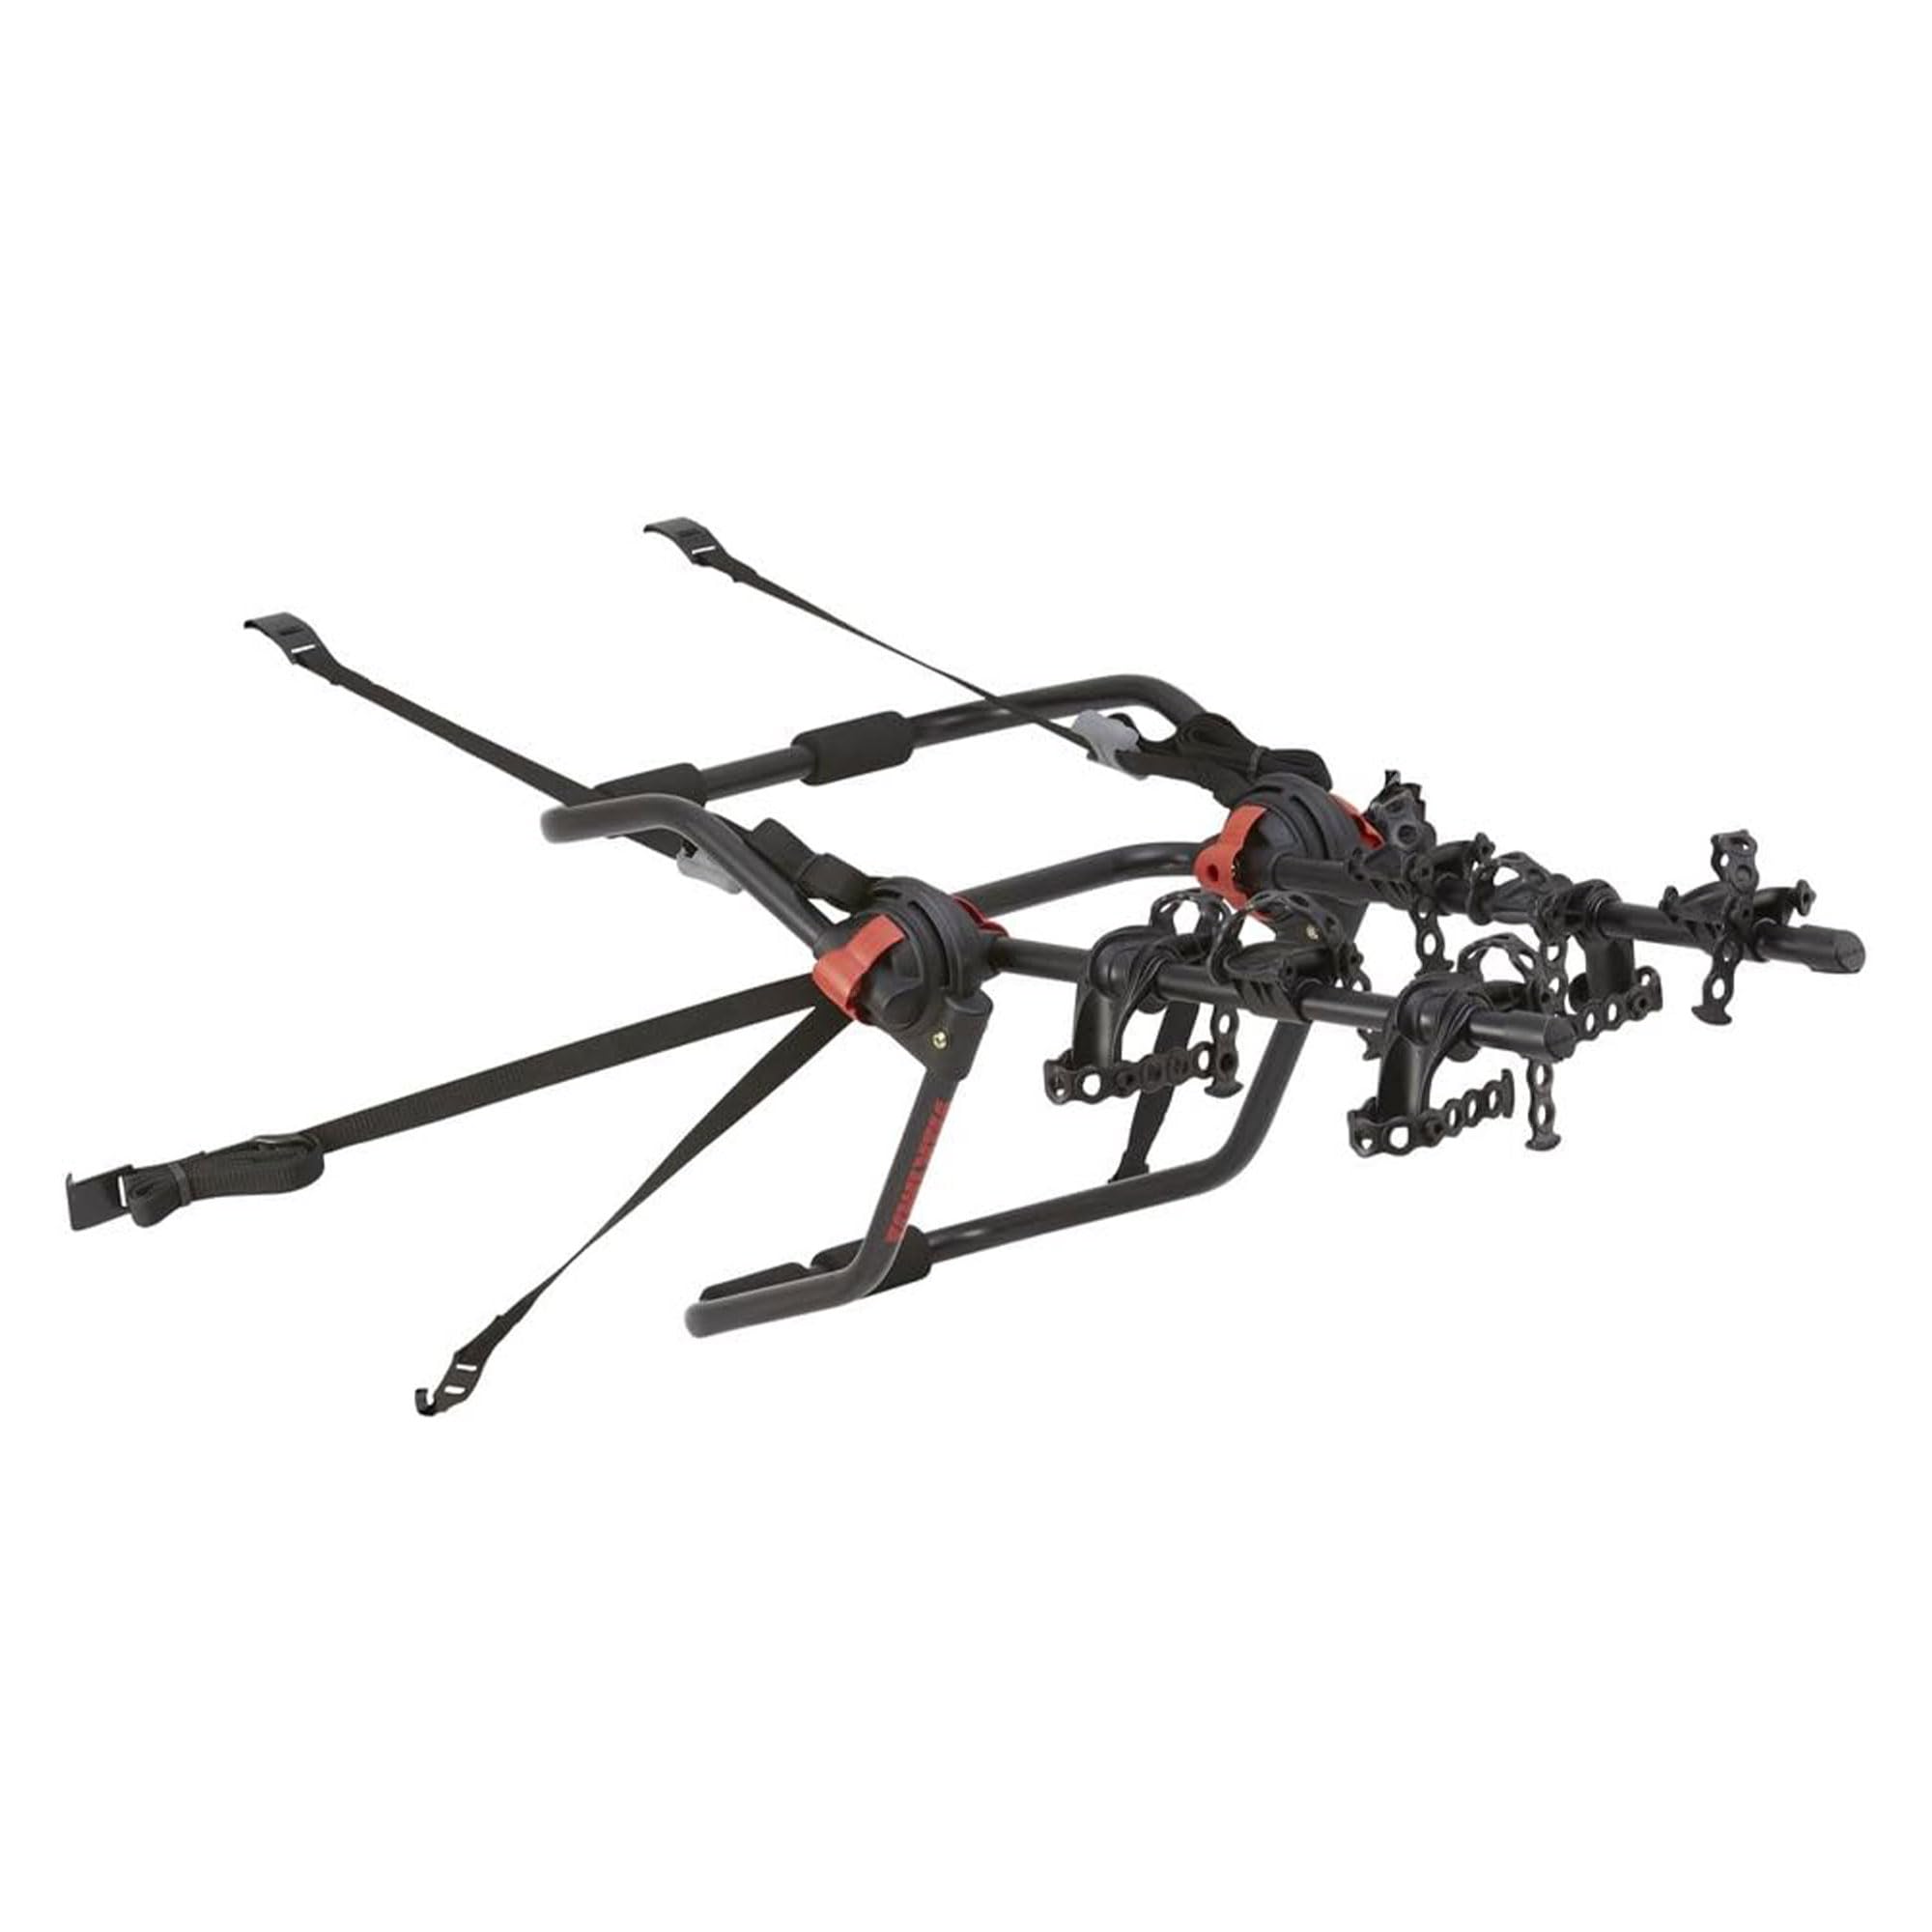
Figure 1.1: Yakima Hangout 2 Bike Rack highlighting key features.
2. Informació de seguretat
WARNING: Failure to follow these instructions could result in serious injury or property damage.
- Always ensure the bike rack is securely attached to your vehicle before loading bikes.
- Do not exceed the maximum weight capacity of 35 lbs (16 kg) per bike.
- Ensure all bikes are properly secured to the rack using the integrated cradles and straps.
- Check all straps and connections periodically during travel, especially on long trips.
- Do not open the vehicle's trunk or hatch if the rack is attached, as this may damage the vehicle or the rack.
- Keep the bike rack and straps away from hot exhaust pipes and sharp metal edges.
- Ensure that the bike rack does not obstruct your vehicle's taillights or license plate.
- Remove the bike rack when not in use to prevent theft and reduce wear.
3. Llista de peces
The Yakima Hangout 2 Bike Rack includes the following components:
- Yakima Hangout 2 Bike Rack main assembly
- Manual d'instruccions
Please verify all parts are present and undamaged before proceeding with installation.
4. Configuració i instal·lació
The QuickTrigger hub system makes installation easy and fast. Follow these steps to properly install your bike rack:
- Desplega el prestatge: Unfold the main frame of the bike rack until it locks into position. Ensure all pivot points are secure.
- Posició al vehicle: Place the top padded feet of the rack on the upper edge of your vehicle's trunk or hatch. The bottom padded feet should rest on the lower part of the trunk/bumper.
- Attach Top Straps: Hook the top straps over the metal edge at the top of your trunk/hatch. Pull the straps to tighten, ensuring the rack is firmly seated.
- Attach Side Straps: Hook the side straps to the metal edges on the left and right sides of your trunk/hatch, near the taillights. Pull the straps to tighten.
- Attach Bottom Straps: Hook the bottom straps to the metal edge below your bumper or at the bottom of your trunk/hatch. Pull the straps to tighten.
- Ajustament final: After attaching all six hooks, tighten all straps by pulling the free ends until the rack is secure and does not wiggle or move. Ensure the rack is tilted slightly upwards from the trunk/hatch for optimal bike clearance.

Figure 4.1: Visual guide for installing the bike rack on a vehicle.
Vídeo d'instal·lació
Video 4.1: Official installation guide for the Yakima HangOut Car Trunk Compact Foldable Bicycle Mount Rack. This video demonstrates the process of attaching the rack to a vehicle's trunk and securing it with straps.
5. Operating Instructions: Loading Bikes
Once the rack is securely installed, you can load your bicycles:
- Prepare Bikes: Remove any loose items from your bikes (e.g., water bottles, pumps, bags) that could fall off during transport.
- Load First Bike: Place the first bike into the inner cradles, closest to the vehicle. Ensure the bike's chain and gears face away from the rack to prevent damage.
- Secure First Bike: Use the integrated StableCradles and rubber straps to firmly secure the bike frame to the rack. Ensure the bike is stable and does not move excessively.
- Load Subsequent Bikes: If carrying a second bike, load it into the outer cradles. Alternate the direction of the bikes (e.g., first bike facing left, second bike facing right) to optimize weight distribution and minimize contact.
- Secure Subsequent Bikes: Use the remaining integrated StableCradles and rubber straps to secure the second bike.
- Comprovació final: After loading all bikes, gently shake the rack and bikes to ensure everything is tight and secure. Adjust straps if necessary.

Figure 5.1: Two bikes securely loaded onto the Yakima Hangout 2 Bike Rack.
6. Manteniment
Regular maintenance ensures the longevity and safe operation of your Yakima Hangout 2 Bike Rack:
- Neteja: Clean the rack regularly with mild soap and water. Avoid harsh chemicals that could damage the finish or plastic components.
- Inspecció: Periodically inspect all straps, buckles, and padded feet for signs of wear, fraying, or damage. Replace any worn or damaged parts immediately.
- Lubricació: Apply a small amount of silicone-based lubricant to moving parts (e.g., QuickTrigger hub) to ensure smooth operation.
- Emmagatzematge: When not in use, clean the rack and store it in a dry, cool place away from direct sunlight. The arms fold for compact storage.

Figure 6.1: The Yakima Hangout 2 Bike Rack folded for compact storage.
7. Solució De Problemes
If you encounter issues with your bike rack, refer to the following common problems and solutions:
- Rack is not stable: Ensure all six straps are fully tightened. Verify that the padded feet are making full contact with the vehicle surface and are clean. Adjust the rack's position slightly if needed.
- Bikes are touching each other or the vehicle: Re-position bikes, ensuring they are loaded in alternating directions. Adjust the angle of the rack arms if possible to create more clearance. Ensure all bike accessories are removed.
- Straps are loose during travel: Re-tighten all straps. Check for any obstructions preventing full tension. Ensure straps are not worn or damaged.
- Dificultat per enganxar ganxos: Ensure the trunk/hatch is slightly open to allow hooks to securely grip the metal edges. Close the trunk/hatch carefully after hooks are in place.
8. Especificacions
| Característica | Detall |
|---|---|
| Número de model | 8002637 |
| Marca | Yakima |
| Capacitat | 2-bicicletes |
| Pes de l'article | 13.5 lliures |
| Dimensions del producte (L x A x A) | 23 x 21 x 10 polzades |
| Color | Negre |
| Material | Metall |
| Tipus de muntatge | Power Grip |
| Tipus d'ajust d'automòbil | Ajuste universal |
| És plegable | Sí |
9. Garantia i assistència
The Yakima Hangout 2 Bike Rack comes with a manufacturer's warranty against defects in materials and workmanship. For specific warranty details, including duration and coverage, please refer to the warranty card included with your product or visit the official Yakima weblloc.
For technical support, troubleshooting assistance, or to order replacement parts, please contact Yakima Customer Service through their official weblloc web o la informació de contacte que es proporciona a l'embalatge del producte.


