1. Producte acabatview
The Thermaltake TOUGHLIQUID 420 EX Pro ARGB Sync All-in-One (AIO) CPU Liquid Cooler is designed to provide efficient cooling for your processor while offering customizable ARGB lighting. This model features a 420mm radiator equipped with three 140mm TOUGHFAN EX14 Pro fans, utilizing MagForce 2.0 technology for simplified installation and stable connections. The water block incorporates an industrial design with an infinity mirror lighting effect, enhancing the aesthetic appeal of your PC build.
The TOUGHFAN EX14 Pro fans are engineered with a redesigned 9-blade structure made from Liquid Crystal Polymer (LCP), delivering high airflow and static pressure with minimal noise levels. The cooler is compatible with a wide range of Intel and AMD CPU sockets, including the latest LGA 1851/1700 and AM5 platforms.

Imatge 1.1: acabatview of the Thermaltake TOUGHLIQUID 420 EX Pro ARGB Sync All-in-One Liquid Cooler, showcasing the radiator, fans, and water block.
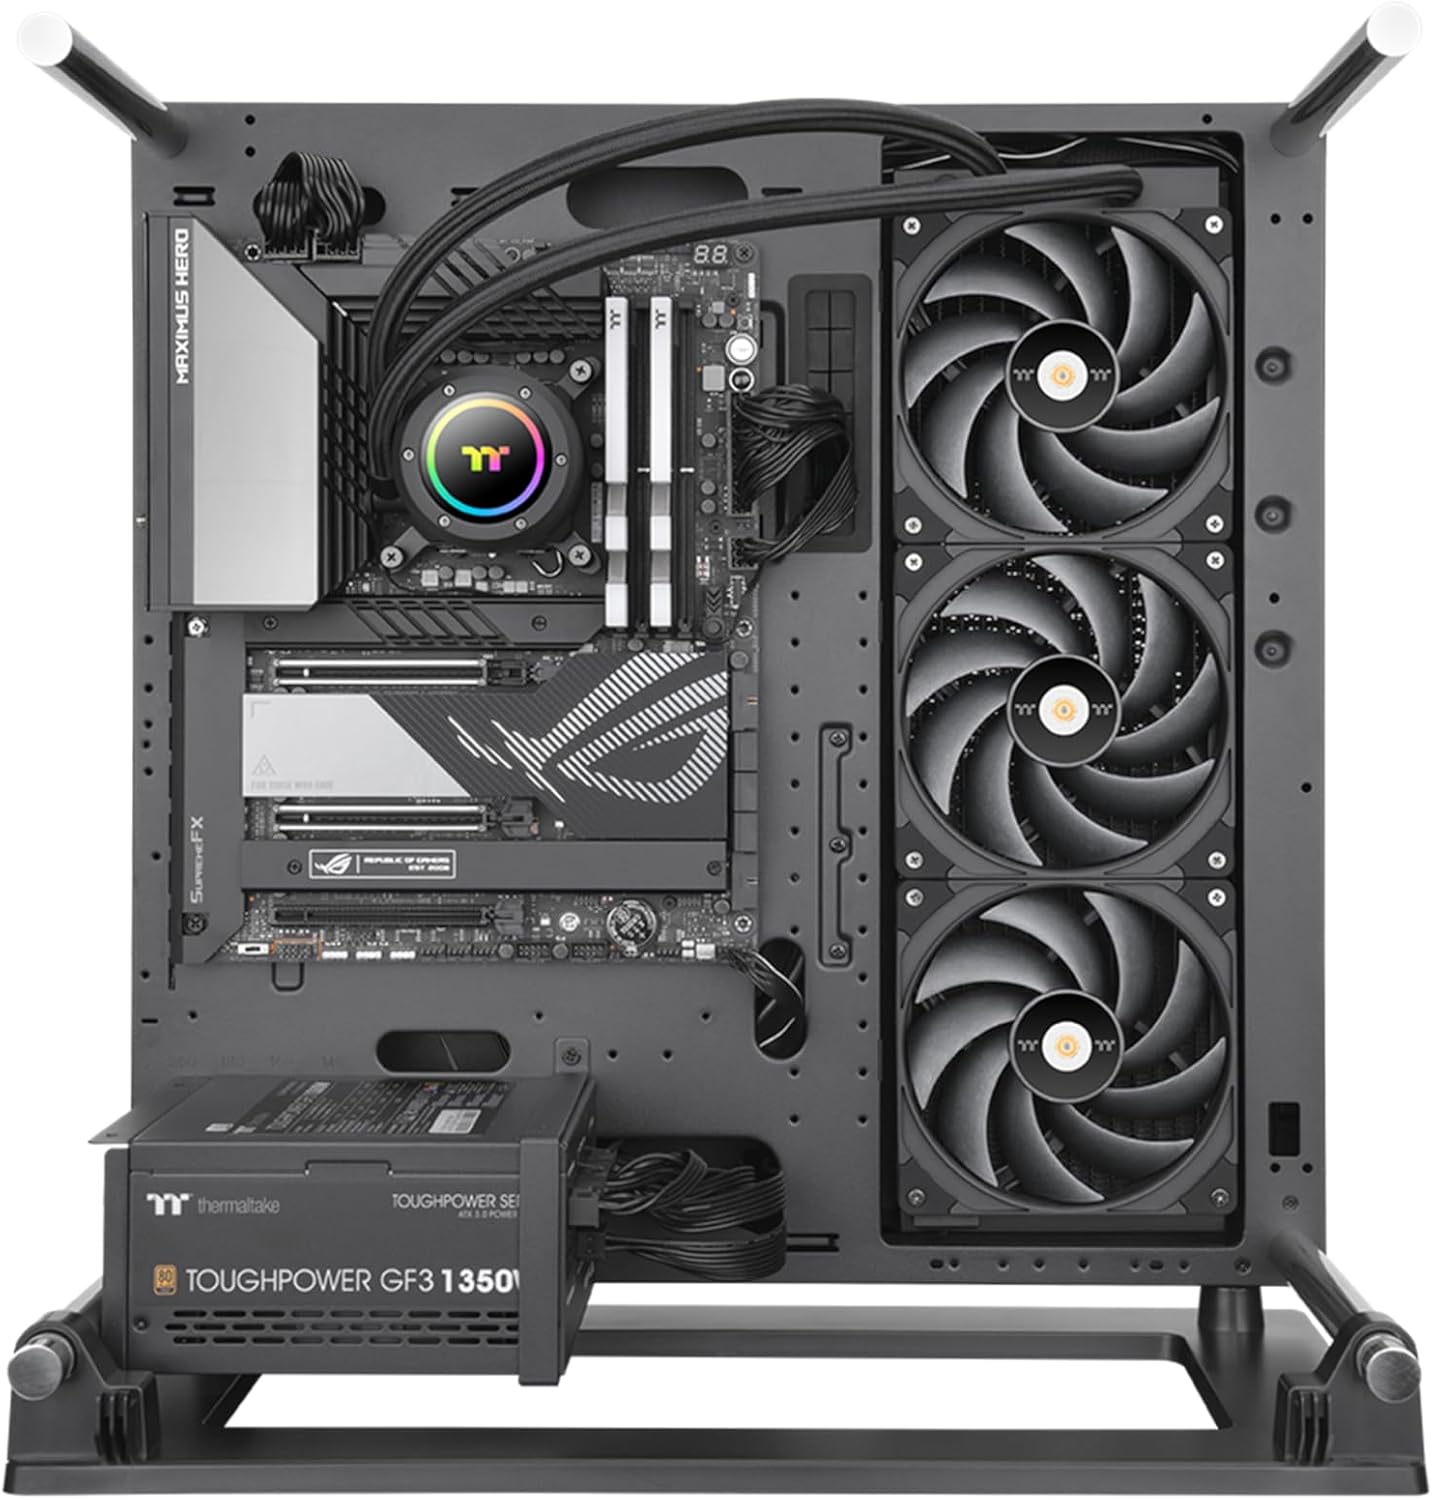
Image 1.2: The TOUGHLIQUID 420 EX Pro installed within a computer case, demonstrating its placement and overall appearance.
2. Contingut del paquet
Verify that all components are present in the package before proceeding with installation. If any items are missing or damaged, please contact Thermaltake customer support.
- TOUGHLIQUID 420 EX Pro AIO CPU Liquid Cooler (Radiator, Pump/Water Block, Tubing)
- Three (3) TOUGHFAN EX14 Pro 140mm Fans
- Mounting Hardware for Intel Sockets (LGA 1851/1700/1200/115X/2066/2011)
- Mounting Hardware for AMD Sockets (AM5/AM4/AM3+/AM3/AM2+/AM2)
- Fan Screws and Radiator Screws
- Pasta tèrmica
- Manual d'usuari (aquest document)
3. Especificacions
| Característica | Especificació |
|---|---|
| Número de model | CL-W401-PL14BL-A |
| Dimensions del producte | 20.4" de llargada x 8.2" d'amplada x 6.1" d'alçada (51.8 cm x 20.8 cm x 15.5 cm) |
| Mètode de refrigeració | Líquid (Tot en un) |
| Mida del ventilador | 3 x 140mm (TOUGHFAN EX14 Pro) |
| Velocitat del ventilador (PWM) | 500 ~ 2000 RPM |
| Flux d'aire del ventilador | 119.6 CFM |
| Pressió estàtica del ventilador | 3.57 mm-H2O |
| Nivell de soroll del ventilador | 31.6 dB-A |
| Velocitat de la bomba | Fins a 3300 RPM |
| Tipus de connector d'alimentació | 4-pins |
| Voltage | 12 Volts |
| Wattage | 8.76 watts |
| Material | Acrylonitrile Butadiene Styrene, Copper, Aluminum, Glass, Stainless Steel |
| Dispositius compatibles | Ordinadors d'escriptori |
| Compatibilitat de socket de CPU | Intel: LGA 1851/1700/1200/115X/2066/2011 AMD: AM5/AM4/AM3+/AM3/AM2+/AM2 |

Image 3.1: The 27mm slim radiator with a thickened 20mm copper chamber, designed for enhanced cooling performance.

Image 3.2: The high-performance copper base plate of the water block, designed to accelerate heat conductivity.
4. Configuració i instal·lació
Carefully follow these steps to install your Thermaltake TOUGHLIQUID 420 EX Pro AIO CPU Liquid Cooler. Refer to your motherboard and PC case manuals for specific mounting locations and clearances.
4.1 Prepareu el sòcol de la CPU
- Identify your CPU socket type (Intel LGA or AMD AM series).
- Install the appropriate backplate (if required) and mounting brackets for your CPU socket onto the motherboard.
- Clean the CPU surface with isopropyl alcohol to remove any old thermal paste or residue.
- Apply a small amount of thermal paste (pea-sized dot) to the center of your CPU's integrated heat spreader (IHS).
4.2 Muntar el radiador i els ventiladors
The TOUGHFAN EX14 Pro fans utilize MagForce 2.0 for easy daisy-chaining and connection.
- Determine the optimal mounting location for the 420mm radiator in your PC case (e.g., top, front).
- Attach the three TOUGHFAN EX14 Pro fans to the radiator using the provided fan screws. Ensure the airflow direction is correct for your case's cooling strategy (typically exhausting air out of the case).
- Connect the fans to each other using the MagForce 2.0 magnetic connectors. This minimizes cable clutter.
- Secure the radiator assembly to your PC case using the appropriate screws.

Image 4.1: TOUGHFAN EX Pro fans demonstrating the MagForce 2.0 quick connect design for reduced cable management.

Image 4.2: Close-up of MagForce 2.0 Pogo pin contact pads, designed for steady and efficient fan connections.
4.3 Install the Water Block
- Carefully place the water block onto the CPU, aligning it with the mounting holes on the brackets.
- Secure the water block with the provided thumb screws or nuts, tightening them in a diagonal pattern until snug. Avoid over-tightening.
- The water block features a rotatable upper cap. Adjust its orientation for the desired aesthetic once installed.

Image 4.3: The water block featuring ARGB lighting and a rotatable cap for aesthetic customization.
4.4 Connecteu els cables
- Connect the 4-pin PWM cable from the pump to the CPU_FAN or AIO_PUMP header on your motherboard.
- Connect the ARGB cable from the water block to a compatible 5V ARGB header on your motherboard or an ARGB controller.
- Connect the main power cable for the fans (from the MagForce 2.0 chain) to a fan header on your motherboard or a dedicated fan controller.
- Ensure all cables are routed neatly and do not interfere with other components or airflow.

Image 4.4: Diagram illustrating the wide CPU socket compatibility, including Intel LGA 1851/1700 and AMD AM5.
5. Instruccions de funcionament
Once installed, the TOUGHLIQUID 420 EX Pro will begin cooling your CPU upon system startup. For optimal performance and customization, consider the following:
- Control del ventilador i la bomba: The cooler's fans and pump are PWM controlled. You can adjust their speed curves through your motherboard's BIOS/UEFI settings or using compatible motherboard software. This allows you to balance cooling performance and noise levels according to your preferences.
- Control d'il·luminació ARGB: The ARGB lighting on the water block and fans can be synchronized with compatible motherboard ARGB software (e.g., ASUS Aura Sync, MSI Mystic Light Sync, Gigabyte RGB Fusion, ASRock Polychrome Sync) or a dedicated ARGB controller. Refer to your motherboard's manual for specific instructions on ARGB control.
- Seguiment: Use system monitoring software to keep track of your CPU temperatures and ensure the cooler is functioning effectively.
6. Manteniment
Un manteniment regular ajuda a garantir la longevitat i el rendiment òptim del vostre refrigerador de líquid.
- Eliminació de pols: Periodically inspect the radiator fins and fan blades for dust accumulation. Use compressed air or a soft brush to gently remove dust. Excessive dust can impede airflow and reduce cooling efficiency.
- Tubs i connexions: Occasionally check the tubing and connections for any signs of wear, kinks, or leaks. While the system is a closed loop and designed to be maintenance-free regarding coolant, visual inspection is recommended.
- No cal reomplir de refrigerant: The TOUGHLIQUID 420 EX Pro is a sealed AIO unit and does not require coolant refills.
7. Solució De Problemes
If you encounter issues with your TOUGHLIQUID 420 EX Pro, refer to the following common troubleshooting steps:
- Els ventiladors no giren:
- Ensure all fan power cables are securely connected to the MagForce 2.0 chain and the main fan header on the motherboard.
- Check BIOS/UEFI settings to confirm fan headers are enabled and configured correctly (e.g., not set to 0 RPM at low temperatures).
- Verify that the MagForce 2.0 connections between fans are properly seated.
- Temperatures altes de la CPU:
- Confirm the water block is securely mounted to the CPU and making good contact. Re-apply thermal paste if necessary.
- Ensure the pump is running (you may hear a faint hum or feel vibrations in the tubing). Check its connection to the motherboard.
- Verify that fans are spinning and that the radiator is not obstructed by dust or other components.
- Check fan and pump speed settings in BIOS/UEFI; ensure they are set to an appropriate performance profile.
- Il·luminació ARGB no funciona/incorrecta:
- Ensure the ARGB cable is correctly connected to a 5V ARGB header (3-pin, not 12V RGB 4-pin). Connecting to a 12V header can damage the LEDs.
- Verify that your motherboard's ARGB software is installed and updated.
- Check for any loose connections in the ARGB chain.
- Sorolls inusuals:
- A slight gurgling sound upon initial startup is normal as air bubbles settle. This should subside.
- If persistent, ensure the radiator is mounted higher than the pump if possible, to allow air to collect in the radiator.
- Check for any cables or objects interfering with fan blades.
8. Garantia i Suport
Els productes Thermaltake es fabriquen amb alts estàndards de qualitat. Per obtenir informació sobre la garantia, consulteu la targeta de garantia inclosa amb el producte o visiteu el lloc web oficial de Thermaltake. website. If you require technical assistance or have questions not covered in this manual, please contact Thermaltake customer support through their official channels.
Oficial de Thermaltake Weblloc: www.thermaltake.com


