1. Introducció
This manual provides detailed instructions for the operation and maintenance of your iTOMA 207A Alarm Clock Radio. This device features APP control, a 15W wireless charger, FM radio, dual alarms, a sleep timer, snooze function, auto-manual dimmer, night light, and an LED display. Please read this manual thoroughly before use to ensure proper functionality and to maximize your product experience.
2. Contingut del paquet
- iTOMA 207A Alarm Clock Radio
- Adaptador d'alimentació
- Manual d'usuari
3. Producte acabatview
Familiarize yourself with the components and controls of your iTOMA 207A Alarm Clock Radio.

Figura 3.1: Frontal View. This image displays the front of the iTOMA 207A Alarm Clock Radio, highlighting its large, ice blue LED display. The display shows the current time (12:38) and the day of the week (SAT), along with small icons indicating alarm status and Bluetooth connectivity. The unit has a sleek black body with a clear base that emits a soft blue glow.

Figura 3.2: Panell de control superior. Aquesta imatge ofereix un detall view of the top panel of the iTOMA 207A Alarm Clock Radio. It features a central circular snooze/volume control button with the iTOMA logo and a lightning bolt icon, indicating the wireless charging area. Surrounding this are various function buttons for setting alarms (AL1, AL2), clock/time zone, sleep/timer, tune controls, FM radio, dimmer, LED night light, and Bluetooth pairing. The layout is designed for intuitive access to all functions.

Figura 3.3: Dimensions del producte. Aquesta imatge mostra un pro lateralfile of the iTOMA 207A Alarm Clock Radio, with measurements indicating its compact size. The height is approximately 90.5mm (3.56 inches), the width is 158mm (6.22 inches), and the depth is 75mm (2.95 inches). This view emphasizes the unit's rectangular shape and the clear base.
Control Buttons and Display Elements:
- SNOOZE/VOL+/- Button: Press to snooze an alarm, rotate to adjust volume.
- Botons AL1/AL2: Set and activate Alarm 1 and Alarm 2.
- CLOCK SET/TIME ZONE Button: Adjust time and date settings, set time zone.
- SLEEP/TIME-ZONE Button: Activate sleep timer or adjust time zone.
- TUNE+/- Buttons: Adjust FM radio frequency or navigate menu options.
- FM ON/OFF Button: Turn FM radio on or off.
- Botó DIMMER: Ajusteu la brillantor de la pantalla.
- Botó LED: Control the night light.
- FM MEM/BT PAIR Button: Save FM stations or initiate Bluetooth pairing.
- Coixinet de càrrega sense fil: Situat a la part superior per a dispositius compatibles.
- USB-A & Type-C Charging Ports: Located on the rear for wired charging.
4. Configuració
4.1 Connexió d'alimentació
- Connect the power adapter to the DC IN port on the back of the alarm clock.
- Connecteu l'adaptador d'alimentació a una presa de corrent estàndard.
- The clock display will illuminate, and the time may automatically set.
4.2 Configuració inicial de l'hora
Upon initial power-up, the clock may automatically synchronize its time. If manual adjustment is required:
- Manteniu premut el botó CONJUNT DE RELLOTGE botó. Els dígits de l'hora parpellejaran.
- Utilitza el TUNE+/- botons per ajustar l'hora. Premeu CONJUNT DE RELLOTGE per confirmar.
- Repetiu-ho per a minuts, any, mes i dia.
- Per canviar entre el format de 12 hores i el de 24 hores, premeu la tecla CONJUNT DE RELLOTGE button during time setting until the option appears, then use TUNE+/- per seleccionar.

Figure 4.1: 12/24 Hour Format. This image illustrates the difference between the 12-hour and 24-hour time display formats on the clock radio, showing 10:38 AM and 22:38 respectively.
4.3 App Installation and Control
The iTOMA 207A can be controlled via a dedicated smartphone application, offering enhanced functionality and ease of use.
- Download the 'iTOMA' app from the App Store (for iOS devices) or Google Play Store (for Android devices).
- Assegureu-vos que el Bluetooth estigui habilitat al vostre telèfon intel·ligent.
- Open the iTOMA app and follow the on-screen instructions to pair with your alarm clock radio.
- Once connected, you can control various settings such as time, alarms, radio, and display options directly from the app.
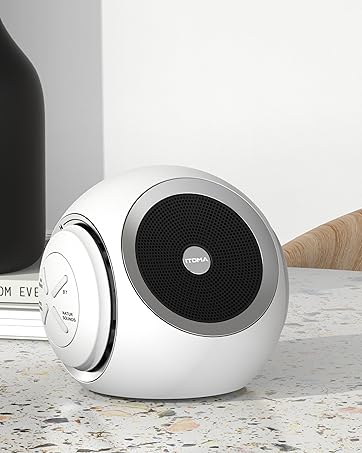
Figure 4.2: App Control Interface. This image shows a smartphone screen with the iTOMA application open. The app provides a user-friendly interface to manage the alarm clock's functions, including setting alarms, controlling the FM radio, and selecting natural soundscapes.
5. Instruccions de funcionament
5.1 Configuració de l'alarma (alarma dual)
The iTOMA 207A features two independent alarms (AL1 and AL2) with customizable settings.
- Manteniu premut el botó AL1 or AL2 botó. L'hora de l'alarma parpellejarà.
- Utilitza el TUNE+/- buttons to adjust the hour, then press the alarm button again to confirm.
- Repetiu durant minuts.
- Select the alarm source (FM Radio or Buzzer) using TUNE+/-, a continuació, confirmeu.
- Choose the alarm volume (1-16) and confirm.
- Select the alarm week mode: 1-1 (Single Day), 1-5 (Dies feiners), 1-7 (Every Day), or 6-7 (Weekends).
- Per activar/desactivar una alarma, premeu el botó corresponent AL1 or AL2 breument el botó. Apareixerà/desapareixerà una icona d'alarma a la pantalla.

Figure 5.1: Dual Alarm Modes. This graphic illustrates the dual alarm functionality, allowing users to set two separate alarms. Options include waking up to FM radio or a buzzer, and selecting from four different week modes: single day, weekdays only, every day, or weekends only.
5.2 Funcionament de la ràdio FM
- Premeu el botó FM ON/OFF botó per encendre la ràdio.
- Utilitza el TUNE+/- buttons to manually tune to a desired frequency (87.5-108 MHz). Press and hold for auto-scan.
- To save a station: While listening to a station, press and hold the FM MEM botó. Ús TUNE+/- to select a preset number (up to 20), then press FM MEM de nou per salvar.
- To recall a saved station: Briefly press the FM MEM botó i, a continuació, feu servir TUNE+/- per recórrer els valors predefinits.
- Temporitzador de son: Mentre la ràdio està encesa, premeu el botó DORMIR button repeatedly to set a sleep timer (10-90 minutes). The radio will turn off automatically after the set time.
5.3 Càrrega sense fil
The iTOMA 207A features a 15W wireless charging pad on its top surface.
- Col·loca el teu telèfon intel·ligent o dispositiu compatible amb Qi directament a la base de càrrega sense fil.
- Assegureu-vos que el dispositiu estigui centrat a la base de càrrega per a una càrrega òptima.
- A charging indicator will appear on your device's screen or the clock's display (if applicable) to confirm charging has begun.

Figure 5.2: Wireless Charging. This image shows the iTOMA 207A Alarm Clock Radio with a smartphone placed on its top surface, actively undergoing wireless charging. The phone's screen indicates charging status, demonstrating the convenience of the integrated 15W wireless charging pad.
5.4 USB-A and Type-C Charging Ports
Two additional charging ports are available on the rear of the unit for wired charging.
- Connect your device's charging cable to either the USB-A or Type-C port.
- Plug the other end of the cable into your smartphone, tablet, or other compatible device.
- El dispositiu començarà a carregar-se.

Figure 5.3: Multiple Charging Options. This image demonstrates the versatile charging capabilities of the iTOMA 207A. A smartphone is shown wirelessly charging on the top pad, while a smartwatch is connected via a cable to one of the wired charging ports on the back, illustrating the ability to charge multiple devices simultaneously.
5.5 Display Dimmer and Night Light
Adjust the brightness of the LED display and control the integrated night light.
- Atenuador de pantalla: Premeu el botó DIMMER button repeatedly to cycle through 5 brightness levels (Bright, Dim, Invisible, Off) or activate the auto-dimmer function.
- Llum nocturna: Premeu el botó LED button to turn the night light on/off or cycle through its 2 brightness levels.

Figura 5.4: Configuració del regulador d'intensitat de la pantalla. This composite image illustrates the four main brightness settings for the iTOMA 207A's LED display: Bright, Dim, Invisible (very faint), and Off. This allows users to customize the display visibility according to ambient light conditions and personal preference.
5.6 Connectivitat Bluetooth
Connect your smartphone or other Bluetooth-enabled devices to stream audio.
- Premeu el botó BT PARELL button to enter Bluetooth pairing mode. The Bluetooth icon on the display will flash.
- On your device, search for Bluetooth devices and select "iTOMA 207A" (or similar name).
- Once paired, the Bluetooth icon will stop flashing and remain solid. You can now play audio through the clock radio.

Figure 5.5: Bluetooth Pairing. This image shows a smartphone's Bluetooth settings menu, with the iTOMA 207A (labeled as '207') successfully paired and connected. This demonstrates the process of connecting an external device to the alarm clock radio via Bluetooth for audio streaming.
5.7 Funció de repetició
Quan soni una alarma, premeu la tecla gran DORMITAR button on top of the unit to temporarily silence the alarm for 9 minutes. The alarm will sound again after the snooze period. This can be repeated multiple times.

Figure 5.6: Snooze Function. This close-up image focuses on the large, central SNOOZE/VOL- button on the top of the iTOMA 207A. An arrow indicates pressing the button to activate the 9-minute snooze function, allowing for a brief delay before the alarm sounds again.
6. Manteniment
- Neteja: Feu servir un drap suau i sec per netejar la superfície del despertador. No utilitzeu netejadors líquids ni materials abrasius.
- Col·locació: Col·loqueu la unitat sobre una superfície estable i plana, allunyada de la llum solar directa, de fonts de calor i d'humitat excessiva.
- Cable d'alimentació: Assegureu-vos que el cable d'alimentació no estigui pessigat ni danyat.
7. Solució De Problemes
| Problema | Causa possible | Solució |
|---|---|---|
| La pantalla del rellotge està tènue o il·legible. | Dimmer setting is too low or auto-dimmer is active in low light. | Premeu el botó DIMMER button to cycle through brightness levels or disable auto-dimmer. |
| La càrrega sense fil no funciona. | Dispositiu no compatible amb Qi, no centrat o amb objectes estranys al coixinet. | Ensure device is Qi-compatible and properly aligned. Remove any obstructions. |
| La recepció de ràdio FM és deficient. | Antena no estesa o posicionada correctament; interferències locals. | Extend and adjust the FM antenna. Try repositioning the unit. |
| El dispositiu Bluetooth no es pot emparellar. | Clock not in pairing mode; device too far; previously paired. | Ensure clock is in BT PAIR mode. Move device closer. Forget device on phone and re-pair. |
| L'alarma no sona. | Alarm not activated, volume too low, or incorrect week mode. | Verify alarm is ON (icon visible), volume is set, and week mode matches current day. |
8. Especificacions
- Marca: iTOMA
- Model: 207A
- Color: Ice Blue Led Display
- Dimensions del producte: 7.5 x 3.81 x 9 cm (aprox. 158 x 75 x 90.5 mm)
- Pes de l'article: 820 g
- Material: Plàstic
- Tipus de visualització: LED
- Sortida de càrrega sense fils: 15W
- Wired Charging Ports: 1x USB-A, 1x Type-C
- Rang de freqüència de FM: 87.5-108 MHz
- Característiques de l'alarma: Dual Alarm, 4 Week Modes, Radio/Buzzer Wake-up, 1-16 Volume Levels
- Durada de la posposació: 9 minuts
- Atenuador de pantalla: 5-level manual, Auto-dimmer
- Llum nocturna: Nivell 2
- Control de l'aplicació: Yes (via 'iTOMA' app)
9. Garantia i Suport
For warranty information or technical support, please refer to the official iTOMA website or contact iTOMA customer service directly. Keep your purchase receipt for warranty claims.
Fabricant: iTOMA
Lloc de treball: Flat A, 14/Fl., Fully Industrial Building No. 6 Tsun Yip Lane 999077 Kwun Tong KWUN TONG 999077 HONG KONG HK +85290600619


