1. Introducció
Thank you for choosing the VIKIO HOME 30-inch Range Hood Insert. This manual provides essential information for the safe and efficient installation, operation, and maintenance of your new kitchen appliance. Please read this manual thoroughly before installation and use, and keep it for future reference.

Figure 1.1: VIKIO HOME 30-inch Range Hood Insert, showcasing its sleek stainless steel design and integrated lighting.
2. Informació important de seguretat
Per reduir el risc d'incendi, descàrrega elèctrica o lesions, observeu el següent:
- Llegiu totes les instruccions abans d'utilitzar aquest aparell.
- Els treballs d'instal·lació i el cablejat elèctric han de ser realitzats per persones qualificades d'acord amb tots els codis i estàndards aplicables, inclosa la construcció antiincendis.
- Es necessita aire suficient per a la combustió adequada i l'escapament dels gasos a través del conducte de fum (xemeneia) dels equips de combustió de combustible per evitar el rebuig.
- Quan talleu o perforeu la paret o el sostre, no danyeu el cablejat elèctric i altres serveis ocults.
- Els ventiladors per conductes s'han de ventilar sempre a l'exterior.
- No utilitzeu aquesta unitat amb cap dispositiu de control de velocitat d'estat sòlid.
- Aquesta unitat ha d'estar connectada a terra.
- Netegeu els filtres de greix amb freqüència. No s'ha de permetre que s'acumuli greix al ventilador ni al filtre.
- No deixeu mai les unitats de superfície desateses a configuracions altes. Les ebullicions provoquen fum i vessaments de greix que poden encendre.
- Always turn hood ON when cooking at high heat or when flaming foods.
- Use appropriate pan size. Always use cookware appropriate for the size of the surface element.
3. Què hi ha a la caixa
Verifiqueu que tots els components siguin presents abans de començar la instal·lació:
- VIKIO HOME Range Hood Insert Unit
- 2 x filtres deflectors d'acer inoxidable
- Ducting Adapter (if applicable for ducted setup)
- Maquinari de muntatge (cargols, ancoratges)
- Manual d'usuari
- Cable d'alimentació
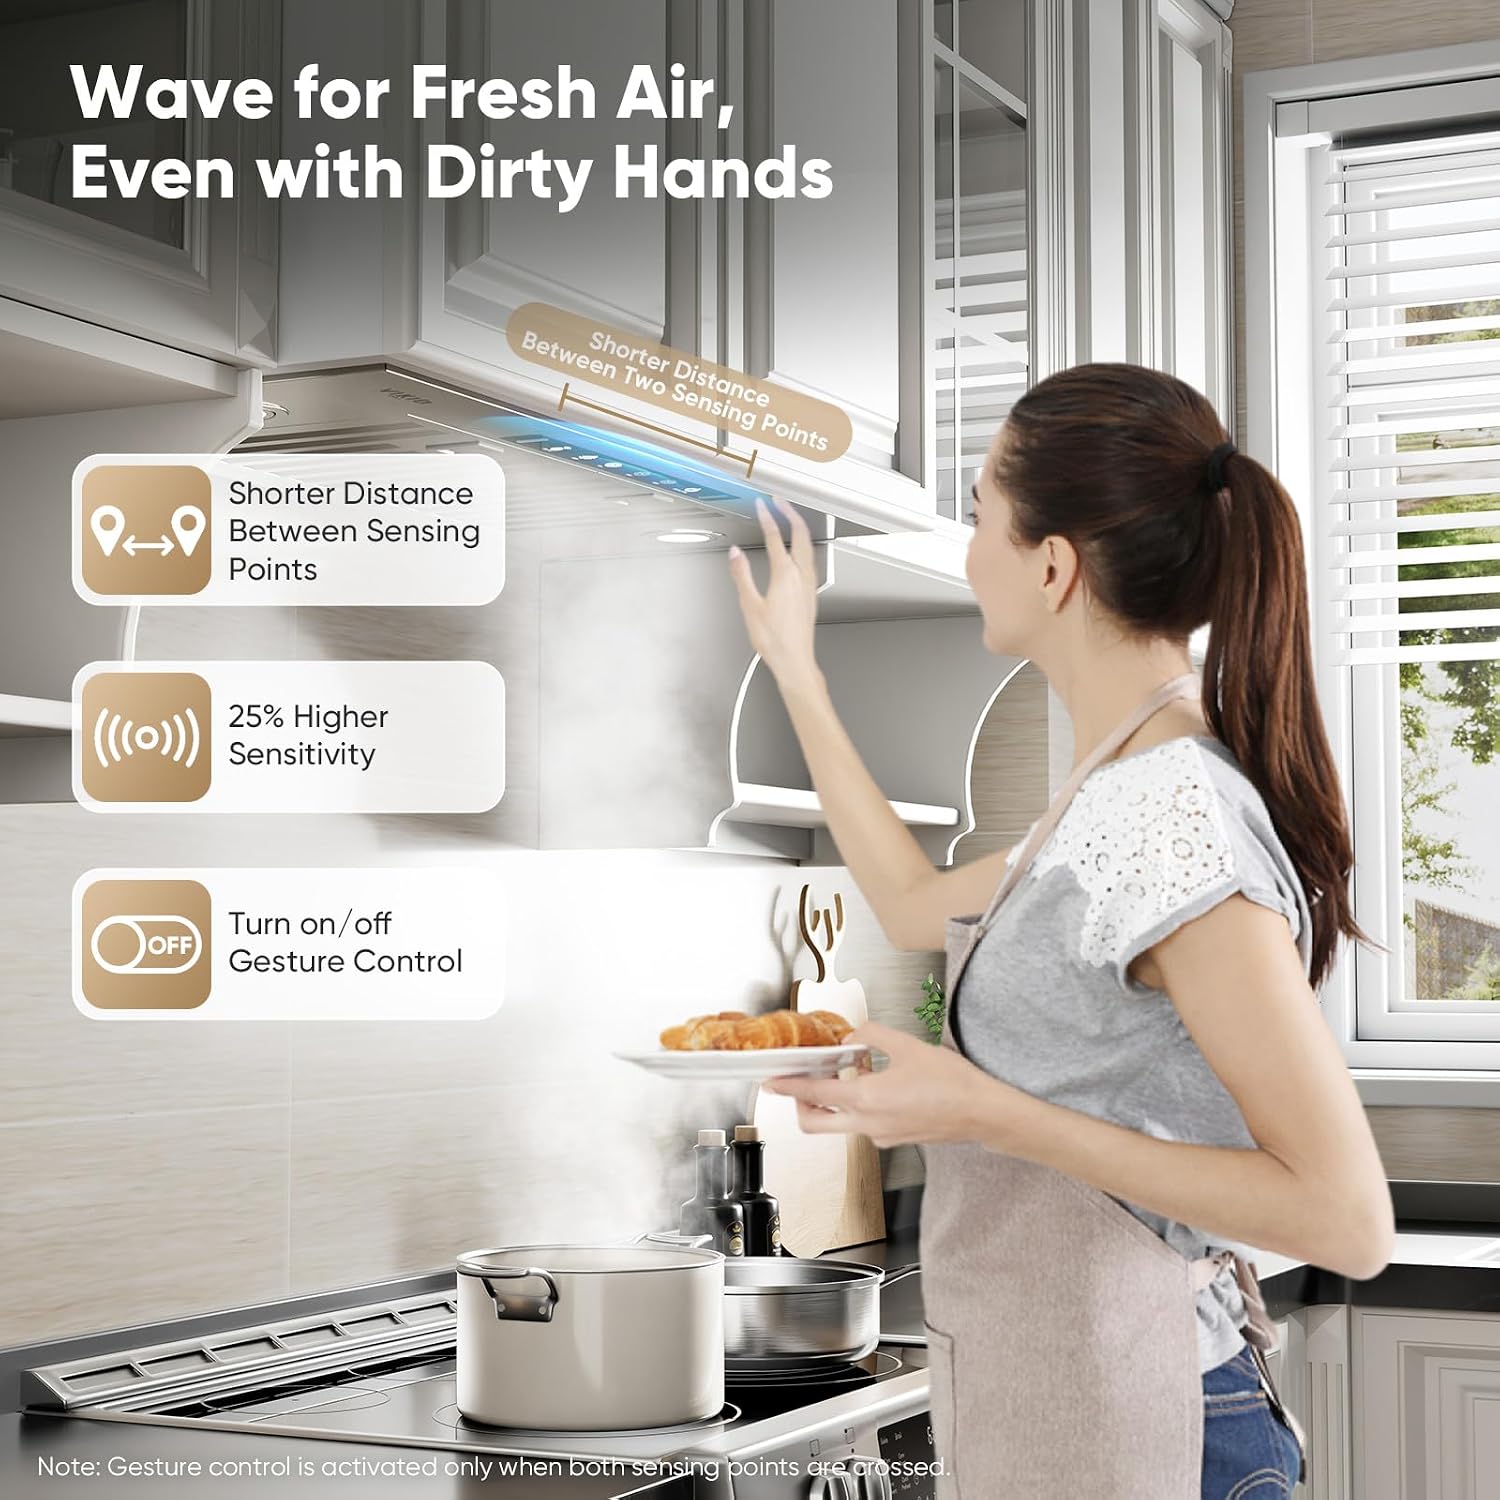
Figura 3.1: Example of the power plug included with the range hood unit.
4. Configuració i instal·lació
This range hood insert is designed for built-in installation within a cabinet. Ensure you have the necessary tools and that the installation area meets the required dimensions (refer to Section 7: Specifications).
4.1 Comprovacions prèvies a la instal·lació
- Confirm cabinet opening dimensions are suitable for a 30-inch insert.
- Ensure electrical supply is available and meets product requirements (110 Volts).
- Decide between ducted or ductless (recirculating) ventilation. For ductless operation, charcoal filters (not included) are required.
4.2 Passos d'instal·lació
- Prepareu l'obertura de l'armari segons les dimensions proporcionades.
- Carefully lift the range hood insert into the prepared opening.
- Secure the unit using the provided mounting hardware. Ensure it is level and firmly attached to the cabinet structure.
- For ducted installation, connect the ducting to the top exhaust outlet and vent to the outside. For ductless, install charcoal filters (sold separately) and ensure the top vent is clear for air recirculation.
- Connecteu el cable d'alimentació a una presa de corrent elèctrica amb terra.

Figure 4.1: The range hood insert seamlessly integrated into kitchen cabinetry, demonstrating a typical installation scenario.
4.3 Vídeo de demostració de la instal·lació
Video 4.1: An official demonstration video from VIKIO HOME showing the step-by-step process for installing the range hood insert. This video covers the built-in installation procedure, including placement and securing the unit.
5. Instruccions de funcionament
Your VIKIO HOME Range Hood Insert features both gesture and touch controls for convenient operation.
5.1 Tauler de control acabatview
The control panel is located on the front of the unit and includes icons for power, light, fan speed, and gesture control activation.
5.2 Gesture Control
The advanced gesture control allows for hands-free operation. Simply wave your hand in front of the sensor to turn the unit on/off or adjust fan speeds. The sensor detection is highly accurate to prevent accidental triggers.

Figure 5.1: Illustration of the gesture control feature, allowing users to operate the range hood with a simple hand wave, ideal for maintaining hygiene during cooking.
5.3 Ajust de la velocitat del ventilador
The range hood offers 3 fan speed levels to accommodate various cooking needs. Use the touch controls or gesture control to cycle through low, medium, and high speeds. The powerful 980 CFM dual-intake motor ensures efficient smoke and odor removal.

Figure 5.2: Visual representation of the range hood's powerful suction, effectively clearing smoke and steam from the cooking area.
Il·luminació 5.4
The integrated LED lights provide bright illumination for your cooking surface. Activate or deactivate the lights using the dedicated touch button on the control panel.

Figure 5.3: The range hood's LED lights illuminating the stovetop, ensuring clear visibility while cooking.
6. Manteniment
Un manteniment regular garanteix un rendiment òptim i una llarga vida útil de la campana extractora.
6.1 Cleaning the Baffle Filters
The stainless steel baffle filters are dishwasher-safe and designed for easy removal and cleaning. It is recommended to clean them regularly, depending on cooking frequency, to maintain effective grease capture.
- Turn off the range hood and disconnect power.
- Locate the filter release latches and carefully remove the filters.
- Place filters in a dishwasher or wash by hand with warm, soapy water.
- Deixeu que els filtres s'assequin completament abans de tornar-los a instal·lar.

Figure 6.1: The removable, dishwasher-safe stainless steel filters, designed for easy cleaning and maintenance.
6.2 Cleaning the Exterior Surface
Wipe the exterior stainless steel surface with a soft cloth and a non-abrasive cleaner designed for stainless steel. Avoid harsh chemicals or abrasive pads that could scratch the finish.
7. Solució De Problemes
Si teniu problemes amb la campana extractora, consulteu els següents problemes i solucions habituals:
| Problema | Causa possible | Solució |
|---|---|---|
| La caputxa no funciona | No power supply; Circuit breaker tripped; Power cord not plugged in. | Check power connection; Reset circuit breaker; Ensure plug is fully inserted. |
| Baixa potència d'aspiració | Grease filters are dirty; Ducting is obstructed or too long; Incorrect fan speed. | Clean filters; Check ducting for obstructions; Select a higher fan speed. |
| Soroll excessiu | Loose parts; Obstruction in fan; Improper installation. | Check for loose screws or components; Remove any obstructions; Verify proper installation. |
| Els llums no funcionen | Light bulb faulty; Electrical connection issue. | Replace LED bulb (GU10 LED); Check wiring connections. |
| Gesture control unresponsive | Sensor obstructed or dirty; Incorrect gesture. | Clean sensor area; Ensure proper hand motion as described in manual. |
8. Especificacions del producte
| Característica | Especificació |
|---|---|
| Número de model | VK-RB12-30 |
| Capacitat de cabal d'aire | 980 peus cúbics per minut (CFM) |
| Material | Acer inoxidable |
| Nivell de soroll | 35 dBA (low speed) to under 65 dBA (high speed) |
| Tipus de muntatge | Insert Mount |
| Tipus de controls | Gesture & Touch |
| Voltage | 110 Volts |
| Nombre de velocitats | 3 |
| Pes de l'article | 25.4 lliures |
| Tipus de font de llum | LED (GU10) |
| Tipus de filtre | Baffle (Dishwasher-Safe Stainless Steel) |
| Tipus de ventilació | Ducted/Ductless Convertible |
| Dimensions del producte (P x A x A) | 11.75" x 27.7" x 13.63" |
9. Garantia i atenció al client
VIKIO HOME is committed to providing high-quality products and excellent customer service. Your range hood insert comes with a hassle-free purchase guarantee, including free replacements for accessories like filters and lights whenever needed.
For any questions, concerns, or technical assistance, please do not hesitate to contact our professional and friendly customer service team. Refer to your purchase documentation for specific contact details or visit the official VIKIO HOME weblloc.


