1. Introducció
This instruction manual provides comprehensive guidance for the safe and correct installation, operation, and maintenance of your maXpeedingrods 3" Front & 3" Rear Leveling Lift Kit. This kit is designed to increase the ground clearance of your vehicle, allowing for larger tires and improved off-road capability, while maintaining a smooth ride with stock shocks.
1.1. Compatibilitat del vehicle
- Jeep Wrangler JK 2WD/4WD (2007-2018)
- Jeep Wrangler Unlimited JK 2WD/4WD (2007-2018)
Note: This kit is not compatible with the 2018 Jeep Wrangler JL models.

Image: Compatibility chart showing the kit is suitable for Jeep Wrangler JK 2WD and 4WD models from 2007 to 2018.
2. Informació de seguretat
- Installation should be performed by a qualified professional or an individual with extensive automotive mechanical experience.
- Always use appropriate safety equipment, including safety glasses, gloves, and sturdy footwear.
- Assegureu-vos que el vehicle estigui ben recolzat sobre els gats elevadors sobre una superfície plana abans de començar qualsevol treball. No confieu mai només en un gat.
- Disconnect the vehicle's battery before starting work to prevent accidental electrical discharge.
- Follow all torque specifications provided in your vehicle's service manual.
- After installation, perform a full alignment check and adjust headlights.
- Test drive the vehicle in a safe area to ensure proper function and handling before regular use.
3. Contingut del paquet
Verify that all components listed below are present and undamaged before beginning installation. If any parts are missing or damaged, contact maXpeedingrods customer support.

Image: A visual representation of all components included in the kit, such as front and rear coil spacers, shock extender brackets, brake line brackets, and various bolts and nuts.
- Front Coil Spring Spacers (2)
- Rear Coil Spring Spacers (2)
- Front Shock Brackets (2)
- Rear Shock Extender Brackets (2)
- Brake Line Brackets (2)
- High-Tensile Bolts, Nuts, and Washers (Assorted)
- Installation Manual (This document)
3.1. Material Quality
The leveling kit components are constructed from high-strength carbon steel with a golden powder-coated finish, designed to resist corrosion and rust for extended durability.

Image: Detail of the durable carbon steel construction and powder-coated finish of the coil spacers, emphasizing anti-corrosion properties.
3.2. High-Tensile Bolts
The kit includes Grade 8.8 high-tensile bolts with a tensile strength of at least 800MPa, ensuring secure and reliable connections for critical suspension components.

Image: Illustration of the Grade 8.8 high-tensile bolts, highlighting their robust construction for safer connections.
4. Eines necessàries
Abans de començar la instal·lació, reuniu les eines següents:
- Vehicle Jack and Jack Stands
- Cales de rodes
- Metric Socket Set and Wrenches (Common sizes: 18mm, 21mm)
- Clau dinamométrica
- Pry Bar
- Spring Compressor (Optional, but recommended for safety)
- Oli penetrant
- Guants i ulleres de seguretat
5. Instruccions d'instal·lació
These instructions are a general guide. Refer to your vehicle's service manual for specific torque specifications and additional details. It is recommended to work on one side of the vehicle at a time.
5.1. Preparació
- Aparqueu el vehicle en una superfície plana i anivellada.
- Engage the parking brake and place wheel chocks behind the rear wheels (when working on the front) or in front of the front wheels (when working on the rear).
- Loosen the lug nuts on the wheels you will be removing.
- Jack up the vehicle and support it securely with jack stands under the frame. Ensure the axles are hanging freely.
- Traieu les rodes.
5.2. Front Installation
- Disconnect the sway bar links from the axle.
- Disconnect the lower shock mount bolt.
- Carefully lower the axle to allow the coil spring to be removed. A spring compressor may be necessary.
- Install the front coil spring spacer on top of the original coil spring. Ensure it seats correctly.
- Reinstall the coil spring assembly.
- Install the front shock bracket to extend the shock absorber. Secure it with the provided hardware.
- Reattach the lower shock mount bolt and sway bar links.
- Install the brake line bracket to ensure adequate slack for the brake lines.
- Repetiu per a l'altra part frontal.
5.3. Rear Installation
- Disconnect the sway bar links from the axle.
- Disconnect the lower shock mount bolt.
- Carefully lower the axle to allow the coil spring to be removed.
- Install the rear coil spring spacer on top of the original coil spring. Ensure it seats correctly.
- Reinstall the coil spring assembly.
- Install the rear shock extender bracket. Secure it with the provided hardware.
- Reattach the lower shock mount bolt and sway bar links.
- Repetiu per a l'altra part posterior.
5.4. Passos finals
- Reinstall the wheels and hand-tighten the lug nuts.
- Lower the vehicle completely off the jack stands.
- Torque all lug nuts to the manufacturer's specifications.
- Torque all suspension bolts to the manufacturer's specifications.

Imatge: Més deview of all kit components, useful for identifying parts during installation.
6. Consideracions operatives
6.1. Comprovacions posteriors a la instal·lació
- Alineació: A professional wheel alignment is mandatory immediately after installation to prevent premature tire wear and ensure proper vehicle handling.
- Ajust del far: Adjust your vehicle's headlights to their proper level to avoid blinding oncoming traffic.
- Fluid Lines: Inspect all brake lines, ABS lines, and other fluid lines to ensure they are not stretched, pinched, or rubbing against any components.
- Elements de fixació: After approximately 500 miles of driving, re-torque all suspension fasteners to ensure they remain secure.
6.2. Driving Characteristics
The 3" lift will increase your vehicle's ground clearance, allowing for larger tires (up to 33" recommended) and improved off-road performance. While designed to maintain a smooth ride with stock shocks, be aware of the altered center of gravity, which may slightly affect on-road handling characteristics, especially during cornering.
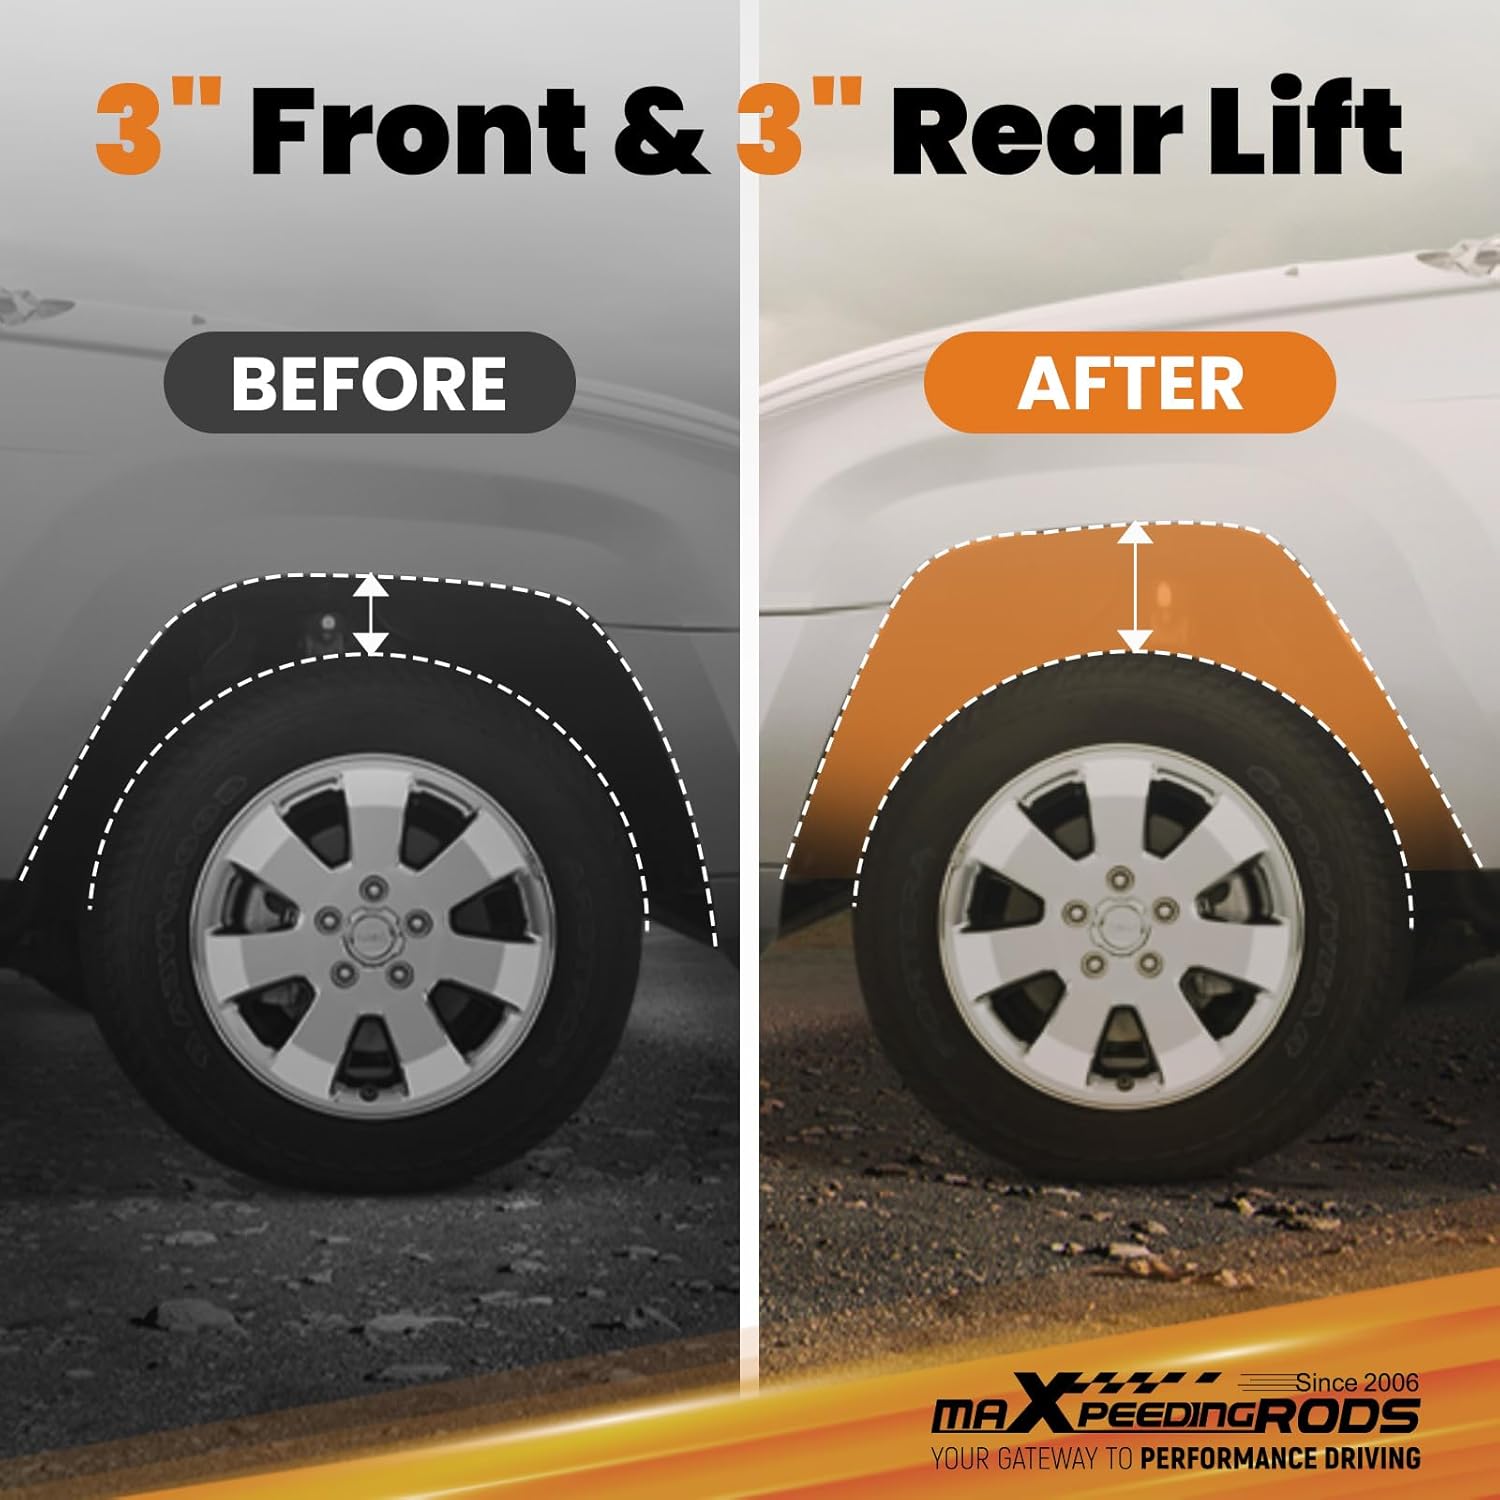
Image: Visual comparison illustrating the increased ground clearance and wheel well space after installing the 3-inch lift kit.
7. Manteniment
Regular inspection of your lift kit components is crucial for safety and longevity.
- Inspecció periòdica: Annually, or after severe off-road use, inspect all components of the lift kit for signs of wear, damage, or corrosion.
- Comprovació de fixacions: Periodically check and re-torque all bolts and nuts associated with the suspension and lift kit.
- Neteja: Keep the components clean from excessive dirt, mud, and salt, which can accelerate corrosion.
8. Solució De Problemes
- Alçada de conducció desigual: Double-check that the correct spacers are installed on the correct axles (front vs. rear) and that they are seated properly. Ensure all components are fully tightened.
- Sorolls inusuals: Inspect all connections for loose bolts or components rubbing against each other. Re-torque all fasteners.
- Poor Handling/Steering Issues: This often indicates a need for a professional wheel alignment. Also, check for proper installation of brake line brackets and sway bar links.
- Brake Line Tension: If brake lines appear stretched, ensure the brake line relocation brackets are correctly installed and providing sufficient slack.
9. Especificacions
| Marca | maXpeedingrods |
| Model | 3" Leveling Lift Kit |
| Aplicació | Jeep Wrangler JK/JKU 2WD/4WD (2007-2018) |
| Alçada d'elevació | 3 Inches Front & 3 Inches Rear |
| Material | High-Strength Carbon Steel |
| Acabar | Golden Powder Coated |
| Components inclosos | Front Coil Spring Spacers, Rear Shock Extender Brackets, Front Shock Brackets, Brake Line Brackets, Hardware |
| Grau de cargol | Grade 8.8 (Tensile Strength ≥ 800MPa) |
| Pes de l'article | Aproximadament 18.85 lliures |
| Dimensions del producte | 12.99 x 9.45 x 5.51 polzades (embalatge) |
| Número de peça del fabricant | PS62TQ |
10. Garantia i Suport
maXpeedingrods is committed to providing high-quality products. This product is backed by a warranty that supports free returns and exchanges within three months of purchase.
For any further information, technical assistance, or warranty claims, please contact maXpeedingrods customer support through the retailer where the product was purchased or visit the official maXpeedingrods weblloc.


