1. Informació important de seguretat
To ensure safe operation and prevent damage to the projector, observe the following precautions:
- Font d'alimentació: Use only the power cord and adapter specified for this projector. Ensure the power outlet matches the projector's voltage requisits.
- Ventilació: No bloquegeu les obertures de ventilació. Assegureu-vos que hi hagi prou espai al voltant del projector per a un flux d'aire adequat per evitar el sobreescalfament.
- Líquid i humitat: Mantingueu el projector allunyat de l'aigua o altres líquids. No el feu funcionar en ambients d'alta humitat.
- Objectes estrangers: Do not insert any objects into the projector's openings.
- Lens Warning: No mireu directament a la lent del projector quan estigui encès.amp està encès, ja que la llum brillant pot causar lesions oculars.
- Neteja: Desconnecteu el cable d'alimentació abans de netejar-lo. Feu servir un drap suau i sec. Eviteu els netejadors líquids o en aerosol.
- Servei: No intenteu fer la reparació del projector vosaltres mateixos. Envieu totes les tasques de manteniment a personal de servei qualificat.
2. Producte acabatview
Familiarize yourself with the various parts and controls of your Casio XJ-A155V projector.
2.1 Davant View

The front of the projector features the projection lens and front ventilation grilles. The lens is where the image is projected from.
2.2 Darrera View i connectivitat

The rear panel provides all the necessary ports for connecting external devices.

Ports include:
- DE: For composite video and audio input.
- COMPUTER/YCbCr/YPbPr: VGA port for computer connection, also supports component video.
- HDMI: High-Definition Multimedia Interface for digital video and audio input.
- USB: Per connectar dispositius USB.
- SERIE: For control and service connections.
2.3 Controls del panell superior

The top panel houses the main control buttons for operating the projector.
- POTÈNCIA/STANDBY: Encén o apaga el projector.
- ENTRADA: Selects the input source (HDMI, Computer, AV, etc.).
- AUTOMÀTIC: Automatically adjusts the image.
- ZOOM: Ajusta la mida de la imatge.
- FOCUS: Adjusts the image clarity.
- MENÚ: Obre el menú de visualització en pantalla (OSD).
- ENTRAR: Confirma les seleccions del menú.
- ESC: Surt del menú o funció actual.
- Arrow Keys (< ^ v >): Navegueu per les opcions del menú i ajusteu la configuració.
2.4 A baix View and Product Label

The bottom of the projector includes adjustable feet for tilt and stability, along with the product information label.
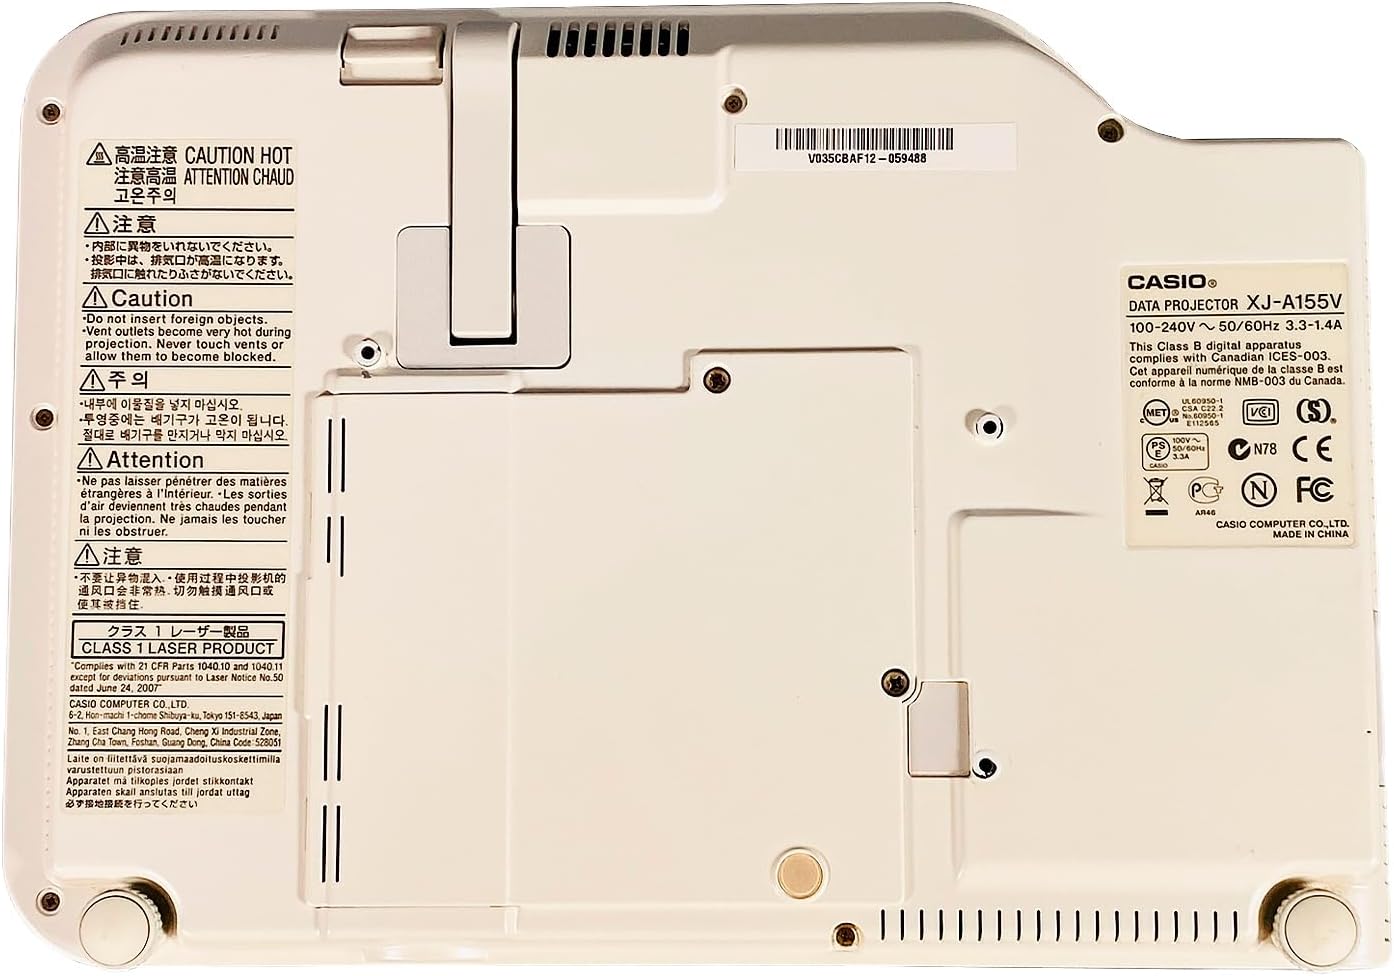
The product label provides important details such as the model number (XJ-A155V), power requirements (100-240V ~ 50/60Hz), and various compliance certifications.
3. Configuració
3.1 Desembalatge
Carefully remove the projector and all accessories from the packaging. Retain the packaging for future transport or storage.
3.2 Col·locació
Place the projector on a stable, level surface. Ensure there is sufficient space around the projector for ventilation. Adjust the projector's feet to achieve the desired projection angle and image alignment.
3.3 Connexió de potència
- Connecteu el cable d'alimentació al port d'entrada d'alimentació del projector.
- Connecteu l'altre extrem del cable d'alimentació a una presa de corrent adequada.
3.4 Connexió de fonts d'entrada
Connect your desired video and audio sources to the appropriate ports on the rear of the projector.
- HDMI: For high-quality digital video and audio from devices like Blu-ray players, laptops, or gaming consoles.
- COMPUTER (VGA): For connecting to a computer's VGA output.
- DE: For standard definition video and stereo audio from devices like DVD players or older video sources.
- USB: For connecting USB storage devices or for certain control functions.
4. Funcionament del projector
4.1 Encès/Apagat
- Per encendre: Premeu el botó POTÈNCIA/STANDBY button on the top panel or remote control. The power indicator light will illuminate.
- Per apagar: Premeu el botó POTÈNCIA/STANDBY button again. Confirm power off if prompted. The projector will enter a cool-down cycle before fully shutting down.
4.2 Selecció d'entrada
Premeu el botó ENTRADA button on the top panel or remote control to cycle through available input sources (HDMI, Computer, AV, etc.) until your desired source is displayed.
4.3 Ajust de l'enfocament i el zoom
- Focus: Utilitza el ENFOCAR buttons (or corresponding controls on the remote) to sharpen the image until it is clear.
- Zoom: Utilitza el ZOOM buttons (or corresponding controls on the remote) to adjust the size of the projected image.
4.4 Navegació de menús
Premeu el botó MENÚ button to open the On-Screen Display (OSD) menu. Use the arrow keys to navigate through options and ENTRAR per seleccionar. Premeu ESC per sortir del menú.
4.5 Image Adjustments
Within the OSD menu, you can adjust various image settings such as Brightness, Contrast, Color, Aspect Ratio, and Keystone Correction to optimize your viewexperiència.
5. Manteniment
5.1 Neteja del projector
- Lent: Netegeu suaument la lent amb un drap suau i sense borrissol dissenyat específicament per a superfícies òptiques. No utilitzeu productes de neteja abrasius.
- Casing: Netegeu el projector casing with a soft, dry cloth. For stubborn dirt, dampen the cloth slightly with water, then wipe dry.
- Reixes de ventilació: Use a soft brush or a vacuum cleaner with a brush attachment to remove dust from the ventilation grilles.
5.2 Manteniment del filtre d'aire
Regularly check and clean the air filter (if accessible) to maintain optimal cooling and projector performance. Refer to the on-screen prompts or specific model documentation for filter location and cleaning instructions.
6. Solució De Problemes
Si teniu problemes amb el projector, consulteu els problemes i solucions més comuns següents:
- Sense imatge:
- Assegureu-vos que el projector estigui encès i que l'indicador d'engegada estigui encès.
- Verify the input source is correctly selected and the source device is on.
- Check all cable connections (HDMI, VGA, etc.) are secure.
- Imatge borrosa:
- Adjust the focus using the ENFOCAR botons.
- Assegureu-vos que la superfície de projecció sigui plana i que el projector estigui a una distància adequada.
- Sense so:
- Comproveu la configuració de volum tant al projector com al dispositiu font.
- Ensure audio cables are correctly connected (if not using HDMI for audio).
- El control remot no funciona:
- Substituïu les piles del comandament a distància.
- Assegureu-vos que no hi hagi obstacles entre el comandament a distància i el receptor d'infrarojos del projector.
7. Especificacions
Key technical specifications for the Casio XJ-A155V DLP Projector:
| Característica | Especificació |
|---|---|
| Marca | Casio |
| Model | XJ-A155V |
| Brillantor | 3,000 lúmens ANSI |
| Resolució | 1024x768 (XGA) |
| Relació de contrast | 1800:1 |
| Tipus de visualització | DLP |
| Font de llum | Laser/LED Hybrid |
| Tecnologia de connectivitat | HDMI, USB, VGA, AV, Serial |
| Característica especial | Portàtil |
| Dimensions del producte | 8 x 11.7 x 1.7 polzades |
8. Garantia i Suport
Per obtenir informació sobre la garantia i assistència tècnica, consulteu la documentació que s'inclou amb la compra o poseu-vos en contacte amb el distribuïdor. Conserveu el comprovant de compra per a reclamacions de garantia.


