1. Introducció
The ELEGOO XL-Mercury Plus 3.0 Washing Bucket is designed to enhance your resin 3D printing post-processing experience. With a generous 7.5L cleaning capacity, it allows for efficient and hassle-free cleaning of larger models or multiple prints simultaneously. This durable, non-toxic polypropylene bucket offers excellent chemical stability and heat resistance, ensuring reliable performance for all your cleaning needs.
Les característiques clau inclouen:
- Capacitat més gran: 7.5 L cleaning capacity, 114% larger than V2.0, for bigger models or multiple prints.
- Basket Cleaning Mode: Direct cleaning of models placed in the basket. Maximum wash volume: 230 × 135 × 260 mm.
- Hanging Cleaning Mode: Securely fix the build plate on adjustable brackets for cleaning. Accommodates build plates up to 10 inches. Maximum wash volume: 214 × 135 × 180 mm.
- Thorough and Safe Cleaning: Wave plate pulsator for rapid water agitation and effective resin residue removal. Rubber sealing design prevents alcohol splashing and evaporation.
- Construcció duradora: Made from high-quality, non-toxic PP plastic for chemical stability and heat resistance.
2. Configuració
Before using your ELEGOO Washing Bucket, ensure all components are correctly assembled and placed within your Mercury Plus 3.0 Wash and Cure Station.
2.1 Desembalatge i anàlisi de componentsview
Upon unboxing, you should find the washing bucket, cleaning basket, and other accessories as shown below.
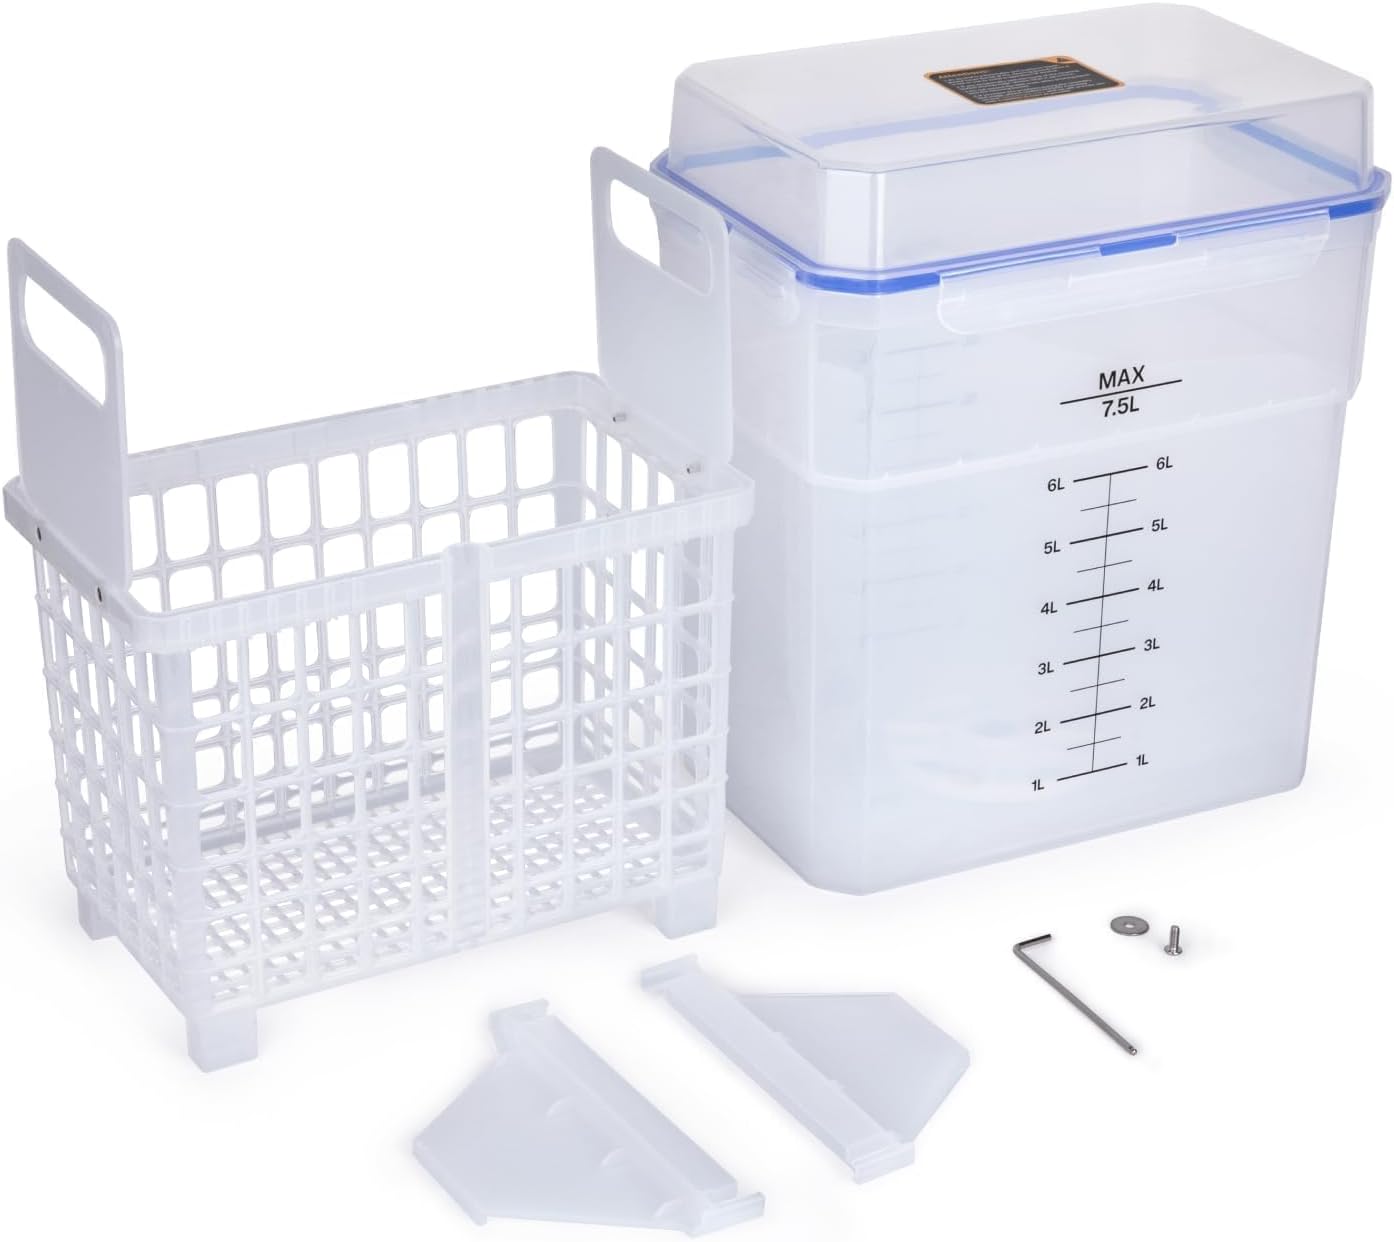
This image displays the complete set of components for the ELEGOO Washing Bucket. It includes the main transparent bucket with volume markings, the white cleaning basket, and additional parts like the build plate holder and small tools.
2.2 Installing the Cleaning Bucket Turntable
The cleaning bucket turntable is crucial for effective washing. Follow these steps to install it:
- Retrieve the outer cover of the machine.
- Lift the cleaning bucket upward to remove it from the machine.
- Open the top cover of the cleaning bucket.
- Take out the cleaning basket.
- Use a 2.5mm hex wrench to loosen the screw securing the old cleaning bucket turntable.
- Remove the washer and take out the old turntable.
- Retrieve the new cleaning bucket turntable, align it with the screw holes, and place it in the installation position.
- Place the gasket into the installation position.
- Use a 2.5mm Allen wrench to tighten the screws securing the cleaning bucket turntable.
- Place the cleaning basket into its installation position.
- Close the top cover of the cleaning bucket.
- Place the cleaning bucket filled with alcohol into the installation position on the machine.
- Cover the machine with the outer cover.
This video provides a visual guide on how to correctly install the cleaning bucket turntable for the ELEGOO Mercury Plus 3.0 Wash and Cure Station. It demonstrates the steps for disassembling the old turntable and assembling the new one, ensuring proper functionality.
3. Instruccions de funcionament
The ELEGOO Washing Bucket supports two primary cleaning modes for your resin prints.
3.1 Basket Cleaning Mode
For direct cleaning of your 3D printed models:
- Carefully remove the model from the build plate.
- Place the model directly into the cleaning basket.
- Ensure the basket is properly seated within the washing bucket.
- Fill the bucket with an appropriate cleaning solution (e.g., isopropyl alcohol) up to the desired level, ensuring the model is fully submerged.
- Turn on the power of your Mercury Plus 3.0 station.
- Select the cleaning mode and set the appropriate time for washing.

This image shows the transparent ELEGOO Washing Bucket from a side angle, highlighting its 7.5L maximum capacity and clear volume markings for precise liquid measurement.
3.2 Hanging Cleaning Mode
For cleaning models directly on the build plate:
- Fix the build plate (with the printed model still attached) onto the adjustable support brackets of the cleaning basket.
- Adjust the brackets to ensure the build plate is securely held and the model will be submerged in the cleaning solution.
- Place the cleaning basket with the attached build plate into the washing bucket.
- Fill the bucket with cleaning solution, ensuring the model is fully submerged without touching the bottom of the bucket.
- Turn on the power of your Mercury Plus 3.0 station.
- Select the cleaning mode and set the appropriate time for washing.

This image illustrates the white cleaning basket with its adjustable support brackets designed to hold a build plate for the hanging cleaning mode. The brackets can be adjusted to accommodate various build plate sizes.
4. Manteniment
Regular maintenance ensures the longevity and optimal performance of your washing bucket.
4.1 Cleaning the Bucket and Basket
- After each use, or when the cleaning solution becomes cloudy with resin residue, empty the bucket.
- Clean the interior of the bucket and the cleaning basket with warm water and mild soap. Avoid abrasive cleaners that could scratch the plastic.
- Ensure all parts are thoroughly dry before refilling with fresh cleaning solution.
4.2 Motor Replacement (if necessary)
In the event of a motor malfunction, you may need to replace the motor assembly. This process involves disassembling the base of the Mercury Plus 3.0 station.
This video demonstrates the detailed steps for replacing the motor in the ELEGOO Mercury Plus 3.0 Wash and Cure Station. It covers disassembling the base, unplugging the old motor, installing a new motor, and reassembling the unit.
5. Solució De Problemes
If you encounter issues with your washing bucket or the Mercury Plus 3.0 station, consider the following:
- Neteja inadequada: Ensure the cleaning solution is fresh and sufficient to cover the models. Check that the turntable is rotating freely.
- Resin Residue Buildup: If the solution is heavily contaminated, replace it. Clean the bucket and basket thoroughly.
- Plat giratori que no gira: Verify that the turntable is correctly installed and the motor is functioning (refer to the motor replacement video if needed). Check power connections.
- Alcohol Evaporation/Splashing: Ensure the rubber sealing design on the lid is properly engaged to prevent loss of cleaning solution.
6. Especificacions
| Atribut | Valor |
|---|---|
| Marca | ELEGOO |
| Model | XL-Mercury Plus 3.0 Bucket |
| Color | Clar |
| Material | Polipropilè (PP) |
| Dimensions del producte | 10.43 cm de llargada x 7.68 cm d'amplada x 12.52 cm d'alçada |
| Capacitat | 7.5 litres |
| Pes de l'article | 3.79 lliures |
7. Garantia i Suport
For warranty information, technical assistance, or any product-related inquiries, please contact ELEGOO customer support directly. Refer to the official ELEGOO website or your product packaging for the most up-to-date contact details.
També podeu visitar el ELEGOO Store on Amazon per a més productes i informació.


