1. Introducció
This manual provides detailed instructions for the installation, operation, and maintenance of your KICKER 47KEY2004 4-Channel DSP Smart Amplifier and KICKER 51KSC6704 KS-Series 6.75" Coaxial Speakers. This audio upgrade bundle is designed to enhance your vehicle's sound system with advanced digital signal processing and high-quality sound reproduction. Please read this manual thoroughly before installation and use to ensure proper function and safety.

Image 1.1: KICKER 47KEY2004 Amplifier and 51KSC6704 Speakers bundle.
2. Informació de seguretat
Observeu sempre les següents precaucions de seguretat durant la instal·lació i el funcionament:
- Disconnect the vehicle's battery negative terminal before beginning any electrical work.
- Assegureu-vos que tot el cablejat estigui correctament encaminat i fixat per evitar danys o curtcircuits.
- Use appropriate gauge wiring for power and ground connections as specified by the amprequisits del vidador.
- Avoid installing components in locations that obstruct vehicle operation or safety features.
- Do not expose components to excessive moisture or extreme temperatures.
- Seek professional installation if you are unsure about any steps.
3. Contingut del paquet
Verifiqueu que tots els elements siguin presents al vostre paquet:
- KICKER 47KEY2004 4-Channel DSP Smart Ampmés viu
- KICKER 51KSC6704 KS-Series 6.75" Coaxial Speakers (Pair)
- Wiring Harnesses for Ampmés viu
- KEY Auto Setup Microphone
- Maquinari de muntatge
- Manual d'usuari (aquest document)
4. Configuració i instal·lació
4.1 KICKER 47KEY2004 DSP Smart AmpInstal·lació més viva
The KICKER 47KEY2004 amplifier is designed for compact installation. Choose a location that is dry, well-ventilated, and provides secure mounting.

Imatge 4.1: Frontal view of the KICKER 47KEY2004 DSP Smart Ampmés viu.
4.1.1 Muntatge
- Select a flat, secure surface, such as under a seat or in the trunk.
- Utilitza el amplifier as a template to mark mounting holes.
- Drill pilot holes carefully, ensuring no wires or fuel lines are damaged.
- Assegureu-vos el amplificador utilitzant els cargols de muntatge proporcionats.
4.1.2 Connexions de cablejat
Refer to the wiring diagram provided with your amplifier for specific connections. General steps include:

Imatge 4.2: Anglesa view of the KICKER 47KEY2004 Amplifier, highlighting connection ports.
- Potència (BATT+): Connect to the positive terminal of the vehicle's battery using an appropriate fuse (not included, typically 20A).
- Terra (GND): Connect to a clean, bare metal chassis point of the vehicle.
- Engegada remota (REM): Connect to the remote output of your head unit or an ignition-switched 12V source.
- Entrada: Connecteu el amplifier's input harness to your head unit's speaker-level or RCA outputs.
- Sortida: Connecteu el amplifier's output harness to the KICKER 51KSC6704 speakers. Ensure correct polarity.
4.1.3 KEY Auto Setup
The KEY Auto Setup feature uses a microphone to automatically optimize the amplifier's DSP settings for your vehicle's acoustics.

Image 4.3: KICKER 47KEY2004 Amplifier shown with the included KEY Auto Setup microphone.
- Connect the KEY Auto Setup microphone to the ampmés viu.
- Place the microphone at the primary listening position (e.g., driver's headrest).
- Follow the specific instructions in the amplifier's dedicated manual for initiating the auto-setup process. This typically involves playing a test tone and allowing the amplifier to analyze the sound.
- The DSP will automatically adjust time alignment, equalization, and other parameters.
4.2 KICKER 51KSC6704 KS-Series 6.75" Coaxial Speakers Installation
These speakers are designed for easy integration into most factory speaker locations.

Image 4.4: A pair of KICKER 51KSC6704 KS-Series 6.75" Coaxial Speakers with protective grilles.
4.2.1 Muntatge
- Remove existing factory speakers from the desired location (e.g., door panels).
- Ensure the KICKER 51KSC6704 speakers fit the opening. Adapters may be required for some vehicles (not included).
- Secure the speakers using the provided mounting screws.
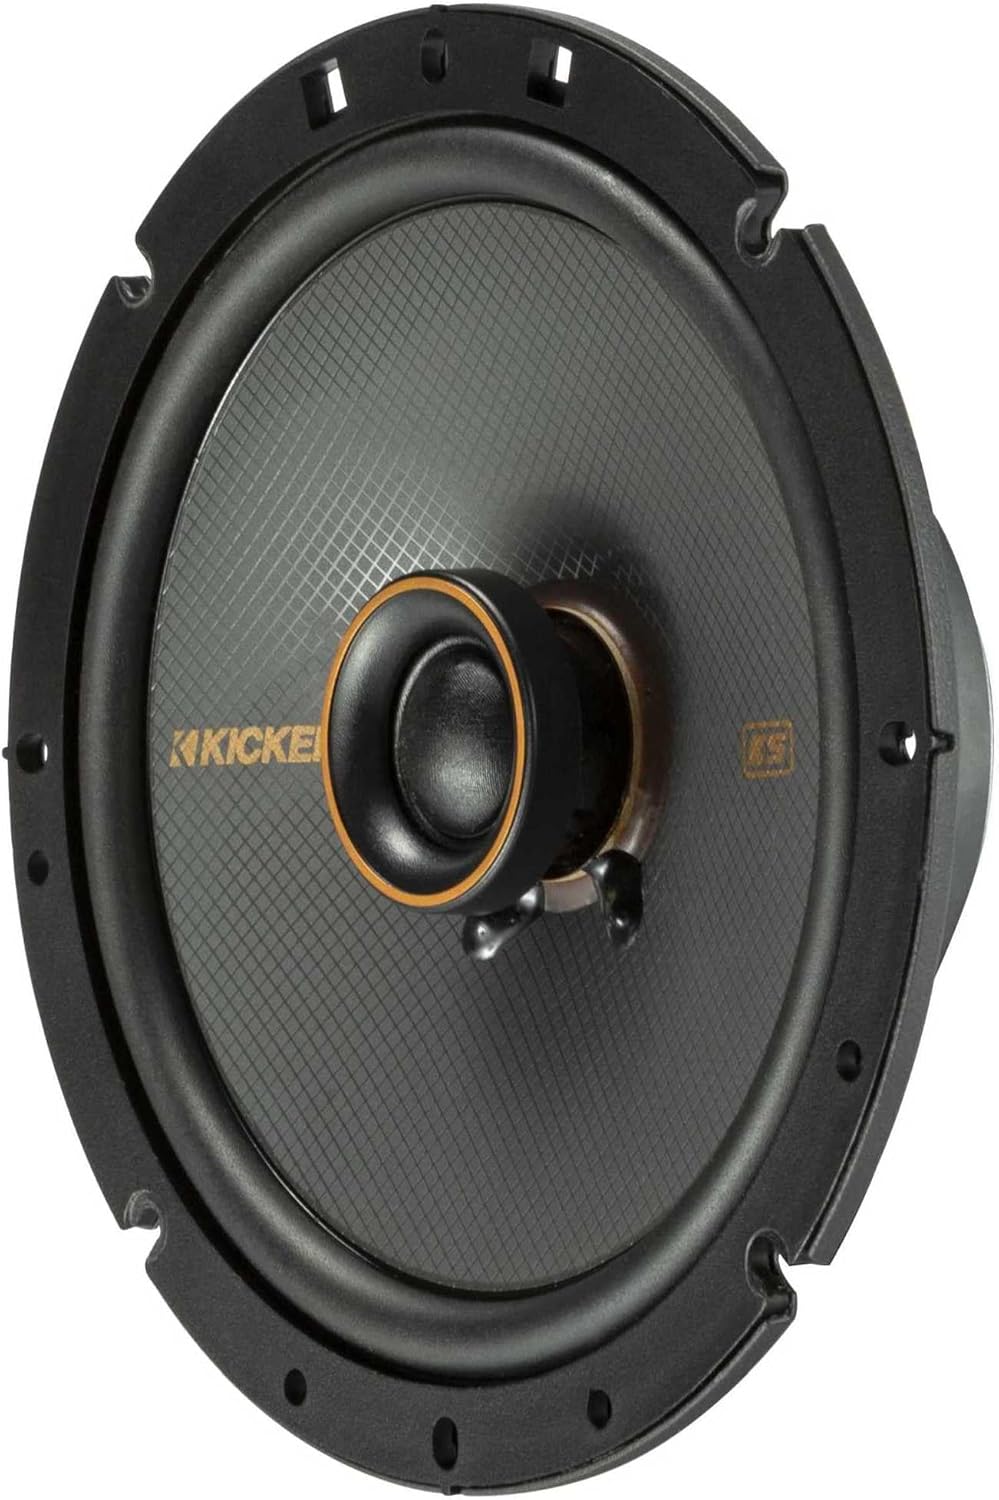
Imatge 4.5: Anglesa view of a KICKER 51KSC6704 KS-Series 6.75" Coaxial Speaker without its grille, showing the cone and tweeter.
4.2.2 Cablejat
- Connect the speaker wires from the KICKER 47KEY2004 amplifier to the terminals on the KICKER 51KSC6704 speakers.
- Observe correct polarity: positive (+) to positive, negative (-) to negative. Incorrect polarity will result in poor sound quality.
- Secure all connections and ensure wires are not pinched or exposed.
5. Funcionament del sistema
Once installed and the KEY Auto Setup is complete, your KICKER audio system is ready for use. The amplifier's DSP will continuously optimize the sound. Adjust volume and audio source settings via your vehicle's head unit.
- Control de volum: Use your head unit's volume control.
- Selecció de la font: Select your desired audio source (radio, Bluetooth, USB, etc.) from your head unit.
- Controls de to: While the KEY amplifier provides advanced DSP, minor adjustments to bass/treble may still be made via your head unit if desired, though it is recommended to rely on the KEY's optimization.
6. Manteniment
Your KICKER audio components require minimal maintenance to ensure long-lasting performance.
- Neteja: Use a soft, dry cloth to wipe down the amplifier and speaker grilles. Avoid abrasive cleaners or solvents.
- Inspecció: Periodically check wiring connections for tightness and signs of wear.
- Medi ambient: Ensure the installation environment remains dry and free from excessive dust or debris.
7. Solució De Problemes
If you encounter issues with your KICKER audio system, refer to the following common problems and solutions:
| Problema | Causa possible | Solució |
|---|---|---|
| Sense so | Sense poder amplifier; input signal missing; speaker wires disconnected. | Check power, ground, and remote connections. Verify input signal from head unit. Inspect speaker wiring. |
| So distorsionat | Input gain too high; damaged speaker; incorrect DSP settings. | Reduce head unit volume or amplifier input gain. Inspect speakers for damage. Re-run KEY Auto Setup. |
| Ampsobreescalfament del lificador | Insufficient ventilation; impedance mismatch. | Assegureu-vos amplifier has adequate airflow. Verify speaker impedance matches ampEspecificacions de l'activador. |
| Sense baix | Speaker polarity reversed; low-pass filter engaged incorrectly. | Check speaker wiring polarity. Review amplifier settings for crossover points. |
8. Especificacions
8.1 KICKER 47KEY2004 4-Channel DSP Smart Ampmés viu
| Característica | Especificació |
|---|---|
| Canals | 4 |
| Potència de sortida RMS | 50 Watts x 4 (at 4 Ohms) |
| Potència total | 200 watts |
| Tecnologia DSP | AI-driven, Auto EQ, Time Alignment, 40-band Equalizer |
| Dimensions (P x A x A) | 3.31" x 9.06" x 18" (Product Dimensions listed for bundle, amplifier is compact) |
| Número de model | 47KEY2004 |
8.2 KICKER 51KSC6704 KS-Series 6.75" Coaxial Speakers
| Característica | Especificació |
|---|---|
| Disseny d'altaveus | Coaxial de 2 vies |
| Mida del woofer | 6-3/4" (6.75") |
| Mida del tuit | 3/4" Silk-Dome |
| Impedància nominal | 4 ohms |
| Recomanat AmpPoder més viu | RMS de 100 Watts |
| Sensibilitat | 90 dB |
| Resposta de freqüència | 40-21 kHz |
| Material del woofer | Polypropylene with Rubber Surround |
| Imant de tweeter | Neodimi |
| Número de model | 51KSC6704 |
9. Garantia i Suport
KICKER products are designed for reliability and performance. For specific warranty information, please refer to the warranty card included with your product or visit the official KICKER website. For technical support, troubleshooting assistance, or to locate an authorized service center, please contact KICKER customer service directly.
KICKER Oficial Weblloc: www.kicker.com
Atenció al client: Refer to the contact information on the KICKER weblloc web o l'embalatge del producte.


