1. Introducció
Thank you for choosing the PUTORSEN Ultrawide Monitor Wall Mount. This heavy-duty monitor arm is designed to securely support ultra-wide monitors up to 57 inches and weighing up to 44 lbs (20 kg). Featuring a gas spring mechanism, it offers full motion adjustability for optimal viewing angles and ergonomic positioning. This manual provides essential information for safe installation, operation, and maintenance of your monitor mount.
2. Informació de seguretat
Please read all instructions carefully before installation and use. Improper installation or use may result in property damage or personal injury.
- Capacitat de pes: Do not exceed the maximum weight capacity of 44 lbs (20 kg). This mount is suitable for monitors between 17 and 57 inches.
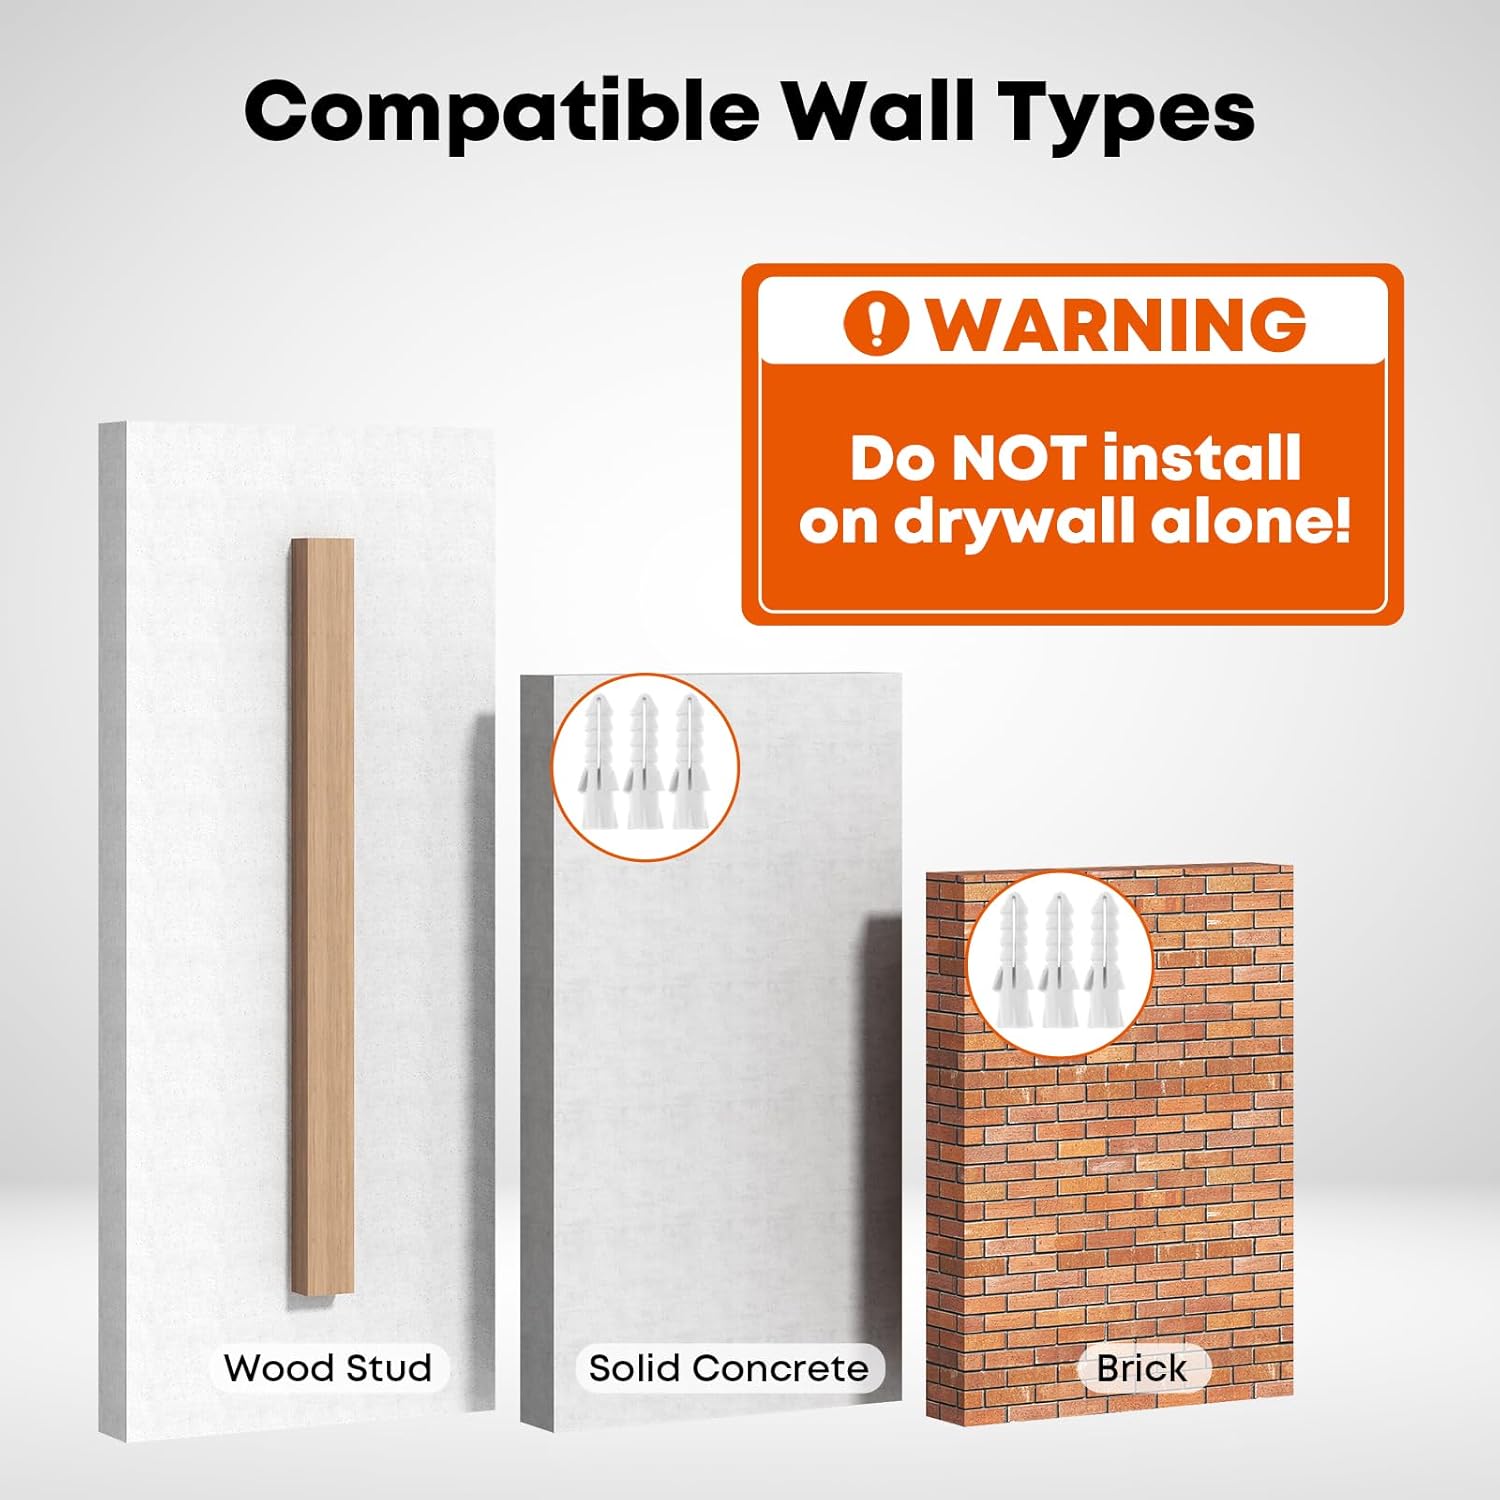
- Tipus de paret: This mount is designed for installation on solid wood studs, concrete walls, or brick walls. NO instal·leu només al panell de guix. Ensure the wall structure can safely support the combined weight of the mount and your monitor.
- Compatibilitat VESA: Ensure your monitor has a compatible VESA pattern (75x75mm, 100x100mm, 100x200mm, 200x100mm, 200x200mm). Non-VESA monitors or non-standard patterns require an additional adapter (not included).
- Molla de gas: The gas spring is under tension. Exercise caution during installation and adjustment to prevent injury.
- Eines: Use appropriate tools for installation. If unsure, consult a qualified professional.
3. Contingut del paquet
Verifiqueu que tots els components siguin presents abans de començar la instal·lació:
- Monitor Wall Mount Arm Assembly
- Placa de paret
- VESA Plate (pre-attached or separate)
- Kit de ferreteria de muntatge (cargols, ancoratges, volanderes)
- Allen Keys for adjustments
- Manual d'instruccions
4. Especificacions
| Marca | PUTORS |
| Model | 57 |
| Tipus de muntatge | Muntatge de paret |
| Material | Acer d'aliatge |
| Color | Blanc |
| Compatibilitat de la mida del monitor | 17" - 57" |
| Capacitat de pes | Fins a 44 lliures (20 kg) |
| Compatibilitat VESA | 75x75mm, 100x100mm, 100x200mm, 200x100mm, 200x200mm |
| Interval d'ajust d'altura | 10.6 polzades |
| Interval d'extensió | 4 polzades (retret) a 19.1 polzades (estès) |
| Angle d'inclinació | +60° a -20° |
| Angle de gir | +90° a -90° |
| Rotació | +90° to -90° (Portrait/Landscape) |
5. Configuració i instal·lació
Follow these steps for secure installation of your PUTORSEN monitor wall mount.
5.1. Prepare Your Workspace
- Clear the area where you plan to install the mount.
- Gather necessary tools: drill, stud finder (for wood studs), level, pencil, measuring tape.
5.2. Wall Plate Installation
- Determine the desired height for your monitor. Mark the position for the wall plate.
- For wood studs, use a stud finder to locate the center of a stud. For concrete/brick, ensure the wall is solid.
- Hold the wall plate against the wall at the marked position and use a level to ensure it is straight. Mark the drill holes.
- Drill pilot holes according to the size specified in the mounting hardware kit.
- Secure the wall plate to the wall using the provided screws and anchors (if applicable for concrete/brick). Ensure it is firmly attached.
5.3. Muntatge del braç
Assemble the monitor arm components as shown in the diagram. The gas spring arm connects to the wall plate, and the VESA plate attaches to the end of the arm.

5.4. Monitor Attachment
- Attach the VESA plate to the back of your monitor using the appropriate screws from the hardware kit. Ensure the screws are tightened securely but do not overtighten.
- Carefully lift your monitor and slide the VESA plate (with monitor attached) onto the arm's mounting head. Ensure it clicks into place or is secured with any locking mechanisms.
- For monitors with non-standard VESA patterns or recessed VESA mounts, an additional adapter (not included) may be required. Refer to your monitor's manual for VESA compatibility.


6. Funcionament i ajustos
The PUTORSEN monitor arm offers a wide range of motion for ergonomic positioning.
6.1. Ajust d'alçada
The gas spring allows for smooth vertical movement. Gently push or pull the monitor up or down to achieve the desired height. The arm provides 10.6 inches of height adjustment.
6.2. Ajust de la inclinació
Tilt the monitor screen up or down to reduce glare and optimize viewing angles. The tilt range is +60° to -20°.
6.3. Ajustament del gir
Swivel the monitor left or right up to 90° in either direction to share your screen or adjust your viewposició d'ingrés.
6.4. Rotació
Gireu el monitor 90° per canviar entre les orientacions horitzontal i vertical.
6.5. Extensió i retracció
Extend the monitor arm up to 19.1 inches from the wall for maximum flexibility or retract it to 4 inches to save space.


6.6. Gestió de cables
Utilize the integrated cable management channels along the arm to route and conceal monitor cables for a tidy workspace.
7. Manteniment
Un manteniment regular garanteix la longevitat i el rendiment òptim del suport del monitor.
- Neteja: Netegeu les superfícies de muntatge amb un drap suau iamp drap. Eviteu productes de neteja o dissolvents abrasius.
- Comproveu les connexions: Reviseu periòdicament tots els cargols i connexions per assegurar-vos que estiguin ben ajustats i segurs.
- Ajust de la molla de gas: If the monitor arm does not hold its position or moves too easily/stiffly, adjust the gas spring tension as described in the Troubleshooting section.
8. Solució De Problemes
Refer to these common issues and solutions.
8.1. Monitor Arm Sags or Drops
This indicates the gas spring tension is too low for your monitor's weight.
- Solució: Use the provided Allen key to turn the tension adjustment screw en sentit horari. Make small adjustments and test the arm's movement until it holds the monitor securely at any height.
8.2. Monitor Arm is Difficult to Move Upwards
This indicates the gas spring tension is too high for your monitor's weight.
- Solució: Use the provided Allen key to turn the tension adjustment screw en sentit antihorari. Make small adjustments and test the arm's movement until it moves smoothly.
8.3. Monitor Tilts Downwards or Upwards Unintentionally
The tilt mechanism may need adjustment.
- Solució: Locate the tilt adjustment screw on the VESA head. Tighten this screw to increase friction and prevent unwanted tilting.

8.4. Monitor Does Not Fit VESA Plate
Your monitor may have a non-standard VESA pattern or require an adapter.
- Solució: Verify your monitor's VESA pattern against the mount's compatibility (75x75mm, 100x100mm, 100x200mm, 200x100mm, 200x200mm). If your monitor has a different pattern or a recessed VESA area, an additional VESA adapter (not included) may be necessary.
9. Garantia i Suport
The PUTORSEN Ultrawide Monitor Wall Mount is backed by a manufacturer's warranty. For specific warranty details, please refer to the product packaging or contact PUTORSEN customer support.
For technical assistance, installation questions, or any concerns regarding your product, please contact our friendly tech support team. Contact information can typically be found on the product packaging or the official PUTORSEN weblloc.


