1. Introducció
This manual provides detailed instructions for the installation, operation, and maintenance of your AINAVI 10.25-inch Touch Screen multimedia player. Please read this manual thoroughly before installation and use to ensure proper functionality and to avoid damage.
1.1. Compatibilitat del producte
This unit is specifically designed for Audi A4, A5, S4, S5, RS4, RS5 models manufactured between 2009 and 2016. It is compatible with vehicles equipped with the original Audi Multimedia radio system. It is no compatible with Audi Concert, Audi Symphony, Audi Chorus, or Audi CD Changer systems.
Abans de la compraasing or installing, verify your vehicle's original radio system matches the 'Audi Multimedia' configuration shown below.

Descripció de la imatge: A visual guide illustrating the compatible 'Audi Multimedia' radio system (marked with a green check) and incompatible 'Audi Concert', 'Audi Symphony', 'Audi Chorus', and 'Audi CD Changer' systems (marked with red crosses) for the AINAVI 10.25-inch Touch Screen.
1.2. Applicable Models and Years
- Audi A4 (2008-2016)
- Audi S4 (2008-2016)
- Audi RS4 (2012-2015)
- Audi A5 (2008-2016)
- Audi S5 (2008-2016)
- Audi RS5 (2010-2015)
These models must be equipped with the Audi Multimedia radio system.

Descripció de la imatge: Displays the original dashboard configurations for Audi A4 and A5 models, followed by an image demonstrating the AINAVI 10.25-inch touch screen seamlessly integrated into an Audi vehicle's dashboard.
2. Característiques del producte
The AINAVI 10.25" Touch Screen unit enhances your driving experience by integrating modern multimedia capabilities while retaining essential original vehicle functions.
- 10.25-inch HD QLED Display: Features a 1280x480 resolution for clear visuals.
- Dual System Operation: Retains original Audi CD system functions while adding Linux system capabilities.
- Wireless Apple CarPlay & Wired Android Auto: Seamless smartphone integration for navigation, calls, messages, and music.
- Bluetooth 4.1: Supports audio streaming, automatic phone book transfer, and hands-free calling.
- DSP Processing & 16-band EQ: Provides enhanced sound quality.
- AHD 720P Backup Camera Support: Offers clearer reverse camera view (camera sold separately).
- Conserva les funcions originals: Compatible with iDrive knob control, original Bluetooth, radio, OEM rear camera, radar, and steering wheel controls.
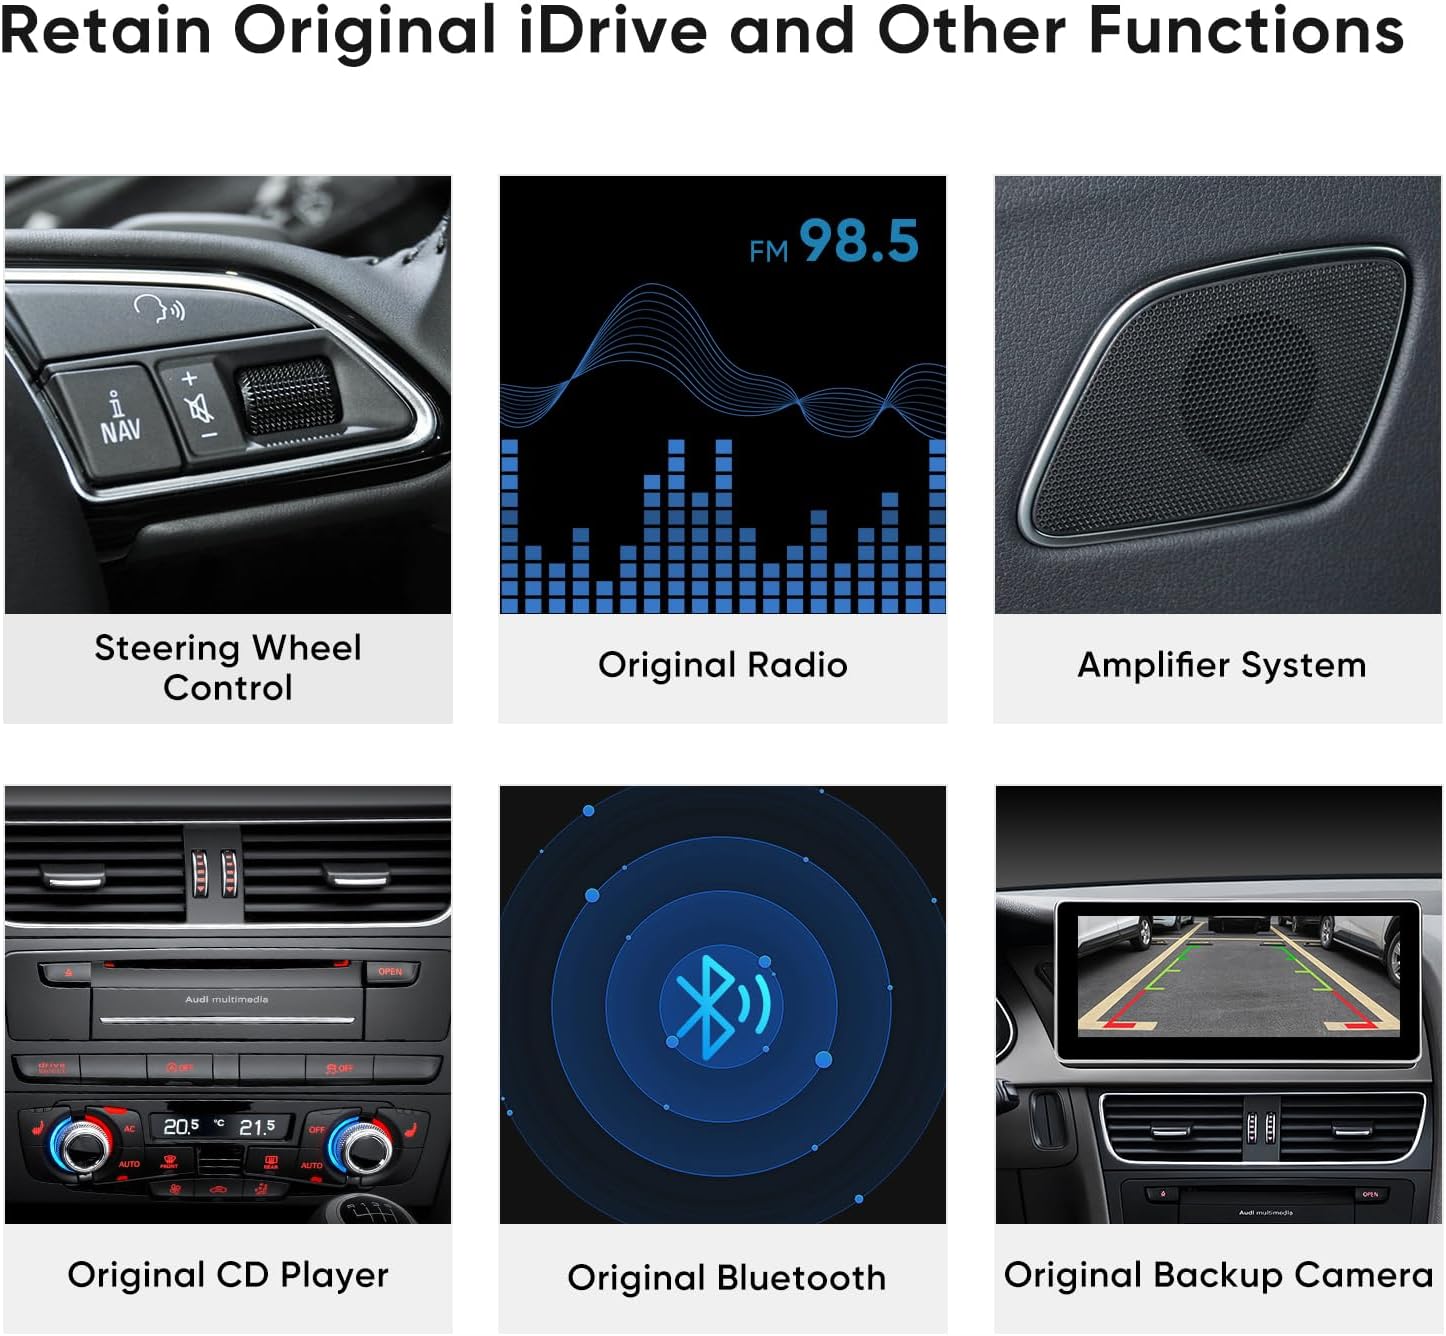
Descripció de la imatge: Illustrates the original Audi features that are maintained and integrated with the new AINAVI touch screen, such as steering wheel controls, radio, amplifier, CD player, Bluetooth, and backup camera.

Descripció de la imatge: Highlights the technical specifications and core functionalities of the unit, including its high-definition touch screen, video playback capabilities, integrated CarPlay and Android Auto, and Bluetooth connectivity.
3. Configuració i instal·lació
Installation of the AINAVI 10.25" Touch Screen requires careful attention to detail. If you are not experienced with car electronics installation, it is recommended to seek professional assistance.
3.1. Components inclosos
- 10.25" Head Unit (1)
- ISO Wiring Harness Cable (1)
- Metal Bracket (1)
- Cargols (8)
- MMI Control (integrated)
- Installation Frame (1)
- LVDS Cable (1)

Descripció de la imatge: Displays the main components of the AINAVI unit, including the head unit, installation frame, and metal bracket, along with a list of all included accessories such as wiring harnesses and screws.
3.2. Passos d'instal·lació
- Treure la unitat principal original: Use radio keys to remove your original Audi head unit. Unplug the fiber optic cable, the main square connector, the grey, yellow, and blue connectors (and green if present), and the ESP button plug. This provides access to the cavity.
- Remove Original Screen: Use a pry tool to carefully remove the screen cover from the dash. It pulls straight out from its clips. Use a T25 Hex tool to remove the original screen. Unplug its cables, noting which ones are needed.
- Access CAN Plug: Remove the glove box (typically 13 8mm screws). Lay it down at an angle to access the CAN plug located against the center console near the rear of the Audi head unit.
- Route T-Harnesses: Route the T-Harness for the CAN through the back hole, connect it to the CAN, and plug the factory CAN cable into the T-Harness. Route the remaining T-Harness up the back of the console to the screen hole. If desired, route the USB cable with a 4-cable connector.
- Connect Main Harnesses: Connect the square T-Harness with the OEM harness.
- Video and MMI Connections: Plug the OEM video connector (originally connected to the factory screen) into the blue video cable connector on the Android Head unit's harness. Connect the red/black plug to the white cables MMI plug on the other harness routed up through the back.
- Col·locació de l'antena: Place the GPS and WiFi/LTE antennas in the back cavity behind where the original screen was.
- Initial Connection and Testing: Connect all harnesses back to the original head unit. Then, connect both white harnesses and the GPS and WiFi/LTE antennas to the AINAVI Head unit. Power on the vehicle and test all functions.
- MMI Control Troubleshooting (if needed): If MMI controls are not working, turn off the car and remove the keys. Unplug the red/black cable connected to the MMI white cables. If you have an additional wire, create a jumper wire and connect both wires in the white harness together. Reconnect and test MMI buttons and volume. If successful, make this connection permanent.
- Assegurar la unitat:
- Fix the metal bracket (A) with screws in the dash.
- Mount the installation frame to the metal bracket with screws (First, B1; Second, B2).
- Fix the clips (C) on the head unit to the installation frame.
- Ensure that the head unit (M) locks correctly into place.
Descripció de la imatge: A diagram outlining the physical assembly of the AINAVI head unit, including the metal bracket, installation frame, and the head unit itself, with labels for screws and clips.
4. Instruccions de funcionament
4.1. Wireless Apple CarPlay & Wired Android Auto
The unit supports both wireless Apple CarPlay and wired Android Auto, allowing seamless integration with your smartphone.
- Connexió: Connect your smartphone to the head unit wirelessly via Bluetooth and Wi-Fi, or via a wired USB connection for Android Auto. The unit should auto-connect within 3-5 seconds after initial setup.
- Funcionalitat: Once connected, you can access GPS navigation, make and receive calls, send and receive messages, and stream music directly from your phone's apps.
- Important Note for Audi Bluetooth: When using CarPlay, ensure no other device is connected to the Audi original Bluetooth system to avoid conflicts.

Descripció de la imatge: Illustrates the user interface of Wireless CarPlay and Wired Android Auto on the AINAVI screen, showcasing features like navigation, music, and phone applications.
4.2. Control de veu intel·ligent
Activate voice control for hands-free operation of CarPlay and Android Auto features.
- Activació: Once connected to CarPlay or Android Auto, activate voice control by saying "Hey Siri" (for Apple CarPlay) or "Hey Google" (for Android Auto), or by touching the microphone button on the screen.
- Ordres: Use voice commands to get directions, make calls, send/receive messages, and control music playback.

Descripció de la imatge: Shows examples of voice commands for Siri and Google Assistant, highlighting how users can interact with the system for tasks like checking voicemail, playing music, and sending messages.
4.3. Original Car System Access
You can switch between the AINAVI Linux system and the original Audi system to access vehicle settings and functions not available on the new screen.
- Canvi: The screen provides an option to select "Original Car" or "Audi original system" to revert to the factory interface.
- Funcions: Use the original system to adjust HVAC temperature, reset TPMS, or access other specific Audi menus.
5. Manteniment
To ensure the longevity and optimal performance of your AINAVI 10.25" Touch Screen, follow these general maintenance guidelines:
- Neteja: Use a soft, lint-free cloth to clean the screen. For stubborn smudges, lightly dampNetegeu el drap amb aigua o un netejador de pantalles. Eviteu productes químics agressius o materials abrasius.
- Temperatura: Eviteu exposar la unitat a temperatures extremes, tant altes com baixes, durant períodes prolongats.
- Actualitzacions de firmware: Periodically check for available firmware updates from AINAVI to ensure the system runs efficiently and to address any known issues.
- Connexions de cable: Ensure all cables remain securely connected. Loose connections can lead to intermittent functionality.
6. Solució De Problemes
This section addresses common issues you might encounter with your AINAVI 10.25" Touch Screen.
6.1. Problemes comuns i solucions
- MMI Controls Not Working: If the controls by the shifter are unresponsive after installation, refer to step 3.2.9 in the Installation Steps section regarding the MMI white cables. This often requires cutting and joining specific wires to bypass an incompatibility.
- Audio Pausing/Catching Up: If audio pauses or lags for the first few minutes after starting the car, ensure no other devices are connected to the original Audi Bluetooth. Check for firmware updates from AINAVI, as this can sometimes resolve software-related audio issues.
- No Display/Intermittent Display: Verify all LVDS cable connections are secure and correctly seated. A defective or incorrectly built LVDS cable can cause display issues. Ensure the original video connector is properly plugged into the blue video cable connector on the new unit's harness.
- Sense so: Confirm the AUX connector (even if not connected to anything) is plugged into the AMI port in the glovebox. The AMI port needs to switch to AUX-in for CarPlay audio to function correctly. Check all audio wiring harness connections.
- Backup Camera Not Working: Ensure the AHD 720P backup camera (if installed) is properly connected. The unit supports AHD 720P. Verify the camera's power and ground connections. The CANBUS connection should handle the trigger, so a separate trigger wire to the brake light is typically not needed.
- Problemes de connectivitat Bluetooth: Ensure the unit's Bluetooth is enabled and discoverable. Remove any previous pairings and attempt to re-pair your device. As mentioned, avoid simultaneous connections to the original Audi Bluetooth.
6.2. General Troubleshooting Tips
- Restart the Vehicle: Sometimes, turning the car off, removing the key, and restarting can resolve minor software glitches.
- Comprova totes les connexions: A loose wire is a common cause of problems. Double-check every connection point.
- Consult Online Resources: For complex issues, online forums or communities dedicated to Audi multimedia upgrades may offer solutions or similar experiences.
7. Especificacions
| Característica | Especificació |
|---|---|
| Mida de la pantalla | 10.25 polzades |
| Resolució | 1280x480 HD QLED |
| Sistema operatiu | Linux |
| Connectivitat | Wireless Apple CarPlay, Wired Android Auto, Bluetooth 4.1 |
| Funcions d'àudio | Built-in DSP, 16-band EQ, Stereo Audio Output |
| Codificació de vídeo | H.264, MPEG-4 |
| Dispositius compatibles | Smartphone, iPhone |
| Tipus de connector | Arnès de cablejat ISO |
| Pes de l'article | 4.88 lliures (2.22 quilograms) |
| Dimensions del paquet | 16.3 x 8.74 x 7.09 polzades |
8. Garantia i Suport
AINAVI is committed to providing quality products and customer service. For technical assistance, installation guidance, or warranty inquiries, please use the following contact methods:
- Via Amazon Order Center: Navigate to your Amazon order history, find your purchase, and click on the seller's name (HomeCar). Then, select "Ask a question" to send a message. Providing pictures or videos of your technical or installation questions can help expedite support.
- Línia directa: +1 (833) 858-5016 (Working hours: 01:00 PM to 00:00 AM PST)
- Correu electrònic: info@ainavi.com

Descripció de la imatge: A step-by-step visual guide on how to contact customer support through the Amazon platform by clicking on the seller's name and using the 'Ask a question' option.

Descripció de la imatge: Highlights the availability of customer support, showing a car on a road with instructions to contact the seller 'HomeCar' via Amazon or a provided customer service phone number.

Descripció de la imatge: Features a customer service agent and lists various contact methods for support, including a phone number, operating hours, and an email address.


