1. Introducció
The GEPRC TAKER F722 BL32 E55A SE STACK is a high-performance flight controller and electronic speed controller (ESC) stack designed for FPV racing drones. It integrates an advanced F722 processor with a robust BL32 55A 4-in-1 ESC, providing precise control, efficient power delivery, and excellent thermal management for demanding flight conditions. This manual provides essential information for setup, operation, and maintenance of your TAKER F722 BL32 E55A SE STACK.
2. Especificacions
| Característica | Descripció |
|---|---|
| Flight Controller Processor | STM32F722 |
| ESC Current | 55A (BL32 4-in-1) |
| Patró de muntatge | 25.5 mm x 25.5 mm |
| Sortida BEC | Independent 10V and 5V |
| Caixa Negra | Integrated storage for flight data |
| Connectivitat | USB |
| Dimensions | Aproximadament 2 cm de llargada x 2 cm d'amplada x 2 cm d'alçada |
| Pes | Approximately 17 Grams (0.6 ounces) |
3. Producte acabatview i Components
The TAKER F722 BL32 E55A SE STACK consists of a flight controller board and an ESC board, designed to be stacked together. Key components include the F722 processor, gyroscope, and the 55A 4-in-1 ESC with metal-encapsulated modules for heat dissipation.

Figura 3.1: De dalt a baix view of the GEPRC TAKER F722 BL32 E55A SE STACK, showing the flight controller board with the F722 processor and USB-C port.

Figura 3.2: Frontal view of the stack, highlighting the USB-C port and connection headers.

Figura 3.3: lateral view of the stack, showing the separation between the flight controller and ESC boards.
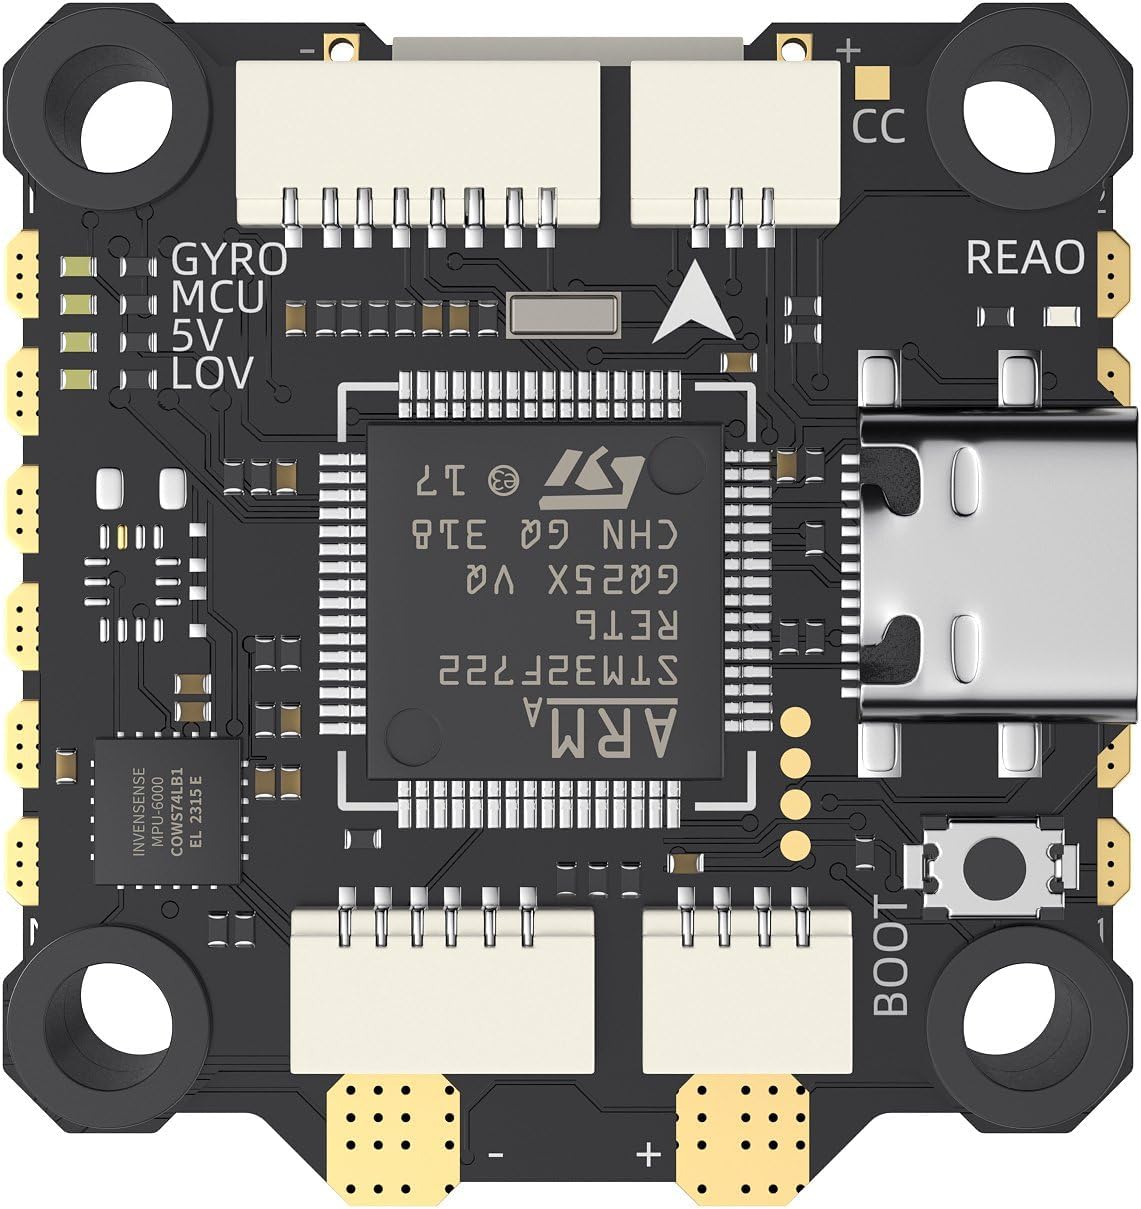
Figura 3.4: Detall superior view of the flight controller board, showing the F722 MCU and various solder pads.

Figura 3.5: Angle view of the stack, providing a perspective of both boards and mounting holes.
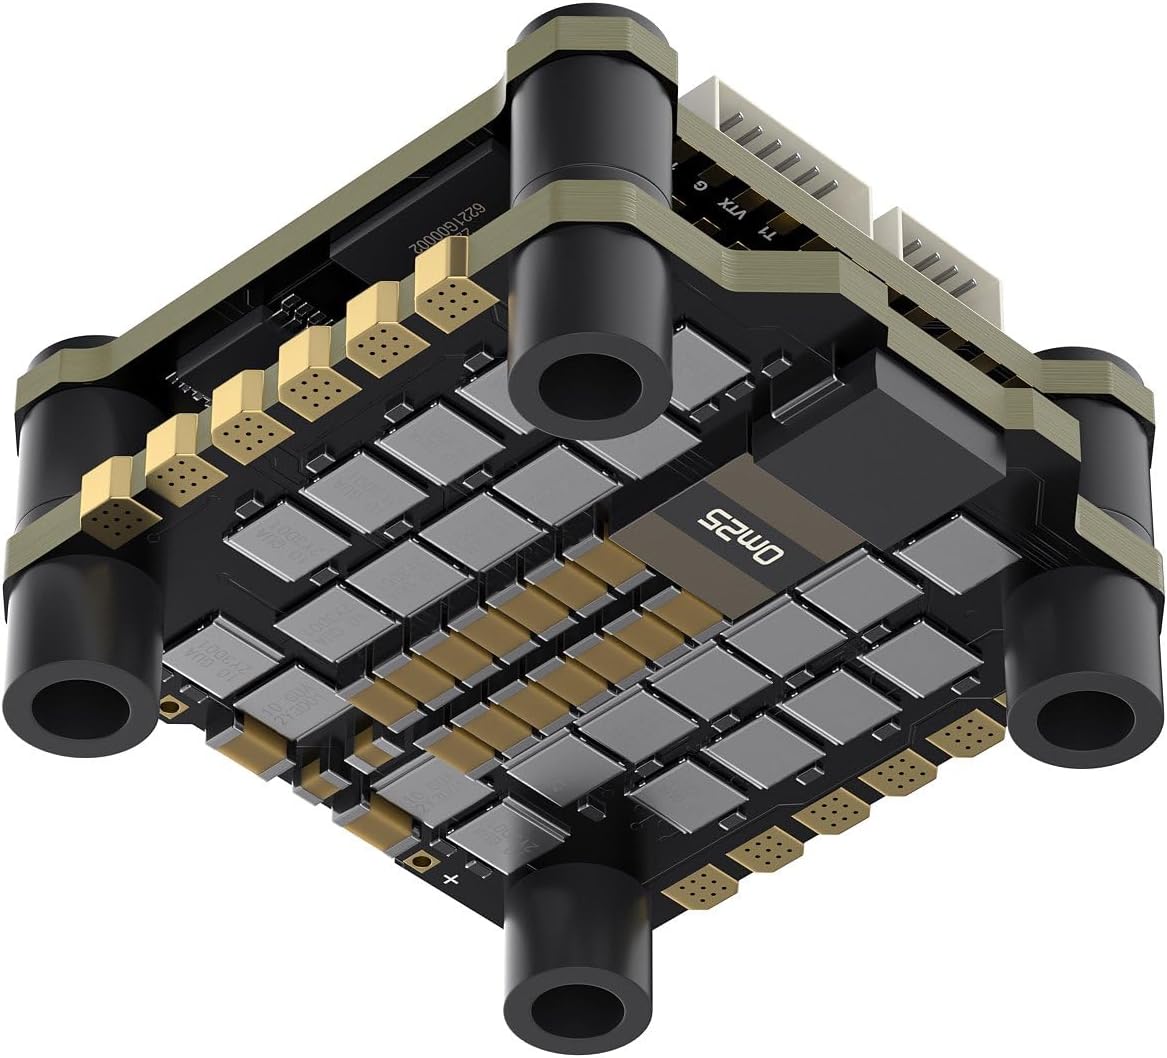
Figura 3.6: Detall de la part inferior view of the ESC board, showing the MOSFETs and power distribution layout.

Figura 3.7: Angle view of the bottom of the stack, showing the ESC components and solder pads for motor connections.

Figure 3.8: Product List showing all included components such as screws, nuts, silicone shock absorbers, and various cables (camera, DJI O3 Air Unit, SH 1.0 4pin, analog video transmission, XT60 power cord).
4. Configuració i instal·lació
Proper installation is crucial for optimal performance and safety. Always ensure power is disconnected before making any connections.
- Muntatge: Secure the stack to your drone frame using the provided 25.5mm x 25.5mm mounting pattern hardware. Ensure proper isolation from carbon fiber to prevent shorts.
- Connexions del motor: Connect your motors to the ESC pads (M1-M4). You can choose between soldering directly or using SH1.0 terminals if applicable. Ensure correct motor rotation direction is configured in your flight controller software.
- Connexió d'alimentació: Solder the XT60 power cord to the main battery pads on the ESC. Pay close attention to polarity (+ and -).
- Connexions perifèriques:
- Receptor: Connect your radio receiver to the appropriate UART on the flight controller.
- FPV Camera: Connect your FPV camera to the dedicated camera input, utilizing the 5V BEC output.
- Transmissor de vídeo (VTX): Connect your VTX to the appropriate video output and power from the 10V or 5V BEC, depending on your VTX requirements.
- DJI Air Unit (if applicable): Use the dedicated DJI Air Unit cable for simplified connection and power.
- Firmware parpellejant: Connect the flight controller to your computer via the USB-C port. Use Betaflight Configurator or similar software to flash the latest firmware and configure settings according to your drone build.
- Configuració inicial: Calibrate the accelerometer, set up modes, OSD, and other parameters in the flight controller software.
5. Directrius de funcionament
Before each flight, perform a pre-flight check to ensure all components are secure and functioning correctly.
- Connexió de la bateria: Always connect the battery securely. Ensure the battery voltage is within the supported range for the stack.
- Armat: Arm the drone only when it is on a stable, level surface and clear of any obstructions or people.
- Modes de vol: Familiarize yourself with different flight modes (e.g., Acro, Angle, Horizon) and their characteristics before flying.
- Seguiment: Pay attention to OSD data (voltage, current, RSSI) during flight to monitor the drone's health.
- Desarmament: Disarm the drone immediately after landing or in case of an emergency.
6. Manteniment
Regular maintenance helps prolong the lifespan and ensure the reliability of your TAKER F722 BL32 E55A SE STACK.
- Inspecció visual: Periodically inspect the boards for any signs of damage, loose connections, or burnt components.
- Neteja: Gently clean the boards with isopropyl alcohol and a soft brush to remove dust, dirt, or debris. Ensure no liquid remains before powering on.
- Actualitzacions de firmware: Mantingueu el controlador de vol i el firmware de l'ESC actualitzats a les darreres versions estables per beneficiar-vos de les millores de rendiment i les correccions d'errors.
- Comprovacions de connexió: Verify that all solder joints are solid and all connectors are securely seated.
7. Solució De Problemes
| Problema | Causa possible | Solució |
|---|---|---|
| No power to FC/ESC | Incorrect battery connection, short circuit, faulty power lead. | Check battery polarity, inspect for shorts, test power lead continuity. |
| Motors not spinning | Incorrect motor wiring, ESC calibration issue, motor protocol mismatch, disarmed. | Verify motor connections, calibrate ESCs, ensure correct DShot/OneShot protocol, check arming conditions. |
| Vol inestable | Incorrect PID tuning, vibrations, damaged propeller, faulty gyroscope. | Adjust PID settings, check for loose components, replace damaged props, inspect gyroscope for damage. |
| No FPV video signal | Incorrect camera/VTX wiring, VTX power issue, channel mismatch. | Verify wiring, check VTX power supply, ensure VTX and goggles are on the same channel. |
| Problemes de connexió USB | Faulty USB cable, driver issues, incorrect DFU mode. | Try a different USB cable, install correct drivers, ensure FC is in DFU mode for flashing. |
8. Garantia i Suport
GEPRC products are designed for high performance and reliability. For warranty information and technical support, please refer to the official GEPRC weblloc web o contacteu directament amb el seu servei d'atenció al client. Conserveu el rebut de compra com a comprovant de compra.
Recursos en línia:


