1. Introducció
The AOOSTAR GEM12+ is a high-performance mini PC featuring the AMD Ryzen 7 PRO 8845HS processor. This manual provides essential information for setting up, operating, and maintaining your device to ensure optimal performance and longevity.

Figure 1: AOOSTAR GEM12+ Mini PC
2. Contingut del paquet
Verifiqueu que tots els elements siguin presents al paquet:
- 1 x AOOSTAR GEM12+ 8845HS Mini PC
- 1 x muntatge VESA
- 1 x Mounting screw set
- 1 x Font d'alimentació
- 1 x HD cable
- 1 x SSD Cooling Pad
3. Configuració inicial
This model is shipped without RAM, SSD, or an operating system. Follow these steps for initial setup:
3.1 Installing RAM and SSD
- Prepare the Mini PC: Ensure the mini PC is powered off and disconnected from all power sources.
- Obriu el xassís: Carefully open the mini PC chassis to access the internal components. Refer to the product's quick start guide or manufacturer's website for specific instructions on opening the case.
- Install DDR5 SO-DIMM RAM: Locate the two DDR5 SO-DIMM slots. Align the RAM module notch with the slot key and insert the module firmly until the side clips snap into place. Repeat for the second module if installing dual channel RAM.
- Instal·leu SSD M.2: Locate the two M.2 2280 PCIe 3.0/4.0 slots. Insert the M.2 SSD into the slot at an angle, then gently push it down and secure it with the provided screw or retention clip. Apply the SSD cooling pad if included.
- Tanca el xassís: Carefully reassemble the mini PC chassis.

Figure 2: RAM Installation

Figure 3: M.2 SSD Installation
3.2 Connexió de perifèrics
- Connecta la pantalla: Connect your monitor(s) to the HD2.1 or DP1.4 ports. The mini PC supports up to four 4K displays.
- Connecteu els dispositius d'entrada: Connect your keyboard and mouse to the available USB ports (USB3.2 Gen2 or USB2.0).
- Connexió de xarxa: For wired internet, connect an Ethernet cable to one of the 2.5G LAN ports. For wireless, ensure your WiFi 6 and Bluetooth 5.2 antennas are properly connected (if external).
- Connexió d'alimentació: Connect the power supply to the DC port on the rear of the mini PC, then plug the power supply into an electrical outlet.

Figure 4: Port Overview
3.3 Primer arrencada i instal·lació del sistema operatiu
- Encès: Press the power button on the front of the mini PC.
- Install Operating System: Insert your preferred operating system installation media (USB drive) and follow the on-screen instructions to install the OS on your newly installed SSD.
- Instal·lació del controlador: After OS installation, install all necessary drivers, which can typically be found on the AOOSTAR official weblloc.
4. Funcionament
4.1 Front and Rear Interfaces
The AOOSTAR GEM12+ offers a variety of ports for connectivity:
- Interfície frontal: Power Switch, Audio Interface, 2x USB3.2 Gen2 ports, 1x OCULINK port, 2x USB4 ports.
- Interfície posterior: 2x 2.5G LAN ports (INTEL I226V), 1x DC power port, 1x DP1.4 port, 1x HD2.1 port, 2x USB2.0 ports.
Wireless connectivity includes built-in WiFi 6 and Bluetooth 5.2.
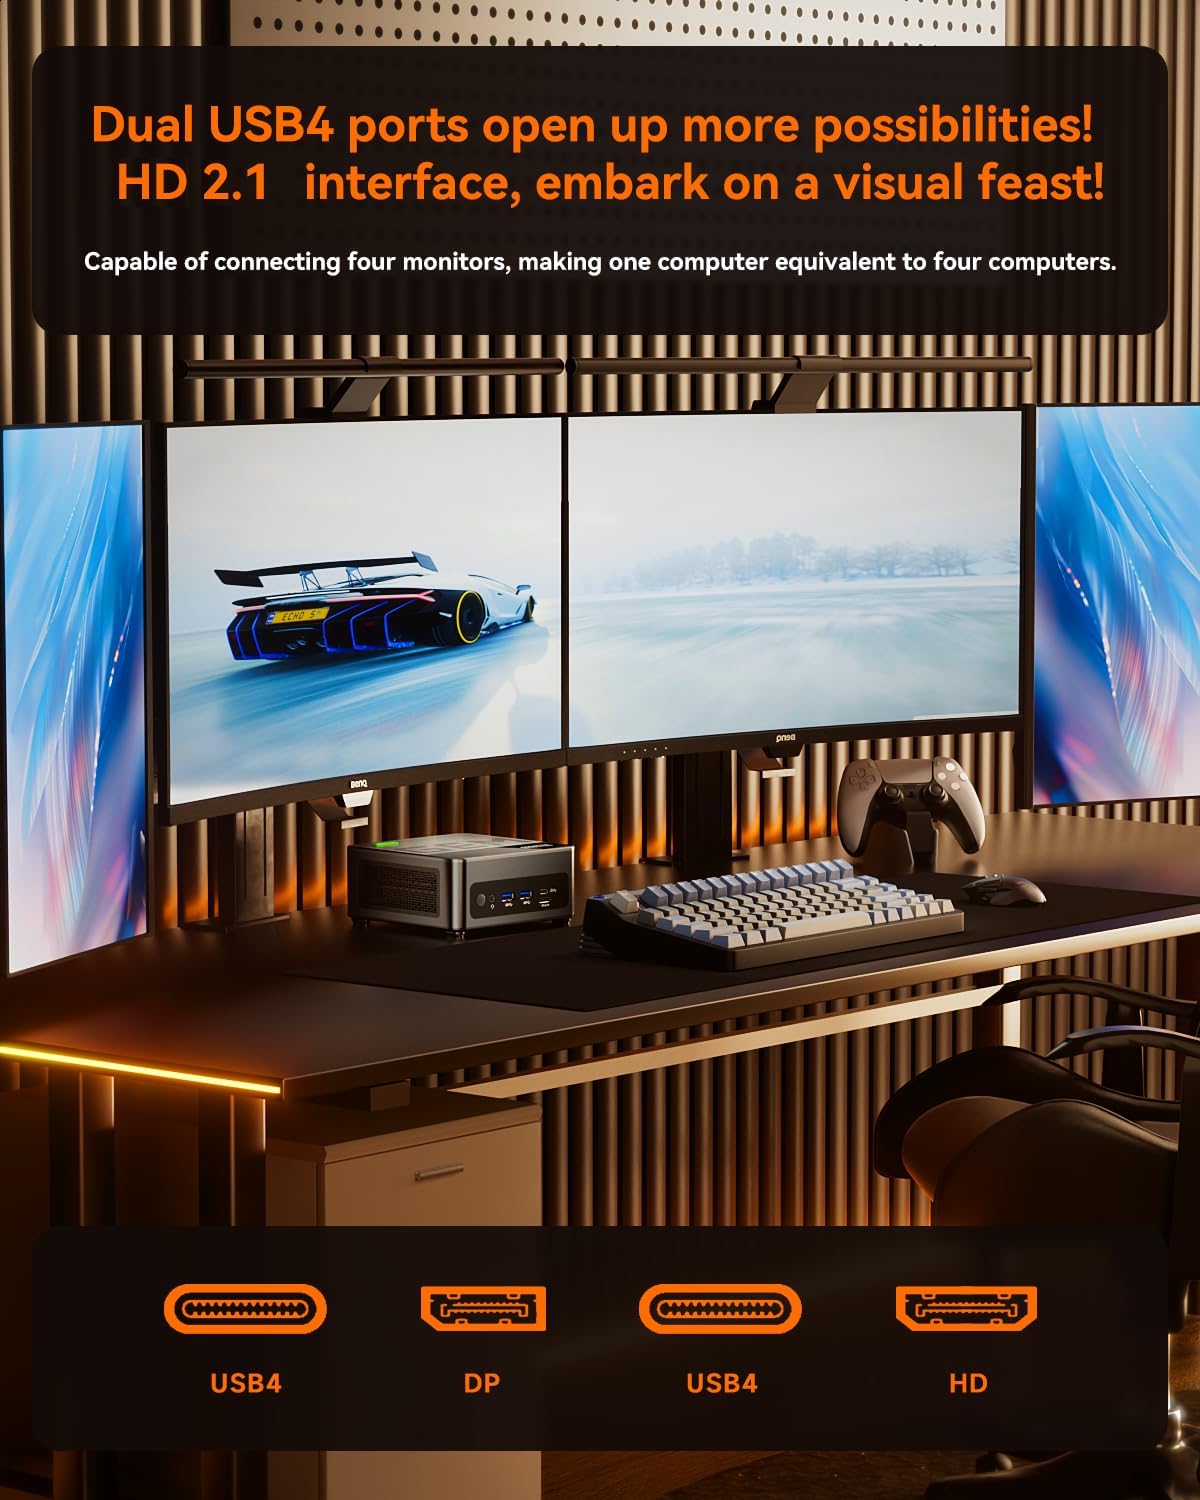
Figure 5: Multi-Display Setup
4.2 Modes de rendiment
The mini PC's BIOS allows adjustment of power consumption and performance:
- Mode silenciós: 45W-54W TDP (Thermal Design Power) for quiet operation.
- Mode equilibrat: 54W-65W TDP for a balance of performance and noise.
- Mode de rendiment: 65W-70W TDP for maximum performance.

Figure 6: Performance Mode Selection
4.3 OCuLink Port Usage
The OCuLink port (64 Gbps) provides a high-bandwidth connection for external GPUs, offering minimal performance loss compared to Thunderbolt 4/USB4. This port operates on an independent channel, not occupying M.2 slots.
Nota: The OCuLink port does not support hot-swapping. Ensure the mini PC is powered off before connecting or disconnecting an external GPU via OCuLink.

Figure 7: OCuLink Port for External GPU
5. Manteniment
5.1 Sistema de refrigeració
The GEM12+ features a dual cooling system with a CPU fan and a vapor chamber, complemented by a VC Graphene Heat Sink. This design ensures efficient heat dissipation, maintaining stable temperatures even under prolonged high load and extending the device's lifespan.

Figure 8: Dual Cooling System
5.2 Atenció general
- Keep the mini PC in a well-ventilated area to prevent overheating.
- Netegeu regularment la pols de les reixetes de ventilació amb aire comprimit.
- Eviteu exposar el dispositiu a temperatures o humitat extremes.
6. Solució De Problemes
If you encounter issues with your AOOSTAR GEM12+ Mini PC, refer to the following common solutions:
- System Does Not Boot: If the system fails to boot on first power-up, ensure that the RAM modules are correctly seated in their slots. Power off the device, disconnect power, and re-seat the memory modules firmly.
- External GPU (eGPU) Boot Issues: If the system does not boot after switching between integrated and external GPUs via OCuLink, perform a power cycle. Power off the mini PC completely, then power it back on.
- External GPU (eGPU) Error 43 in Device Manager: If you experience 'Error 43' with an external GPU, power off the mini PC, unplug it from the power source, open the chassis, and carefully unplug the internal BIOS battery for approximately 5 minutes. Reconnect the BIOS battery, close the chassis, and power on the device. This can reset the BIOS and resolve certain hardware detection issues.
- Problemes d'actualització de la BIOS: If you encounter difficulties following BIOS update instructions from the manufacturer's website, it is recommended to contact AOOSTAR customer support for assistance.
- Screen Software Alerted as Virus: If legitimate screen control software is flagged by antivirus programs, verify its source. If it is from the official manufacturer, you may need to add it to your antivirus program's exemption list.
7. Especificacions
| Característica | Detall |
|---|---|
| Processador | AMD Ryzen 7 PRO 8845HS (8 Cores/16 Threads, up to 5.1 GHz) |
| Gràfics | AMD Radeon 780M (Integrated, 2700 MHz) |
| RAM | DDR5 5600MHz SO-DIMM (2 slots, up to 128GB total) |
| Emmagatzematge | 2x M.2 2280 PCIe 3.0/4.0 slots (Max. 8TB) |
| Sortida de vídeo | 1x HD2.1, 1x DP1.4, 2x USB4 (supports 4x 4K displays) |
| Treball en xarxa | 2x 2.5G LAN (INTEL I226V), WiFi 6, Bluetooth 5.2 |
| Ports USB | 2x USB4, 2x USB3.2 Gen2, 2x USB2.0 |
| Altres ports | 1x OCULINK (64 Gbps), 1x Audio Interface, 1x DC Power |
| Sistema operatiu | Cap (instal·lable per l'usuari) |
| Dimensions | Aprox. 6.81 x 6.81 x 5.08 polzades |
| Pes | Aprox. 3.21 lliures |
8. Garantia i Suport
For warranty information, technical support, or service inquiries, please refer to the official AOOSTAR website or contact AOOSTAR customer service directly. Keep your purchase receipt as proof of purchase for warranty claims.


