1. Introducció
This manual provides comprehensive instructions for the installation, operation, and maintenance of your AINAVI 10-inch QLED Car Stereo Head Unit. Please read this manual thoroughly before installation and use to ensure proper functionality and safety. This unit is designed specifically for Toyota Tacoma models from 2005 to 2015.

Figure 1.1: AINAVI 10-inch QLED Car Stereo Head Unit
This image displays the AINAVI 10-inch QLED Car Stereo Head Unit, showcasing its large touchscreen, physical buttons, and a central knob. Below the unit, a rearview camera and a smartphone screen illustrating Android Auto and CarPlay interfaces are visible, highlighting key features.
2. Informació de seguretat
- Always ensure the vehicle is parked and the engine is off before performing any installation or maintenance.
- Desconnecteu la bateria del vehicle abans de començar la instal·lació per evitar curtcircuits.
- Consulteu un instal·lador professional si teniu dubtes sobre alguna part del procés d'instal·lació.
- No feu servir la unitat de manera que us distregui de la conducció. Prioritzeu sempre la seguretat viària.
- Assegureu-vos que tot el cablejat estigui correctament aïllat i fixat per evitar danys o interferències.
3. Què s'inclou
Verifiqueu que tots els components siguin presents al paquet:
- Car Head Unit with Frame for Toyota Tacoma (x1)
- Cable d'alimentació (x1)
- AHD 1080P posterior View Càmera (x1)
- GPS Antenna (x1)
- USB 4Pin Cable (x1)
- USB 6Pin Cable (x1)
- Micròfon (x1)
- Blue Frame Removal Tool (x1)
- Manual d'usuari (x1)

Figura 3.1: Components inclosos
This diagram illustrates the various components included with the AINAVI car stereo kit, such as the head unit, power cable, RCA cable, car microphone, GPS module, USB cables, reversing control cable, 1080P rearview camera, and a frame removal tool.
Video 3.1: Unboxing and Component Overview
This video demonstrates the unboxing process and provides a detailed look at each component included in the AINAVI car stereo kit, including the main unit, wiring harnesses, and accessories.
4. Producte acabatview
The AINAVI 10-inch QLED Car Stereo Head Unit features a high-resolution touchscreen, physical buttons, and a rotary knob for intuitive control. It integrates advanced features such as CarPlay, Android Auto, GPS navigation, and a powerful audio processor.
4.1. Característiques clau
- 10-inch QLED Touch Screen: 1280x720 resolution for clear visuals and 1080P video playback.
- Wired/Wireless CarPlay & Android Auto: Seamless smartphone integration.
- Navegació GPS: Supports most satellite services with 5G WiFi for accurate navigation.
- 5G WiFi & 8-Core Processor: Ensures fast network speed and smooth operation.
- 6 GB de RAM + 128 GB de ROM: Ample memory for multitasking and app storage.
- 1080P posterior View Suport de càmera: Provides clear reversing scenes with trajectory display.
- 48-EQ (Voice Point Touch Control) + Professional DSP: Advanced audio customization.
- USB to RCA Output: Allows independent video playback on multiple screens.
- Physical Buttons and Manual Knob: For precise and comfortable operation.
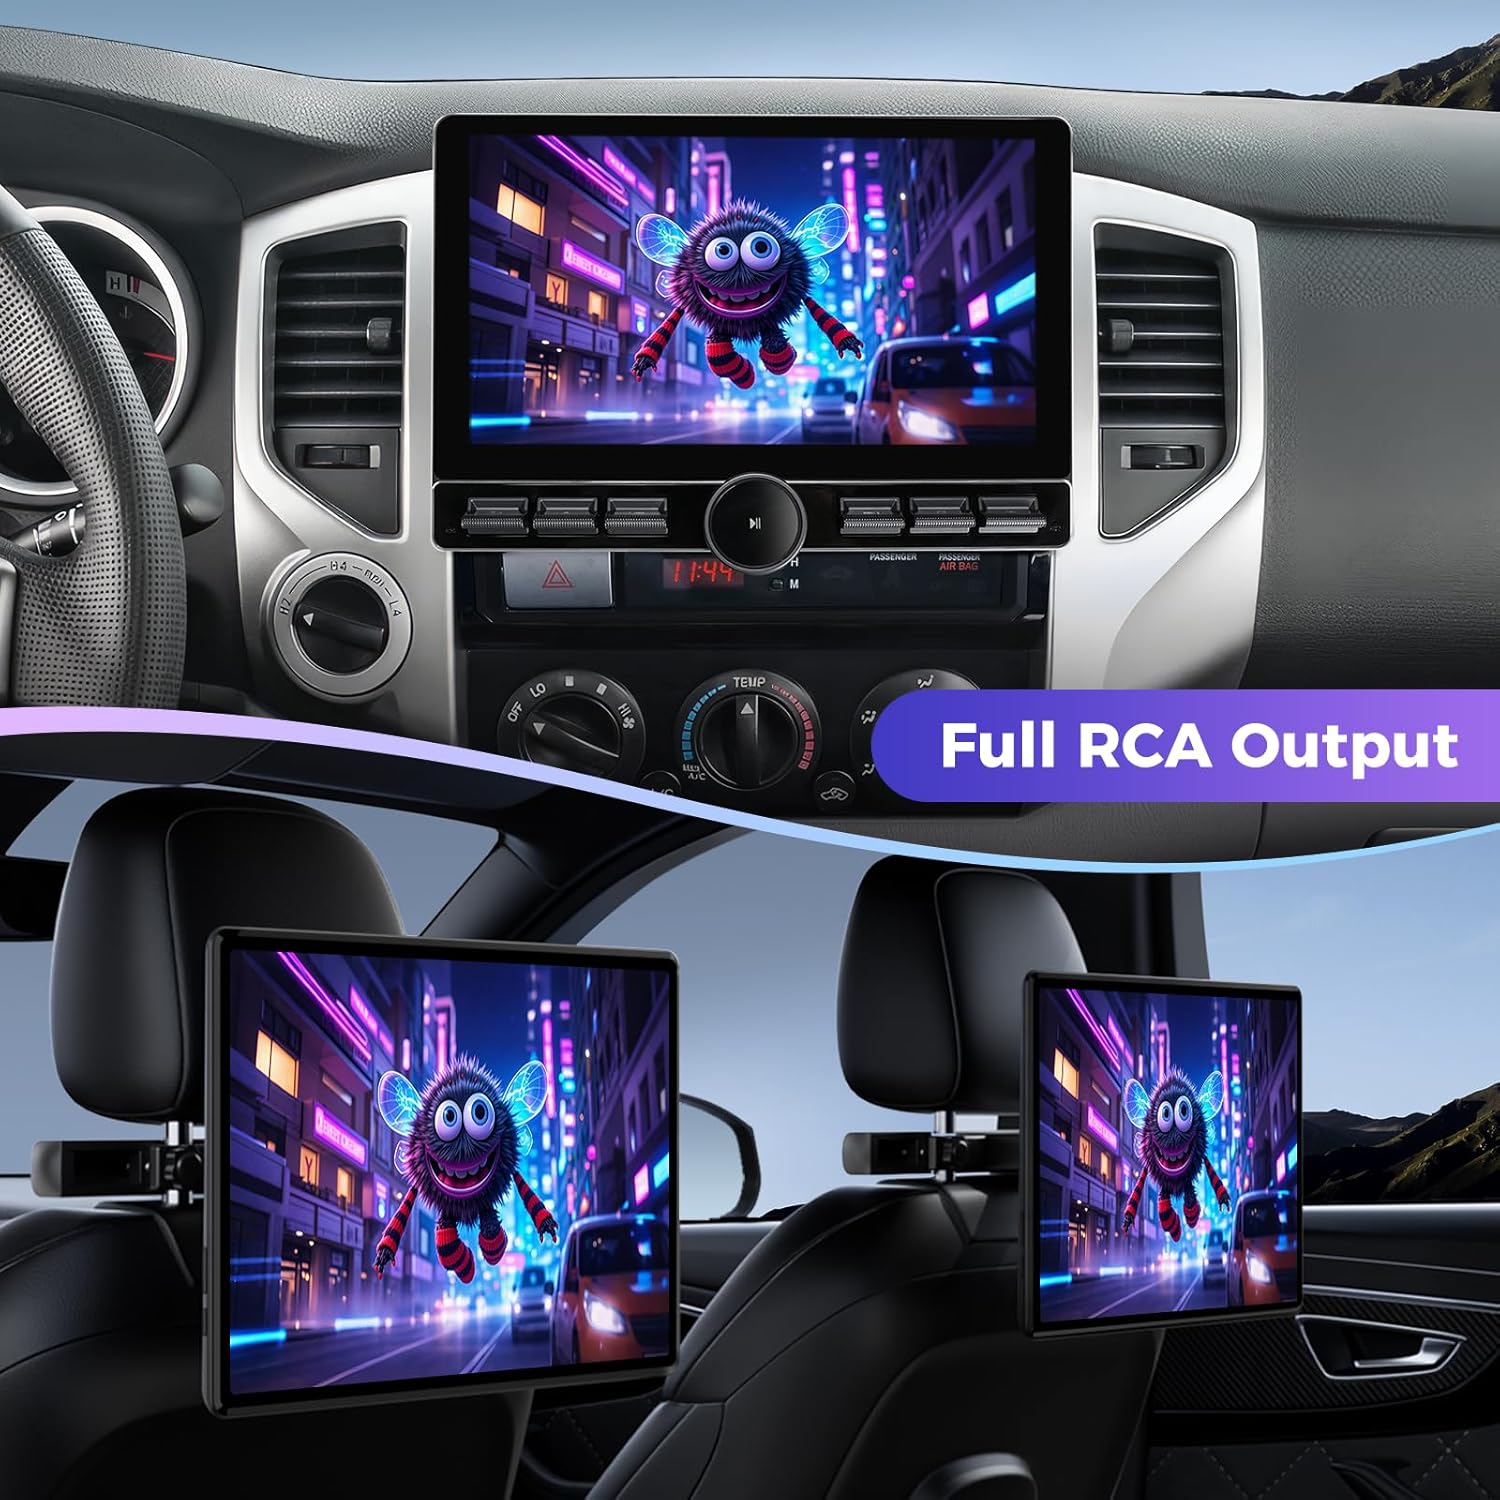
Figure 4.1: Physical Buttons and Manual Knob
This image highlights the physical buttons and the central rotary knob on the AINAVI car stereo, emphasizing their tactile design for easy and precise control during operation.
5. Instal·lació
Professional installation is recommended. Ensure all connections are secure and correctly wired according to your vehicle's specifications.
5.1. Passos previs a la instal·lació
- Desconnecta el terminal negatiu de la bateria del teu vehicle.
- Carefully remove the existing factory radio and dash trim. Use the provided frame removal tool if necessary.
- Identify the vehicle's wiring harness.

Figure 5.1: Before Installation
This image shows the dashboard of a Toyota Tacoma with the factory radio installed, illustrating the appearance before the AINAVI car stereo upgrade.
5.2. Mounting the Head Unit
- Align the head unit with the provided installation frame.
- Gently push the head unit into the frame until it clicks securely into place.
Video 5.2: Installation Guide for Toyota Tacoma Radio
This comprehensive video provides a step-by-step guide for installing the AINAVI car stereo dash kit replacement in a Toyota Tacoma (2005-2015), covering component identification, mounting, and wiring connections.
5.3. Connexions de cablejat
- Connecteu el cable d'alimentació principal al cablejat del vehicle.
- Connect the GPS antenna and route it to a location with a clear view del cel.
- Connecteu els cables USB per a dispositius externs.
- Connecteu el micròfon extern per a trucades de mans lliures.
- Per la part posteriorview camera, connect the video input cable and the power/ground wires. Route the camera cable to the rear of the vehicle.
- If using the USB to RCA output, connect the RCA cables to external monitors.
5.4. Post-instal·lació
- Torneu a connectar la bateria del vehicle.
- Turn on the vehicle and test all functions of the head unit.
- Reinstall the dash trim.

Figure 5.3: After Installation
This image displays the dashboard of a Toyota Tacoma with the AINAVI 10-inch QLED Car Stereo Head Unit successfully installed, showing its integrated appearance and large display.
6. Configuració
6.1. Engegada inicial
Upon first power-on, the unit will boot into the Android operating system. Follow any on-screen prompts for initial setup, such as language selection and time zone.
6.2. Network Connection (5G WiFi)
- Vés a Configuració > Xarxa i Internet > Wi-Fi.
- Select your desired Wi-Fi network and enter the password.
6.3. Connexió Bluetooth
- Vés a Configuració > Dispositius connectats > Bluetooth.
- Activa el Bluetooth i cerca els dispositius disponibles.
- Select your smartphone from the list and pair.

Figura 6.1: Connexió Wi-Fi i Bluetooth
This image shows the AINAVI car stereo displaying screens for Wi-Fi and Bluetooth connections, demonstrating how to connect to a network and pair a device for audio streaming or hands-free calls.
6.4. CarPlay i Android Auto
The unit supports both wired and wireless CarPlay and Android Auto. Ensure your smartphone is compatible and follow the on-screen instructions for connection.
- For wireless connection, ensure Bluetooth is enabled on both the head unit and your phone.
- For wired connection, use a compatible USB cable to connect your phone to the head unit's USB port.

Figure 6.2: CarPlay and Android Auto Interfaces
This image illustrates the seamless integration of Apple CarPlay and Android Auto on the AINAVI car stereo, showing familiar app icons and navigation features accessible from a connected smartphone.
Video 6.3: CarPlay and Android Auto Overview
This video demonstrates the functionality of CarPlay and Android Auto on the AINAVI car stereo, showcasing features like navigation, music playback, and hands-free communication.
7. Instruccions de funcionament
7.1. Navegació bàsica
The QLED touchscreen allows for intuitive control. Swipe left/right to navigate between screens, tap icons to open applications, and use the physical knob for volume control and media playback (play/pause).
7.2. Navegació GPS
Access the navigation application from the main menu. The unit supports Google Maps and other market-available map software. 5G WiFi enhances accuracy and real-time traffic updates.

Figura 7.1: Navegació GPS
This image shows the AINAVI car stereo displaying a detailed GPS navigation map, indicating its capability for route guidance and location services.
7.3. Split Screen Mode
To activate split screen mode, open an application, then swipe up from the bottom of the screen to reveal recent apps. Drag and drop a second application to either side of the screen to run two applications simultaneously.

Figure 7.2: Split Screen and Mirroring
This image illustrates the split-screen capability of the AINAVI car stereo, allowing two applications (e.g., navigation and video playback) to be displayed simultaneously. It also shows screen mirroring from a smartphone.
Video 7.3: Split Screen Functionality
This video demonstrates the split-screen feature of the AINAVI car stereo, showing how users can run and view two different applications simultaneously on the large display.
7.4. Darrera View Càmera
When the vehicle is shifted into reverse, the 1080P rearview camera feed will automatically display on the screen, complete with a ruler line for distance guidance. If your car supports astern trajectory, it will also be displayed.

Figure 7.4: 1080P Rearview Visualització de la càmera
This image shows the AINAVI car stereo displaying a clear 1080P rearview camera feed, complete with parking guidelines, assisting with safe reversing maneuvers.
7.5. Control del volant
The unit supports steering wheel controls. Configuration may be required in the settings menu to map your vehicle's steering wheel buttons to the head unit's functions.

Figura 7.5: Integració del control del volant
This image demonstrates the integration of steering wheel controls with the AINAVI car stereo, allowing drivers to manage media and other functions without taking their hands off the wheel. The screen also shows a split-screen view.
7.6. Audio Settings (DSP & EQ)
Access the DSP (Digital Sound Processor) and EQ (Equalizer) settings to customize your audio experience. Adjust the position of the voice point, select from various sound modes (Normal, Jazz, Pop, Classical, Heavy Metal, Vocal, Soft), and control individual speaker volumes.
7.7. USB to RCA Output
Utilize the USB to RCA output function to connect external headrest monitors, allowing backseat passengers to enjoy independent video playback.
Figure 7.6: Full RCA Output for Rear Monitors
This image demonstrates the full RCA output capability of the AINAVI car stereo, showing the main unit playing content while simultaneously displaying the same content on two rear-seat headrest monitors, providing entertainment for all passengers.
8. Manteniment
- Netegeu la pantalla regularment amb un drap suau i sense borrissol. Eviteu productes de neteja abrasius.
- Mantingueu la unitat lliure de pols i deixalles.
- Ensure proper ventilation around the unit to prevent overheating. The built-in fan assists with cooling.
- Periodically check all wiring connections for security.
9. Solució De Problemes
Si teniu problemes, consulteu les solucions habituals següents:
| Problema | Causa possible | Solució |
|---|---|---|
| La unitat no s'encén | Connexió d'alimentació fluixa, fusible fundit, problema amb la bateria del vehicle. | Check power cable connections. Inspect vehicle fuses. Ensure vehicle battery is charged. Press the reset button (if available). |
| CarPlay/Android Auto no es connecta | Bluetooth pairing issue, faulty USB cable, software glitch. | Ensure Bluetooth is on and paired. Try a different USB cable. Restart both the head unit and your smartphone. Check for software updates. |
| Els comandaments del volant no funcionen | Incorrect wiring, unconfigured settings. | Verify wiring connections. Access the unit's settings to configure steering wheel controls. |
| Sense so | Volume too low, mute activated, speaker wiring issues. | Increase volume. Check if mute is active. Inspect speaker wiring. |
| Screen unresponsive or sluggish | Temporary software issue, too many apps running. | Restart the unit. Close unnecessary applications. Clear system cache if possible. |
10. Especificacions
| Característica | Detall |
|---|---|
| Número de model | 6G+128G |
| Mida de la pantalla | 10 polzades |
| Dimensions del producte | 10 x 10 x 10 polzades |
| Pes de l'article | 4.71 lliures |
| Sistema operatiu | Android |
| Tecnologia de connectivitat | Bluetooth, USB, Wi-Fi, Wired, Wireless |
| Tipus de mapa | Europe, North America, South America, Worldwide |
| Mode de sortida d'àudio | Envoltant estèreo |
| Tipus de muntatge | Muntatge al quadre de comandament |
| Característiques especials | Built-In Bluetooth, Type-C charger, Mirroring, Knob and Physical Buttons, Touchscreen, RDS, Split Screen Function, 8-Core and USB 4Pin 6Pin, 48EQ (Sound Point Control) + Premium DSP, Highest Level QLED, Equalizer, Wired/Wireless Android Auto, Wired/Wireless CarPlay |
11. Garantia
The AINAVI 10-inch QLED Car Stereo Head Unit comes with a 12 Months Manufacturer Guarantee.
12. Suport
For technical assistance or installation support, please contact our professional technical support team:
- Telèfon d'atenció al client: +1 (833) 858-5016
- Horari de treball: 01:00 PM to 00:00 AM PST
- Correu electrònic: info <at> ainavi <dot> com
You can also seek help via your order center on Amazon.

Figura 12.1: Atenció al client
This image features a customer support representative wearing a headset and smiling, symbolizing the availability of assistance for product inquiries and technical support.


