1. Introducció
This manual provides detailed instructions for the safe and effective use of your OLIGHT Oclip Series Headlamp Strap Bundle, featuring the Oclip Pro EDC Flashlight. Please read this manual thoroughly before operation and retain it for future reference.

Image 1.1: The OLIGHT Oclip Pro EDC Flashlight and its compatible Headlamp Corretja.
2. Producte acabatview
2.1 Oclip Pro EDC Flashlight
The Oclip Pro is a versatile clip-on light designed for everyday carry. It features multiple lighting solutions to suit various needs.
- Three Lighting Solutions: Includes a floodlight with 500 lumens, a 120-meter range spotlight, and a 40/4 lumen red light.
- User-friendly UI Design: Modes are switched via a selector.
- Indicador de bateria: Located in the center of the switch, it displays the current battery level.

Image 2.1: Various angles of the OLIGHT Oclip Pro, highlighting its compact design and clip.
2.2 Oclip Headlamp Corretja
The Oclip Headlamp Strap is designed to convert your Oclip series flashlight into a hands-free headlamp. It is compatible with Oclip, Oclip Pro, and Oclip Ultra models.
- Flexible Rotating Light Holder: El capamp bracket allows for 160-degree rotation, ensuring optimal light direction. This mechanism is tested for over 5,000 flips.
- Materials de qualitat: Constructed from premium nylon for durability, lightweight comfort, and a secure fit.

Image 2.2: The OLIGHT Headlamp Strap, designed for hands-free use of Oclip series flashlights.
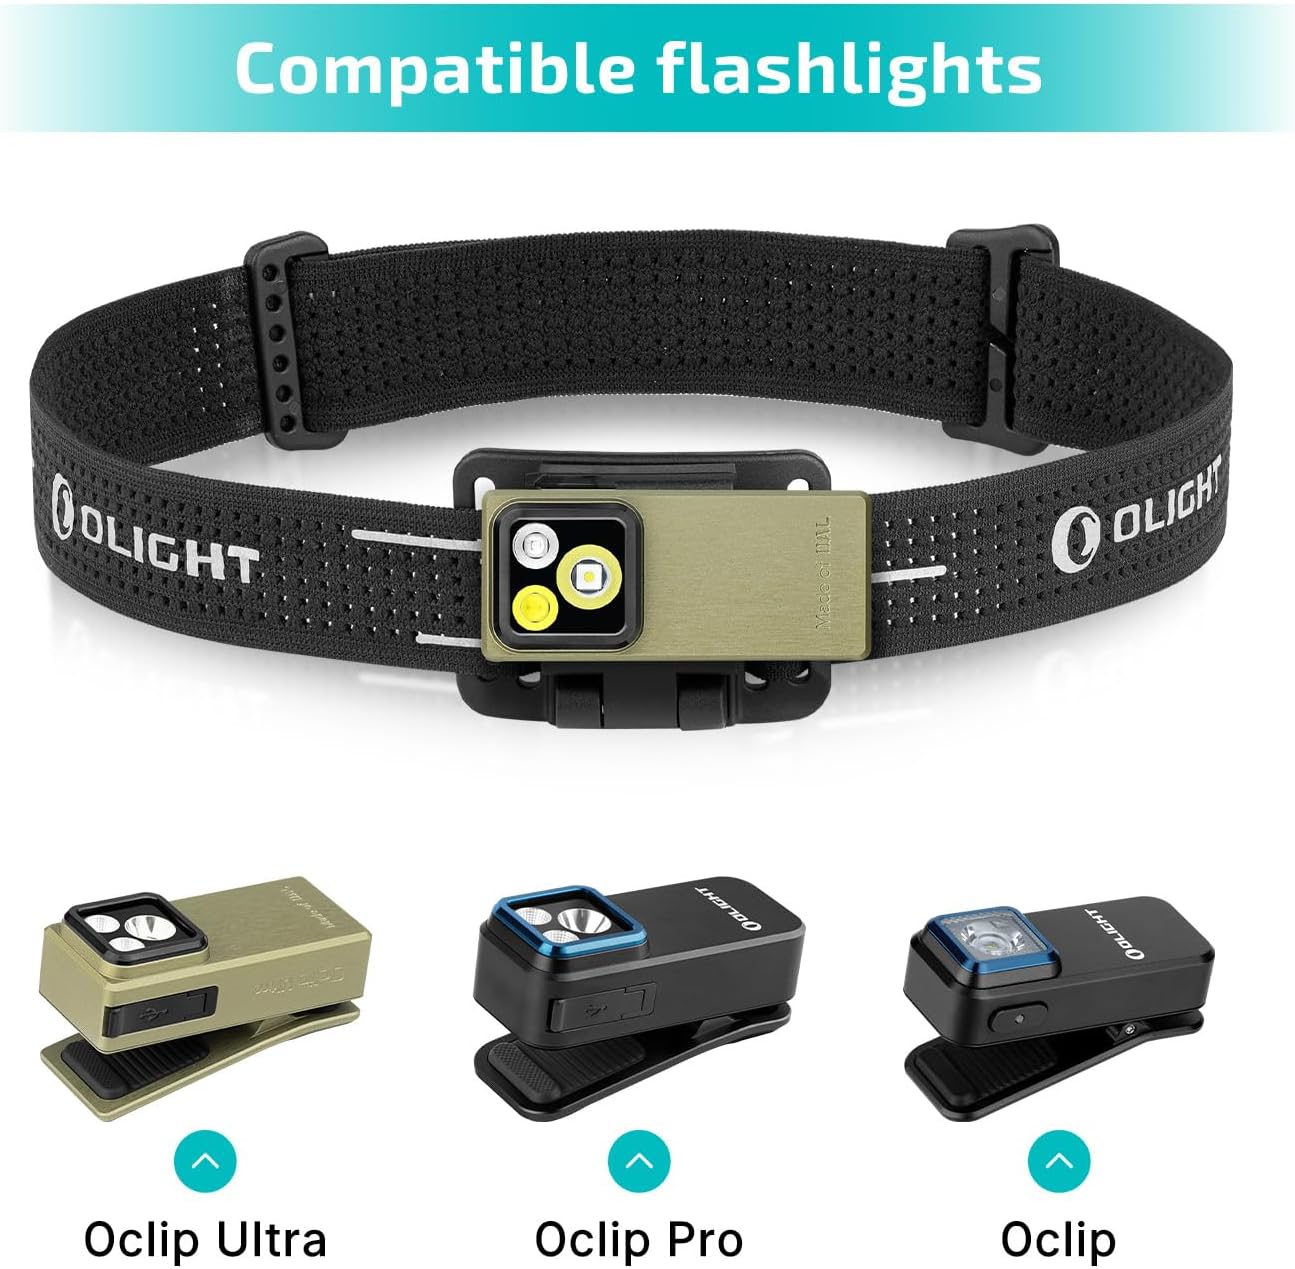
Image 2.3: The headlamp strap shown with compatible Oclip Ultra, Oclip Pro, and Oclip flashlights.

Image 2.4: Size and feature comparison between the Oclip Pro and Oclip models.
3. Configuració
3.1 Attaching the Oclip Pro to the Headlamp Corretja
- Ensure the Oclip Pro flashlight is in the unlocked state (refer to Section 4.4 for lockout/unlock instructions).
- Align the clip of the Oclip Pro flashlight with the bracket on the headlamp corretja.
- Gently push the flashlight into the bracket until it securely clips into place. You should hear a distinct click.
- Adjust the angle of the flashlight within the bracket to your desired position. The bracket allows for 160-degree rotation.
- Col·loca el capçalamp strap on your head and adjust for a comfortable and secure fit.

Image 3.1: The Oclip Pro attached to the headlamp strap, providing hands-free illumination.
3.2 Alternative Mounting Options for Oclip Pro
The Oclip Pro can also be clipped onto various surfaces or attached to metal objects due to its magnetic base, offering versatile hands-free lighting without the headlamp corretja.

Imatge 3.2: Ex.amples of the Oclip Pro being used by clipping it to a shirt, belt, or attaching it magnetically to a metal surface.
4. Instruccions de funcionament
4.1 Encès/Apagat
To turn the Oclip Pro on or off, press the main switch button located on the side of the flashlight.
4.2 Canvi de mode
The Oclip Pro features a selector for switching between different lighting modes (floodlight, spotlight, red light). Rotate the selector to choose your desired mode.
4.3 Ajust de brillantor
While the flashlight is on, press and hold the main switch button to cycle through the brightness levels. The typical order of brightness is Low, Medium, then High. Moonlight mode and Turbo mode may be accessed with specific button presses (refer to the diagram below).

Image 4.1: Visual guide for adjusting brightness levels, including Moonlight, Low, Medium, High, and Turbo modes.
4.4 Lockout & Unlock
For first-time use or to prevent accidental activation, the Oclip Pro may be in a locked state. To unlock, press and hold the main switch button for approximately 1 second. To engage lockout mode, press and hold the button for more than 2 seconds while the light is off.

Image 4.2: Instructions for locking and unlocking the Oclip Pro flashlight.
4.5 Indicador de bateria
The battery indicator in the center of the switch provides real-time information about the remaining battery level. Refer to the product's specific indicator guide for detailed interpretations (e.g., green for high, yellow for medium, red for low).
5. Manteniment
To ensure the longevity and optimal performance of your OLIGHT Oclip Pro and Headlamp Strap, follow these maintenance guidelines:
- Neteja: Wipe the flashlight and strap with a soft, damp tela. Eviteu productes químics agressius o materials abrasius.
- Càrrega: Recharge the Oclip Pro using the provided charging cable when the battery indicator shows low power.
- Emmagatzematge: Emmagatzemeu el producte en un lloc fresc i sec, lluny de la llum solar directa i de temperatures extremes.
- Inspecció: Comproveu periòdicament el capamp strap for any signs of wear or damage.
6. Solució De Problemes
If you encounter issues with your OLIGHT Oclip Pro, refer to the following common problems and solutions:
- La llum no s'encén:
- Check if the flashlight is in lockout mode (refer to Section 4.4).
- Assegureu-vos que la bateria estigui carregada.
- La sortida de llum és tènue:
- The battery might be low; recharge the device.
- Assegureu-vos que la lent estigui neta.
- Flashlight not securely attaching to strap:
- Verify that the flashlight is correctly aligned with the bracket and pushed in until it clicks.
- Inspect the strap bracket and flashlight clip for any damage.
For further assistance, please contact OLIGHT customer support.
7. Especificacions
| Característica | Especificació |
|---|---|
| Tipus de producte | EDC Flashlight with Headlamp Corretja |
| Marca | LLUM |
| Model | Oclip Pro |
| Característica especial | Recarregable |
| Color | Verd |
| Font d'alimentació | Funciona amb bateria (ió de liti) |
| Tipus de font de llum | LED |
| Material (Strap) | Niló |
| Brillantor blanc | 500 lúmens (màx.) |
| Nivell de resistència a l'aigua | No resistent a l'aigua |
| Tipus de muntatge | Head Mount, Clip-on Mount |
| Nombre de llums | 2 (Floodlight, Spotlight, plus Red Light) |
| Característiques de la bombeta | Multi-mode, Red Light Feature |
8. Garantia i Suport
OLIGHT products are manufactured to high-quality standards. For information regarding warranty coverage, product registration, or technical support, please visit the official OLIGHT weblloc web o poseu-vos en contacte amb el seu departament d'atenció al client. Conserveu el rebut de compra com a comprovant de compra per a reclamacions de garantia.
OLIGHT Official Weblloc: www.olightstore.com


