1. Introducció
The ATOMSTACK P1 is an advanced dual-laser engraving machine designed for precision and versatility. Equipped with both a 5W diode laser (455nm) and a 1.2W infrared laser (1064nm), it offers broad material compatibility. Its fully enclosed, FDA/Class 1 certified design prioritizes user safety, making it suitable for beginners and home use. This manual provides essential information for setting up, operating, and maintaining your ATOMSTACK P1, along with instructions for its rotary accessories, the R8 Laser Rotary Chuck and R6 Laser Rotary Roller, for engraving cylindrical objects.
2. Pautes de seguretat
Your ATOMSTACK P1 is designed with multiple safety features to ensure a secure operating environment. Please read and adhere to the following guidelines:
- FDA/Class 1 Safety Certification: The P1 is certified for Class 1 laser safety, making it safe for home use.
- 720° Fully Enclosed Design: The machine features a fully enclosed structure with a visual acrylic observation window. This design eliminates the need for safety goggles during operation.
- Automatic Stop Features: The engraver is equipped with safety mechanisms that automatically stop operation if it is tilted excessively or if the safety lock is not properly closed.
- USB Safety Interlock: An integrated USB key is required to unlock processing and related functions, preventing unauthorized use.
- Secure Enclosure Detection: The laser instantly stops when the door is opened, ensuring immediate safety.
- Detecció d'inclinació basada en giroscopis: A built-in gyroscope detects excessive tilting and stops operation to prevent accidents.

Image: ATOMSTACK P1 highlighting Class 1 Laser Certification and fully enclosed design for safety.
3. Característiques del producte
- Dual Laser System: Integrates a 5W diode laser (455nm) for engraving and cutting various materials like wood, paper, leather, and opaque acrylic, and a 1.2W infrared laser (1064nm) for metals, plastics, and other hard-to-engrave surfaces.
- Alta precisió: Features a CoreXY design with 0.1mm motion accuracy and a maximum working speed of 10000mm/min, ensuring detailed and precise results.
- Àmplia compatibilitat de materials: Capable of engraving over 300 types of materials, including stainless steel, aluminum, brass, iron, gold, silver, platinum, titanium, black acrylic, plastic, wood, bamboo, paper, leather, cardboard, cork, felt, fabric, MDF, and coated metal.
- Quick Focus Adjustment: The focus adjustment tool allows for quick and easy setup, completing focusing within 3 seconds.
- Espai de treball expandible: Supports extension accessories to expand the engraving area up to three times, enabling larger projects.
- Rotary Engraving Support: Compatible with ATOMSTACK R8 Laser Rotary Chuck and R6 Laser Rotary Roller for engraving cylindrical and irregular objects like bottles, cups, rings, and spheres.

Imatge: Més deview of ATOMSTACK P1's key features, including dual laser, precision, and software compatibility.
4. Desembalatge i configuració inicial
Follow these steps to unbox and set up your ATOMSTACK P1 for the first time:
- Desempaquetar la màquina: Carefully remove the ATOMSTACK P1 from its packaging. Ensure all components listed in the user manual are present.
- Connectar l'alimentació: Connect the power adapter to the machine's input port and then plug it into a power outlet.
- Insert USB Key: Insert the provided USB key into the designated USB Key port on the machine. This key acts as a safety interlock.
- Encès: Flip the emergency switch to the 'On' position. The status light should turn green, indicating the machine is ready.
- Connexió a l'ordinador (opcional): Use the provided USB cable to connect the machine to your computer for software control.
- Position Laser Module: After unboxing, the laser module might be near the limit switch. Manually move it to the center of the work area to avoid accidental triggering.
- Ajust del focus: Use the focus adjustment tool to set the correct focal length for your material.
Video: ATOMSTACK P1 Unboxing and initial setup guide.

Image: Steps for quick laser module replacement and focusing.
5. Rotary Accessories
The ATOMSTACK P1 supports rotary accessories for engraving cylindrical and irregular objects.
5.1 ATOMSTACK R6 Laser Rotary Roller Installation
The R6 Rotary Roller is ideal for engraving a variety of irregular cylindrical objects with 180° angle adjustment and 360° rotation.
- Unpack R6: Remove the R6 Rotary Roller and its connecting cables from the packaging.
- Ajustar els rodets: Adjust the position of the rollers on the R6 unit to match the diameter of your cylindrical object. Secure the rollers in place.
- Connect to P1: Locate the Y-axis motor port on the P1 machine. Disconnect the original Y-axis cable and connect the R6's 6-pin motor cable to the Y-axis motor port.
- Connectar USB: Insert one end of the R6's USB cable into the "Accessory Interface" port on the P1 body, and the other end into the "USB port" on the R6 unit.
- Switch to Accessory Mode: After connecting the cables, slide the Y-axis mode selector switch on the P1 down to "Accessory Mode".
Video: Installation guide for the ATOMSTACK R6 Laser Rotary Roller.
5.2 ATOMSTACK R8 Laser Rotary Chuck Usage
The R8 Rotary Chuck is designed for engraving a wide range of irregular cylindrical objects, including balls, rings, spherical objects, and cups with handles. Its high-quality chuck ensures consistent and stable rotation for enhanced accuracy.
- Col·locació: Position the R8 Rotary Chuck securely within the P1's engraving area.
- Object Mounting: Mount the cylindrical or irregular object firmly into the chuck.
- Connectar USB: Connect the R8's USB cable to the "Accessory Interface" port on the P1. The machine should automatically enter roller processing mode.
- Ajustar la configuració: In the software, select the appropriate settings for chuck engraving, including object diameter and perimeter.

Image: ATOMSTACK P1 utilizing the R8 Rotary Chuck to engrave various cylindrical materials.

Image: Demonstrates USB connection for rotary accessories and the corresponding software interface for mode selection.
6. Funcionament
6.1 Software and App Usage
The ATOMSTACK P1 can be controlled via dedicated software (AtomStack Studio) on your computer or through a mobile application. The software offers a preloaded design library and guided material settings for ease of use.
- Selecció de disseny: Choose from a wide range of preloaded templates or import your own designs.
- Material Settings: The software provides guided settings for various materials, simplifying the engraving process.
- Inici amb un sol clic: Adjust settings and initiate engraving with a single click.
Video: Highlights the ease of use and app control for the ATOMSTACK P1 (Mini).
6.2 Compatibilitat de materials
The dual laser system allows for engraving and cutting on a vast array of materials:
- 5W Diode Laser (455nm): Wood, Bamboo, Paper, Leather, Cardboard, Cork, Rock, Felt, Fabric, MDF, Coated Metal, Some Dark Opaque Acrylic.
- 1.2W Infrared Laser (1064nm): Stainless Steel, Aluminum, Brass, Iron, Gold, Silver, Platinum, Titanium, Black Acrylic, Plastic.

Image: Detailed list of materials compatible with the 5W diode and 1.2W infrared lasers.
7. Air Purifier (Optional Accessory)
The Atomstack D3 air purifier is specifically designed for laser systems. It features a 7-layer filter cartridge for strong filtration of odors and harmful substances generated during laser cutting and engraving, achieving a filtration rate of 99.97%.
- Enhanced Air Quality: Ensures a clean and healthy creative environment by effectively removing smoke and odors.
- Funcionament silenciós: The snug-fit design prevents smoke leakage and blocks sound transmission, ensuring low-noise operation even at full power.
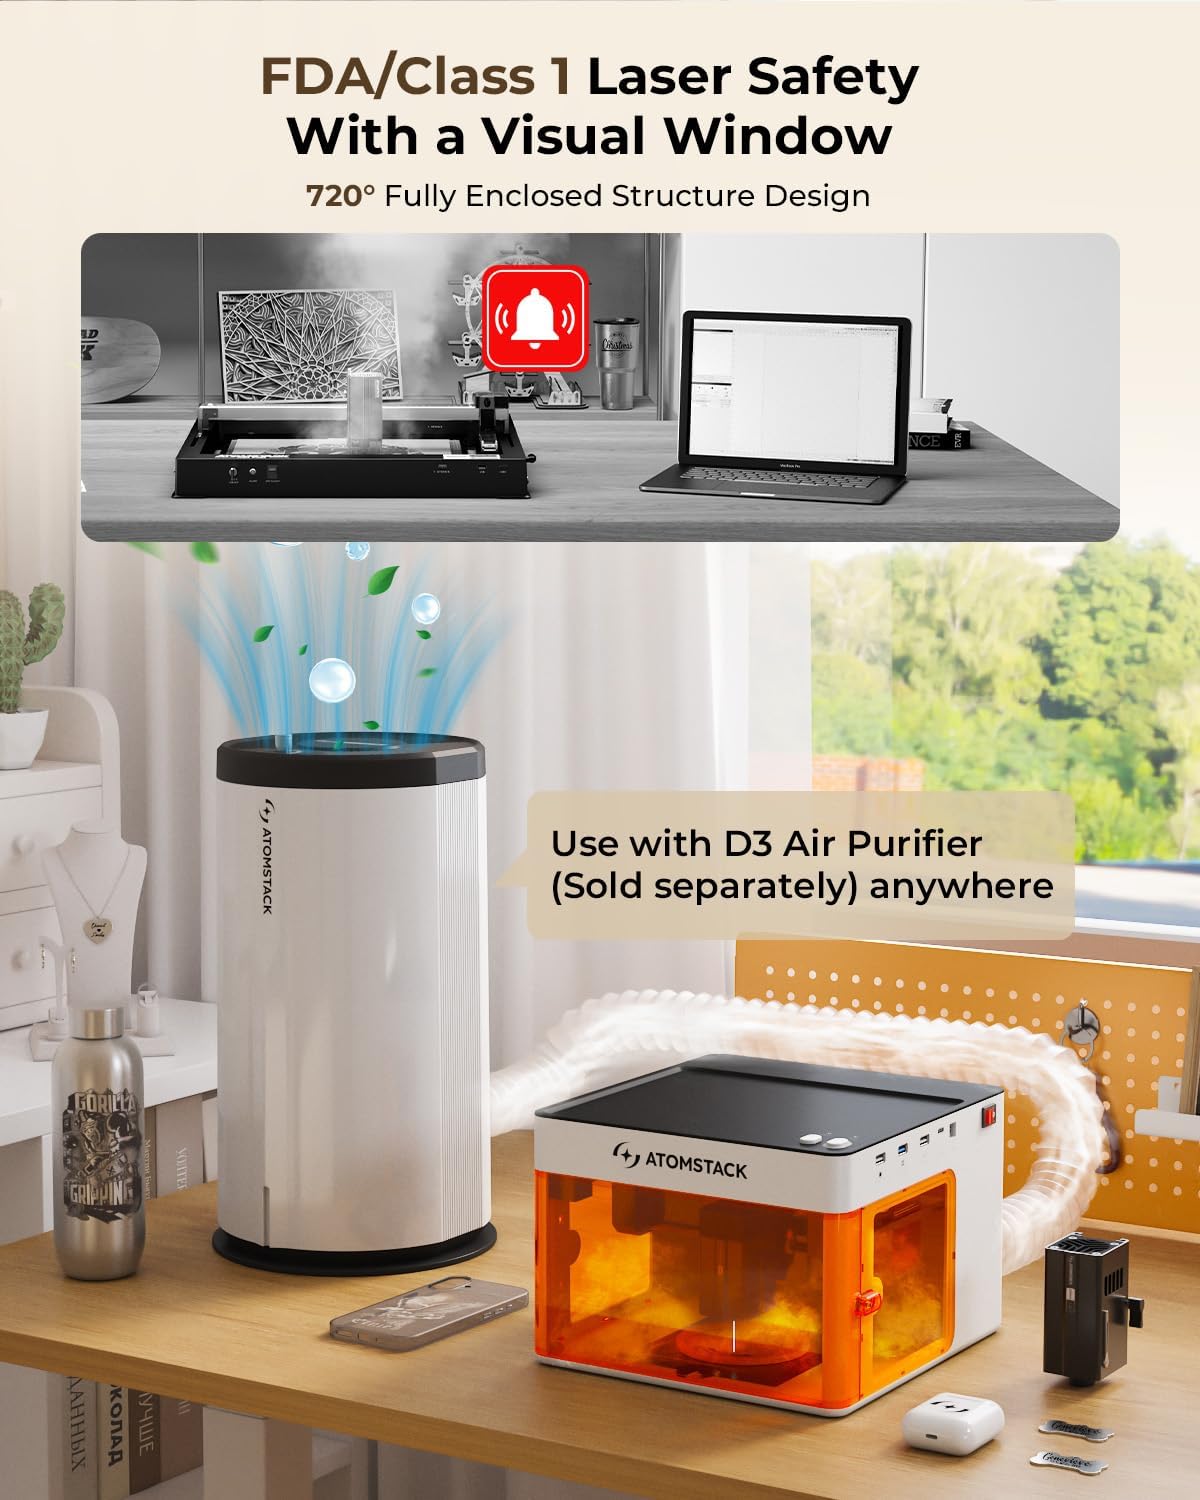
Image: ATOMSTACK P1 shown with the optional D3 Air Purifier, emphasizing clean and safe operation.
8. Especificacions
| Fabricant | ATOMSTAK |
| Número de model de l'article | P1 |
| ASIN | B0FDGNNJMC |
9. Garantia i Suport
ATOMSTACK is committed to providing excellent customer service and support:
- Garantia de 365 dies: Your ATOMSTACK P1 comes with a 365-day warranty.
- Servei 24/7: Dedicated customer support is available 24 hours a day, 7 days a week.
- Resolució de problemes: If you encounter any issues with the engraving machine or require assistance, please refer to the accompanying manual. For further support, contact the ATOMSTACK team directly through the Amazon platform for prompt solutions.


