Manual d'usuari del molinet de cafè elèctric SHARDOR CG836B
Model: CG836B
1. Introducció
Thank you for choosing the SHARDOR Electric Burr Coffee Grinder. This manual provides essential information for the safe and efficient operation, maintenance, and troubleshooting of your new coffee grinder. Please read all instructions carefully before first use and retain for future reference.
This electric burr coffee grinder is designed for home use, offering 32 precise grind settings and an adjustable timer to achieve the ideal texture for various brewing methods, from fine espresso to coarse French press.
2. Informació de seguretat
- Llegiu totes les instruccions abans d’utilitzar l’aparell.
- Aquest aparell només és per a ús domèstic. No utilitzar a l'aire lliure.
- Mantingueu l'aparell i el cable fora de l'abast dels nens.
- Always unplug the grinder from the power outlet when not in use, before cleaning, or when assembling/disassembling parts.
- No submergiu la base del motor en aigua o cap altre líquid.
- To protect the motor, avoid grinding too much coffee at once. The grinder has a built-in safety program allowing up to 120 seconds of continuous grinding, followed by a short cooldown period. For best performance, grind in smaller batches.
- Assegureu-vos que totes les peces estiguin correctament muntades abans de fer funcionar la trituradora.
3. Producte acabatview
Familiarize yourself with the components of your SHARDOR Electric Burr Coffee Grinder:
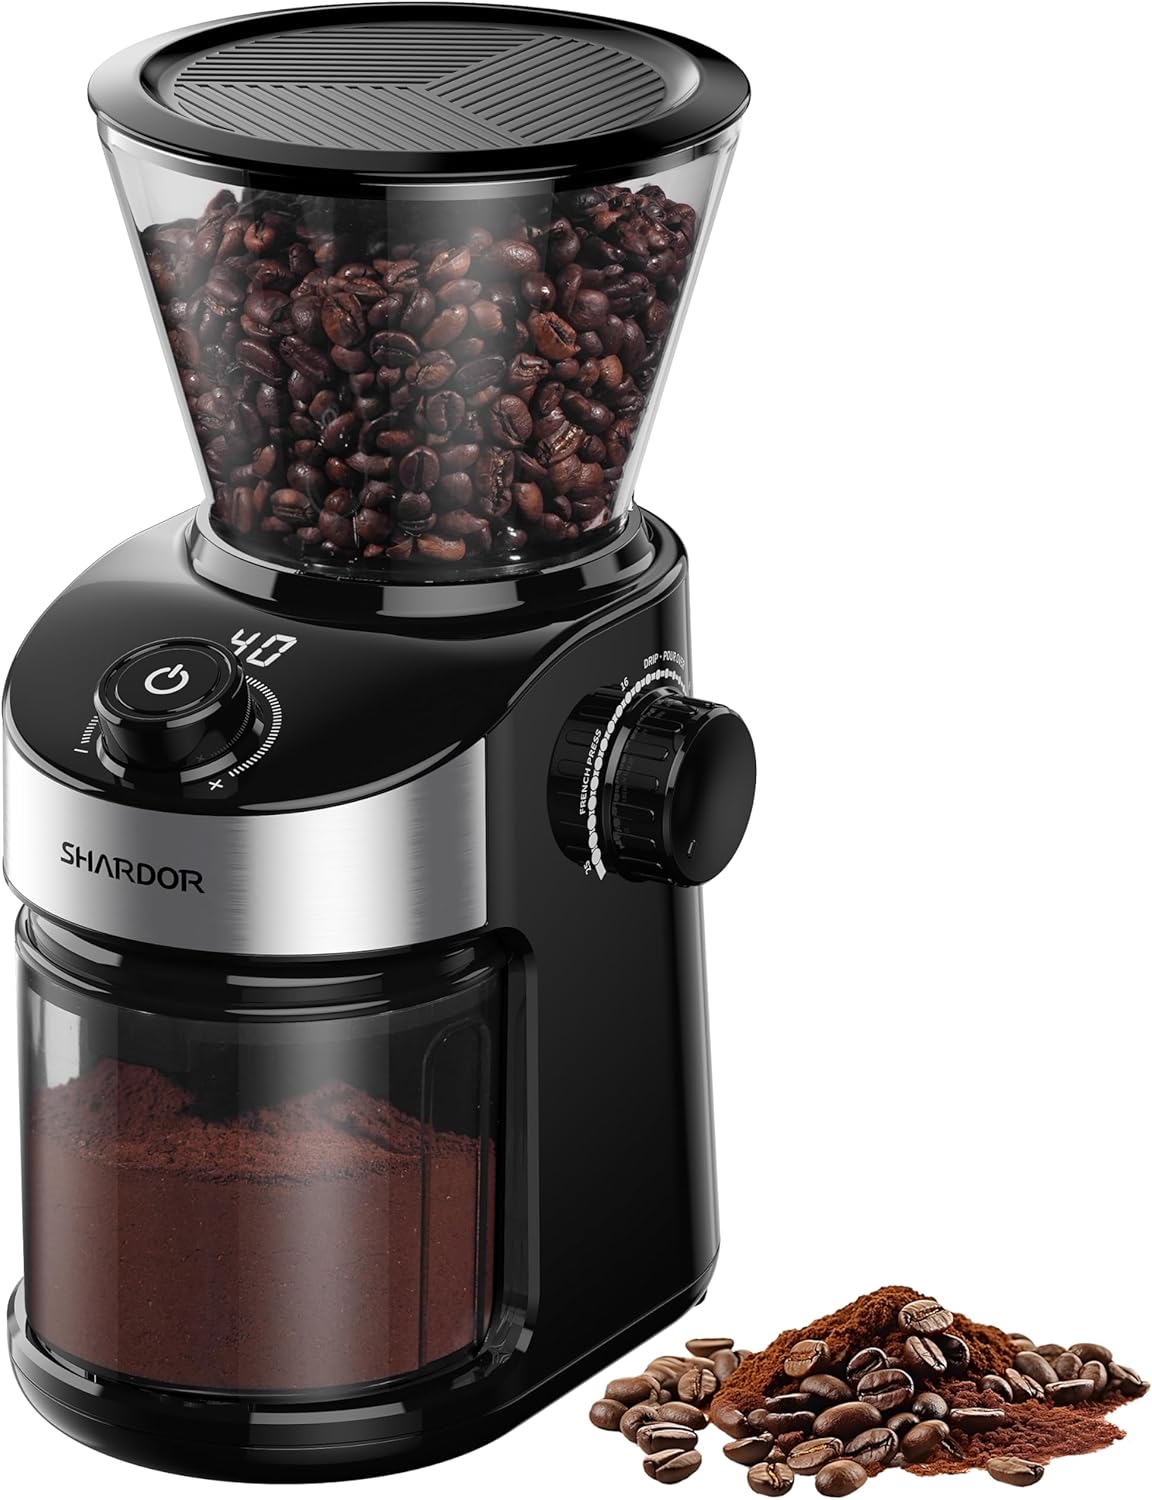
Figura 1: global view of the SHARDOR Electric Burr Coffee Grinder CG836B.
- Tremuja de mongetes: Conté grans de cafè sencers per moldre.
- Upper Burr: The removable top burr for grinding.
- Selector de mida de mòlta: Adjustable dial to choose desired grind fineness (1-32).
- Tauler de control: Features digital timer display, time adjustment buttons (+/-), and Start/Stop button.
- Contenidor de mòlt: Collects the freshly ground coffee.
- Raspall de neteja: For easy maintenance of the burrs and chamber.

Figure 2: Premium metal flat burr mechanism ensures uniform grinding.
4. Configuració
- Desembalar: Traieu amb cura tots els components de l'embalatge.
- Col·locació: Place the grinder on a clean, dry, and stable surface.
- Muntar la tremuja: Align the arrow symbol on the bean hopper with the lock symbol on the grinder base. Twist clockwise until it locks into place.
- Insert Grounds Container: Slide the grounds container into its designated slot at the front of the grinder.

Figure 3: Ensure proper alignment of the bean hopper for secure operation.
Video 1: Demonstrates the setup and basic operation of the SHARDOR Burr Coffee Grinder.
5. Instruccions de funcionament
- Afegir grans de cafè: Open the lid of the bean hopper and pour in your desired amount of whole coffee beans. Close the lid securely.
- Seleccioneu la mida de la mòlta: Rotate the grind size selector dial to choose your preferred fineness. The settings range from 1 (finest, for espresso) to 32 (coarsest, for French press). Refer to the markings for Drip, Pour Over, and French Press.
- Set Grind Time: Use the '+' and '-' buttons on the control panel to adjust the grinding time. The digital timer allows for precise control up to 40 seconds.
- Comença a triturar: Press the Start/Stop button to begin grinding. The grinder will automatically stop once the set time is reached. You can also press the button again to stop grinding manually at any time.
- Eliminar motius: Once grinding is complete, carefully remove the grounds container from the grinder.

Figure 4: Ensure coffee beans are dry before adding to the hopper.

Figure 5: The grind size selector offers 32 options for various brewing methods.

Figure 6: The digital timer allows for precise control over grinding duration.

Figure 7: One-touch operation for convenience.
6. Manteniment i neteja
Una neteja regular garanteix un rendiment òptim i allarga la vida útil del molinet.
- Desconnectar: Desconnecteu sempre el molinet abans de netejar-lo.
- Elimina peces: Remove the bean hopper and grounds container. The upper burr can be removed by twisting it counter-clockwise after unlocking the hopper.
- Rebaves netes: Use the included cleaning brush to remove any residual coffee grounds from the upper and lower burrs.
- Clean Containers: Wash the bean hopper and grounds container with warm, soapy water. Rinse thoroughly and dry completely before reassembling. Do not wash the main motor unit.
- Base de neteja: Netegeu l'exterior de la base del motor amb anunciamp tela.
- Torneu a muntar: Reassemble all parts, ensuring the bean hopper is locked securely in place.

Figure 8: Use the cleaning brush to remove residual coffee grounds from the burrs.
7. Solució De Problemes
- Grinder does not turn on: Ensure the power cord is securely plugged into a working outlet. Check that the bean hopper is correctly locked into position.
- El molinet s'atura inesperadament: The grinder has a safety feature that limits continuous operation to 120 seconds. Allow it to cool down before resuming. Ensure the bean hopper is not empty.
- Mòlta inconsistent: Check that the burrs are clean and free of obstructions. Adjust the grind setting to a different level to see if consistency improves.
- Coffee grounds sticking to container: This grinder features anti-static technology to minimize this issue. If grounds still stick, gently tap the container or use the cleaning brush.
8. Especificacions
| Característica | Detall |
|---|---|
| Marca | SHADOR |
| Número de model | CG836B |
| Color | Negre pur |
| Dimensions del producte | 5 cm de llargada x 9.7 cm d'amplada x 6.5 cm d'alçada |
| Pes de l'article | 2.92 lliures |
| Capacitat | 6.7 ounces (coffee beans) |
| Configuració de la mòlta | 32 Precision Settings |
| Temporitzador | 40-Second Adjustable Digital Timer |
| Voltage | 120 Volts |
| Fabricant | SHADOR |
9. Garantia i Suport
Your SHARDOR Electric Burr Coffee Grinder is covered by a manufacturer's warranty. Please refer to the warranty card included in your packaging for specific terms and conditions.
For product support, troubleshooting assistance, or to inquire about replacement parts, please contact SHARDOR customer service through the contact information provided on your warranty card or the official SHARDOR weblloc.


