1. Introducció
Thank you for choosing the Geevon Indoor Outdoor Wireless Thermometer. This device provides accurate temperature and humidity readings for up to three locations, along with weather forecasts and specialized indices for mold, dew, and heat. Please read this manual carefully to ensure proper setup and operation.
Contingut del paquet:
- Unitat de visualització principal (1)
- Wireless Outdoor Sensor (1)
- Manual d'usuari (1)
2. Informació de seguretat
- Do not expose the main unit or sensor to extreme temperatures, direct sunlight, or moisture.
- Use only the specified battery type (2 AAA batteries for the main unit, 2 AAA batteries for the sensor, not included).
- Eliminar les bateries usades de manera responsable d'acord amb la normativa local.
- No intenteu desmuntar ni reparar el dispositiu. Poseu-vos en contacte amb el servei d'atenció al client si sorgeixen problemes.
- Mantenir fora de l'abast dels nens.
3. Producte acabatview
The Geevon Indoor Outdoor Wireless Thermometer consists of a main display unit and one wireless outdoor sensor. The main unit displays indoor and outdoor conditions, while the sensor transmits outdoor data wirelessly.
Main Unit and Sensor:

Image: The main display unit (left) and the wireless outdoor sensor (right). The main unit features a large LCD screen showing various environmental data.
Dimensions:

Image: A diagram illustrating the dimensions of the main unit (4.2 inches tall, 3.1 inches wide, 0.8 inches deep) and the outdoor sensor (3.7 inches tall, 2 inches wide, 0.8 inches deep).
Botons i funcions:

Image: A detailed diagram showing the location and function of each button on the main unit: SNOOZE/LIGHT, CH (Channel), UP/DOWN keys, and MOLD/DEW/HEAT (IND) button.
- SNOOZE/LLUM: Activates the 10-second backlight.
- CH (canal): Switches between outdoor sensor channels (1, 2, 3).
- AMUNT AVALL: Adjusts settings or views historical data.
- IND (Mold/Dew/Heat): Cycles through Mold Index, Dew Point, and Heat Index displays.
4. Configuració
4.1 Instal·lació de la bateria
- Open the battery compartment on the back of both the main display unit and the wireless outdoor sensor.
- Insert 2 AAA batteries into each unit, observing the correct polarity (+/-).
- Tanqueu els compartiments de la bateria de manera segura.
The main unit will power on automatically and begin searching for the outdoor sensor. The outdoor sensor will transmit data once batteries are installed.
4.2 Col·locació del sensor
Place the outdoor sensor in a location that is protected from direct sunlight and precipitation to ensure accurate readings. The maximum wireless range is approximately 200 feet (60 meters) in open air. Obstacles like walls and electronic devices can reduce this range.
4.3 Emparellament i selecció de canals
The main unit and sensor should pair automatically upon battery installation. If the outdoor reading is not displayed, press the 'CH' button on the main unit to cycle through channels 1, 2, and 3 until the sensor's data appears. If pairing fails, remove and reinsert batteries in both units, then try again.
4.4 Opcions de muntatge

Image: The main unit can be placed on a tabletop using its integrated stand or wall-mounted using the hanging hole on the back. The outdoor sensor also has a hanging hole for wall mounting.
- Col·locació de la taula: Use the integrated stand on the back of the main unit for stable placement on any flat surface.
- Muntatge a la paret: Both the main unit and the outdoor sensor have hanging holes for secure wall mounting.
5. Instruccions de funcionament
5.1 Activació de la retroiluminació
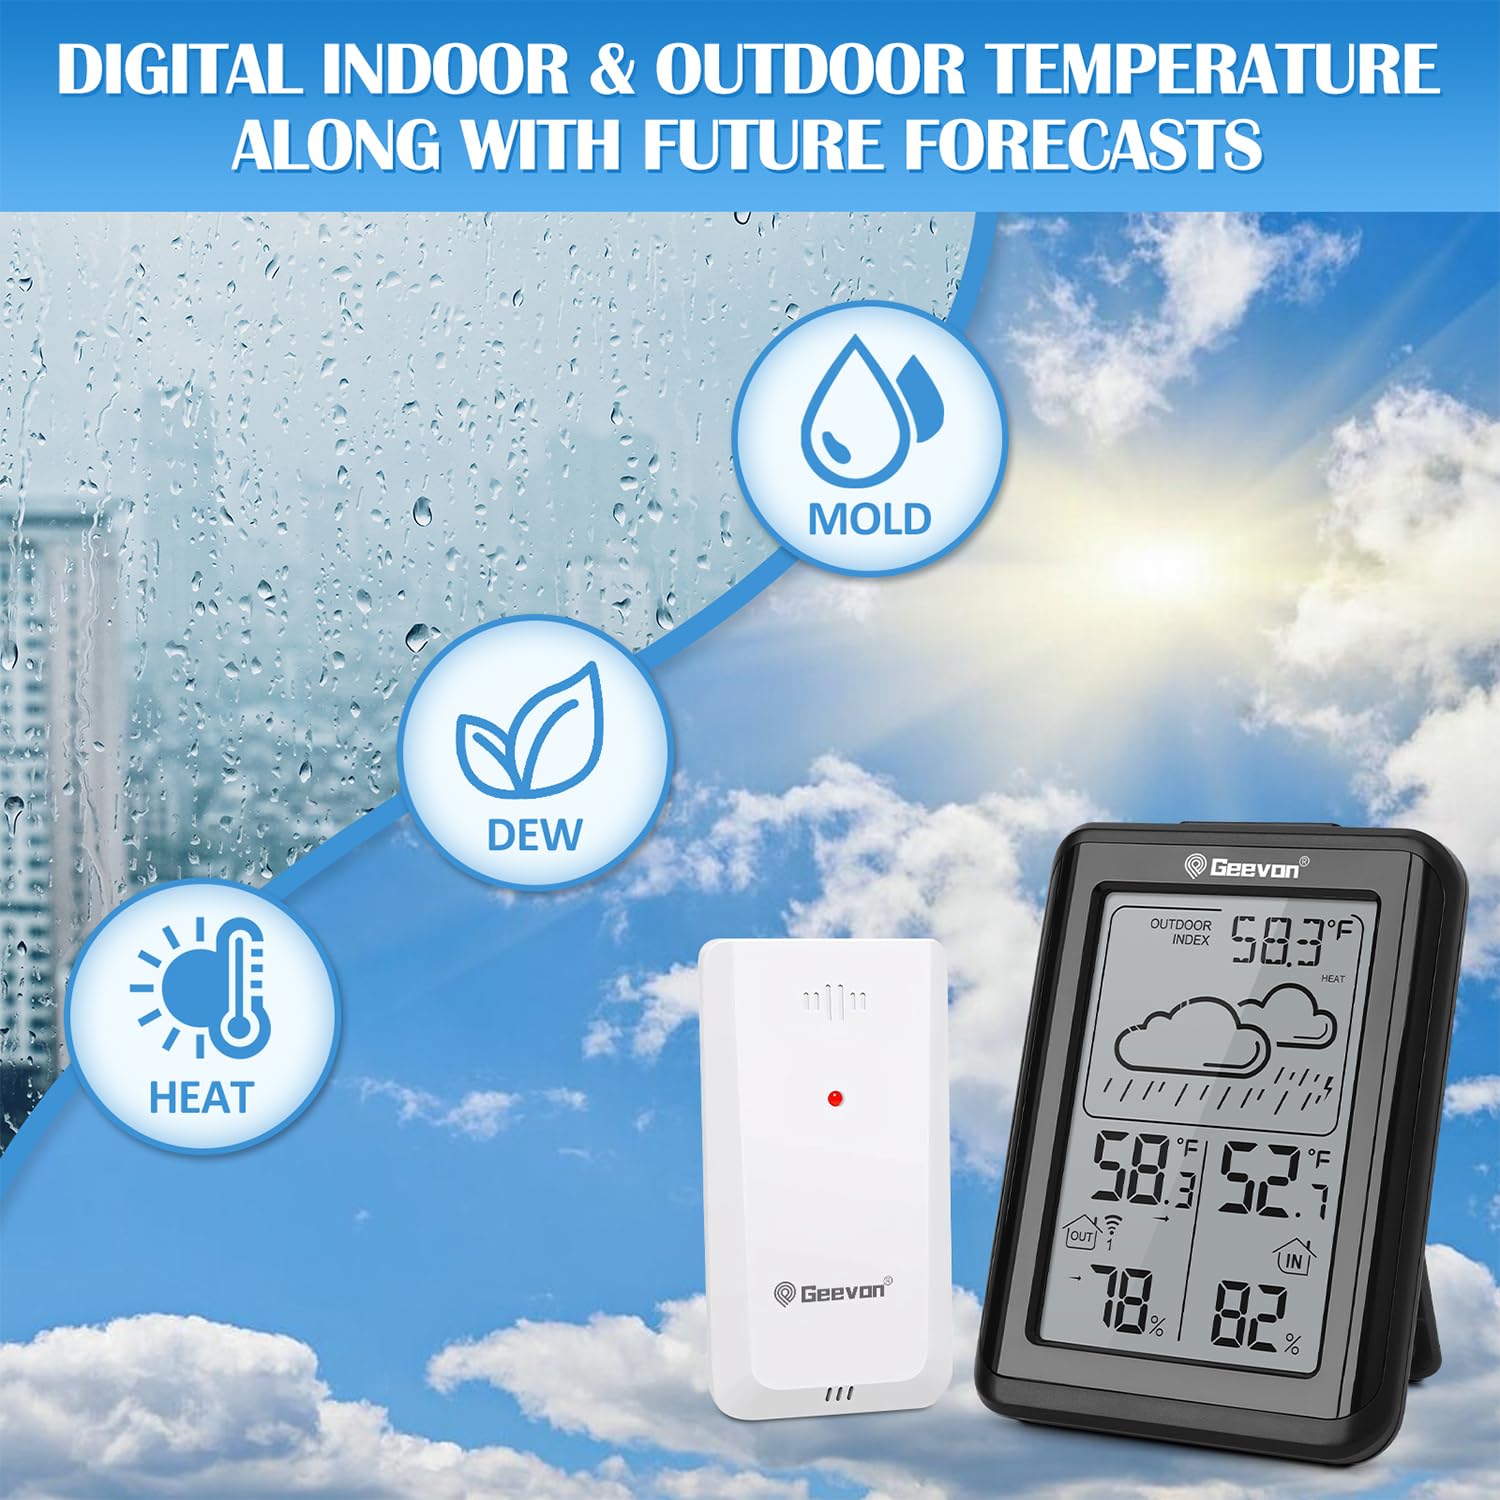
Image: A hand pressing the 'TOP BUTTON' (SNOOZE/LIGHT) on the main unit to activate the 10-second backlight, illuminating the display for easy reading in low light.
Premeu el botó SNOOZE / LIGHT button on the top of the main unit to activate the backlight for 10 seconds. This improves visibility in low-light conditions.
5.2 Selecció de la unitat de temperatura (°C/°F)
To switch between Celsius (°C) and Fahrenheit (°F), press and hold the IND button for 3 seconds. Then, use the Amunt/Avall buttons to select your preferred unit.
5.3 Multi-Channel Monitoring

Image: The main unit displaying outdoor temperature and humidity, with smaller icons indicating the possibility of connecting up to three wireless sensors for monitoring different areas like a child's room, kitchen, or office.
The thermometer supports up to three wireless outdoor sensors (one included). Press the CH button to cycle through the channels and view temperature and humidity data from each connected sensor.
5.4 Mold, Dew, and Heat Index

Image: The main unit displaying the outdoor index, showing icons for Mold, Dew, and Heat, along with corresponding temperature and humidity readings. This feature helps users monitor environmental conditions for potential risks.
Premeu el botó IND button to cycle through the following indices:
- Mold Index: Indicates the risk of mold growth based on temperature and humidity.
- Punt de rosada: The temperature at which air becomes saturated with water vapor, leading to condensation.
- Índex de calor: A measure of how hot it feels when relative humidity is factored in with the actual air temperature.
5.5 Registres màxims/mínims
The device automatically records the maximum and minimum temperature and humidity values over a 24-hour period. Press the Amunt/Avall botons a view these historical records.
5.6 Previsió meteorològica
The main unit provides a weather forecast for the next 12-24 hours based on changes in atmospheric pressure. Icons displayed include Sunny, Slightly Cloudy, Cloudy, Rainy, Heavy Rainy, and Snowy.
5.7 Escenaris d'ús

Image: A collage showing the Geevon thermometer being used in various environments, including a bedroom, baby room, greenhouse, living room, and warehouse, highlighting its versatility for monitoring different spaces.
This thermometer is suitable for monitoring conditions in various indoor and outdoor environments, including:
- Baby rooms
- Dormitoris
- Sales d'estar
- Cuines
- Oficines
- Hivernacles
- Garatges
6. Manteniment
6.1 Neteja
Netegeu el dispositiu amb un suau, damp drap. No utilitzeu productes de neteja abrasius ni dissolvents, ja que poden danyar la pantalla o laasing.
6.2 Substitució de la bateria
Replace batteries when the low battery indicator appears on the display. Ensure correct polarity during installation.
6.3 Emmagatzematge
Si guardeu el dispositiu durant un període prolongat, traieu-ne les piles per evitar fuites i danys.
7. Solució De Problemes
| Problema | Causa possible | Solució |
|---|---|---|
| No hi ha lectura de temperatura/humitat exterior. | Sensor not paired or out of range; low sensor battery. | Press 'CH' button to select correct channel. Re-insert sensor batteries. Move sensor closer to main unit. |
| Lectures inexactes. | Sensor exposed to direct sunlight or moisture; interference. | Relocate sensor to a shaded, dry area. Ensure no strong electronic interference nearby. |
| La pantalla està tènue o en blanc. | Low main unit battery. | Substituïu les piles de la unitat principal. |
| Weather forecast is incorrect. | Forecast is based on atmospheric pressure changes, not real-time conditions. | This is normal. The forecast is a prediction and may not always match current weather. |
8. Especificacions
- Número de model: EUA-24297
- Dimensions del producte: 0.8 x 3.1 x 4.2 cm (unitat principal)
- Pes: 6.74 unces
- Font d'alimentació: Battery Powered (2 AAA batteries required for main unit, 2 AAA batteries required for sensor)
- Material: Acrilonitril butadiè estirè (ABS)
- Connectivitat: Sense fil
- Característiques especials: History Max/Min Record, Large Display, Low Battery Indicator, Mold Index, Dew Point, Heat Index, 10s Backlight
- Interval sense fil: Fins a 60 m (a l'aire lliure)
- Canals: Supports up to 3 outdoor sensors
9. Garantia i Suport
The Geevon Indoor Outdoor Wireless Thermometer comes with a 1 any de garantia from the date of purchase. Geevon also provides lifetime customer support for this product.
For technical assistance, warranty claims, or any questions regarding your product, please contact Geevon customer support through the retailer's platform or the official Geevon weblloc.


